|
Proper Municipality Name |
Photo Description |
Photo |
|
Photos taken
from driver's perspective appear offset from centre-line Photos: |
North-
Bound |
South-
Bound |
| City of Toronto |
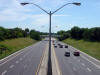
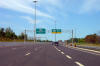
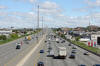
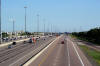
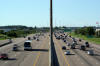
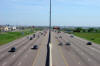
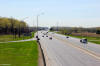
View looking south along Black Creek Drive. Back Creek Drive is a
municipal at-grade expressway owned and operated by the City of Toronto.
Photo taken: August 12th, 2007. |
(720x480)
(1440x960) |
| City of Toronto |
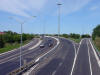
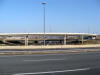
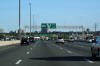
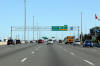
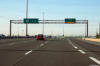
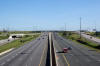
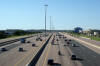
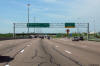
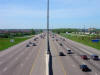
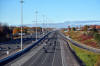
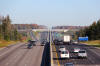
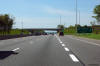
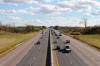
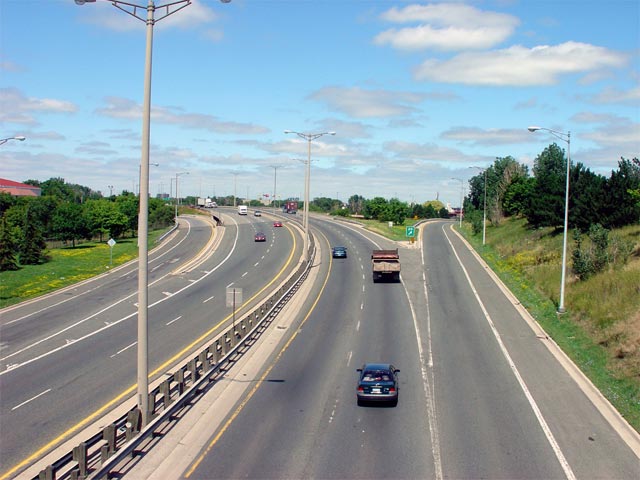
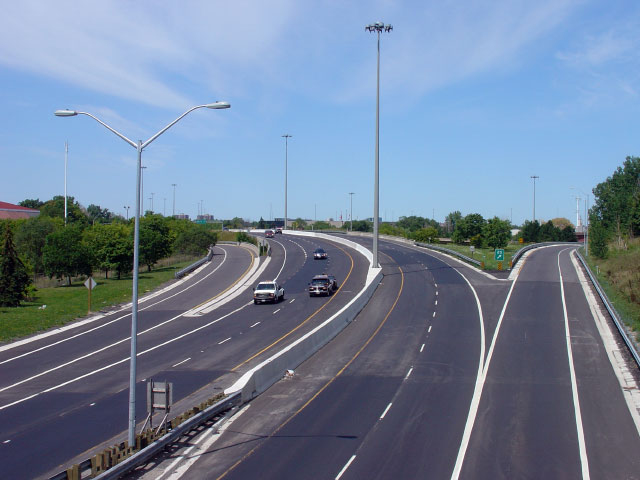
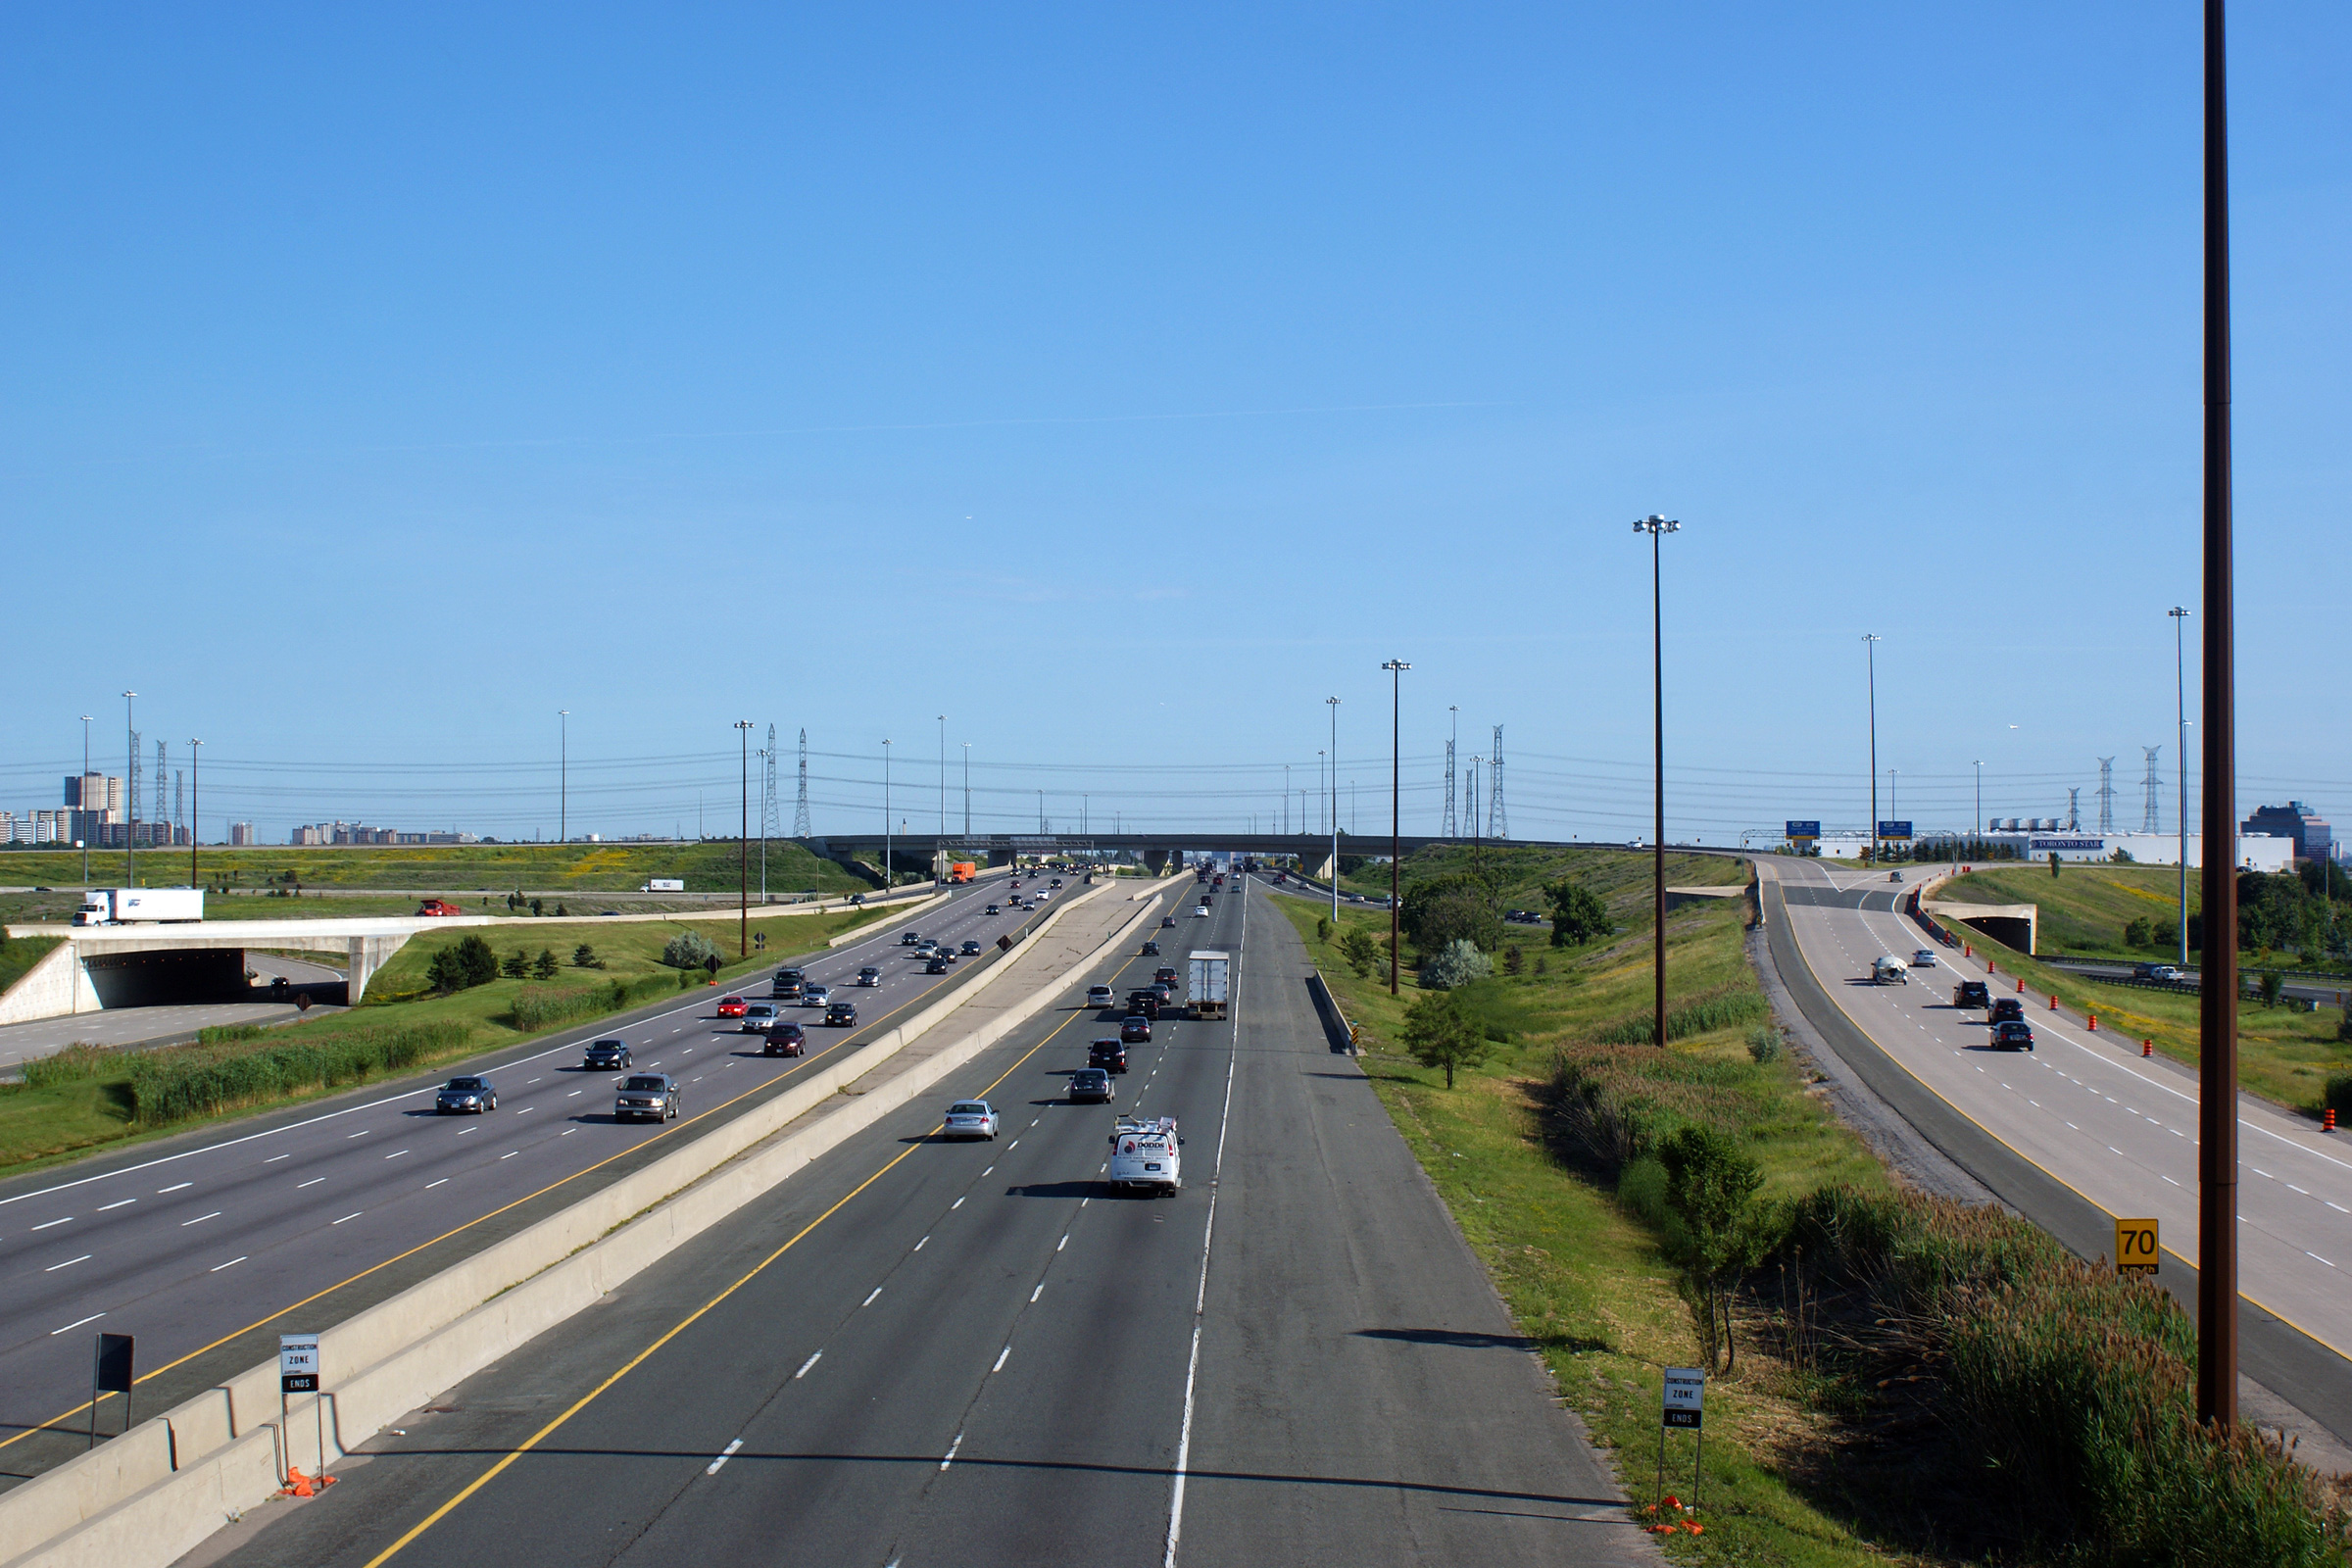
Highway 400 looking north from the Maple Leaf Drive overpass on the 400.
This Photo shows the southern beginning of Highway 400. South of the Maple
Leaf Drive overpass is Black Creek Drive, which is a city maintained
at-grade urban expressway. The Highway
401 interchange is situated about 1.5 km north of this overpass. Upper photo taken: July August 12th, 2007.
Lower photo taken: July 23rd, 2004. |
(720x480)
(1440x960) |
| City of Toronto |
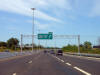
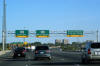
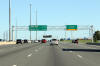
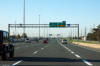
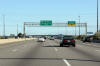
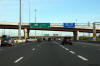
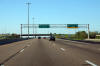
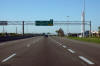
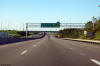
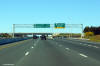
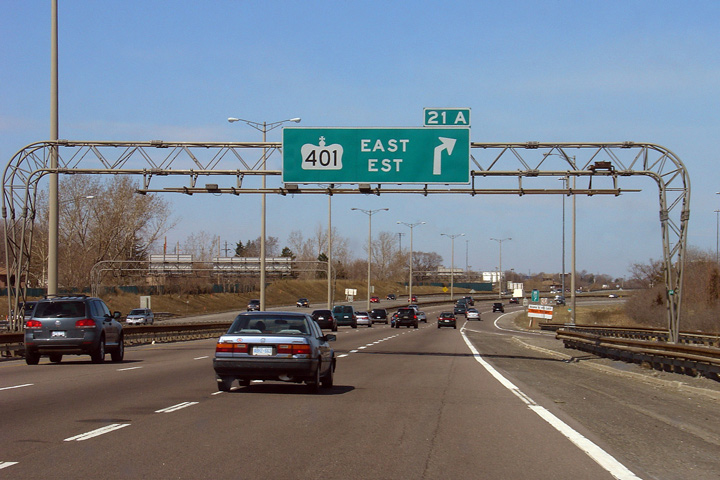
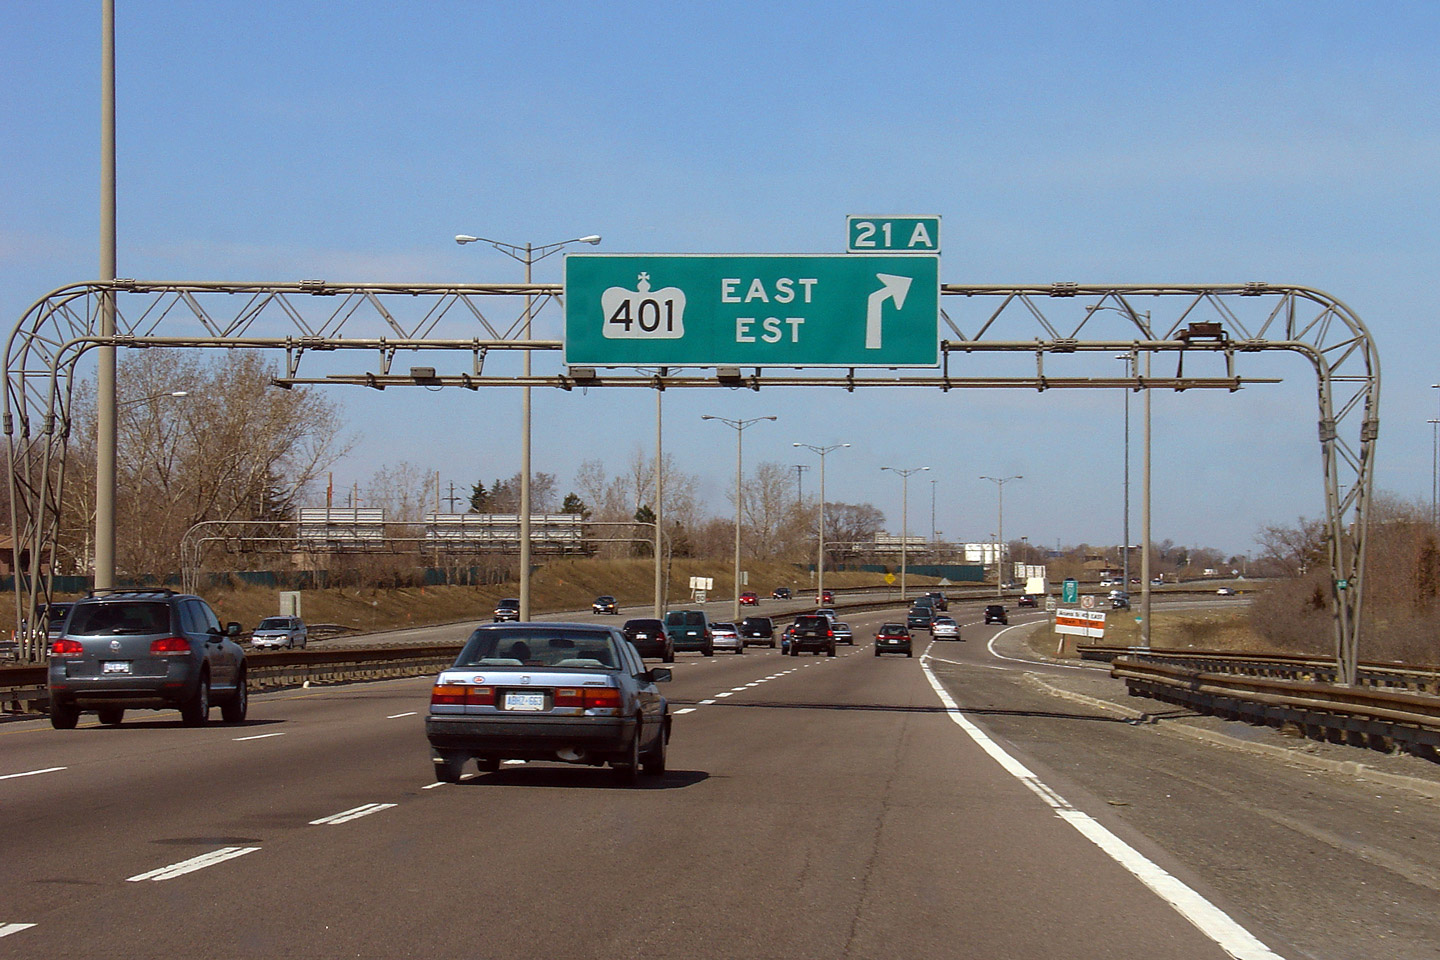
Northbound advanced sign for the ramp to Highway 401 east. Unlike the
neighbouring Allen Road interchange, none of the ramps from Highway 400 have
a direct connection to Highway 401's Express Lanes.
Upper photo taken: August 20th, 2005.
Lower photo taken: August 12th, 2007. |
 (720x480) (720x480)
(1440x960) |
| City of Toronto |
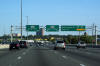
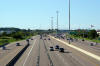
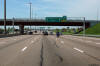
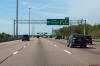
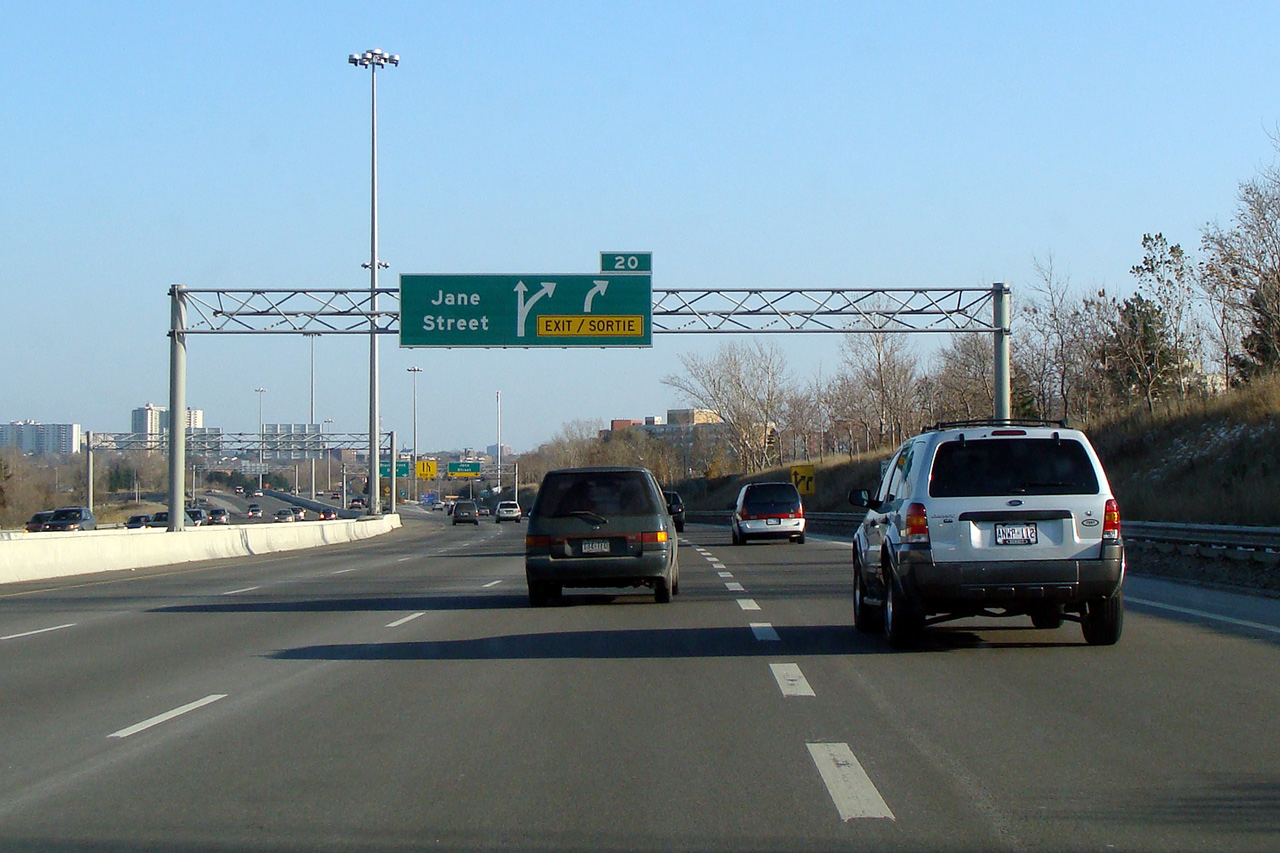
Jane Street is the southern most interchange along Highway 400. Just
south of the Jane Street interchange is the Maple Leaf Drive overpass, and
the official transition between Highway 400 and Black Creek Drive.
Photo taken: November 25th, 2007. |
 (720x480) (720x480)
(1440x960) |
| City of Toronto |
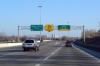
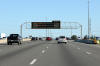
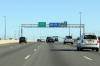
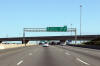
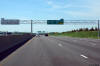
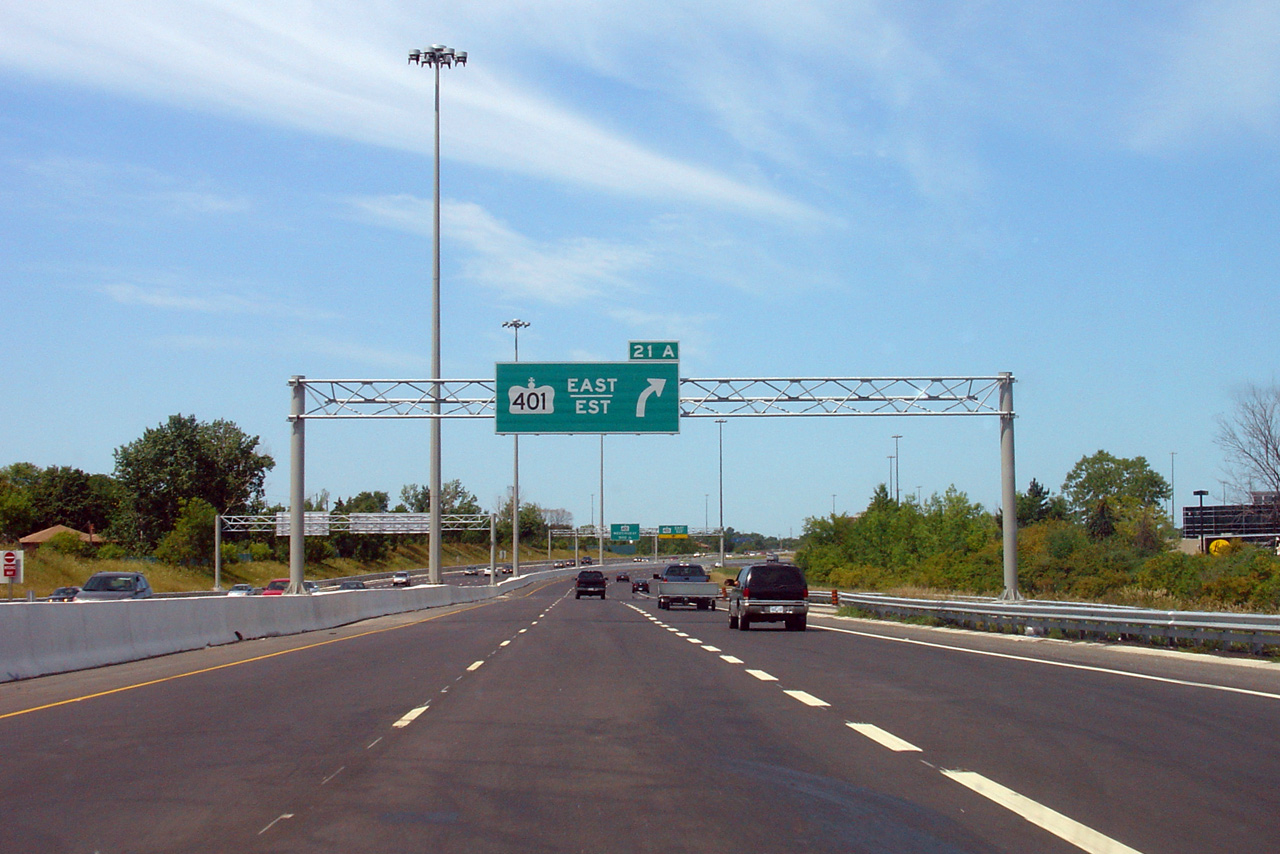
Second overhead sign for the ramp to Highway 401 east. Photo taken: August
12th, 2006. |
 (720x480) (720x480)
(1440x960) |
| City of Toronto |
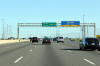
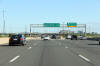
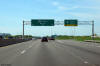
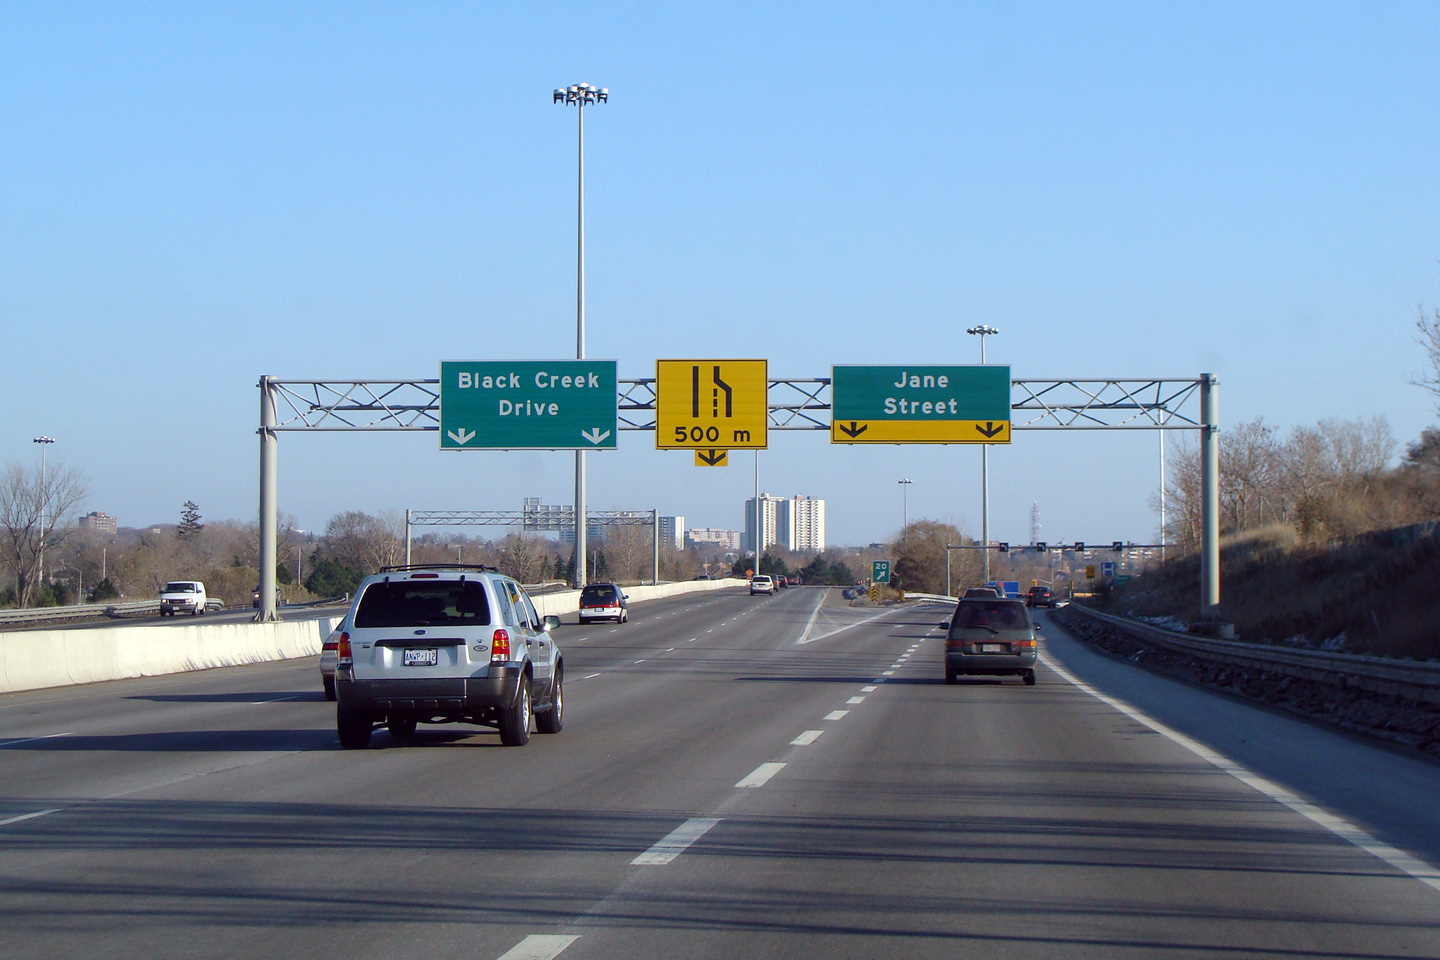
Advanced overhead signage for the Jane Street interchange. Highway 400
was reconstructed south of Highway 401 during the 2005/06 construction
season. Photo taken: November 25th, 2007. |
 (720x480) (720x480)
(1440x960) |
| City of Toronto |
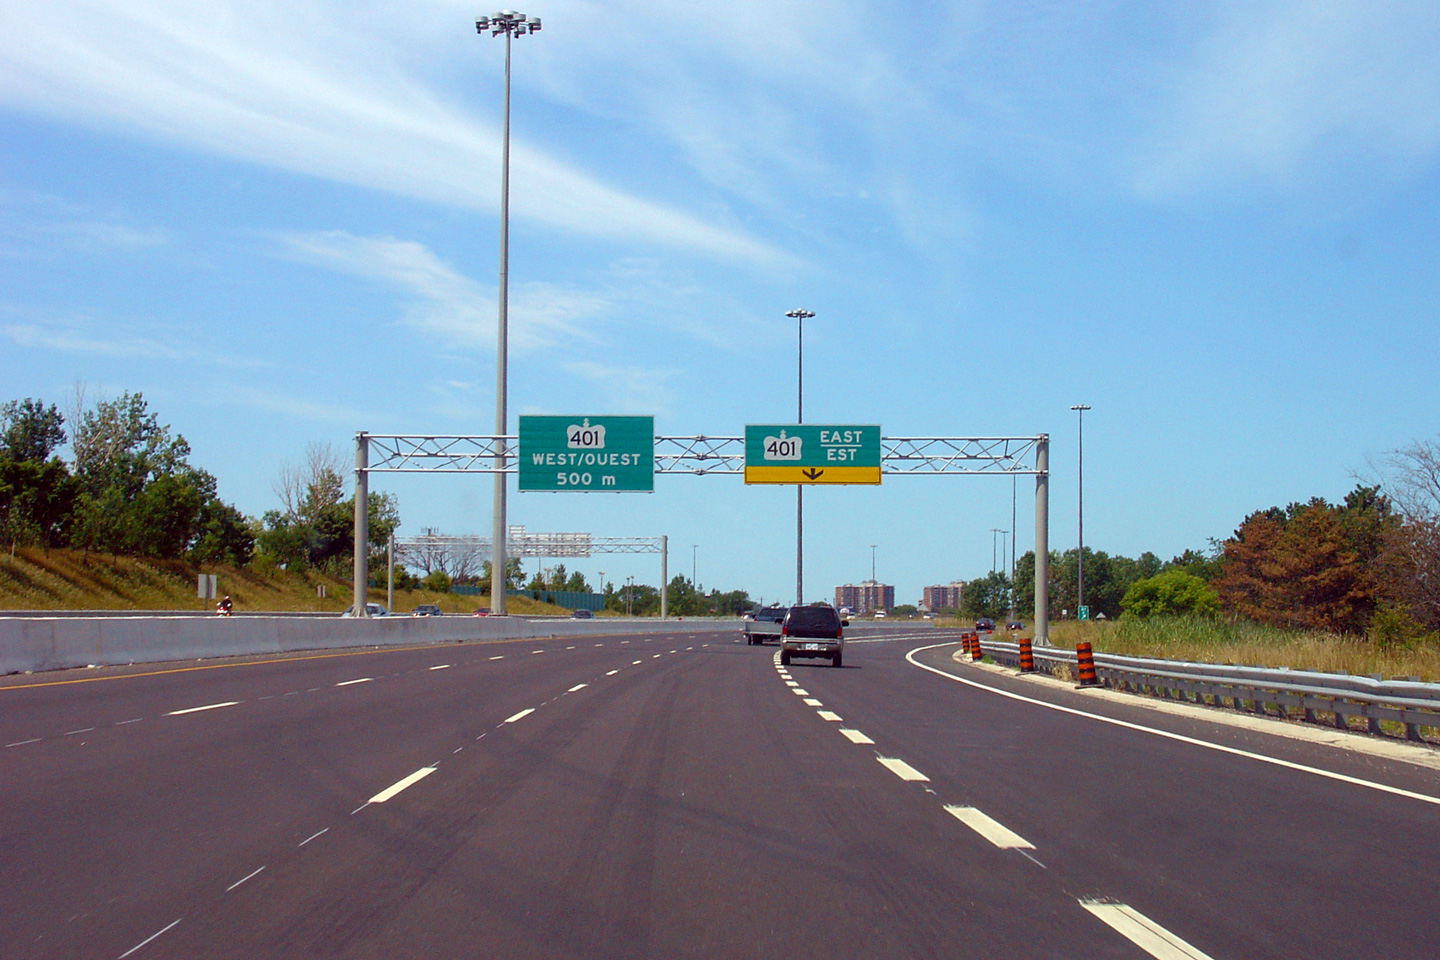
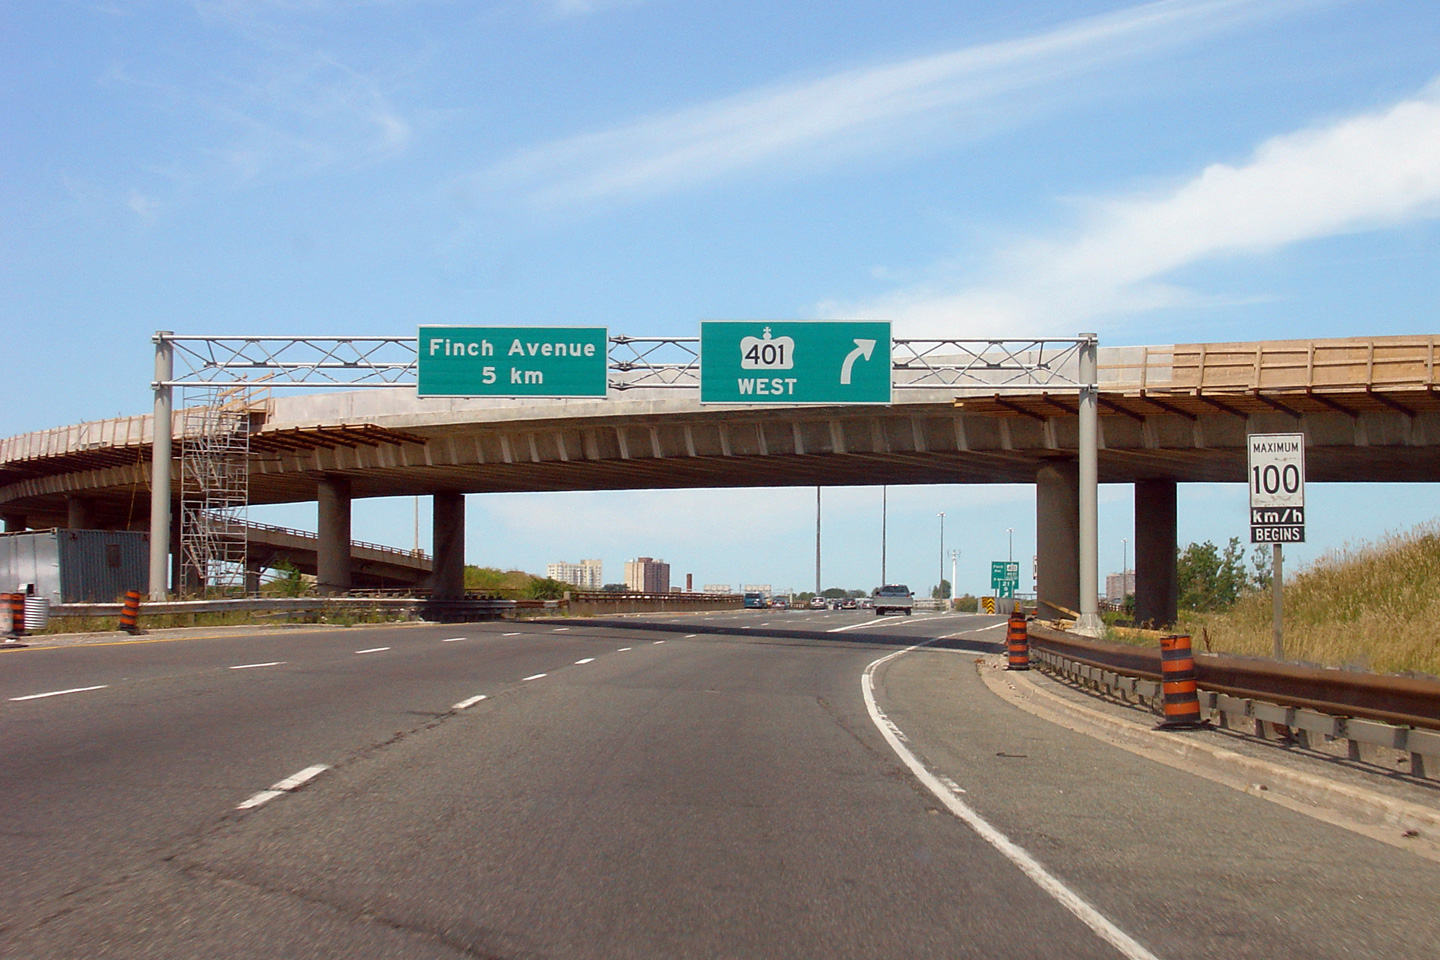
Northbound signage for the loop ramp to Highway 401 West. Photo taken:
August 12th, 2006. |
 (720x480) (720x480)
(1440x960) |
| City of Toronto |
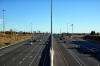
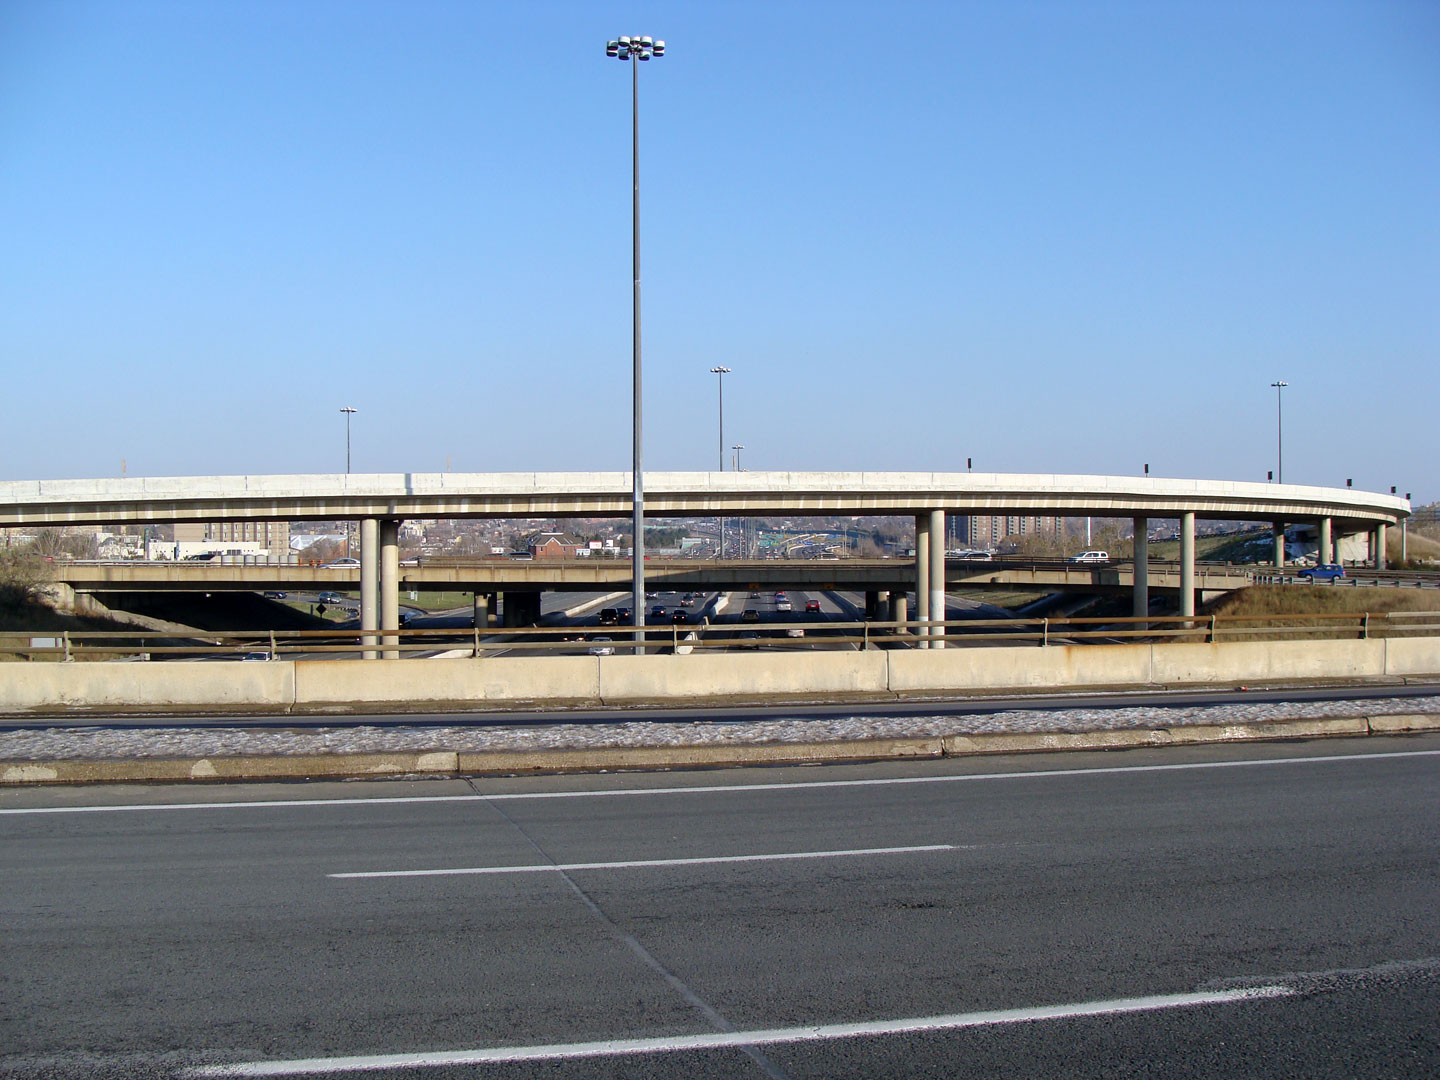
View looking east from the southbound Highway 400 structure over the 401
towards the northbound structure. Notice the new jersey barriers
instead of the stylish 'double rail' barrier on the high-level flyover
between Highway 400 South and Highway 401 East.
Photo taken: November 25th, 2007. |
(720x480)
(1440x960) |
|
Highway 400 meets Highway 401 at
a very large, and very busy interchange.
Click here for Highway 401 images. |
| City of Toronto |
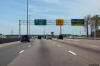
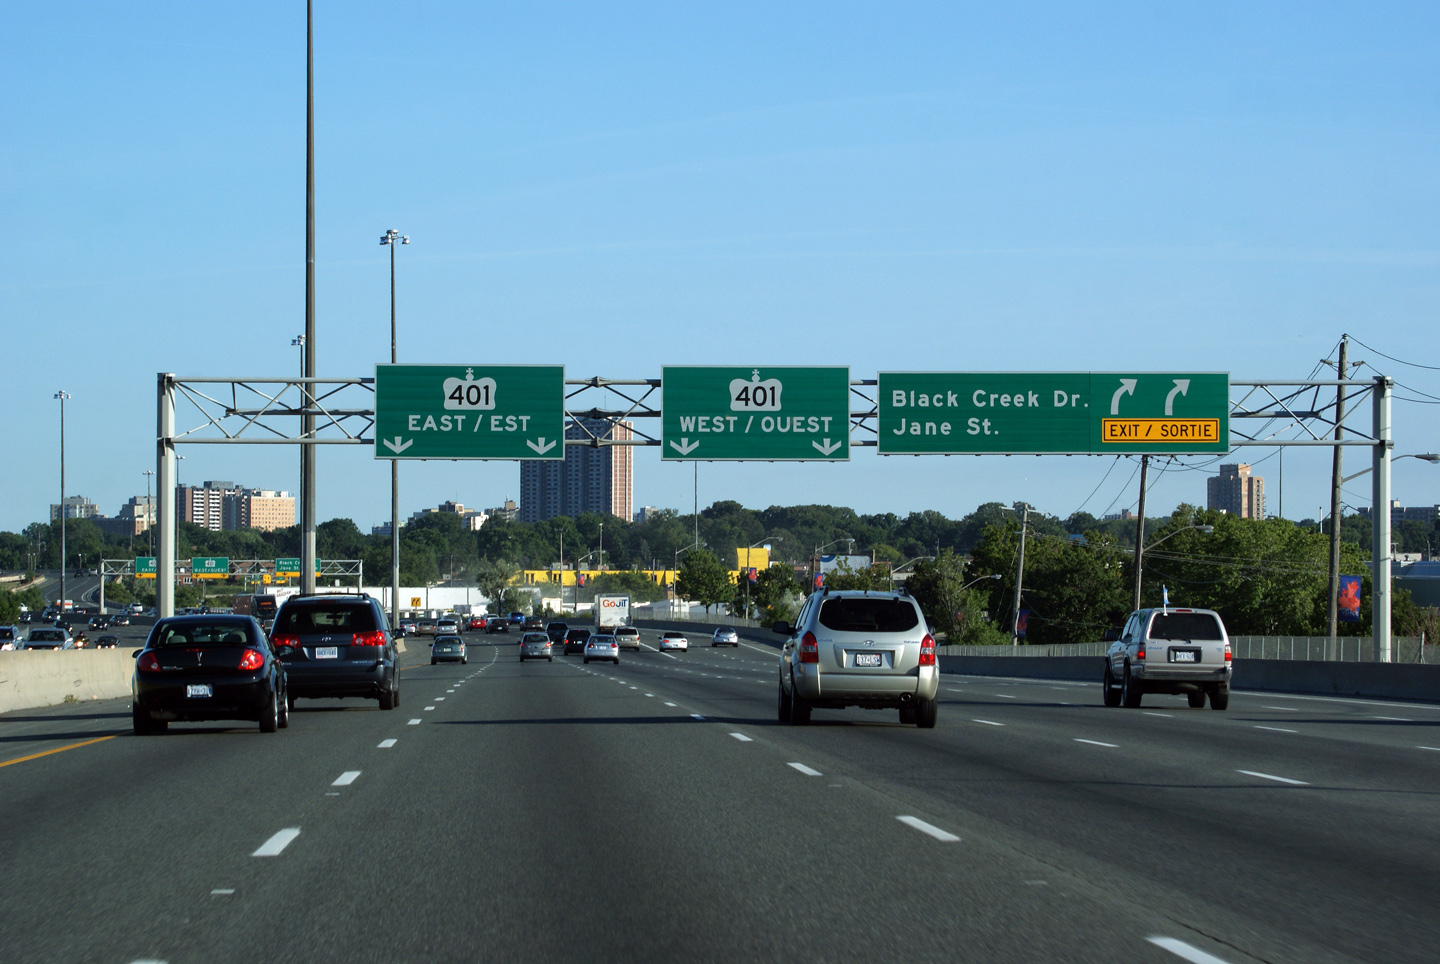
Exit signage at the Highway
401 interchange on the southbound 400.
Photo taken: July 2nd, 2010. |
 (720x480) (720x480)
(1440x960) |
| City of Toronto |
Advance for the Highway
401 exit.
Photo taken: July 2nd, 2010. |
 (720x480) (720x480)
(1440x960) |
| City of Toronto |
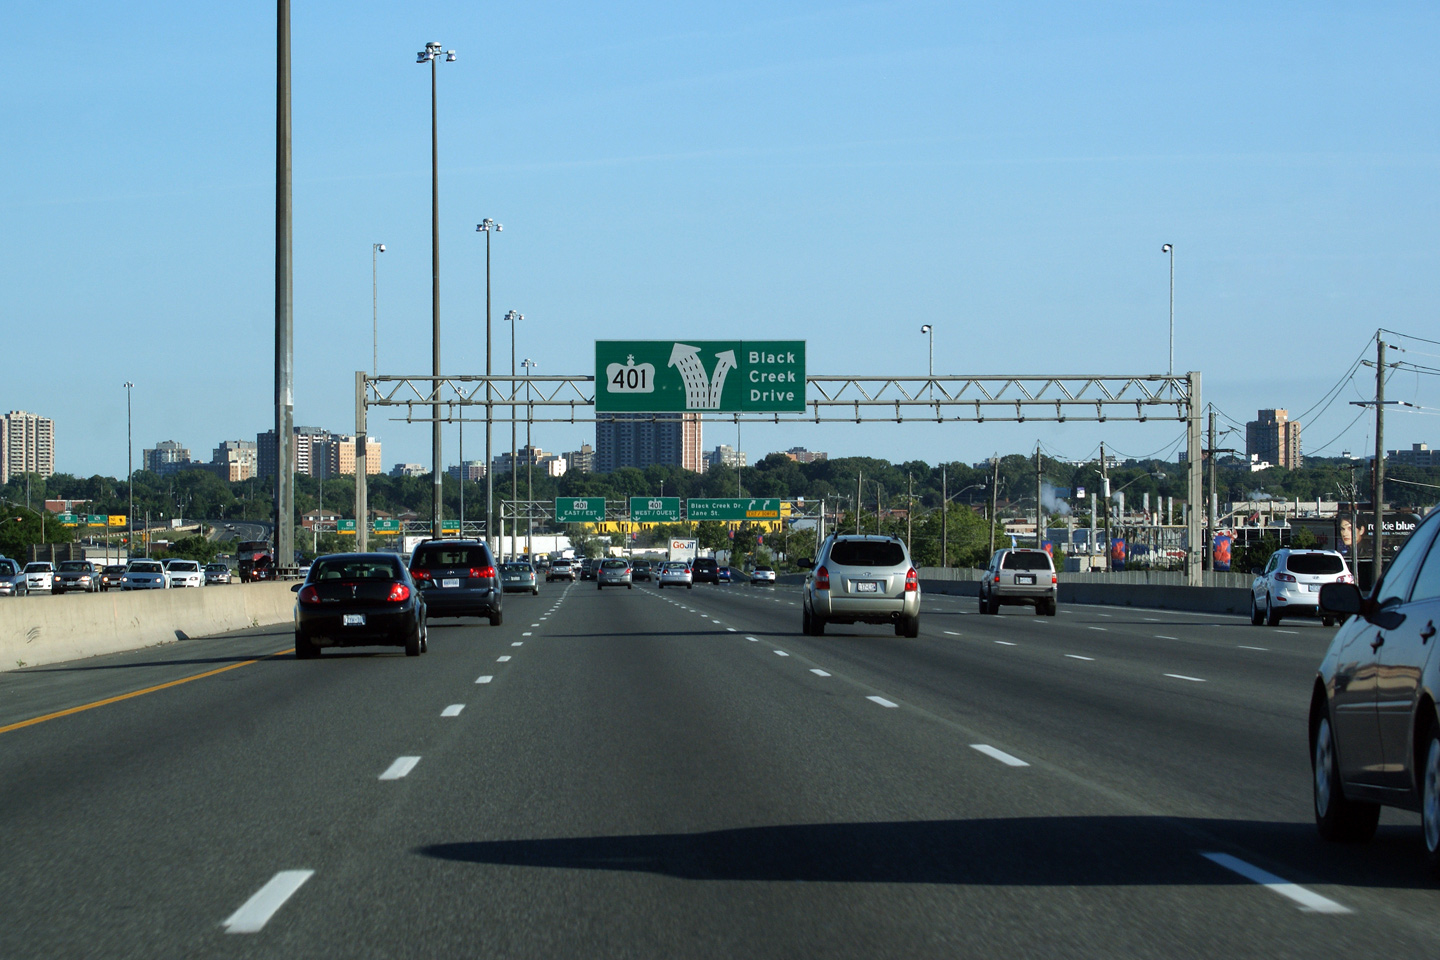
Diagramical sign for upcoming Highway
401 interchange on the Southbound 400. South of Highway 401, the 400
is signed only as Black Creek Drive.
Photo taken: July 2nd, 2010. |
 (720x480) (720x480)
(1440x960) |
| City of Toronto |
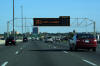
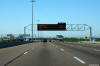
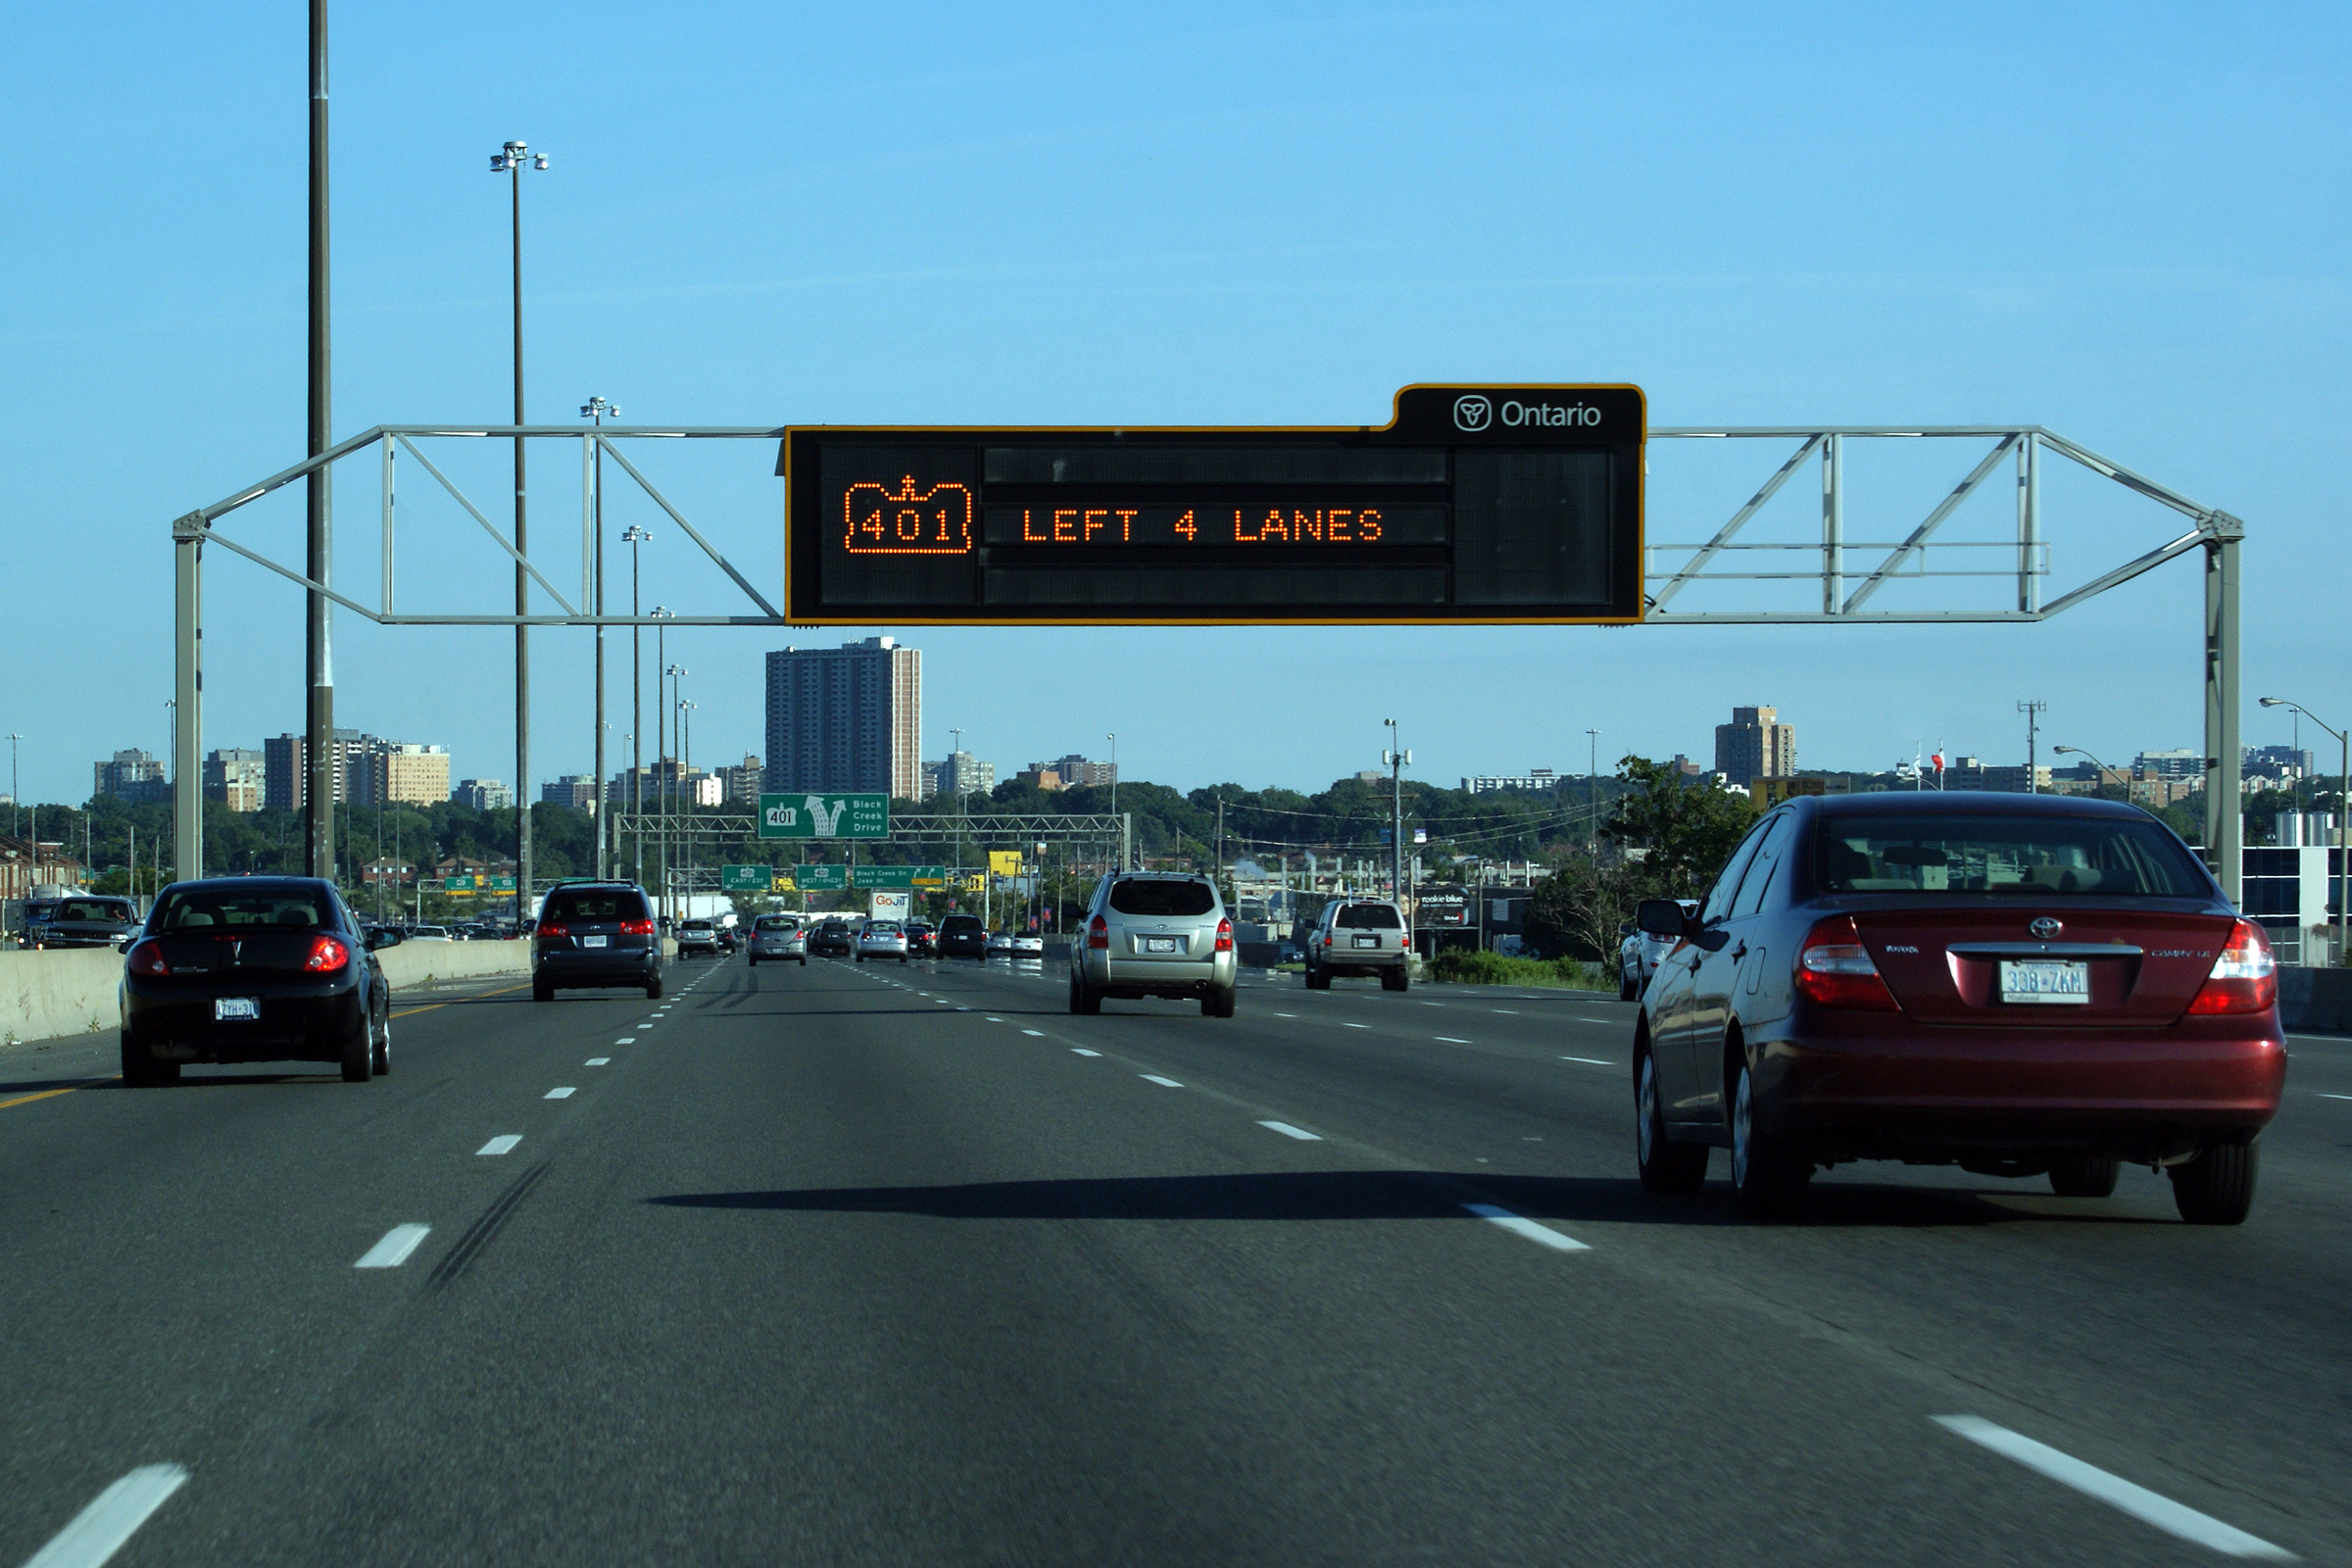
Overhead changeable message sign denoting the southbound ramp to Highway
401. This is a very Californian way of indicating the lane designations.
Photo taken: July 2nd, 2010. |
 (720x480) (720x480)
(1440x960)
(2400x1600) |
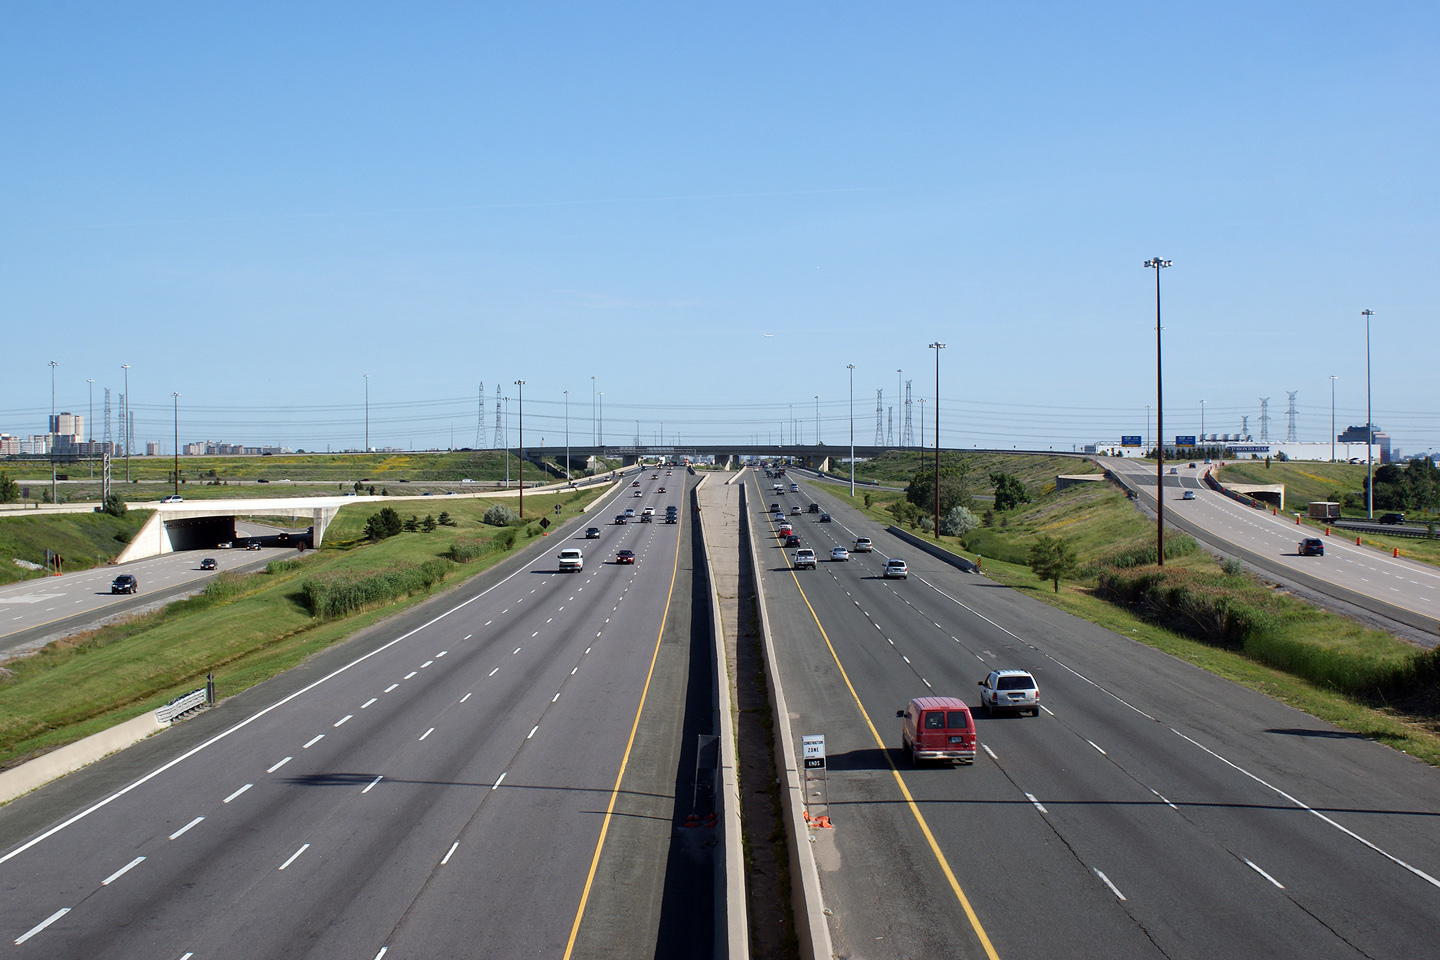
| City of Toronto |
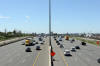
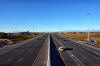
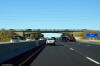
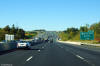
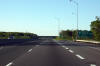
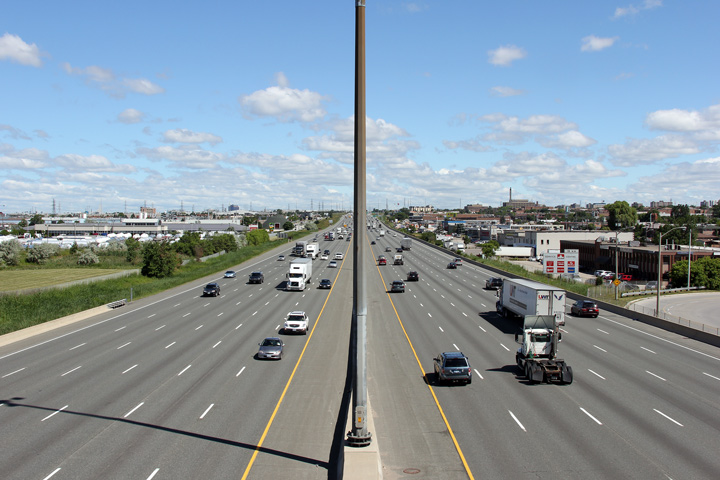
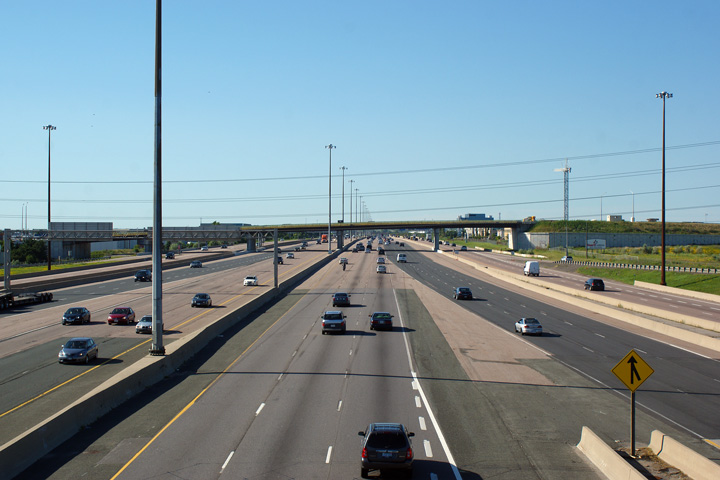
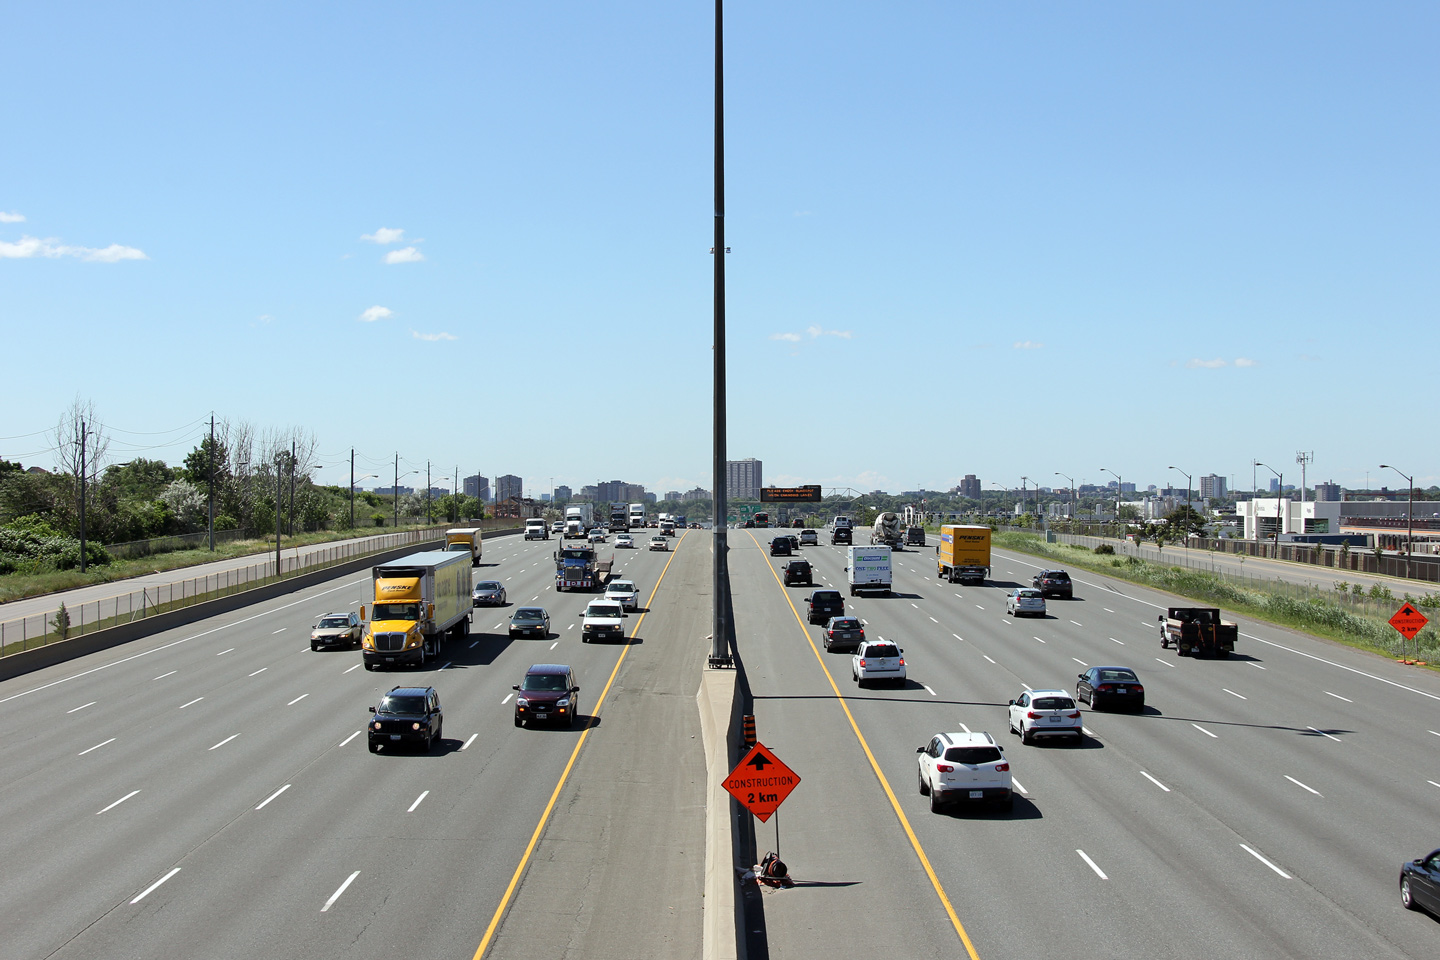
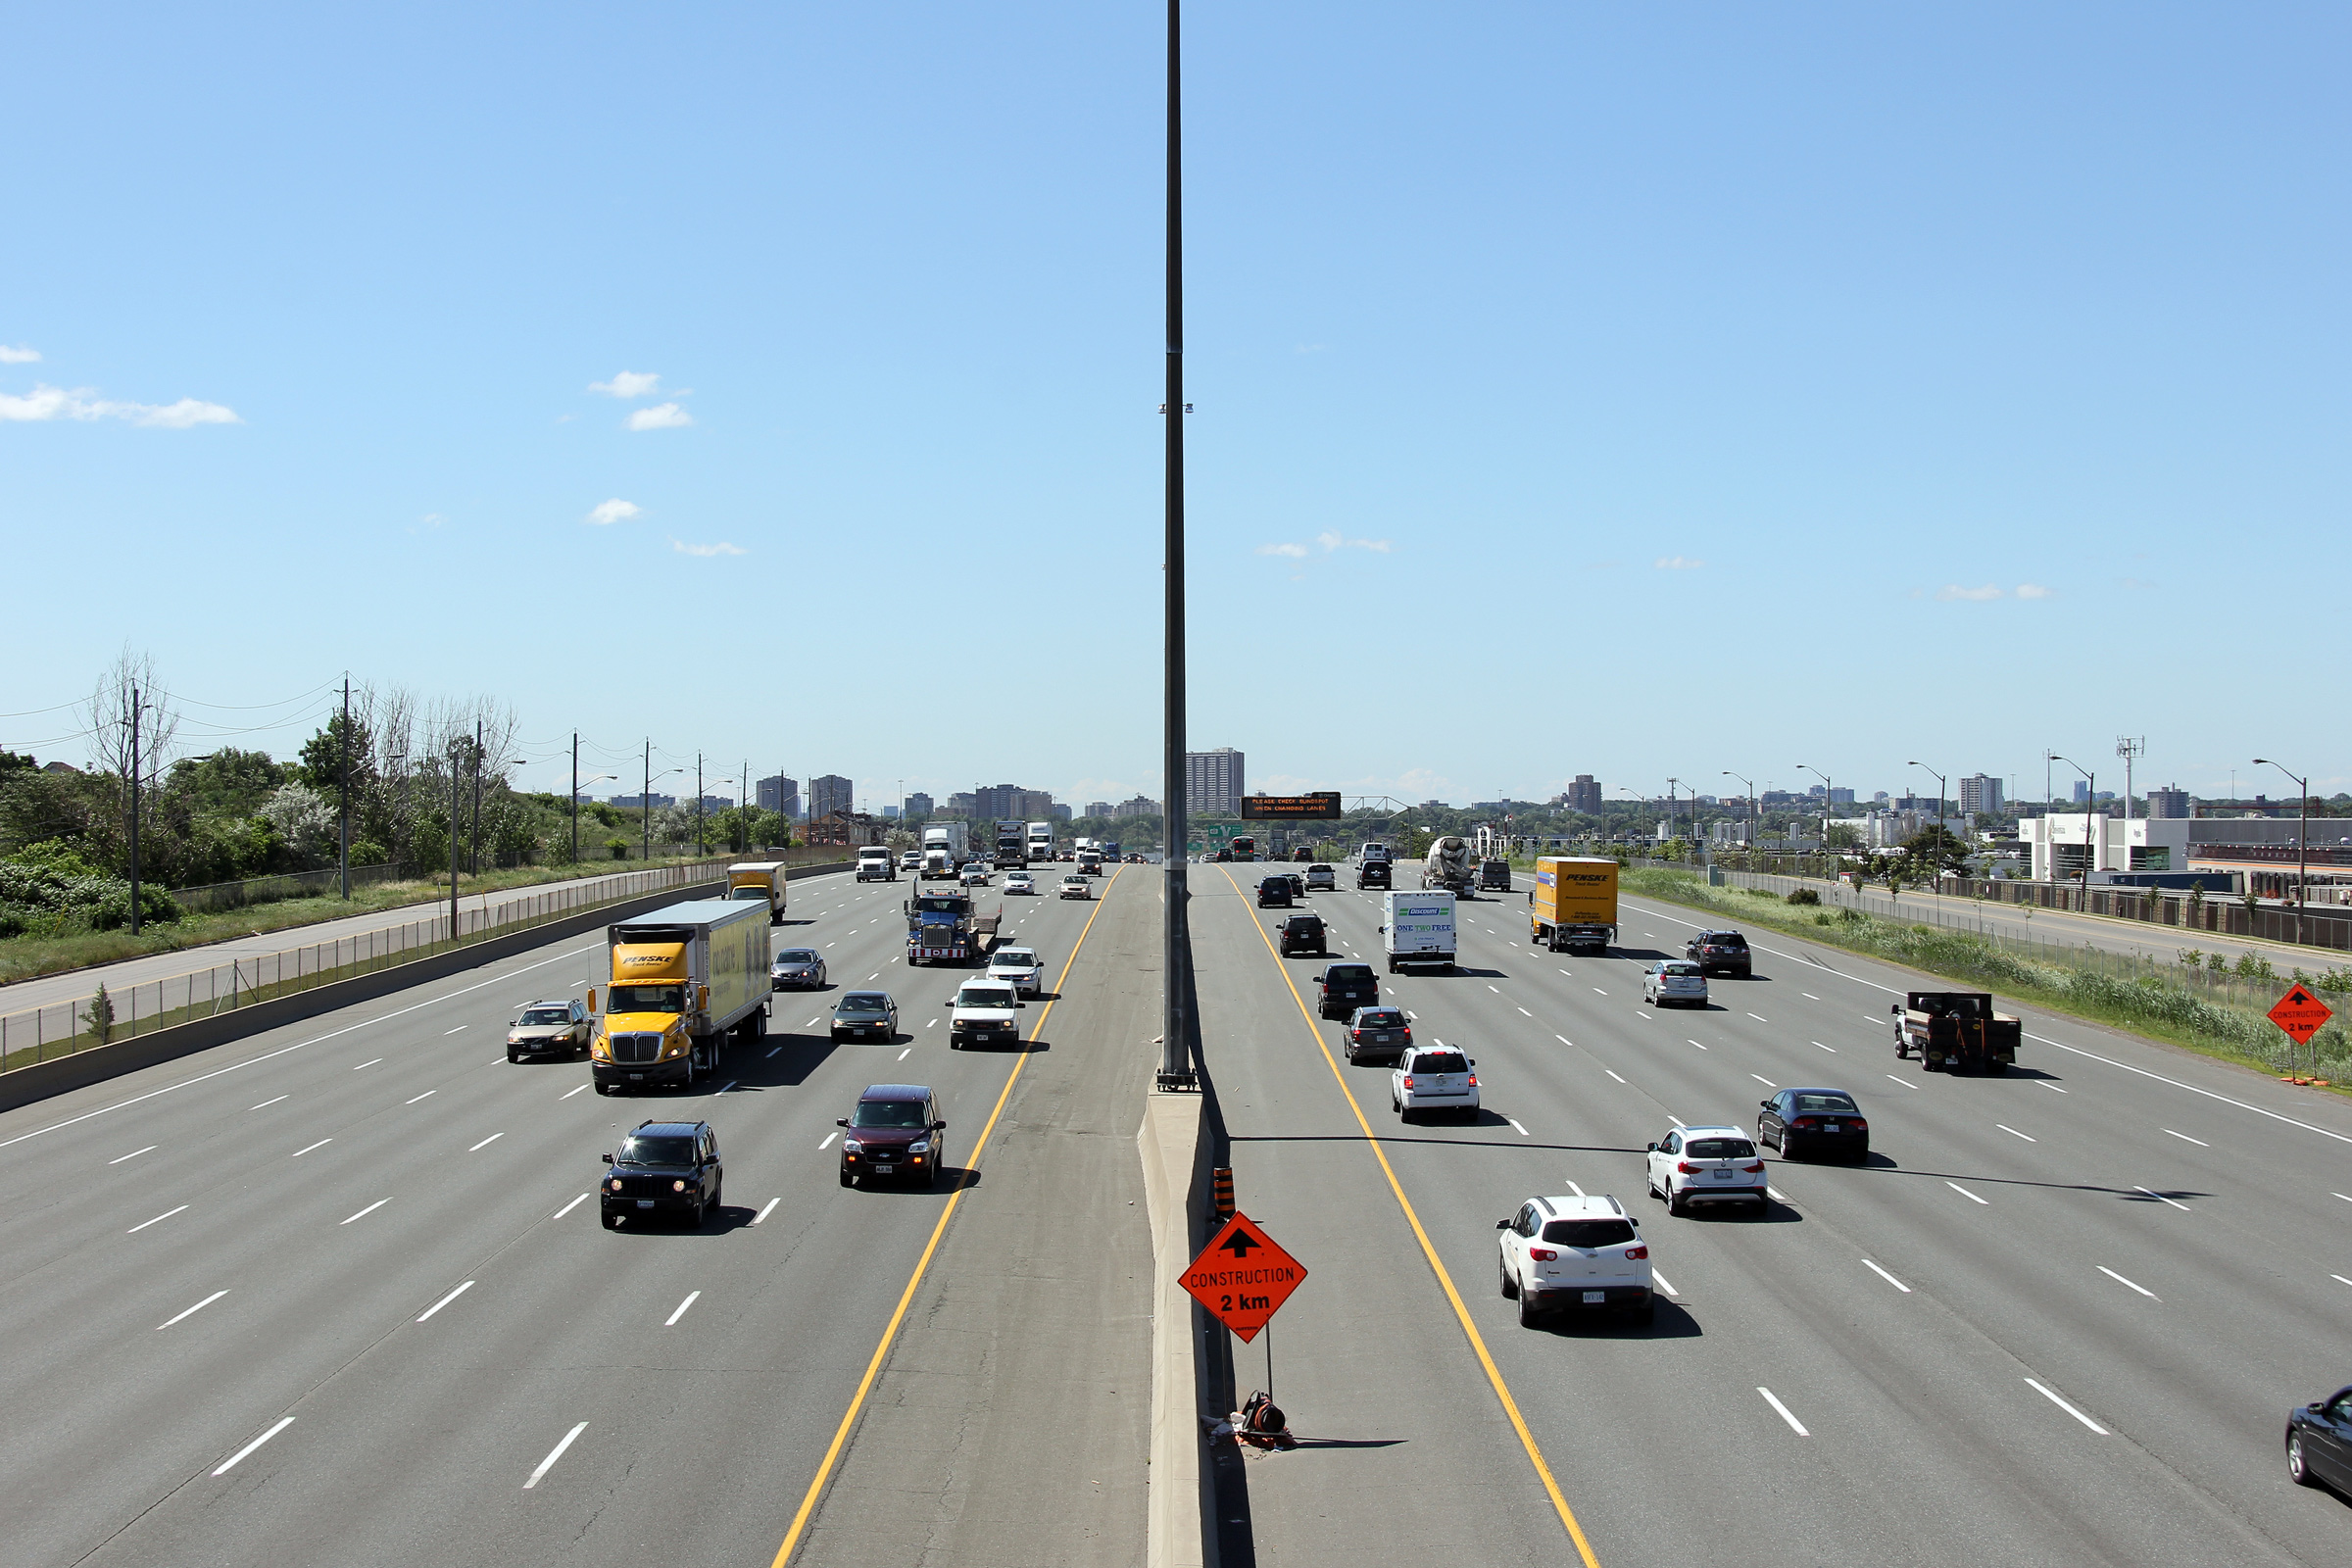
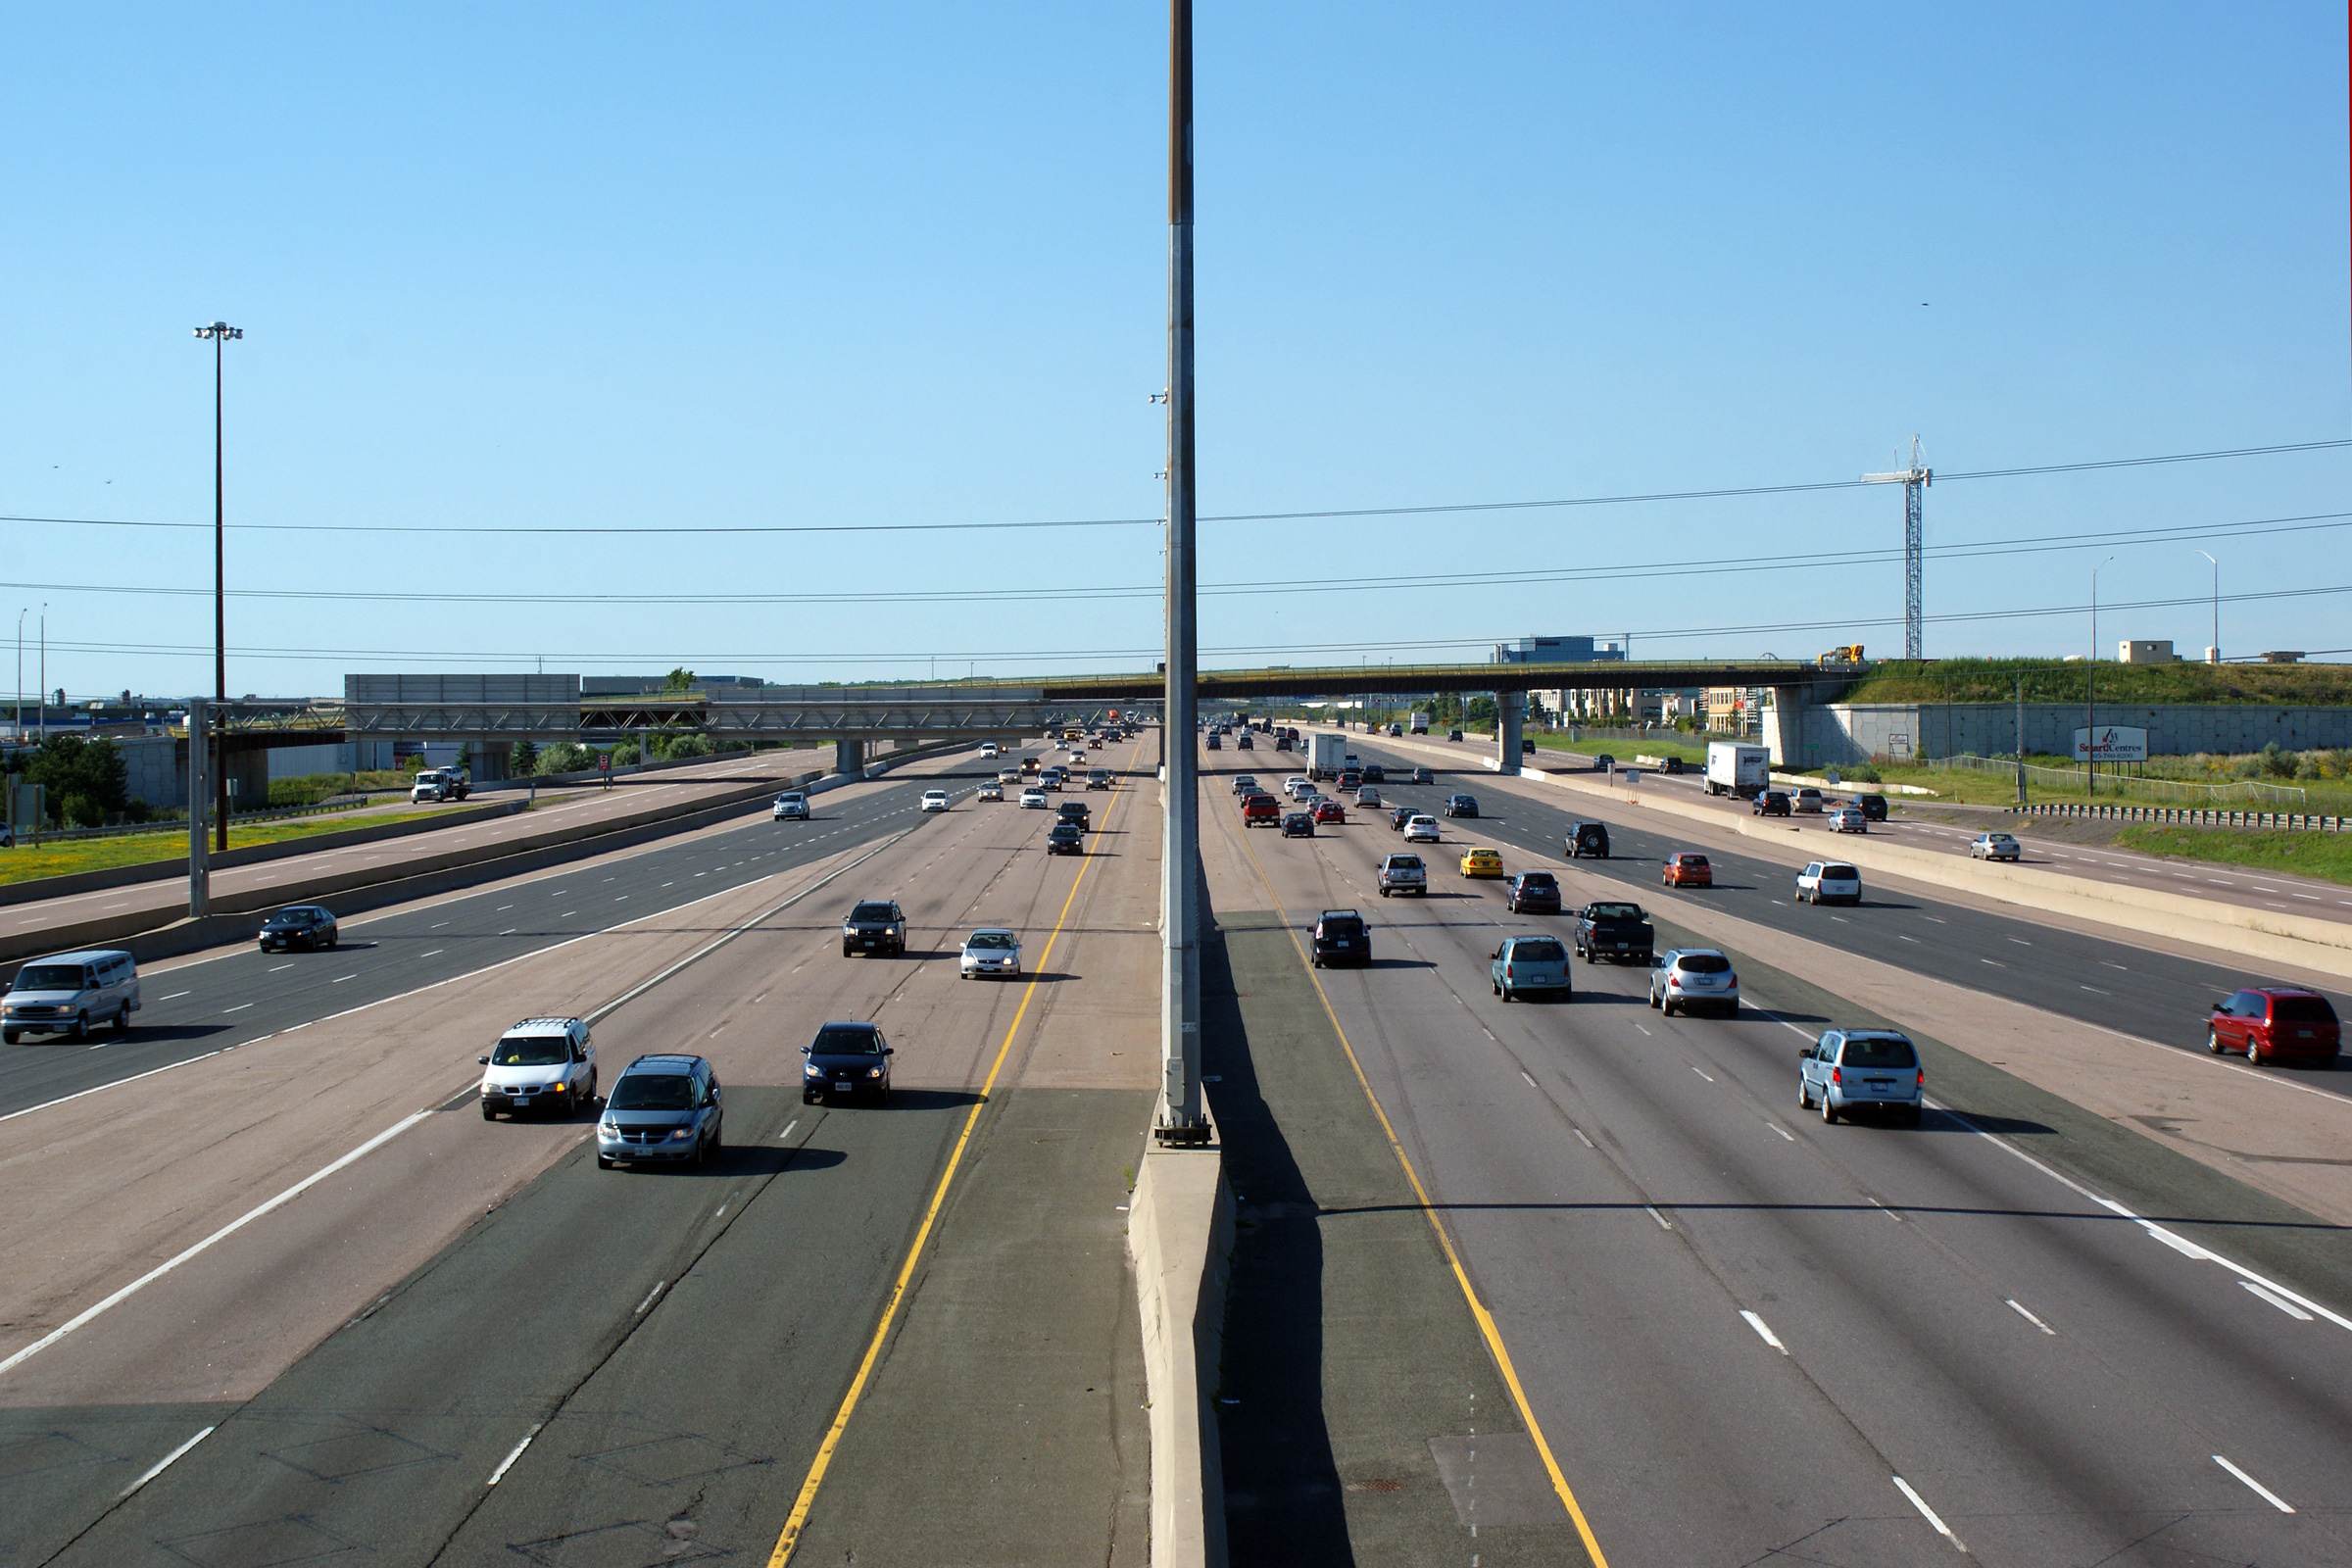
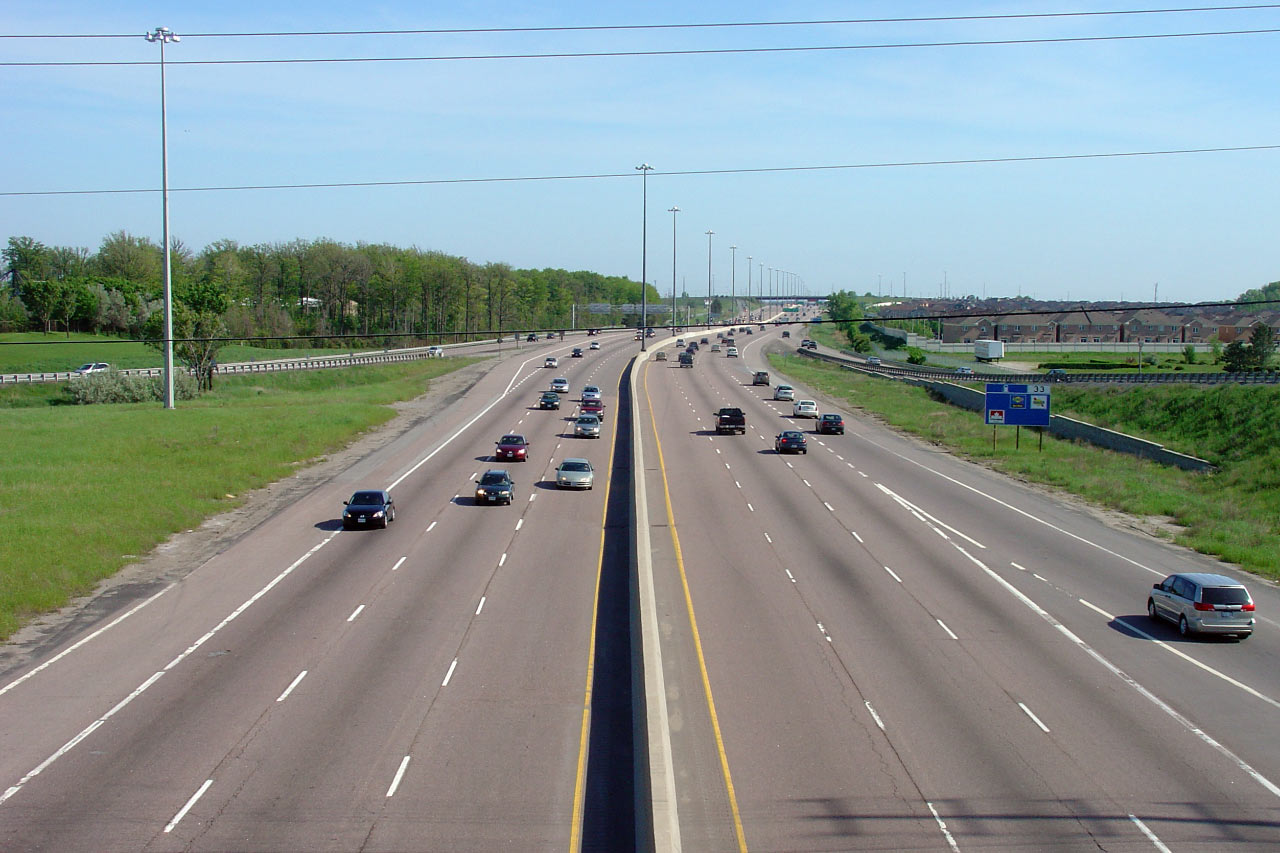
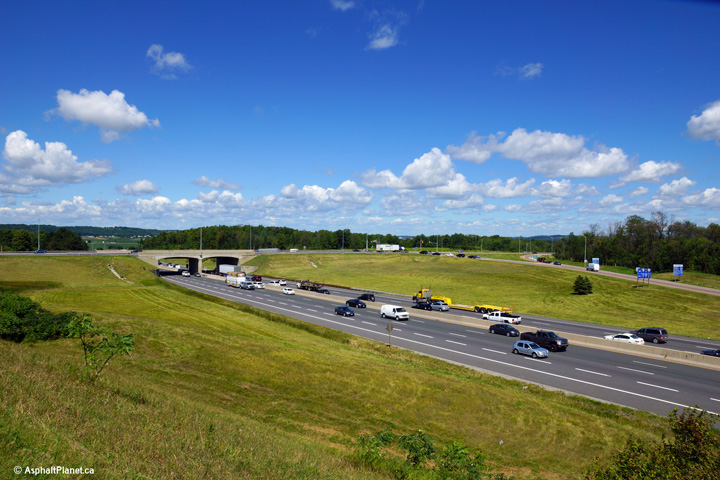
Looking south towards Highway
401 from the Sheppard Avenue overpass in Toronto. This overpass is
located roughly at kilometre marker 23. Photo taken: June 25th, 2012. |
(720x480)
(1440x960)
(2400x1600) |
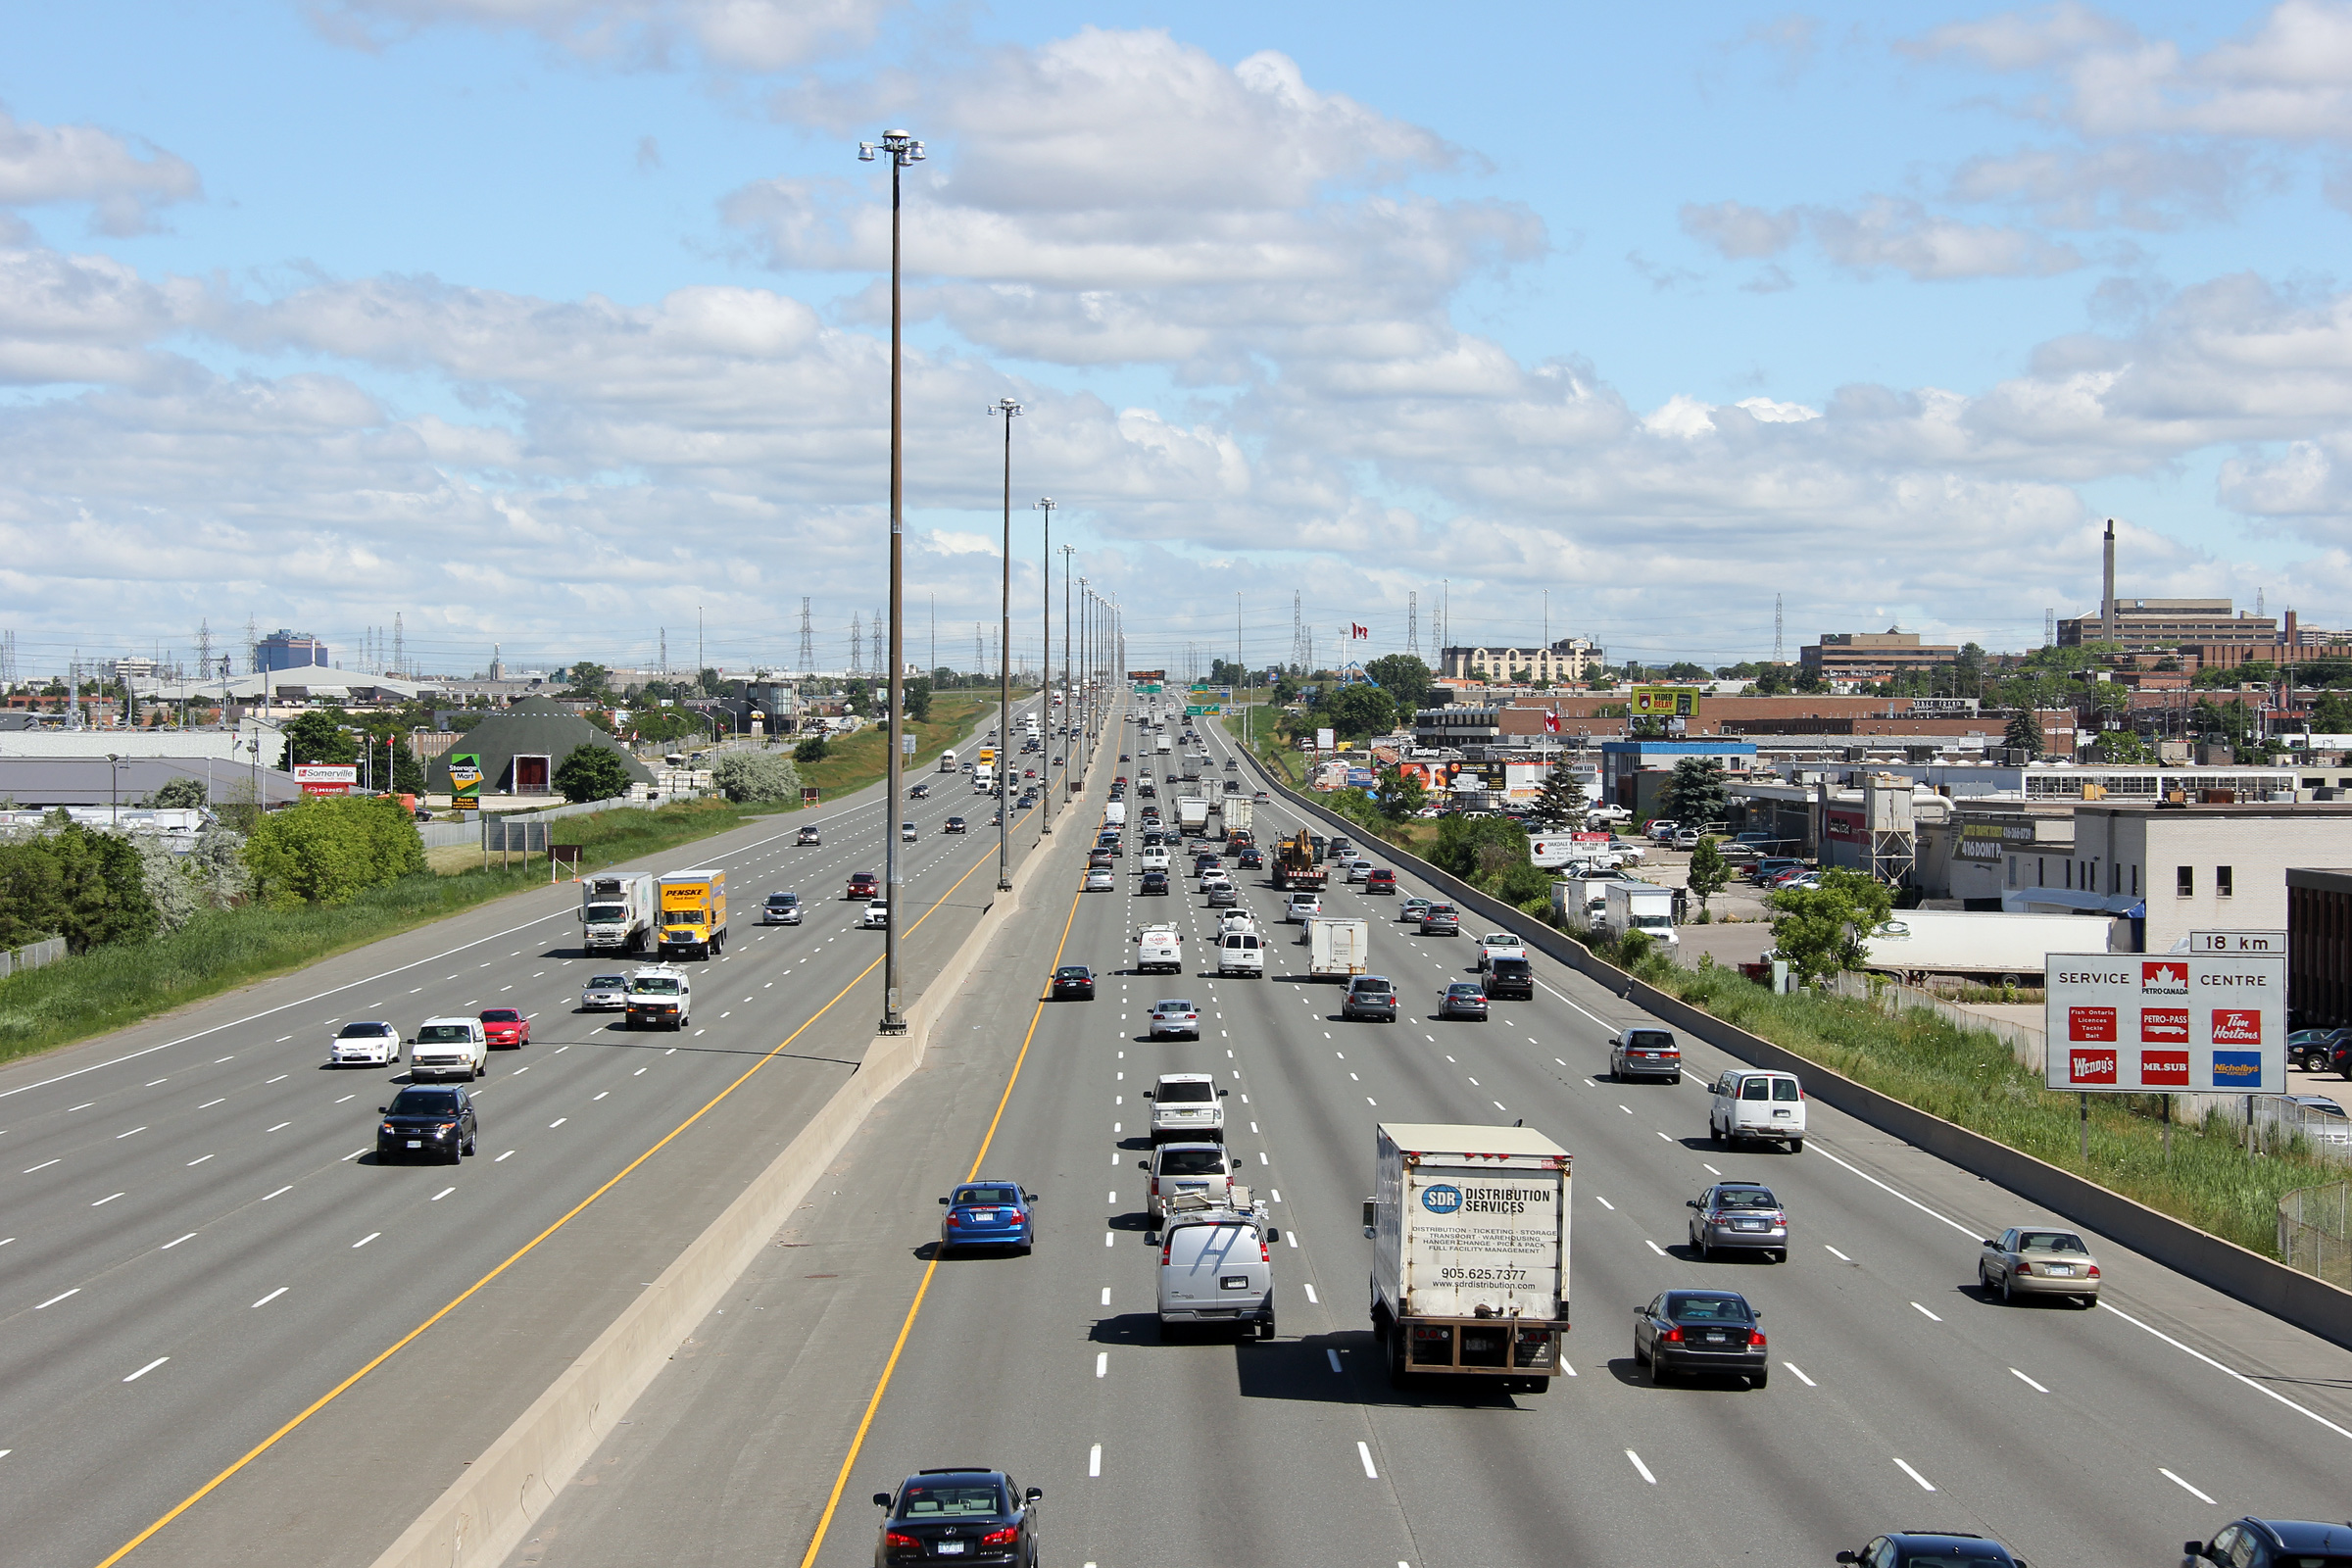
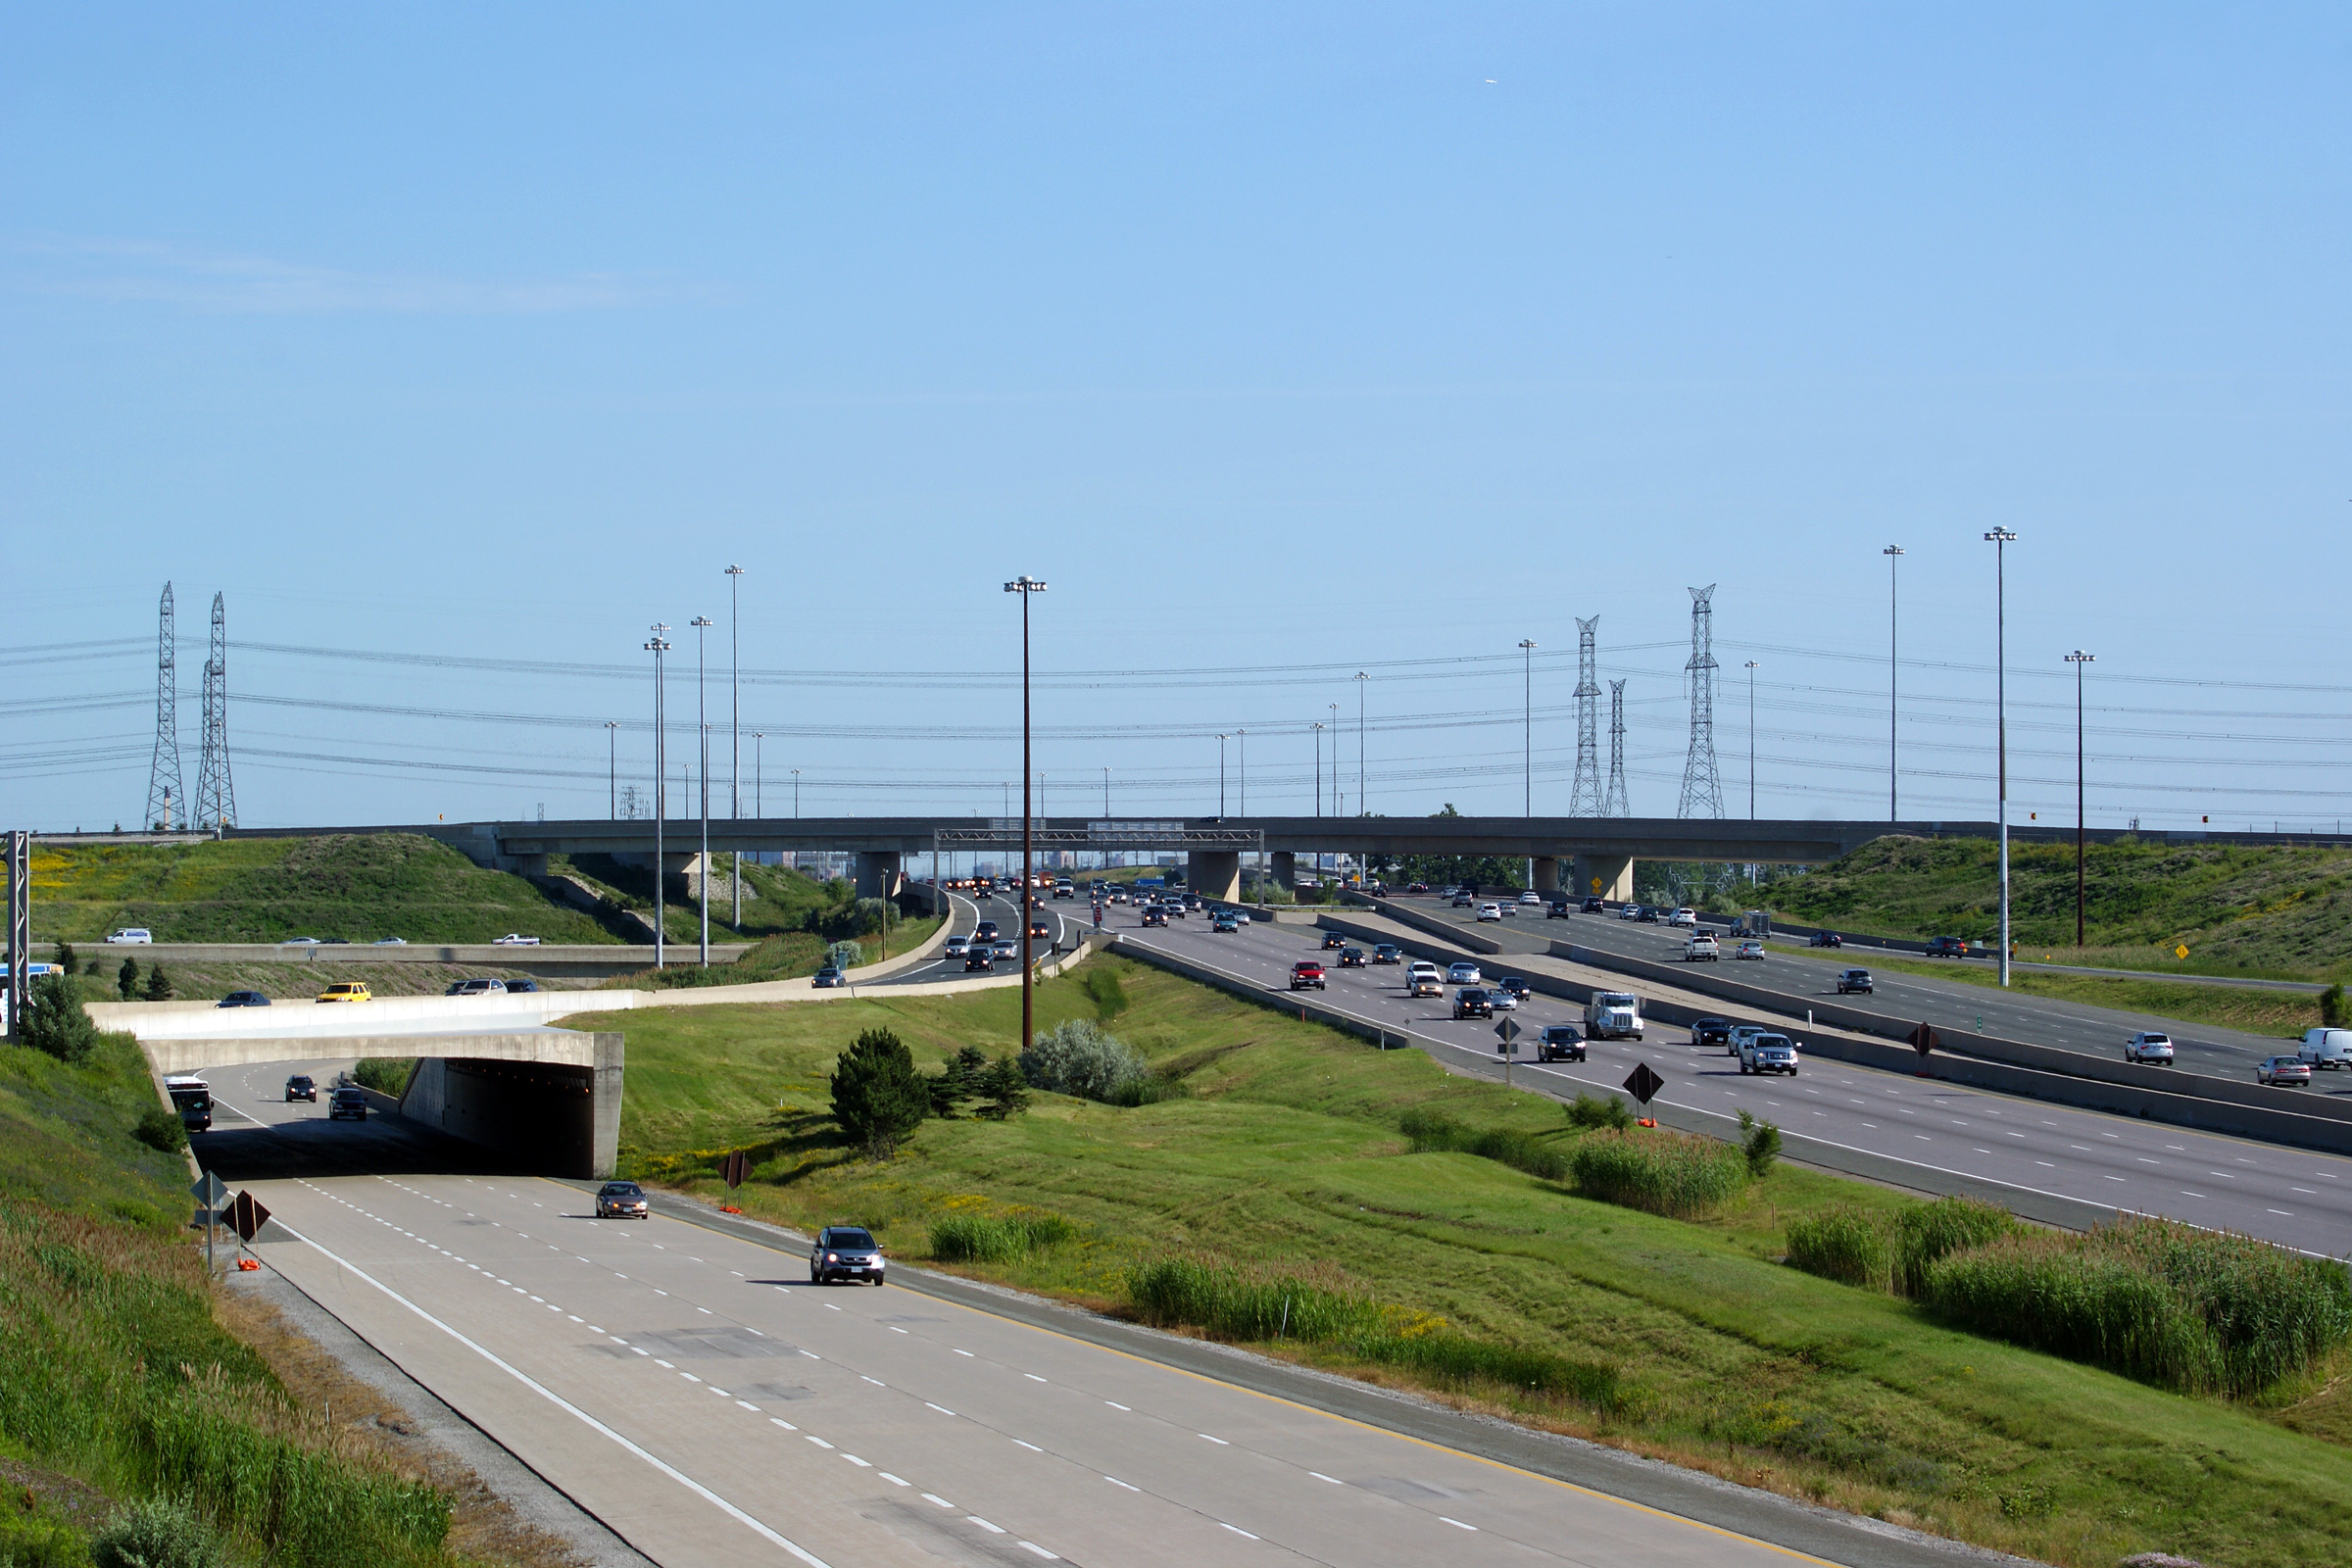
| City of Toronto |
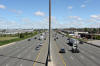
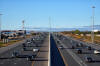
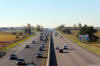
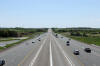
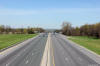
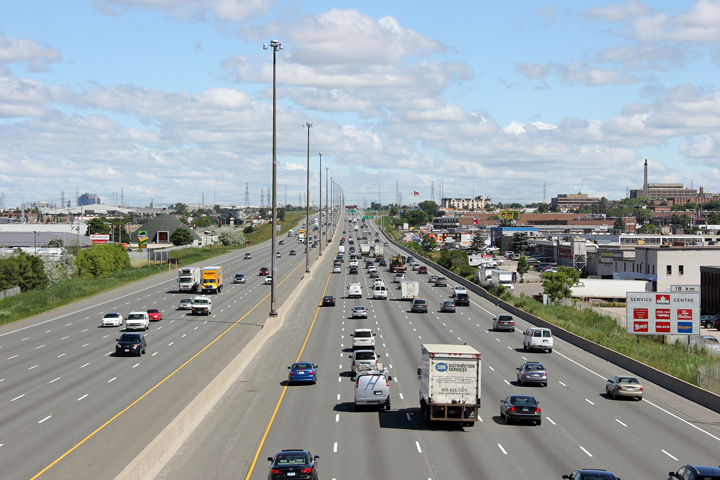
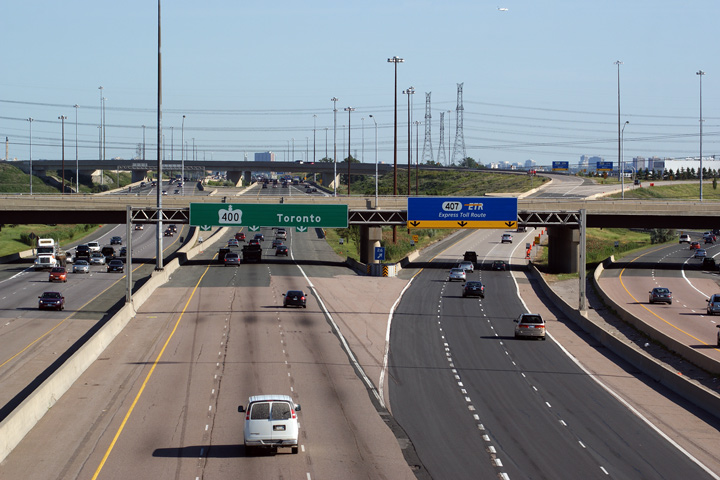
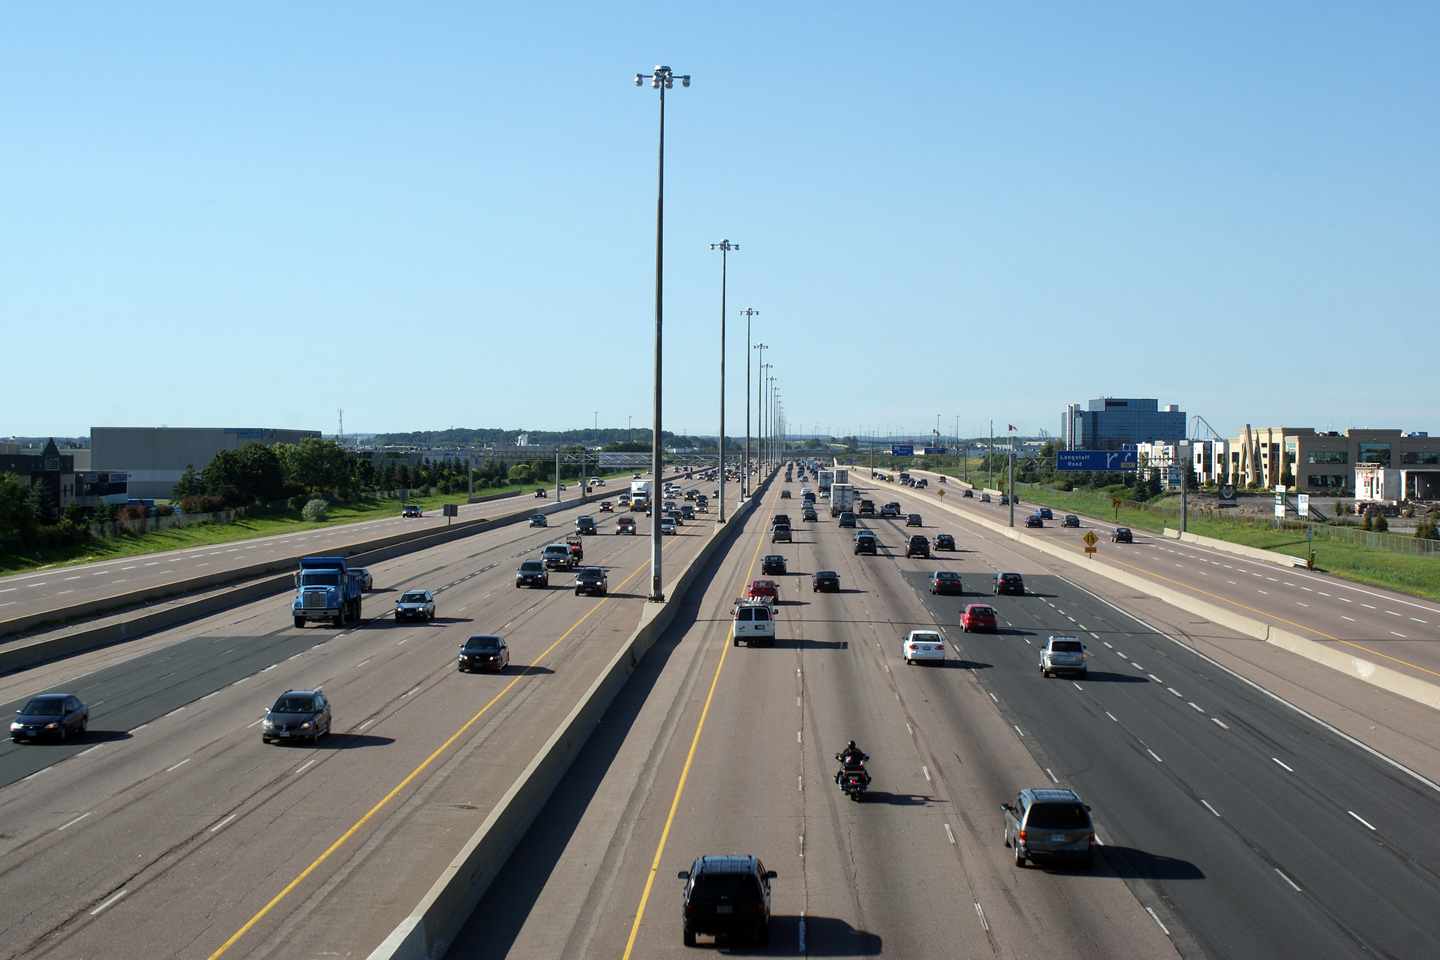
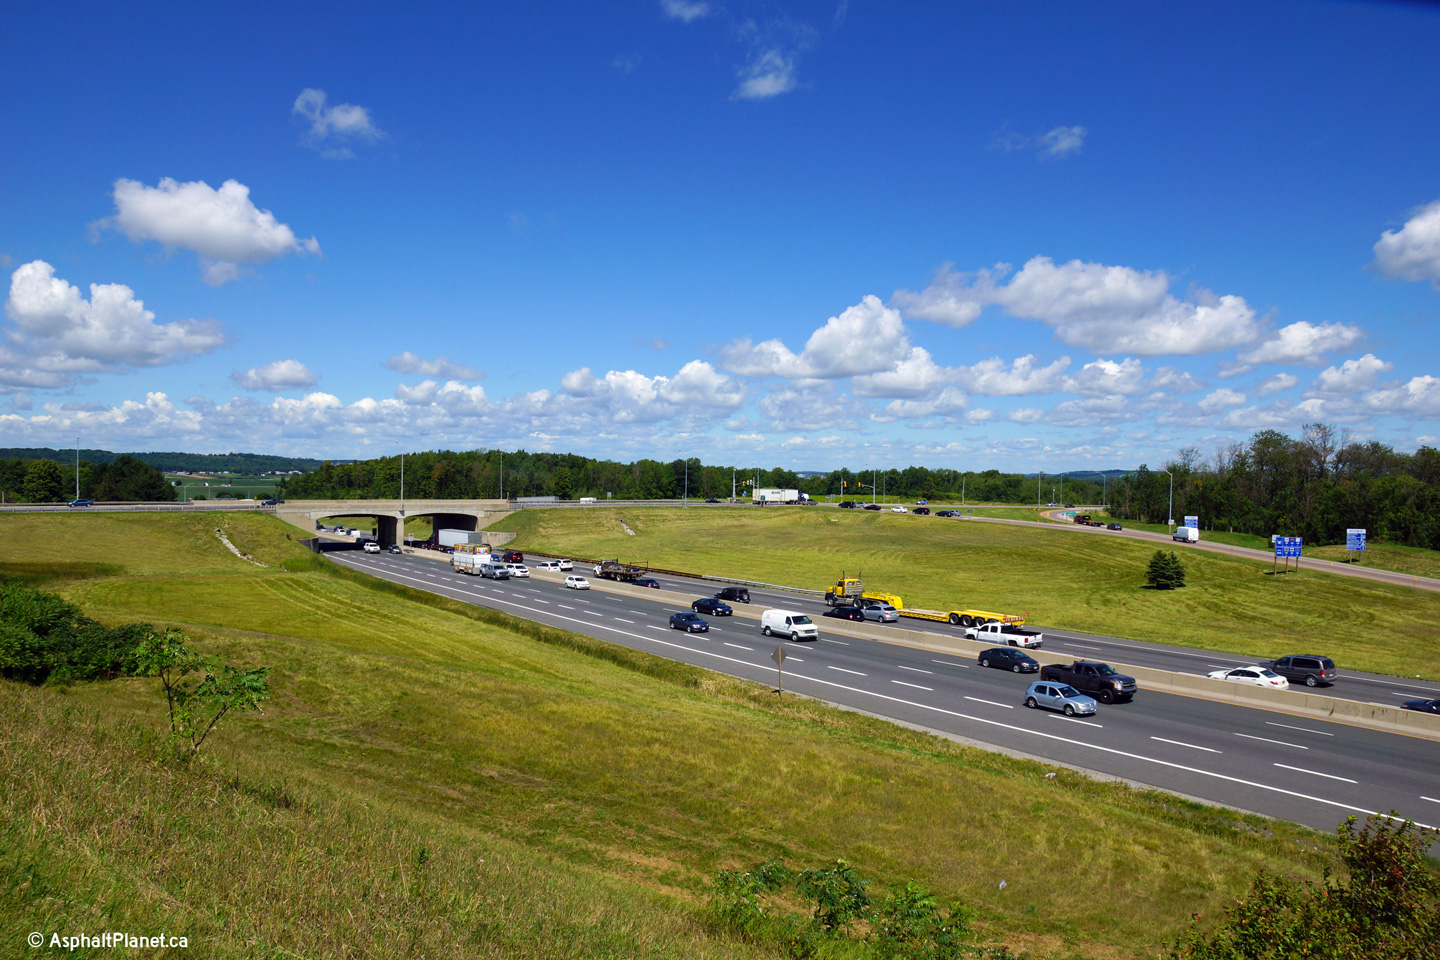
Highway 400 looking north from the Sheppard Avenue overpass. Highway 400 is a
12-lane freeway from Highway
401 northerly to Finch Avenue.
Photos taken: June 25th, 2012. |
(720x480)
(1440x960)
(2400x1600)
(720x480)
(1440x960)
(2400x1600) |
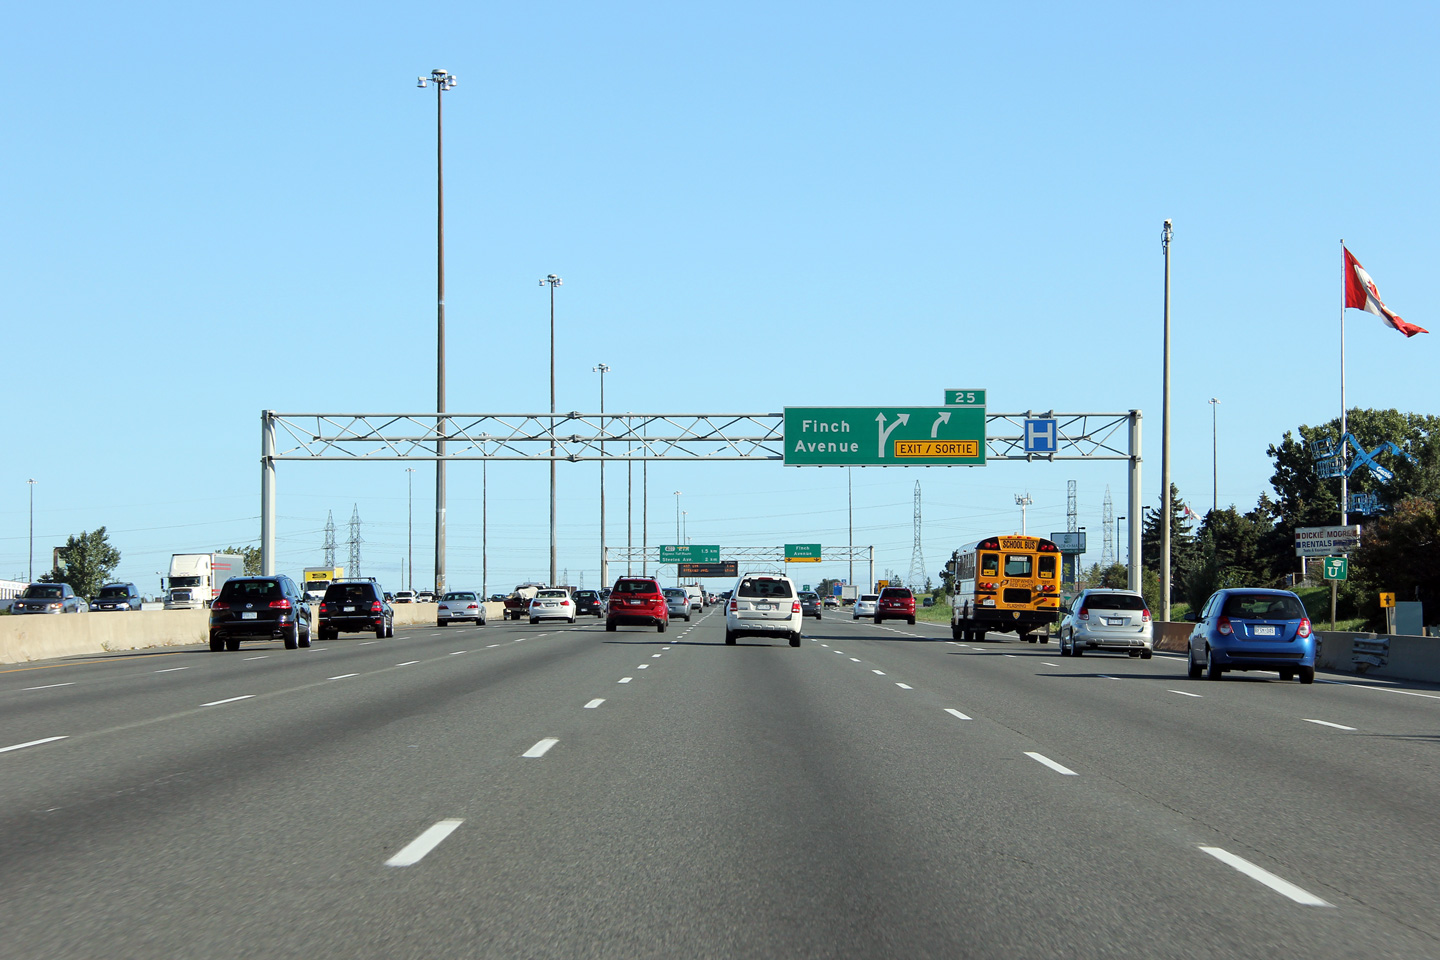
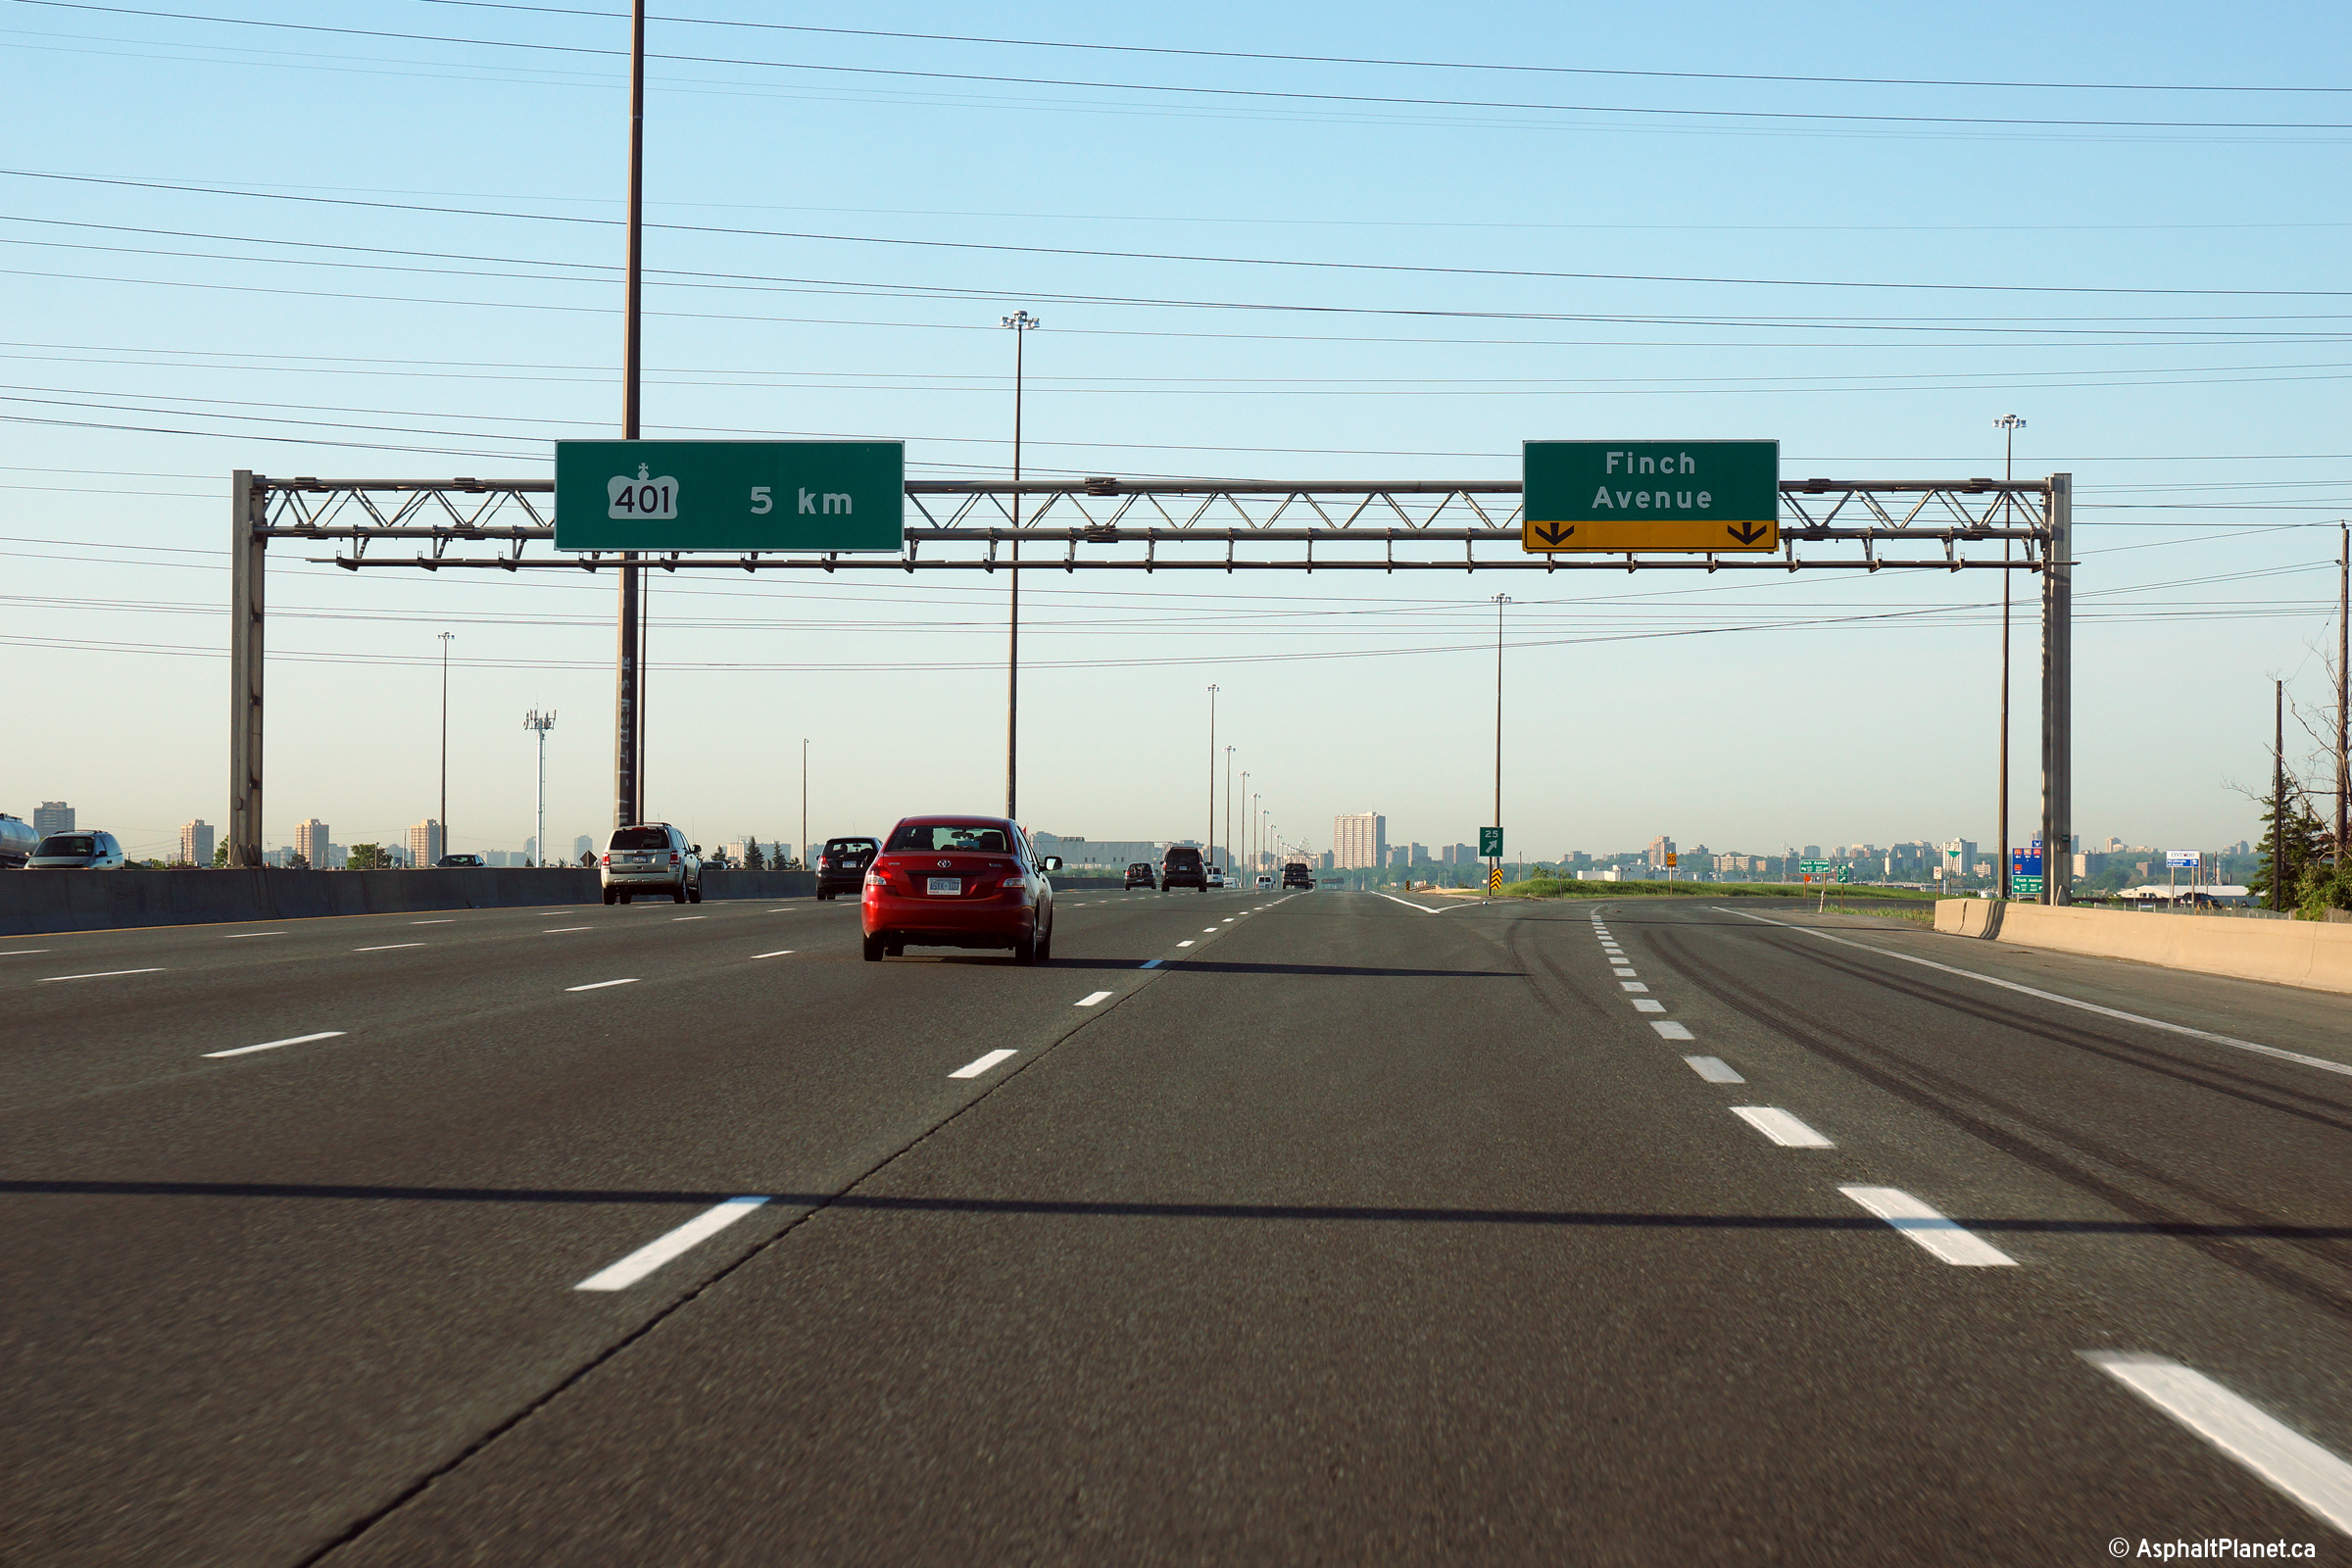
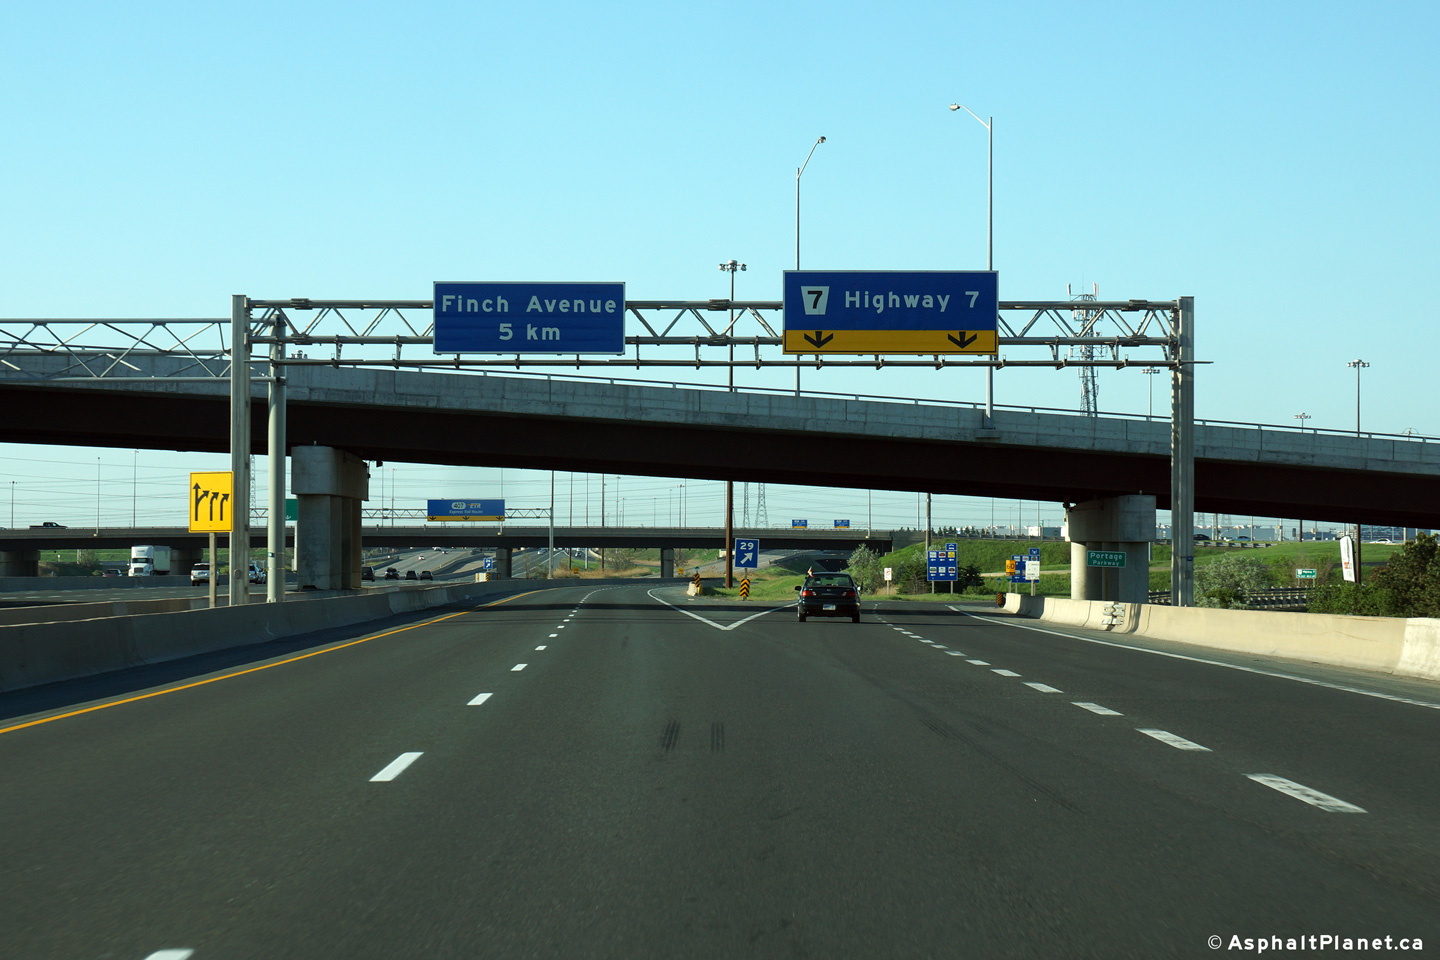
| City of Toronto |
Northbound advanced signage for the Finch Avenue exit. The sixth
northbound lane exits the mainline lanes of Highway 400 for Finch Avenue at
this interchange.
Photo taken: August 18th, 2012. |
 (720x480) (720x480)
(1440x960)
(2400x1600) |
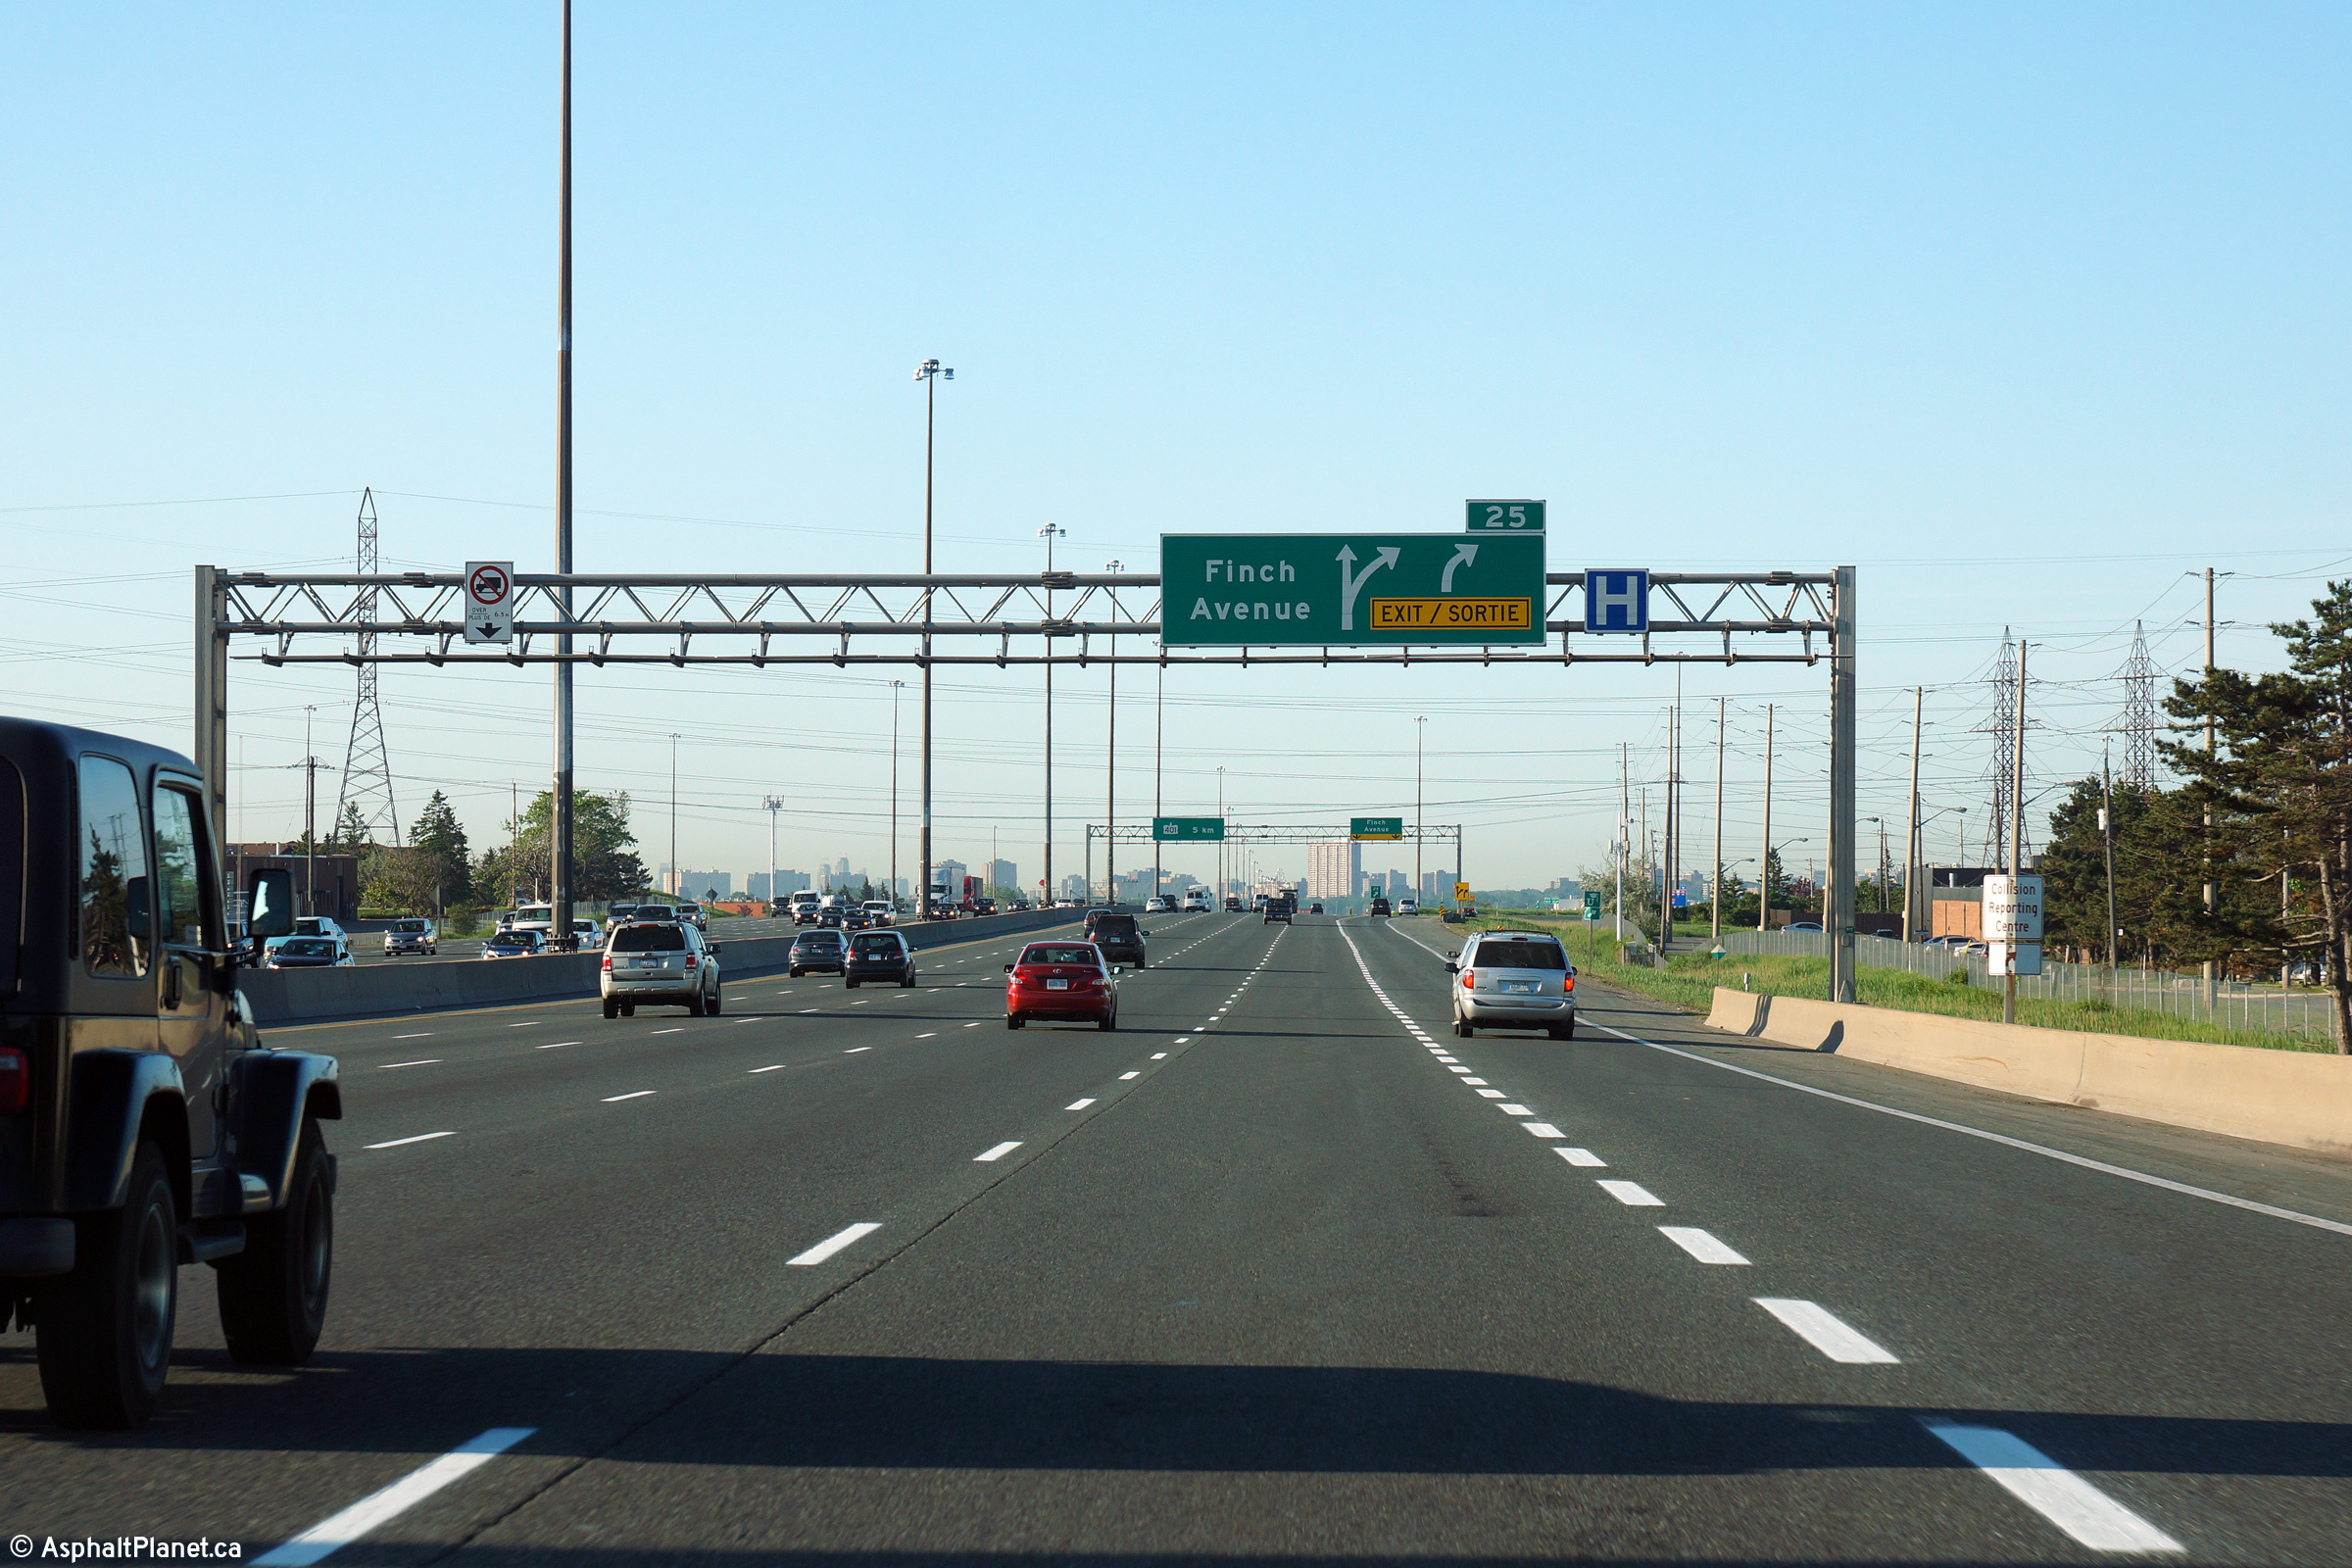
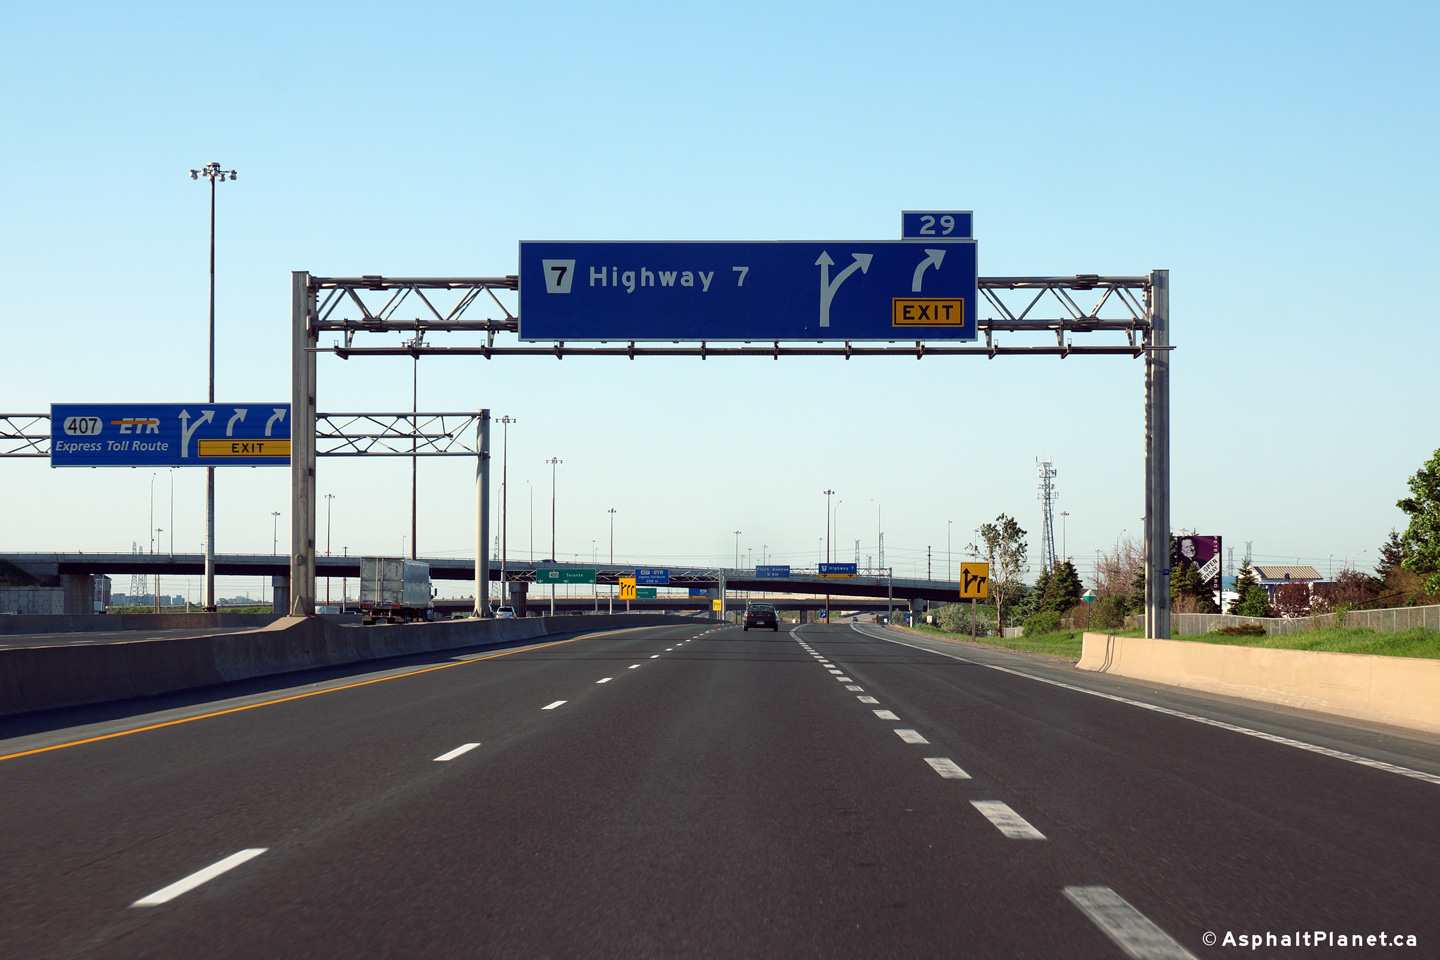
| City of Toronto |
Northbound exit signage for the Finch Avenue interchange.
Photo taken: August 18th, 2012. |
 (720x480) (720x480)
(1440x960)
(2400x1600) |
| City of Toronto |
Changeable message signage at the Finch Avenue interchange.
Photo taken: August 18th, 2012. |
 (720x480) (720x480)
(1440x960)
(2400x1600) |
| City of Toronto |
Signage at the southbound off-ramp to Finch Avenue.
Photo taken: May 31st, 2014. |
 (720x480) (720x480)
(1440x960)
(2400x1600) |
| City of Toronto |
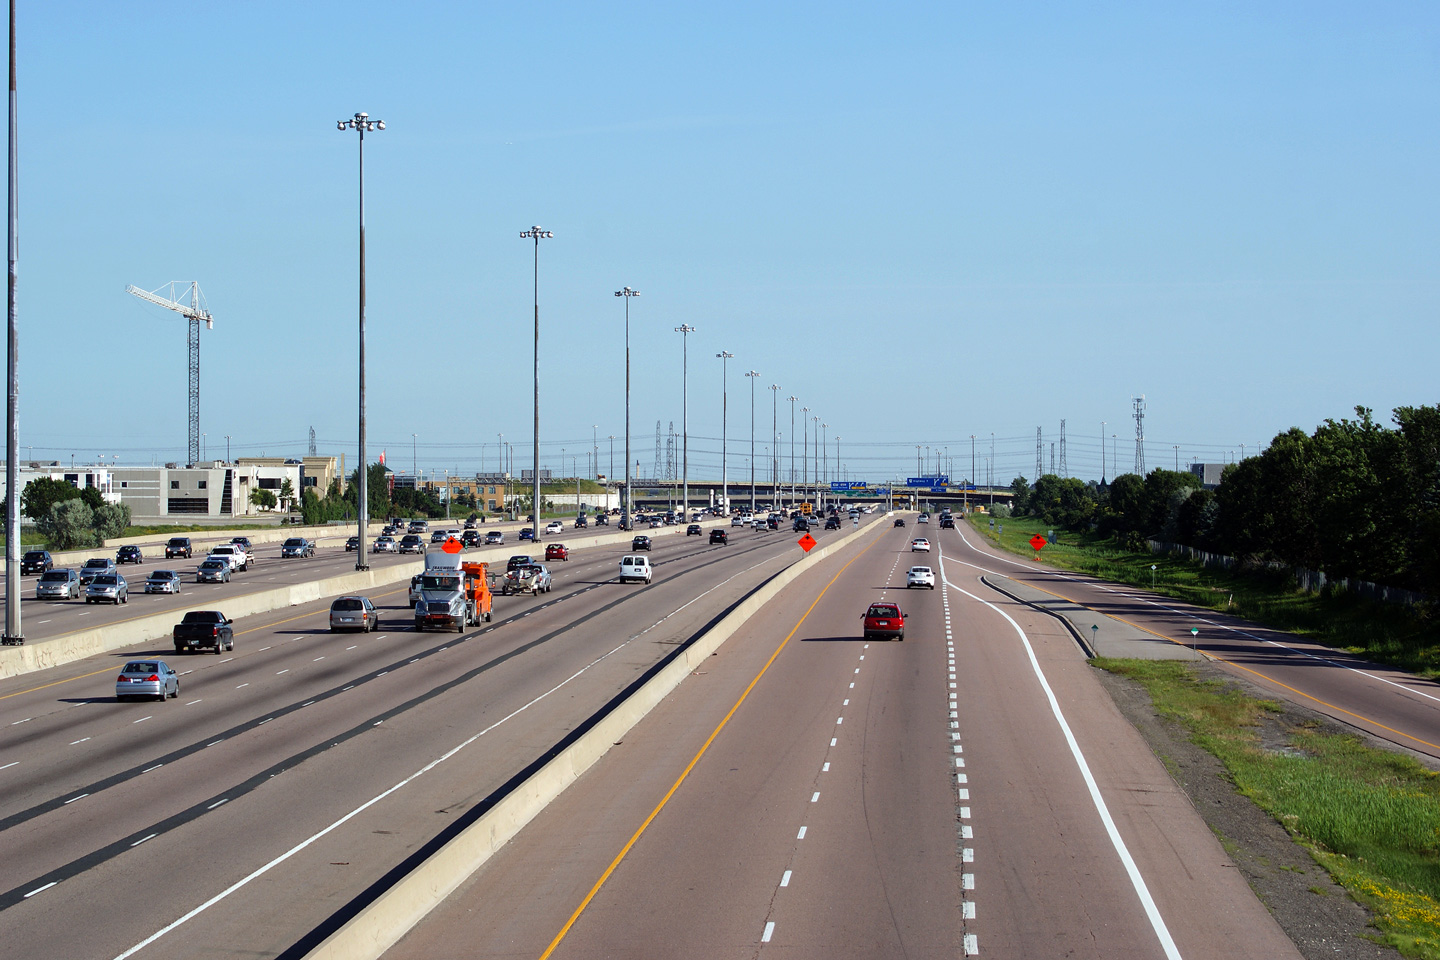
Southbound advanced signage for the Finch Avenue interchange. The
sixth southbound lane that joined Highway 400 from the Highway 407
interchange exits at Finch Avenue. Highway 400 has six southbound
lanes once again beyond the Finch Avenue interchange to the Highway 401
interchange.
Photo taken: May 31st, 2014. |
 (720x480) (720x480)
(1440x960)
(2400x1600) |
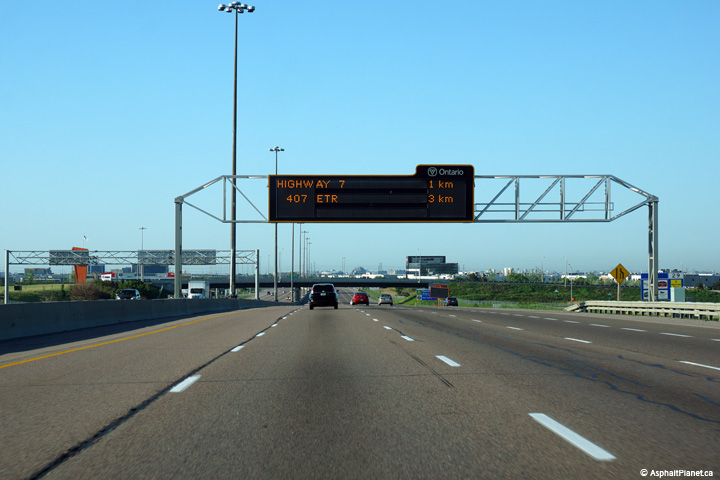
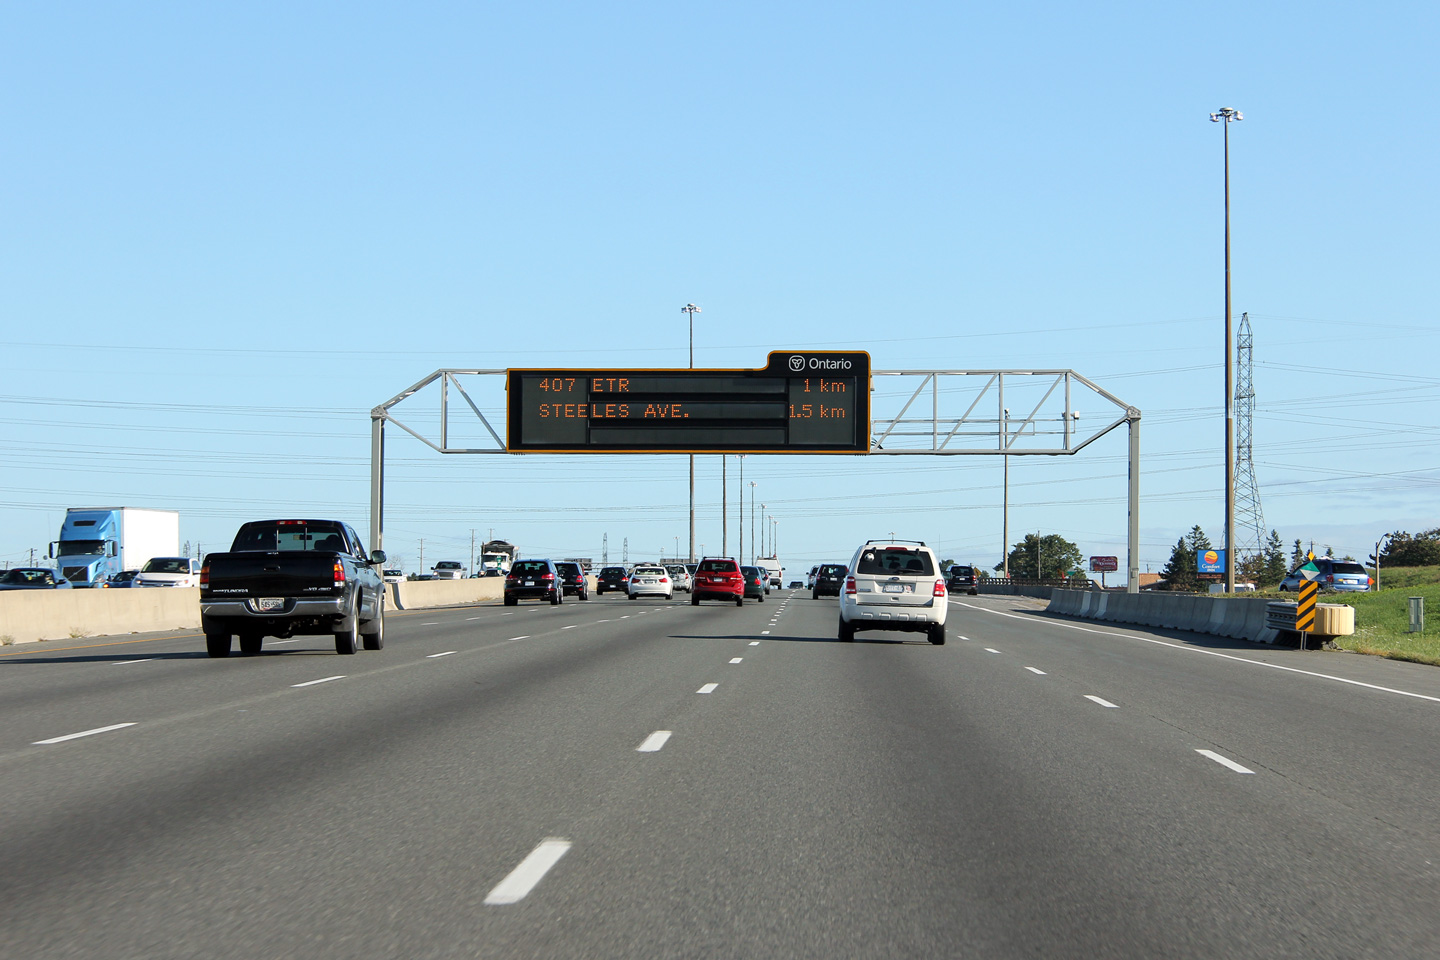
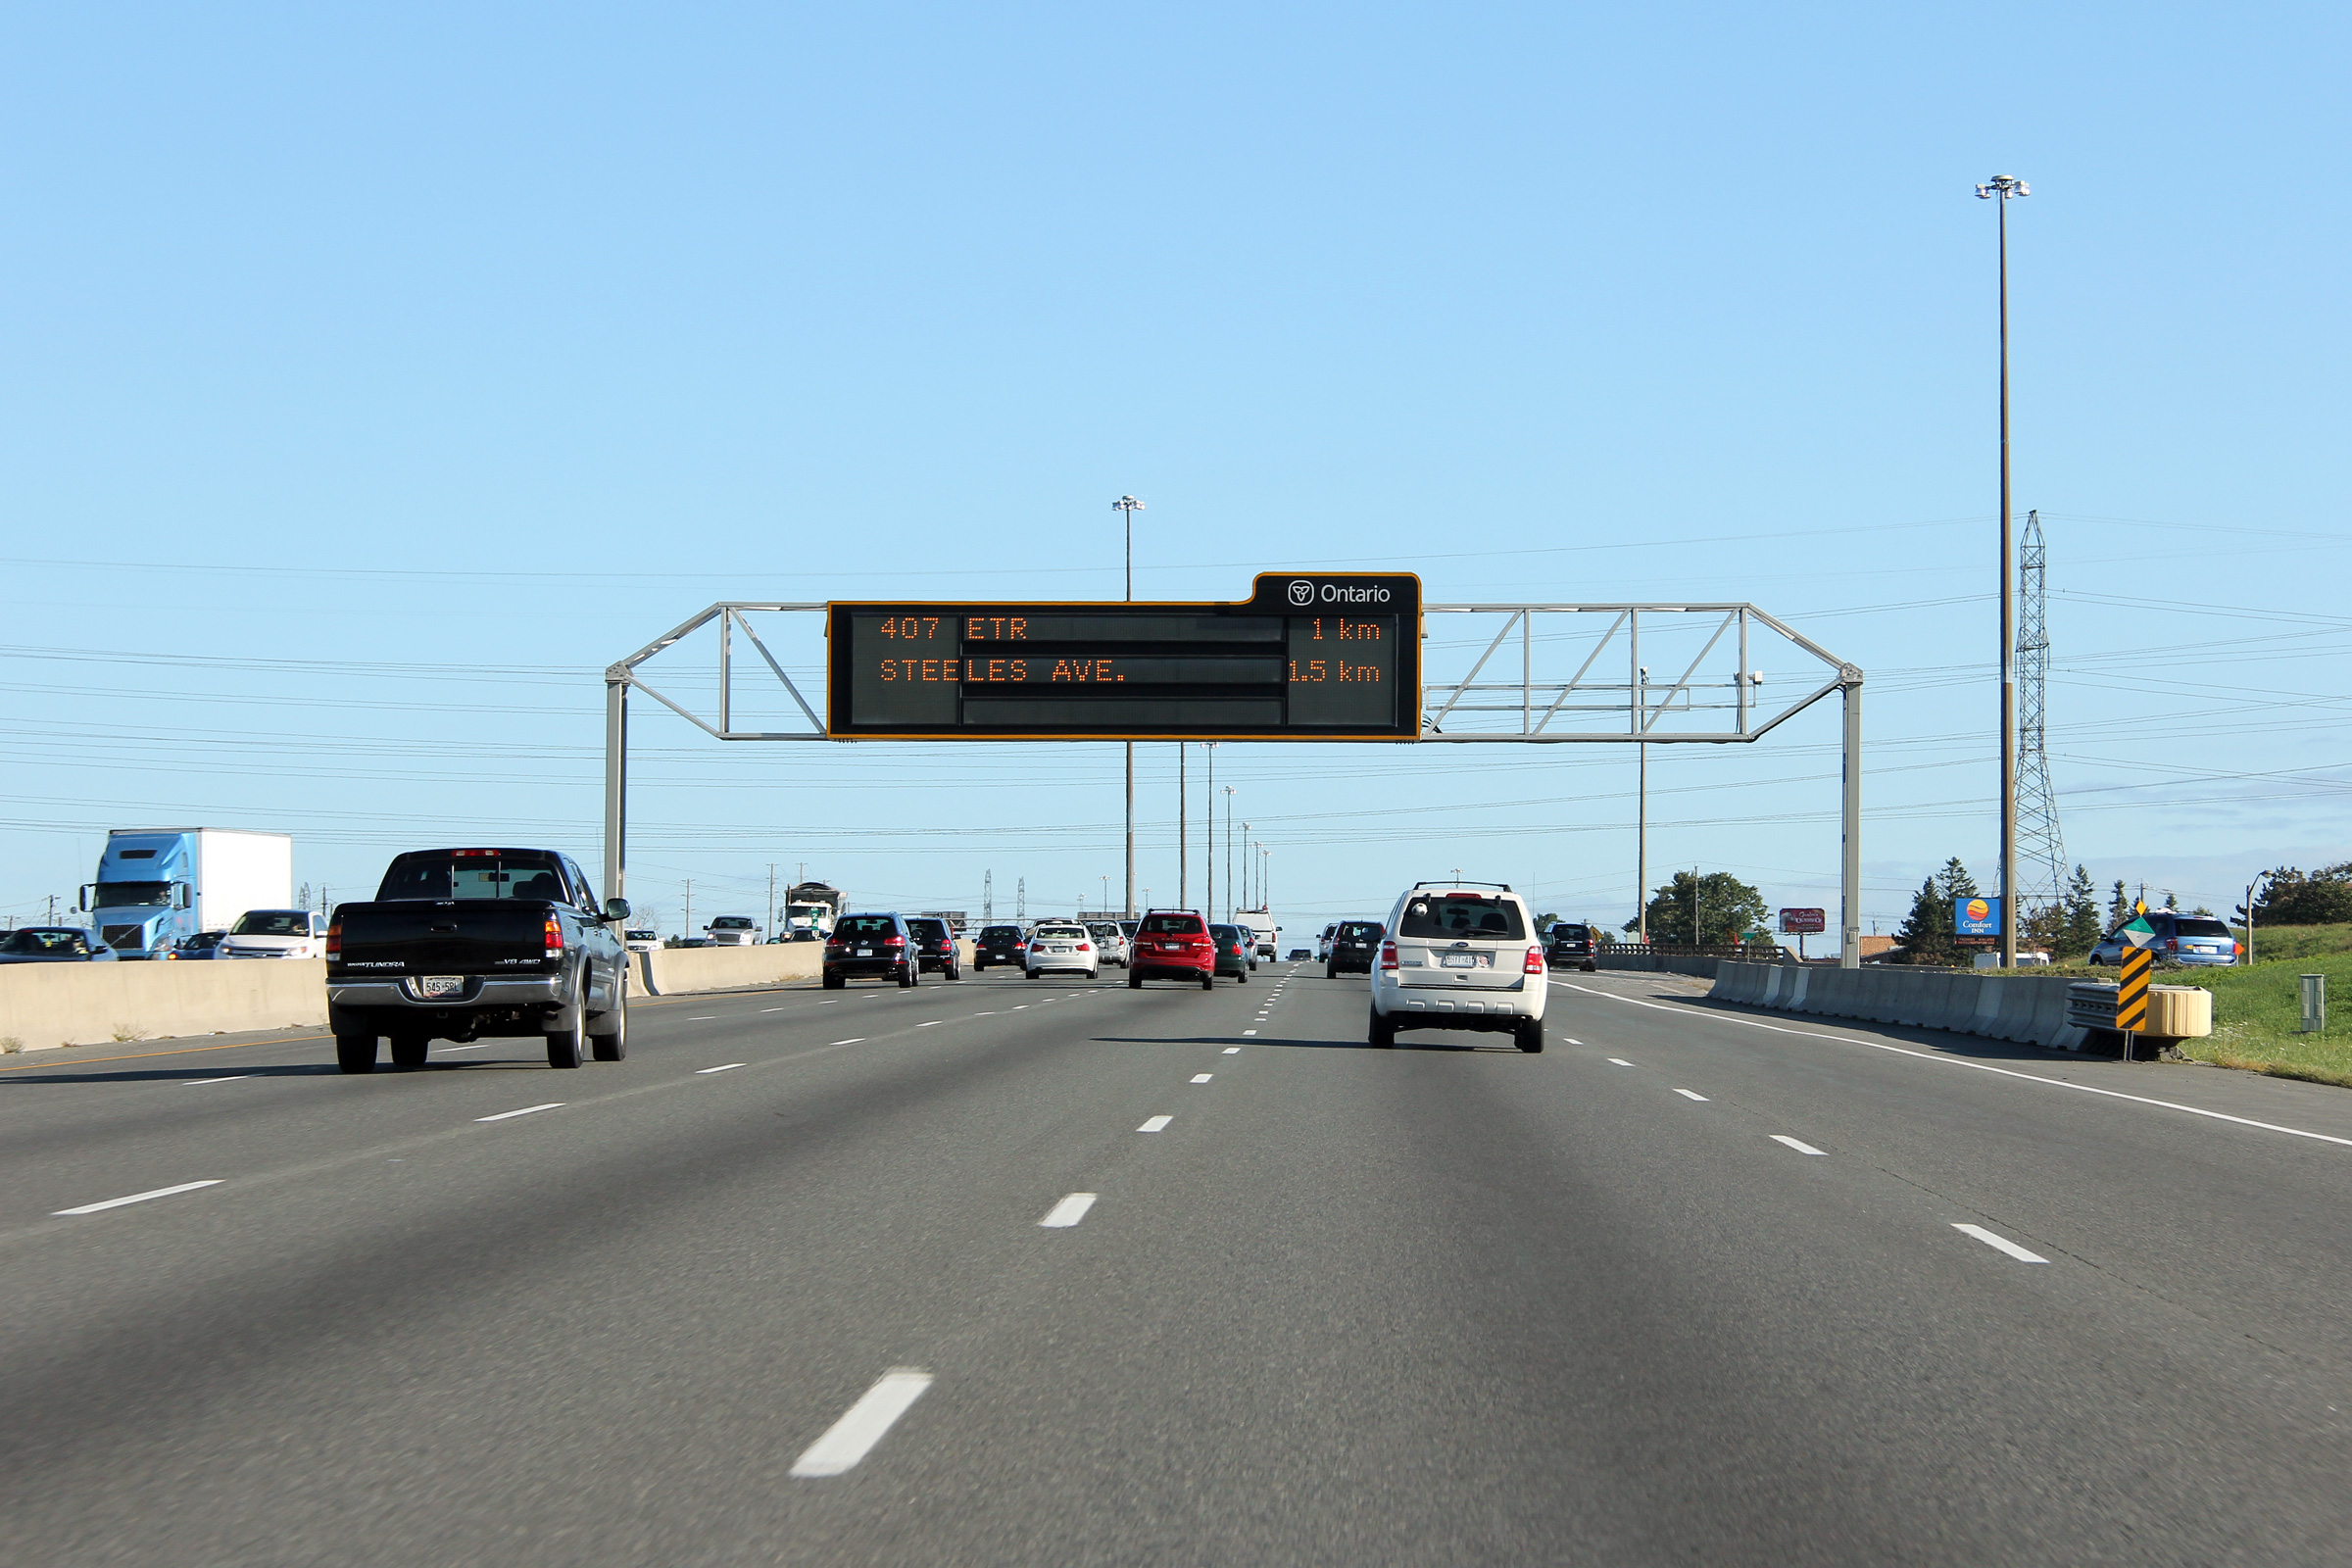
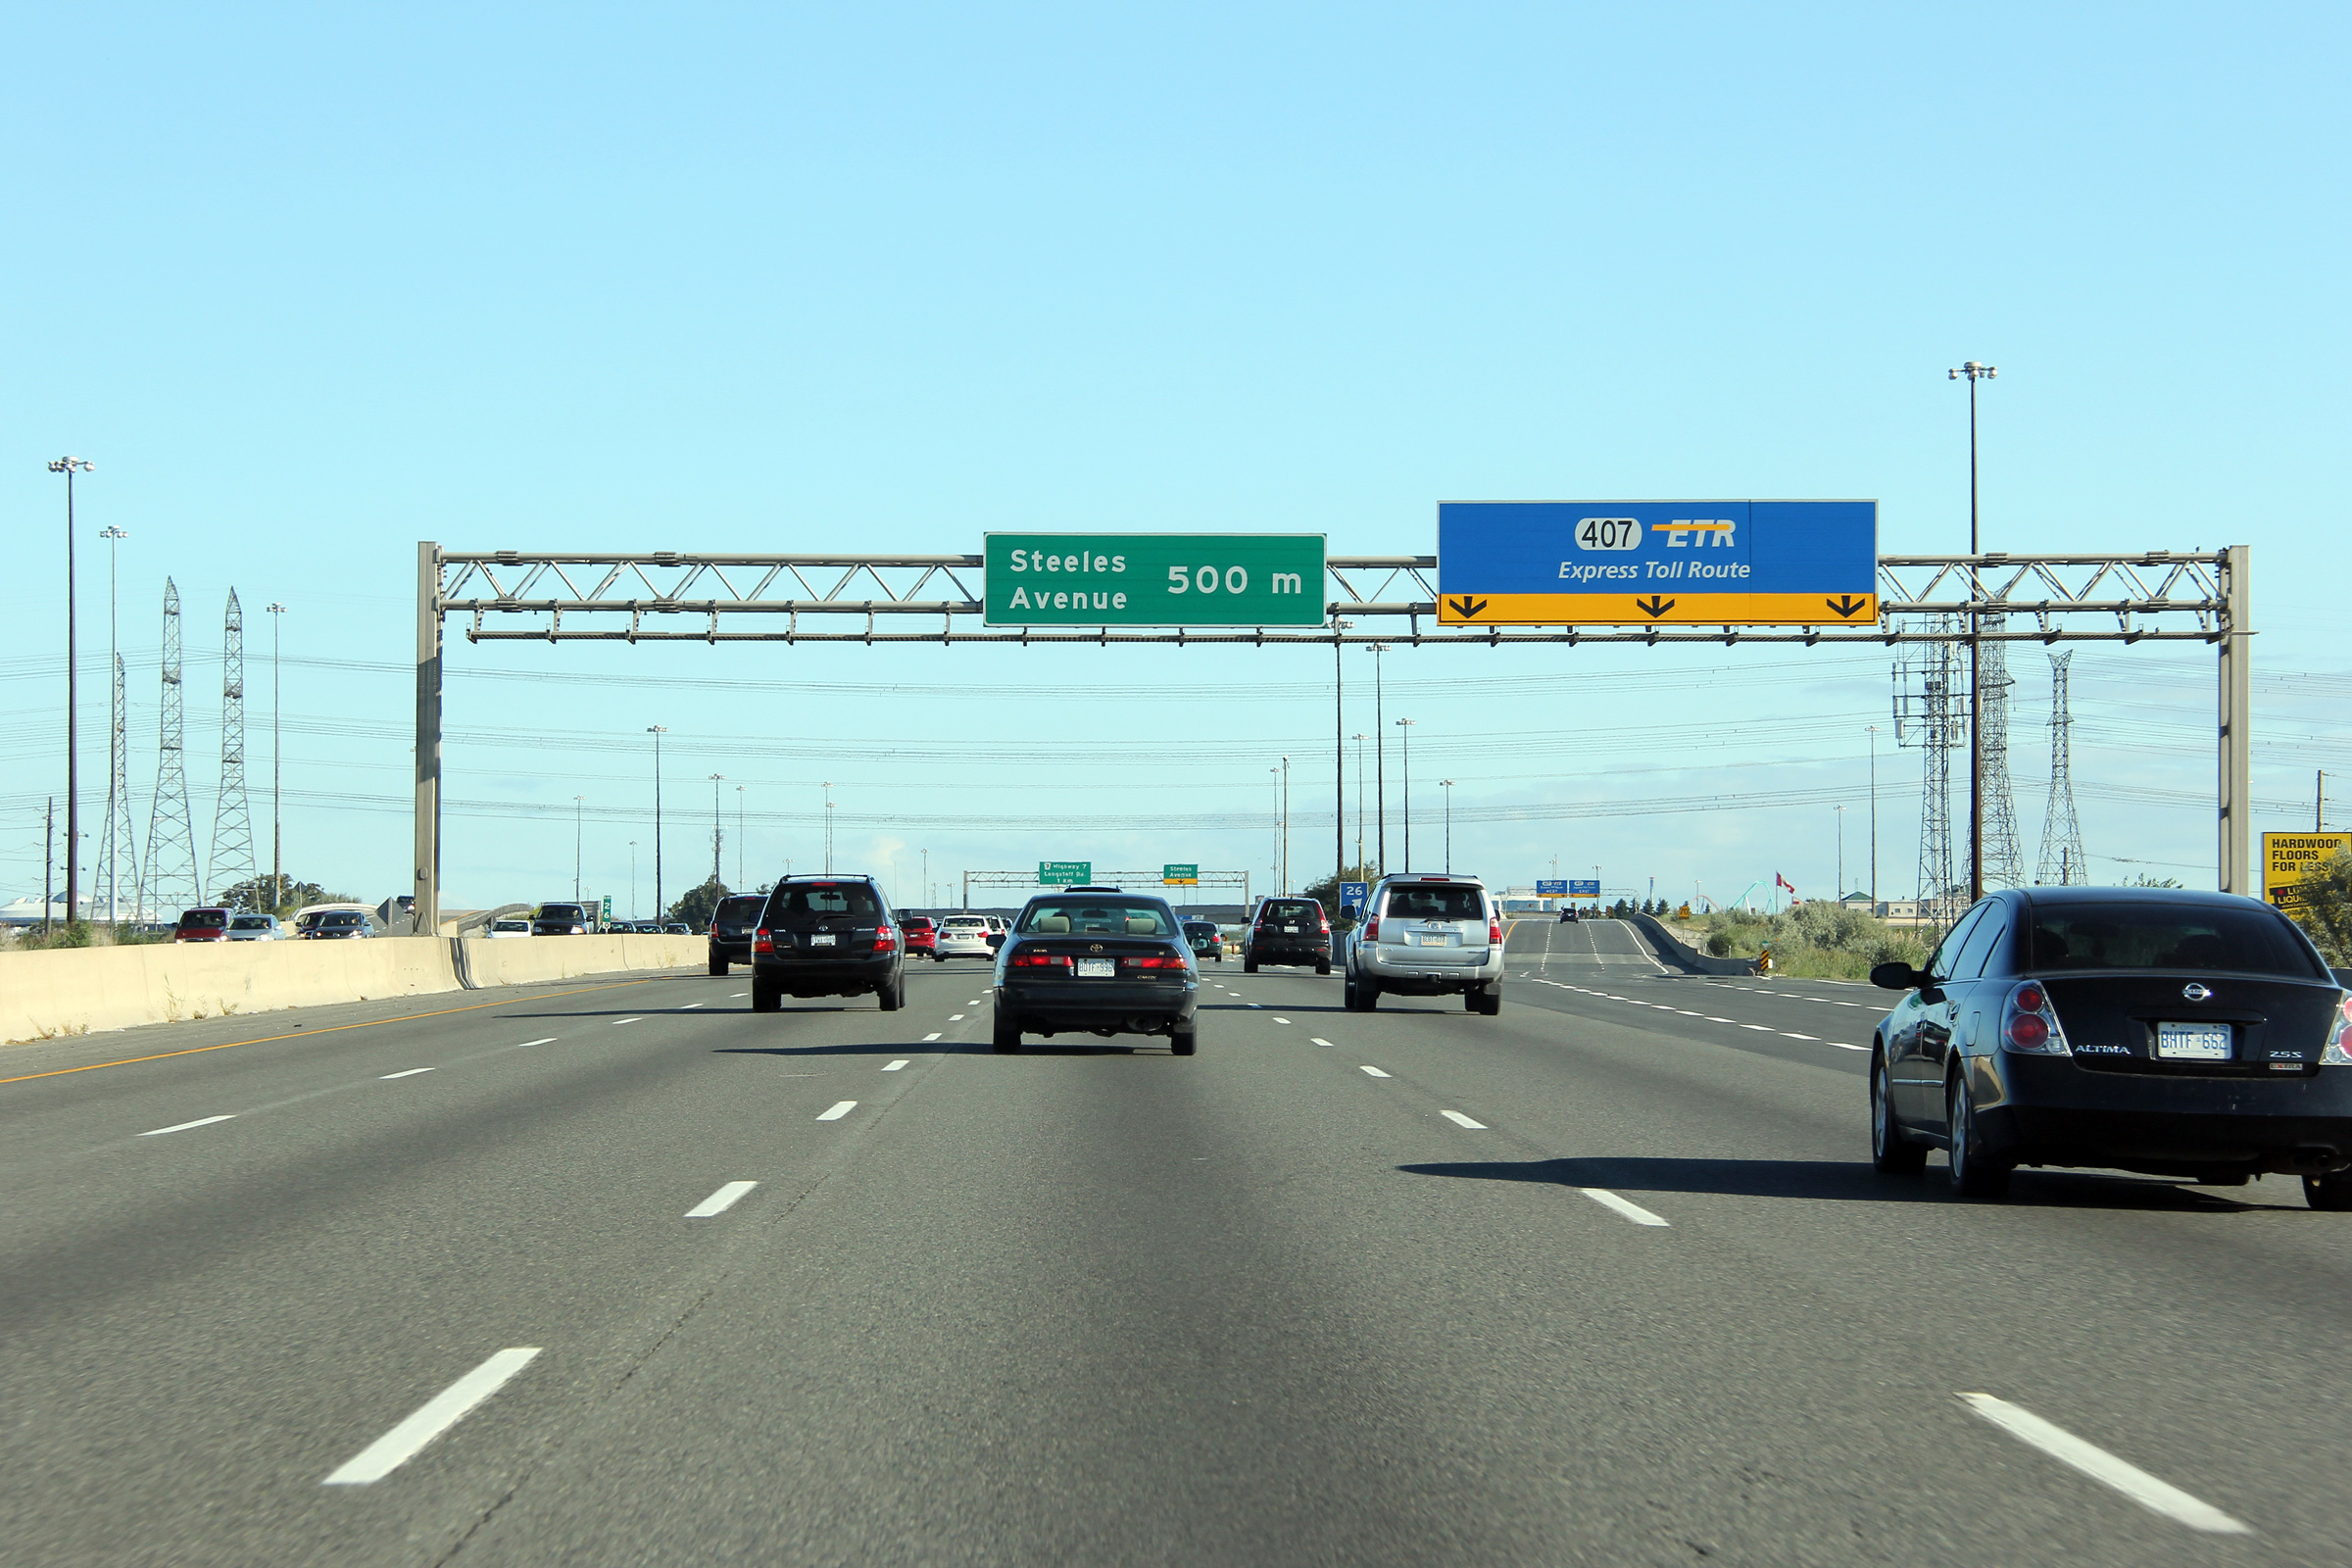
| City of Toronto |
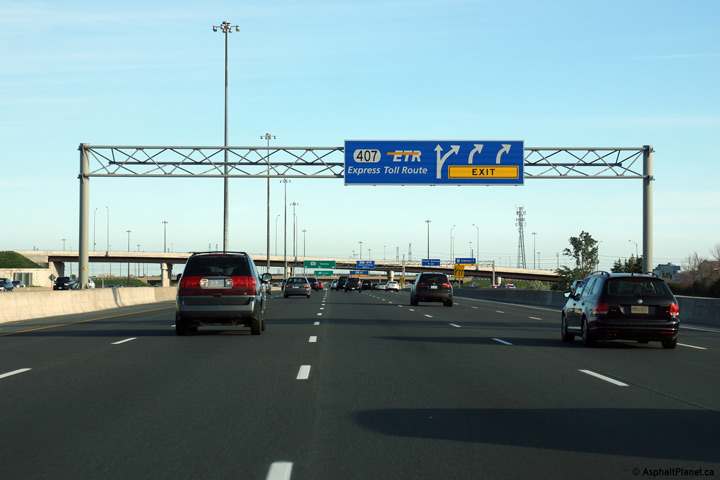
Advanced sign denoting the upcoming Highway 400/407
interchange. The 407 meets Highway
400 with a diamond stack interchange. Diamond stacks are a very
expensive and high capacity interchange type. The 400/407
interchange is the only example of this interchange type in Canada.
Photo taken: August 18th, 2012. |
 (720x480) (720x480)
(1440x960)
(2400x1600) |
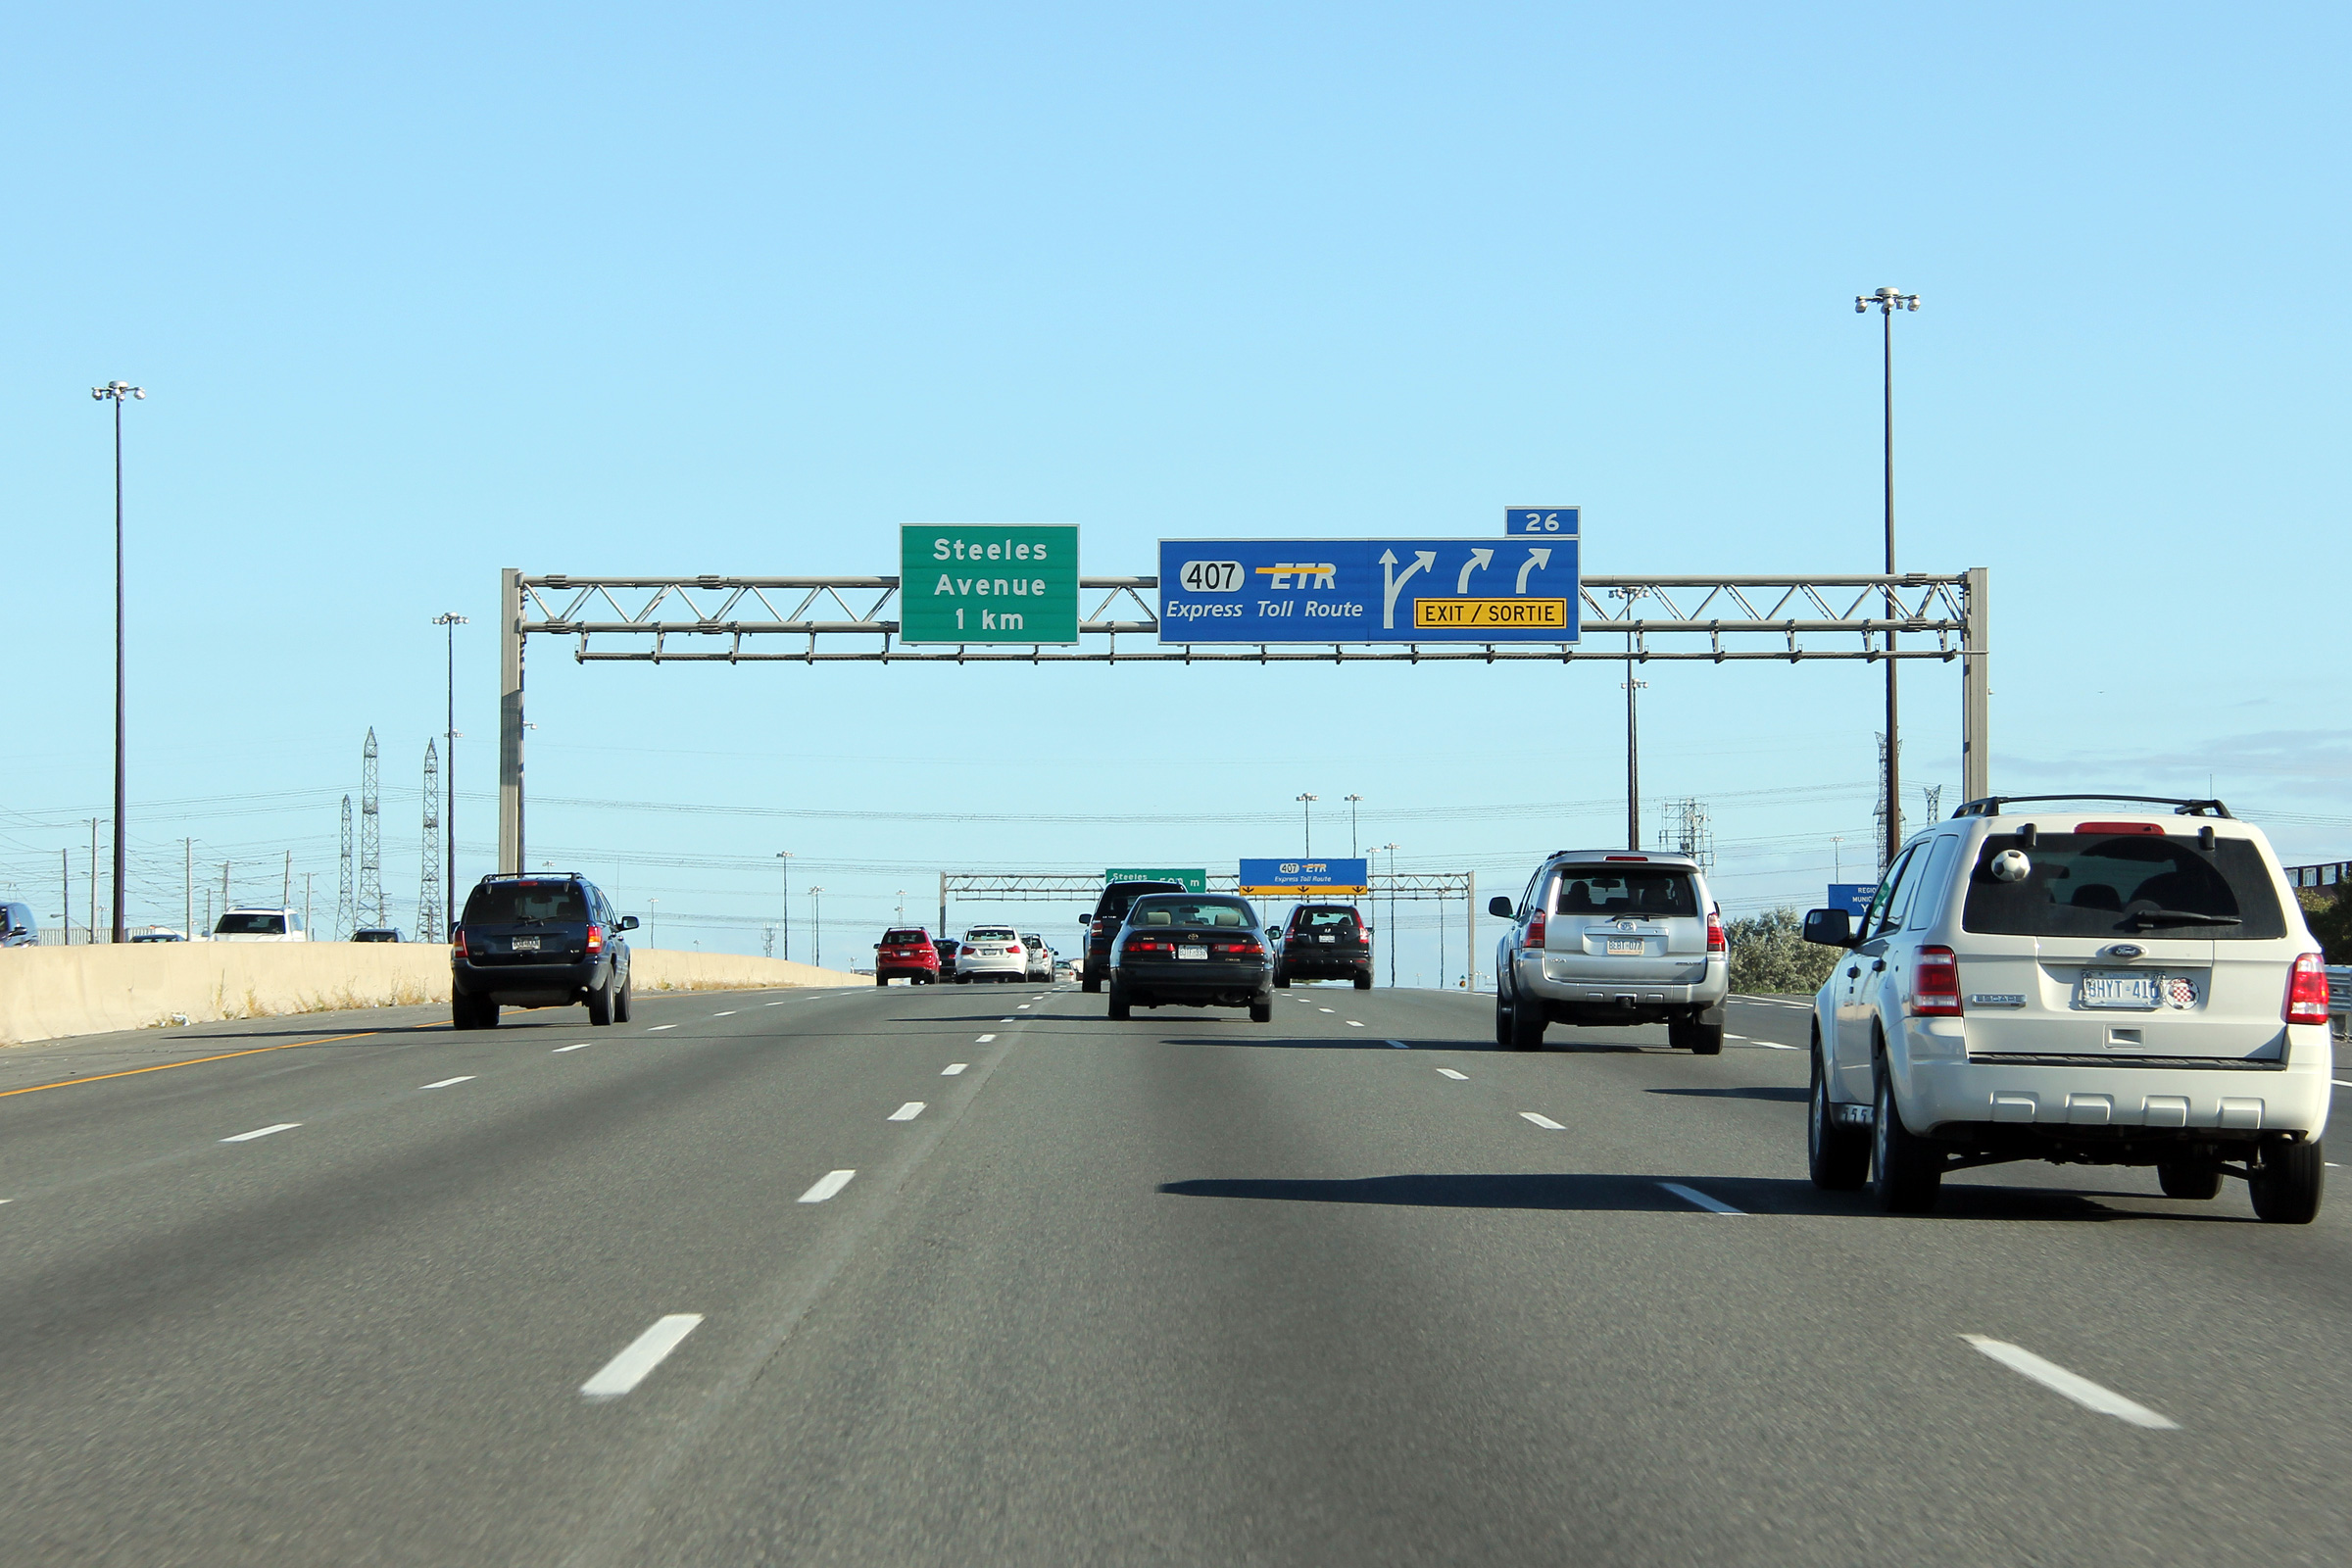
| City of Toronto |
Signage denoting the northbound Highway 407
exit from the 400. Photo taken: August 18th, 2012. |
 (720x480) (720x480)
(1440x960)
(2400x1600) |
| City of Vaughan Regional
Municipality of York |
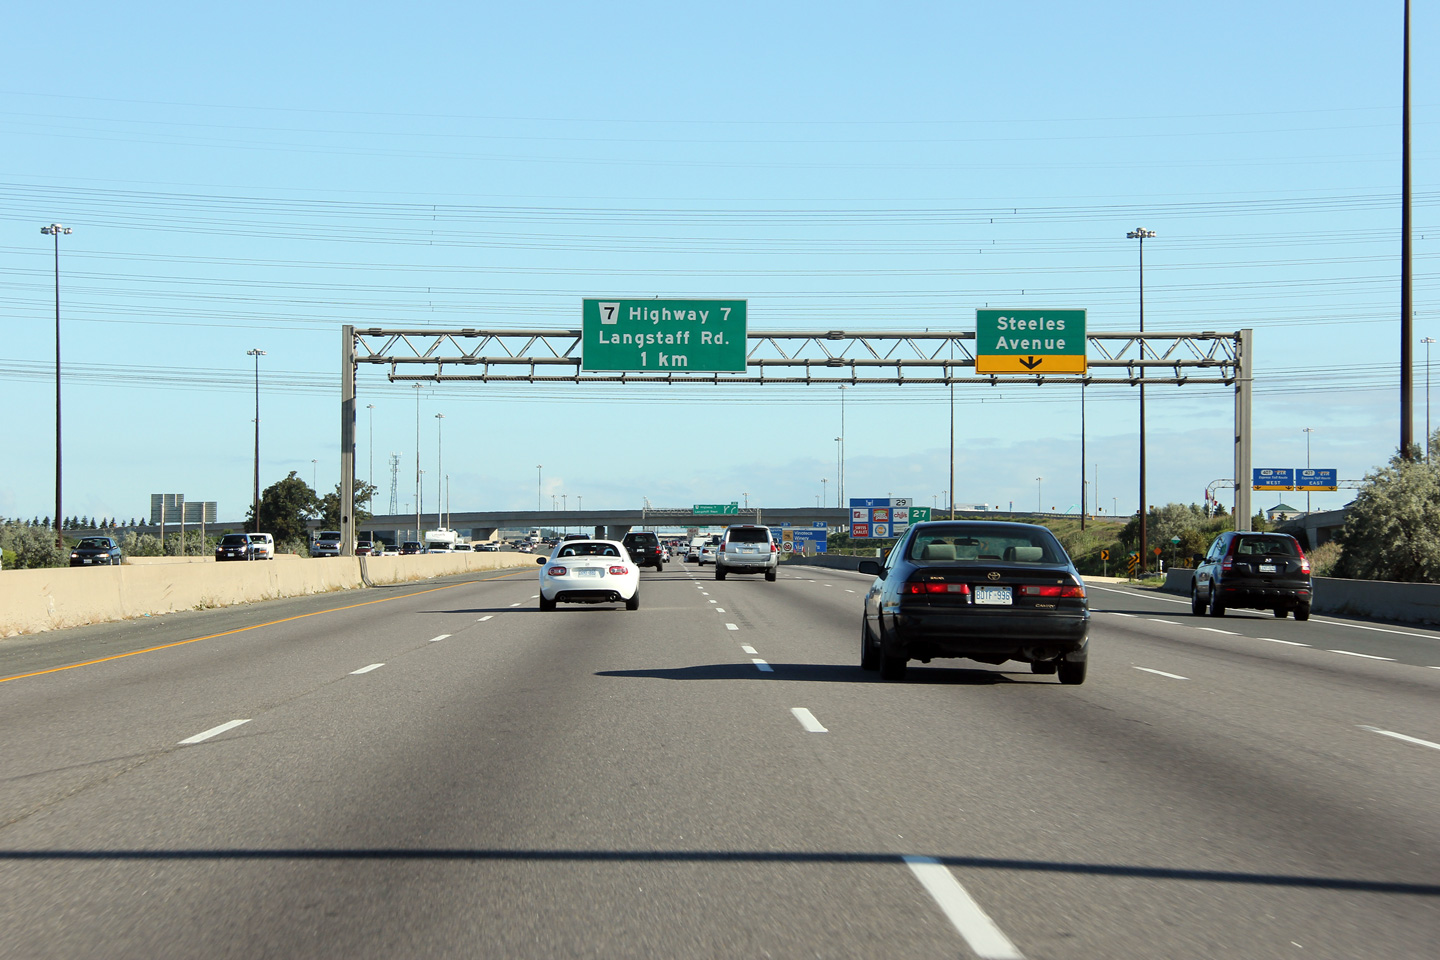
Exit for Steeles Avenue from Highway 400 north. The ramp to Steeles
Avenue passes under the high-speed off-ramp for Highway 407. Photo taken:
August 18th, 2012. |
 (720x480) (720x480)
(1440x960)
(2400x1600) |
| City of Vaughan Regional
Municipality of York |
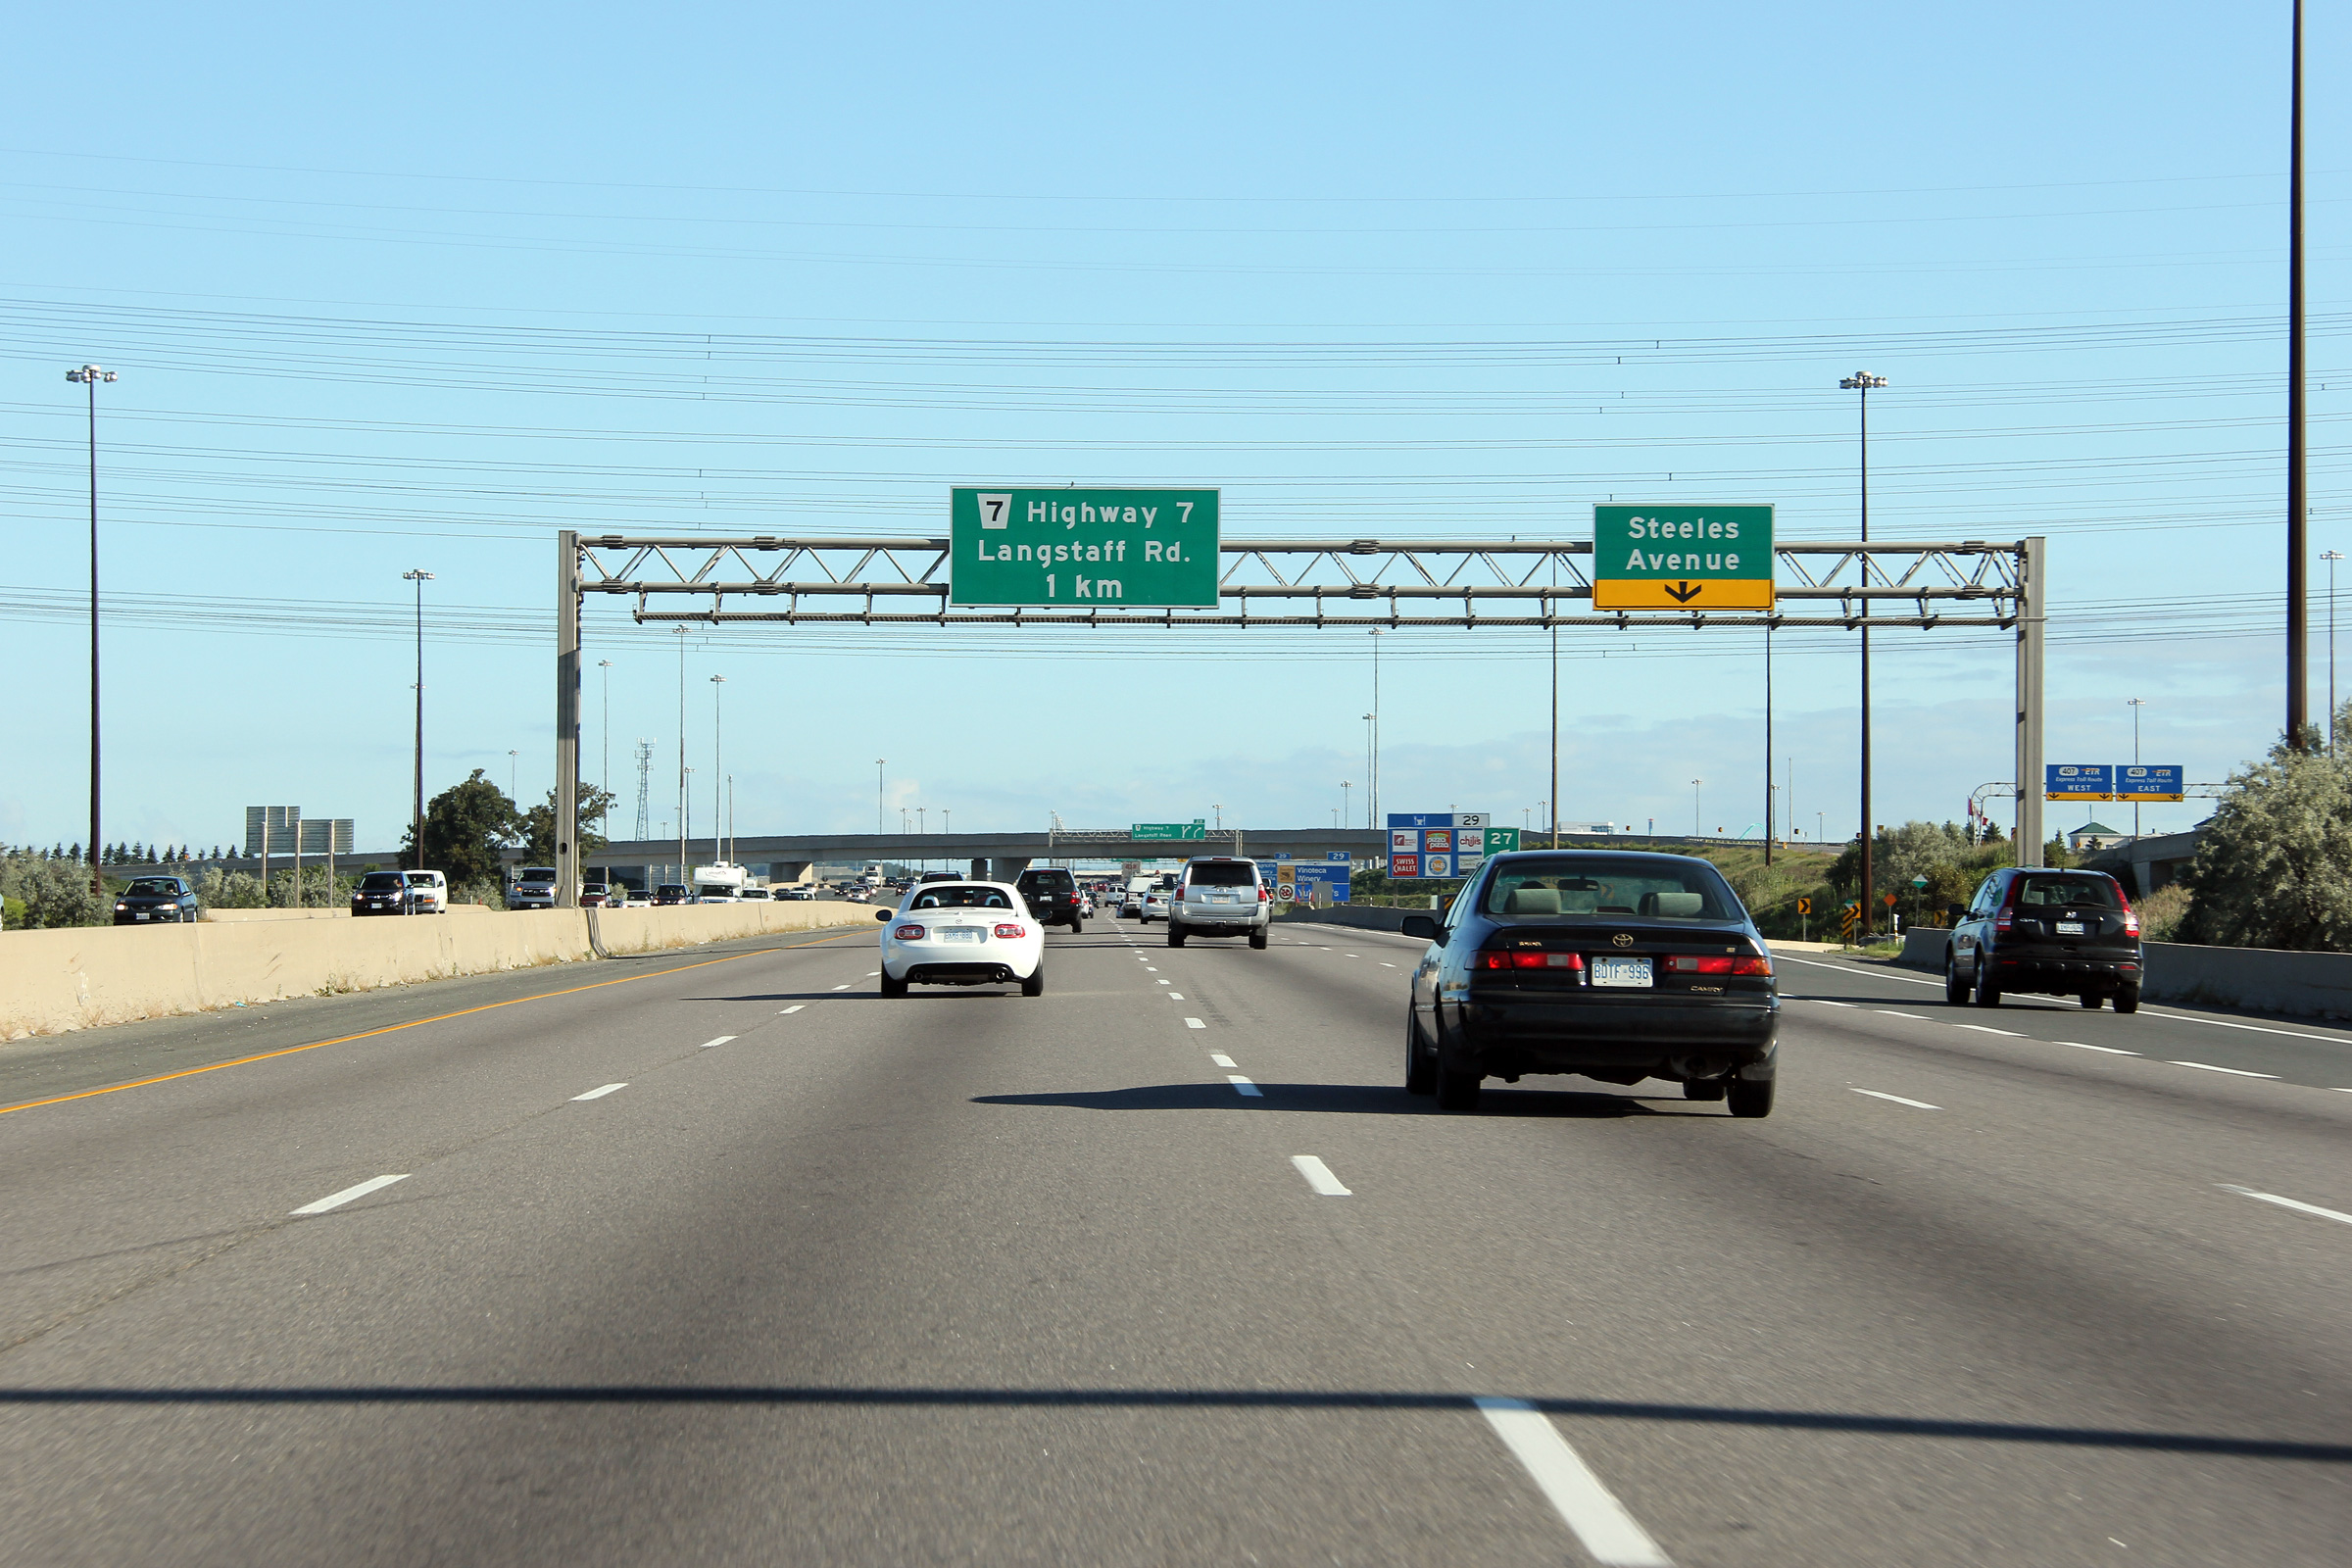
Advanced signage for the short collector between Highway 7 and Langstaff Road. Photo taken:
August 18th, 2012. |
 (720x480) (720x480)
(1440x960)
(2400x1600) |
|
Highway 407 is the GTA's northern
tolled by-pass.
Click here for Highway 407 images. |
| City of Vaughan Regional
Municipality of York |
Signage for the collector lanes for Highway 7 and Langstaff Road. Photo taken:
August 18th, 2012. |
 (720x480) (720x480)
(1440x960)
(2400x1600) |
| City of Vaughan Regional
Municipality of York |
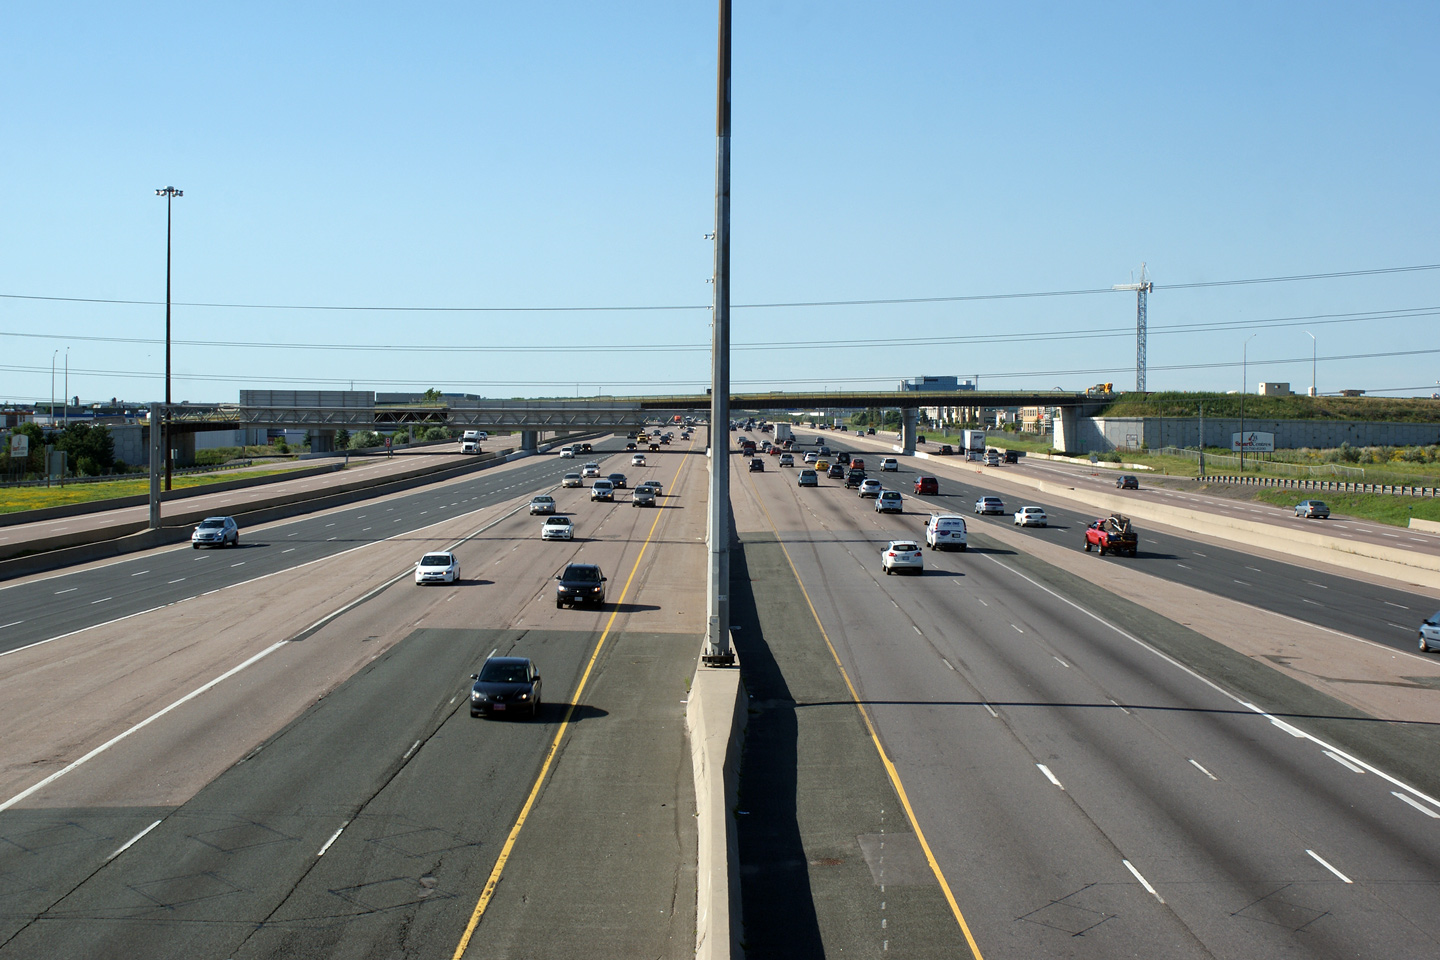
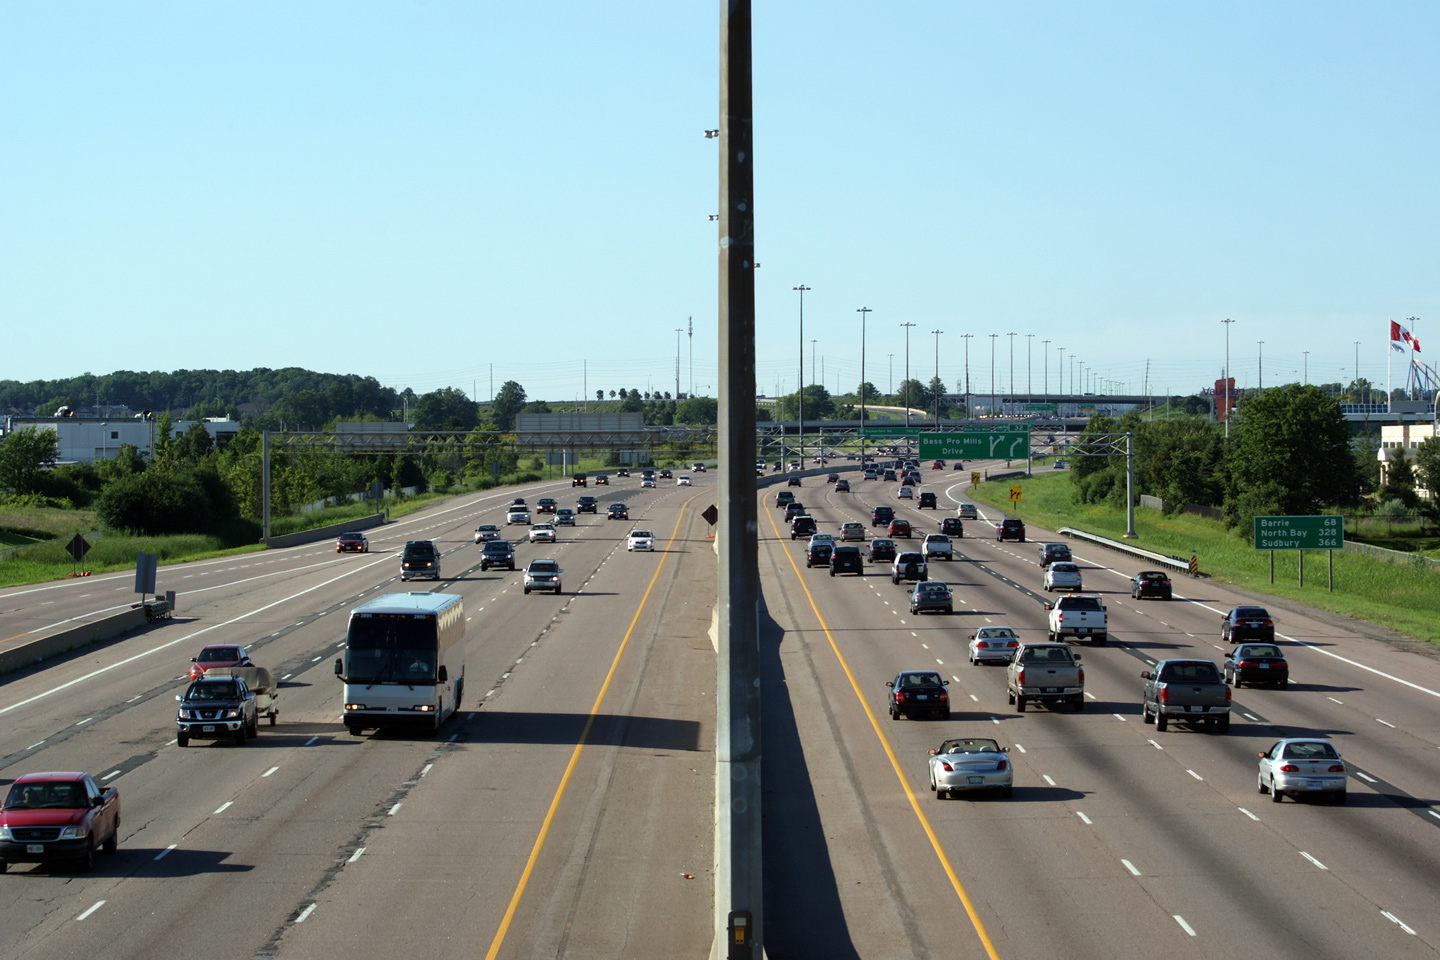
Three views of
Highway 400 looking south from the Highway 7
overpass.
Photos taken: July 2nd, 2010. |
(720x480)
(1440x960)
(2400x1600)

(720x480)
(1440x960)
(2400x1600)
(720x480)
(1440x960)
(2400x1600)
|
|
Highway 7 extends across Southern
Ontario from Sarnia to Ottawa.
Click here for Highway 7 images. |
| City of Vaughan Regional
Municipality of York |
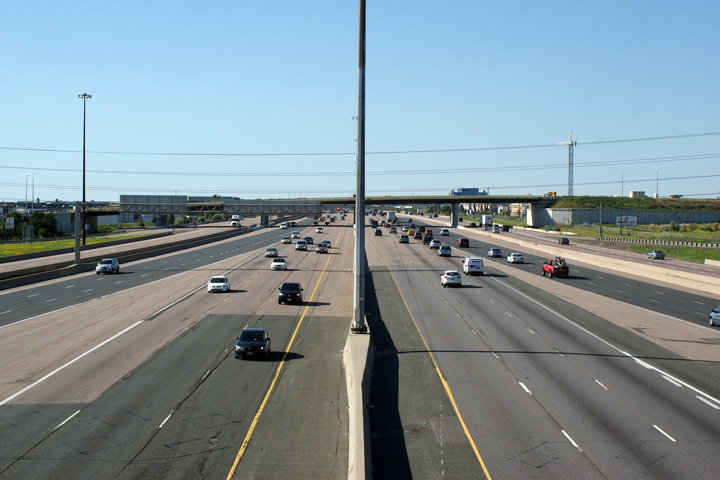
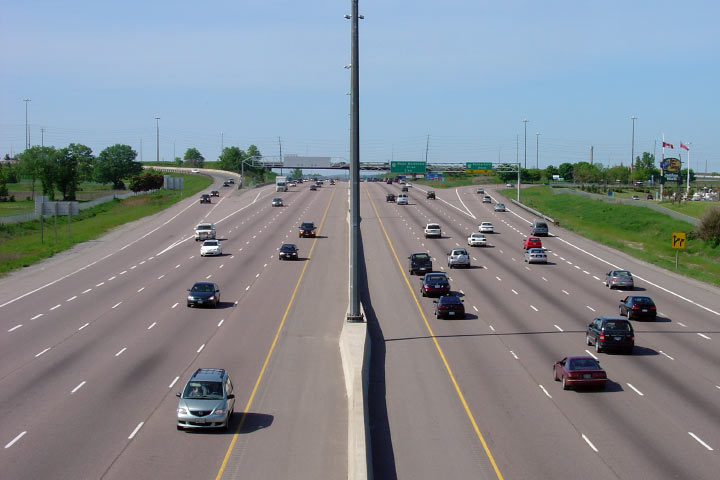
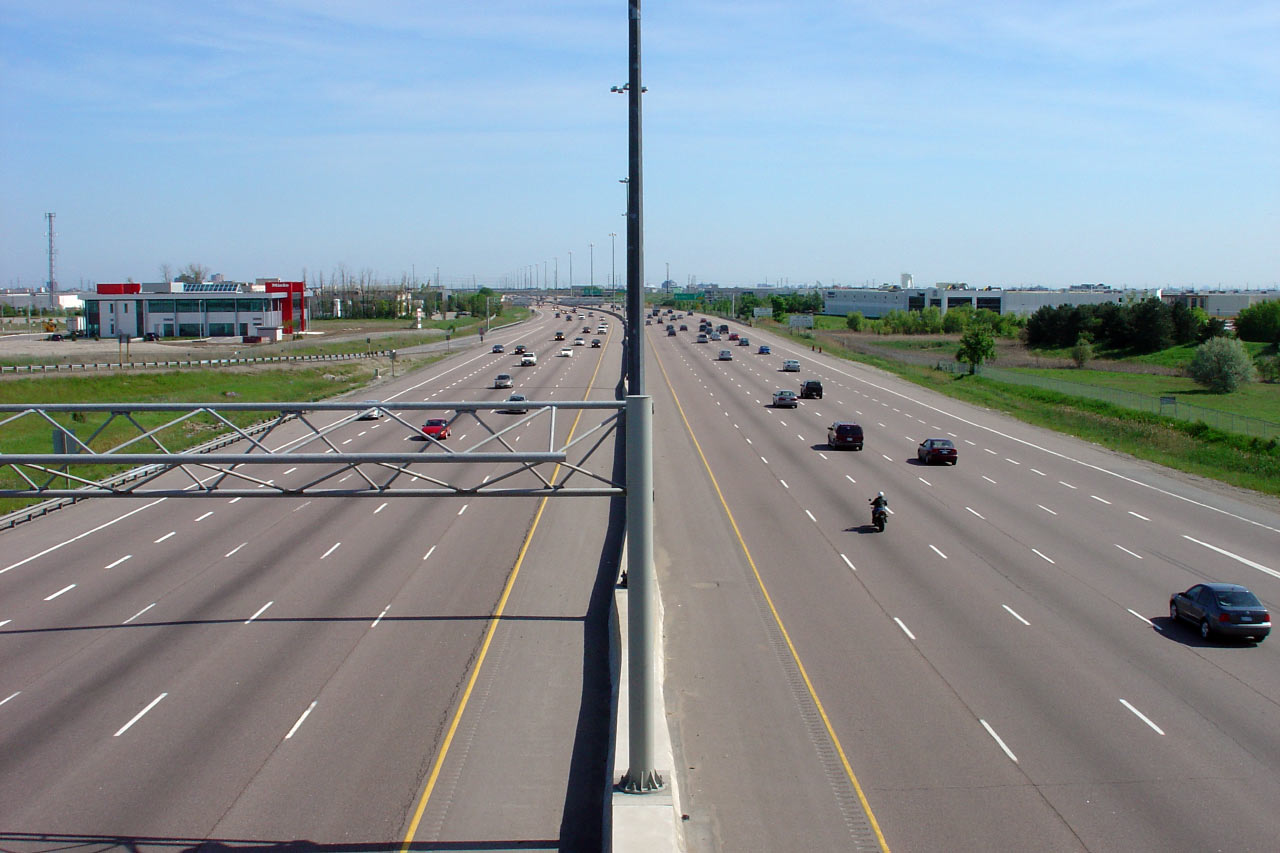
Highway 400 looking north from the Highway 7 overpass. From
Highway 7
northerly for about 1km to the Langstaff Road overpass, Highway 400 has a short
14-lane C-D configuration. This short C-D system was designed to
minimize weaving and allow longer merging lanes for the
Highway 407
and Highway 7 interchanges. Upper photo taken: June 20th, 2005.
Lower photo taken: June 20th, 2005. |
(720x480)
(1440x960)
(2400x1600)
(720x480)
(1440x960)
(2400x1600) |
City of Vaughan
Regional Municipality of York |
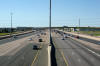
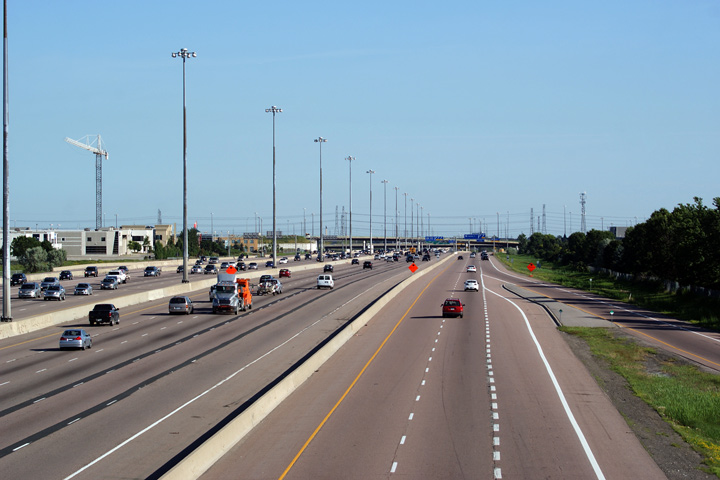
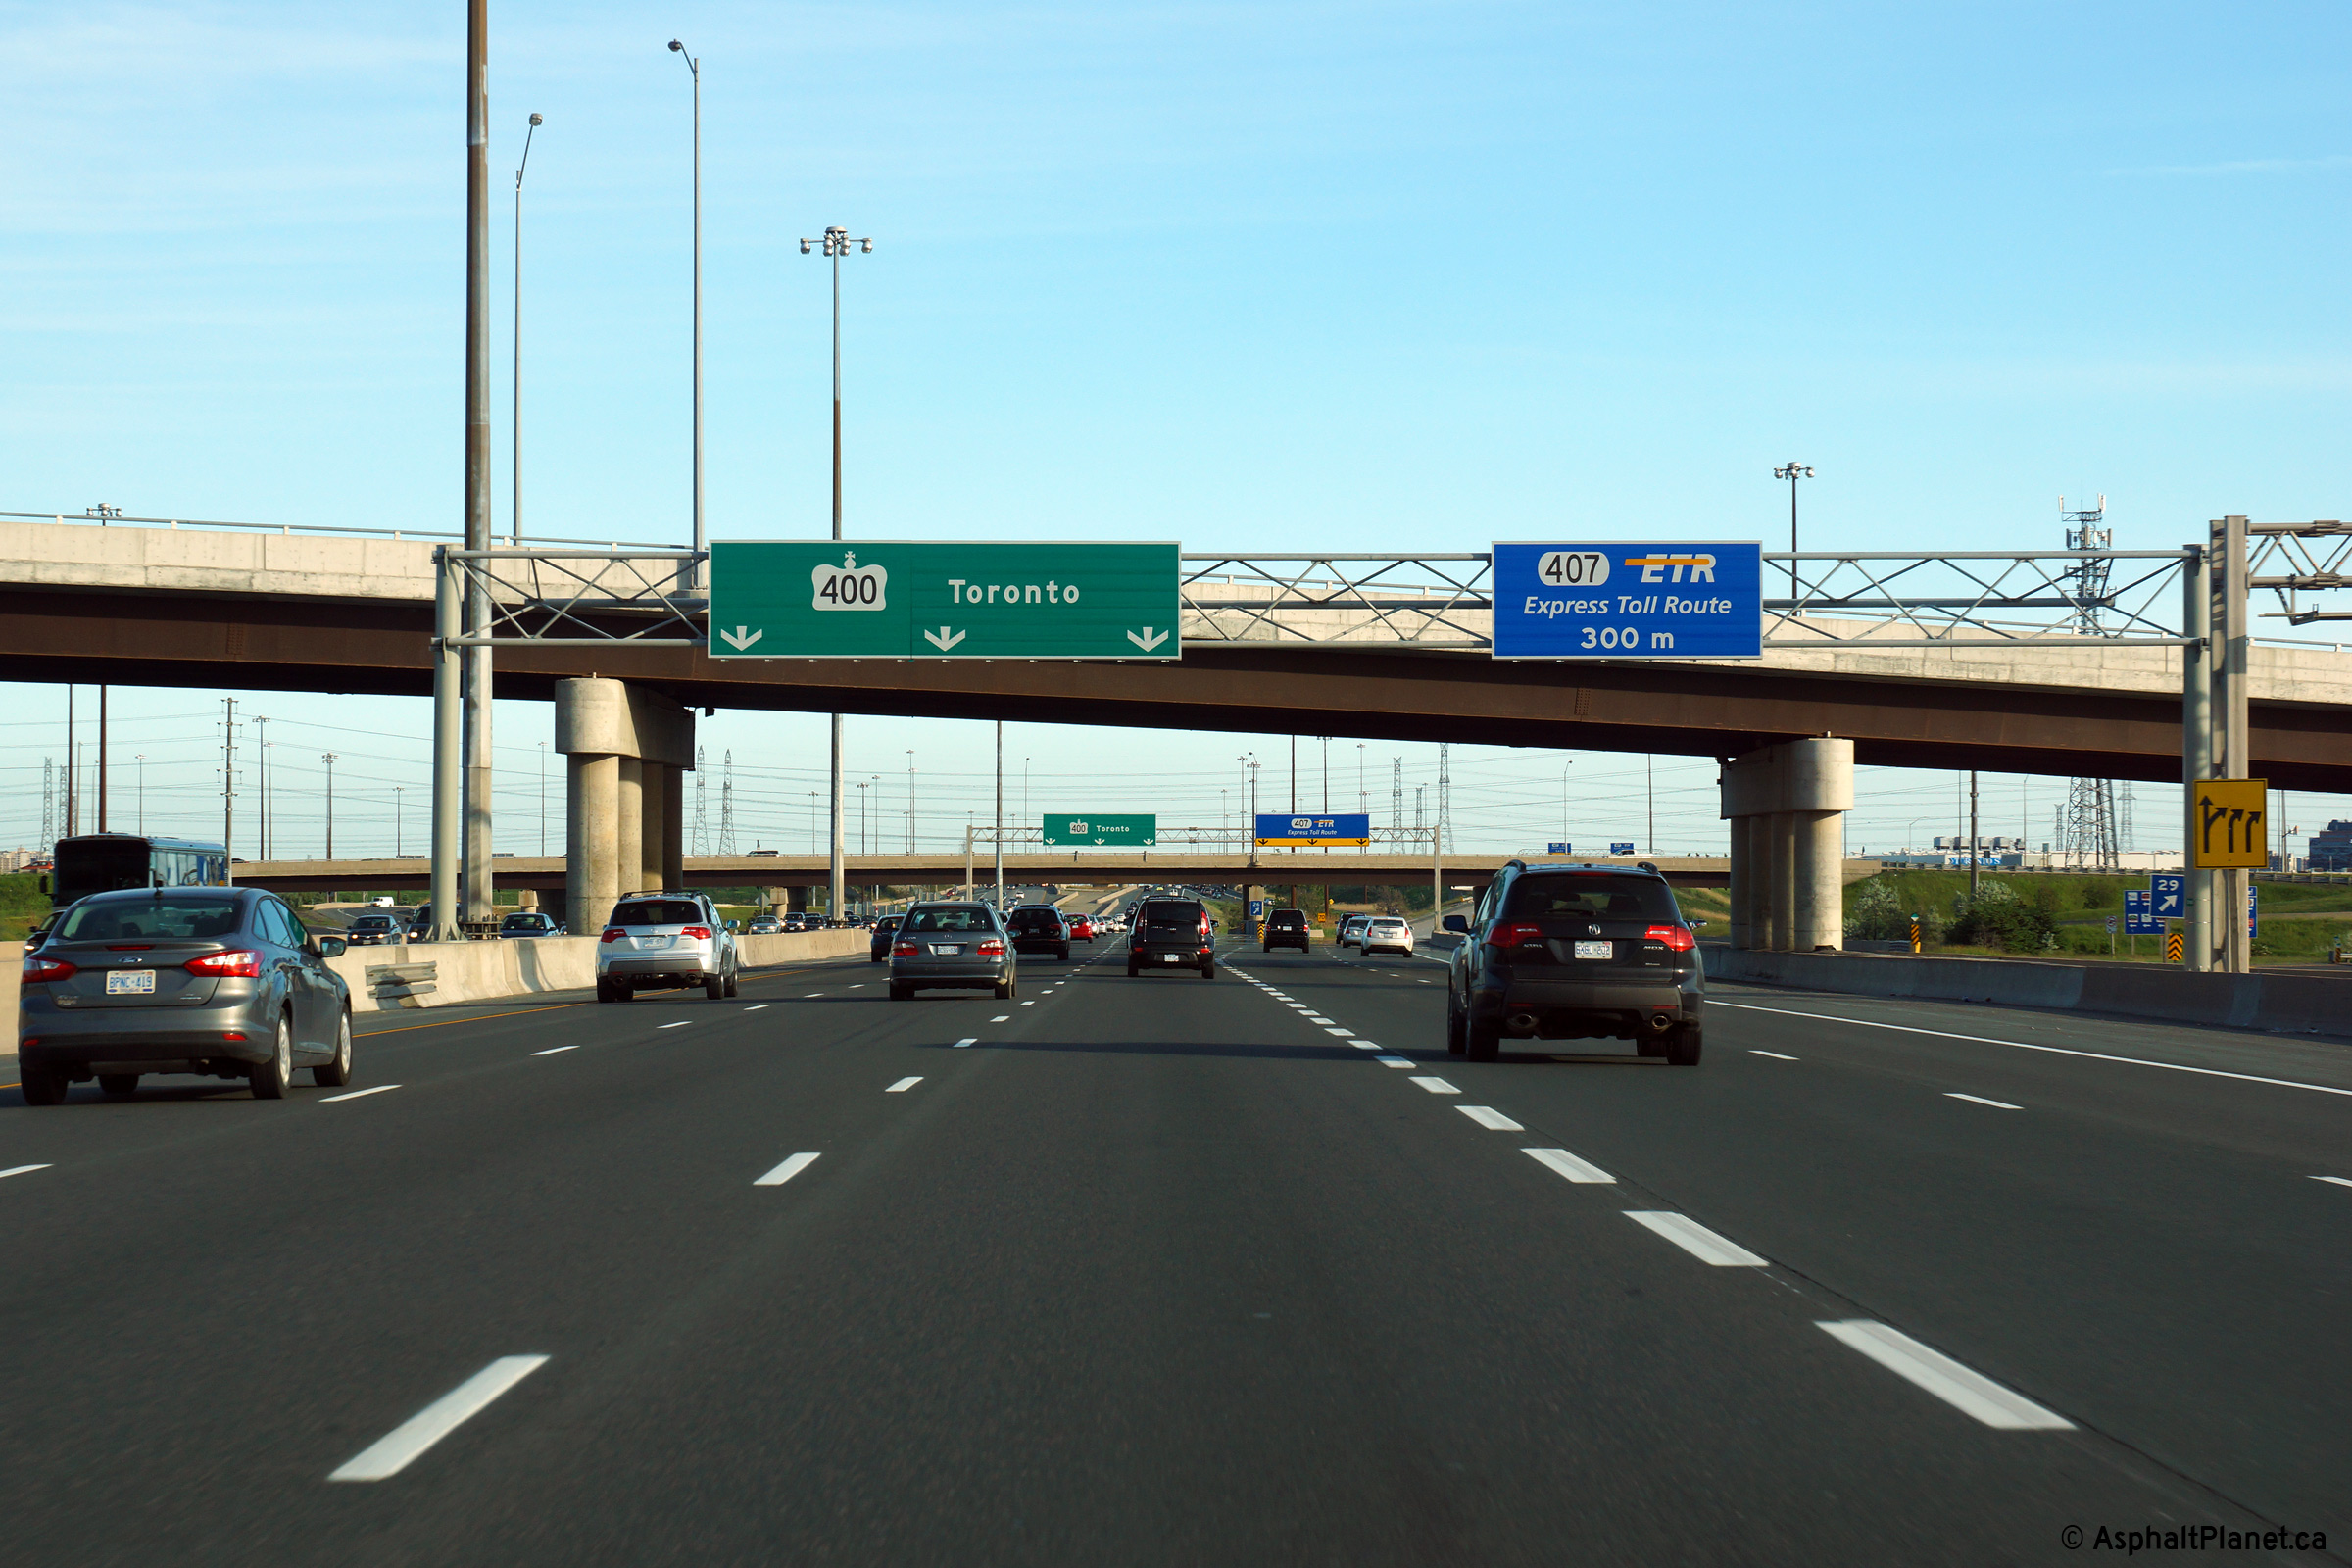
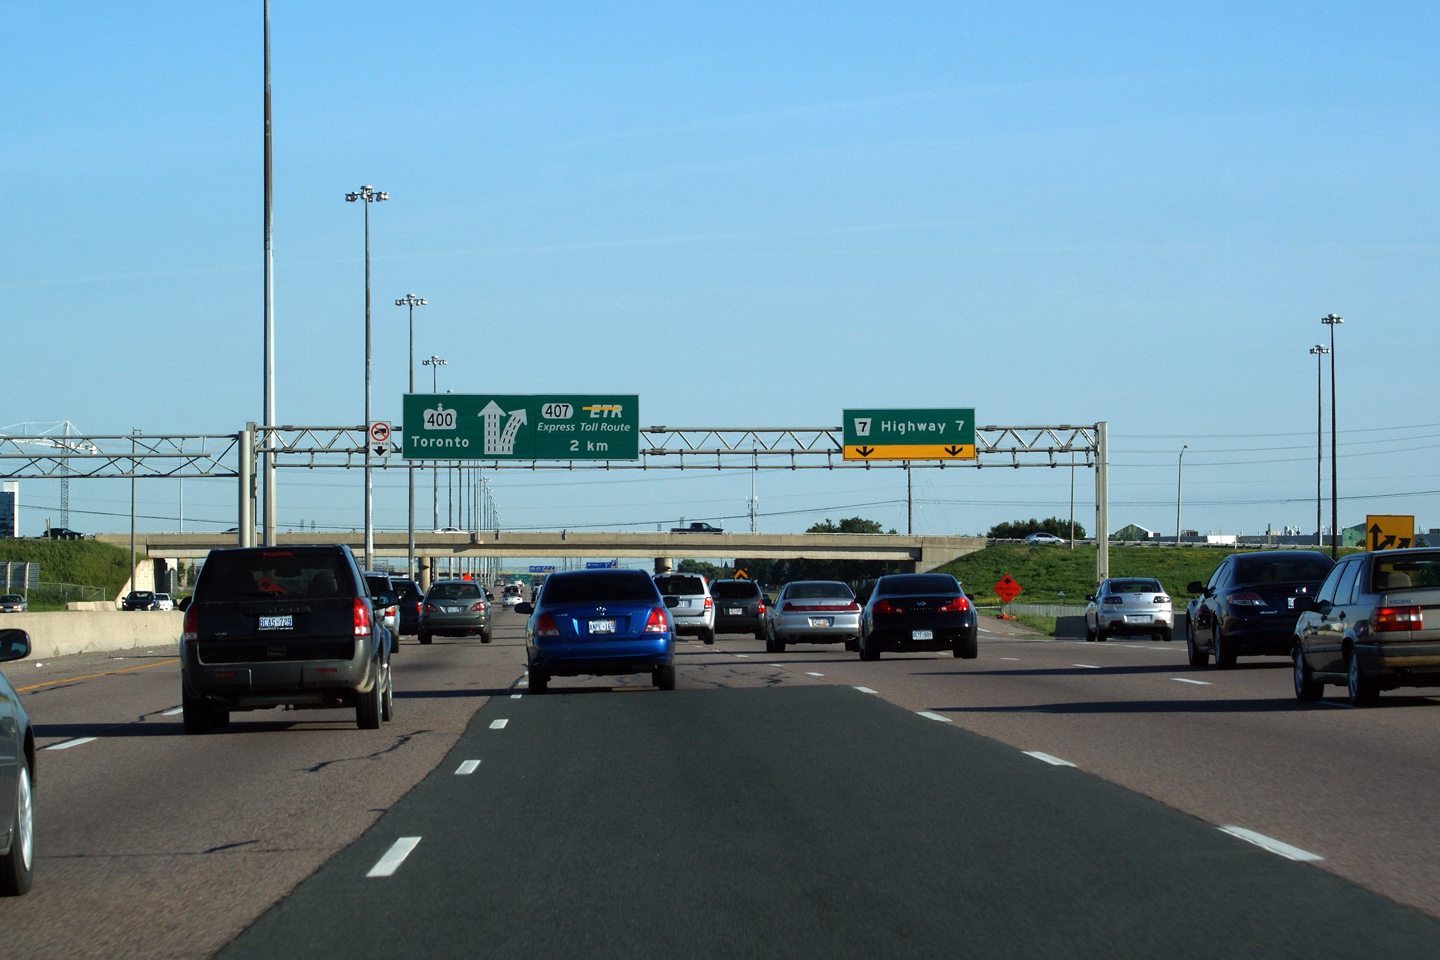
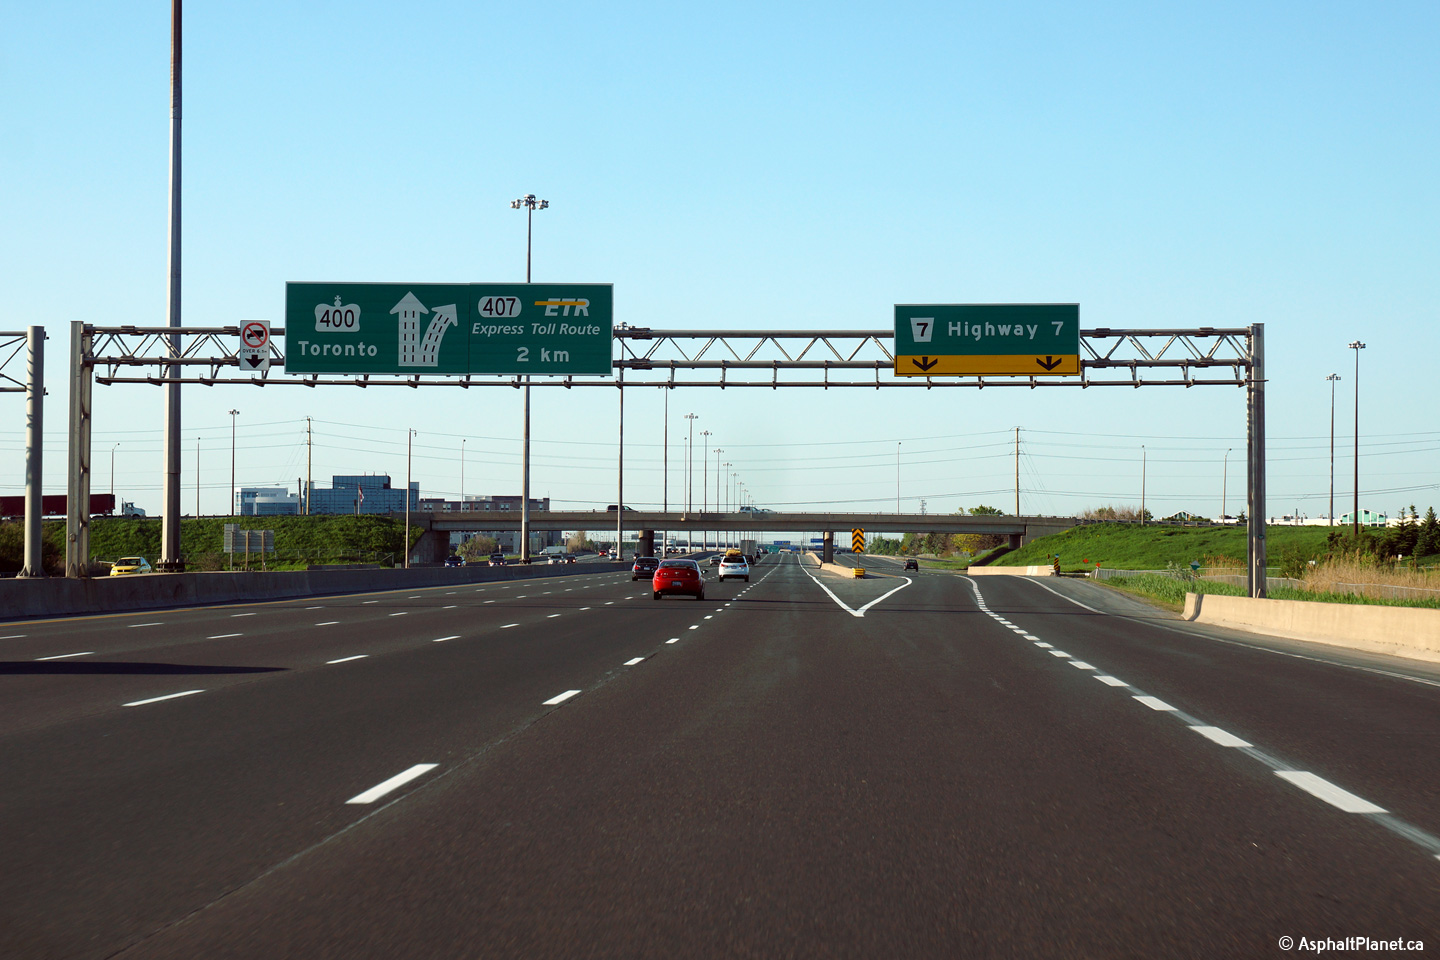
This view looks southerly from the Portage Parkway overpass towards the
southbound signage for the Highway 400/407 split. Notice that the signage,
(and the carriageway) permits an additional southbound express lane to continue past the 407
interchange should the need for additional capacity arise.
Photo taken: July 2nd, 2010. |
 (720x480) (720x480)
(1440x960) |
City of Vaughan
Regional Municipality of York |
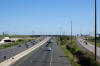
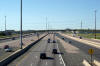
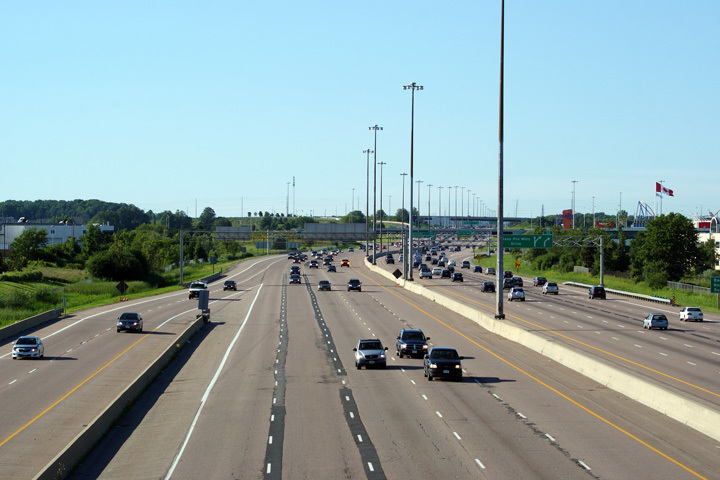
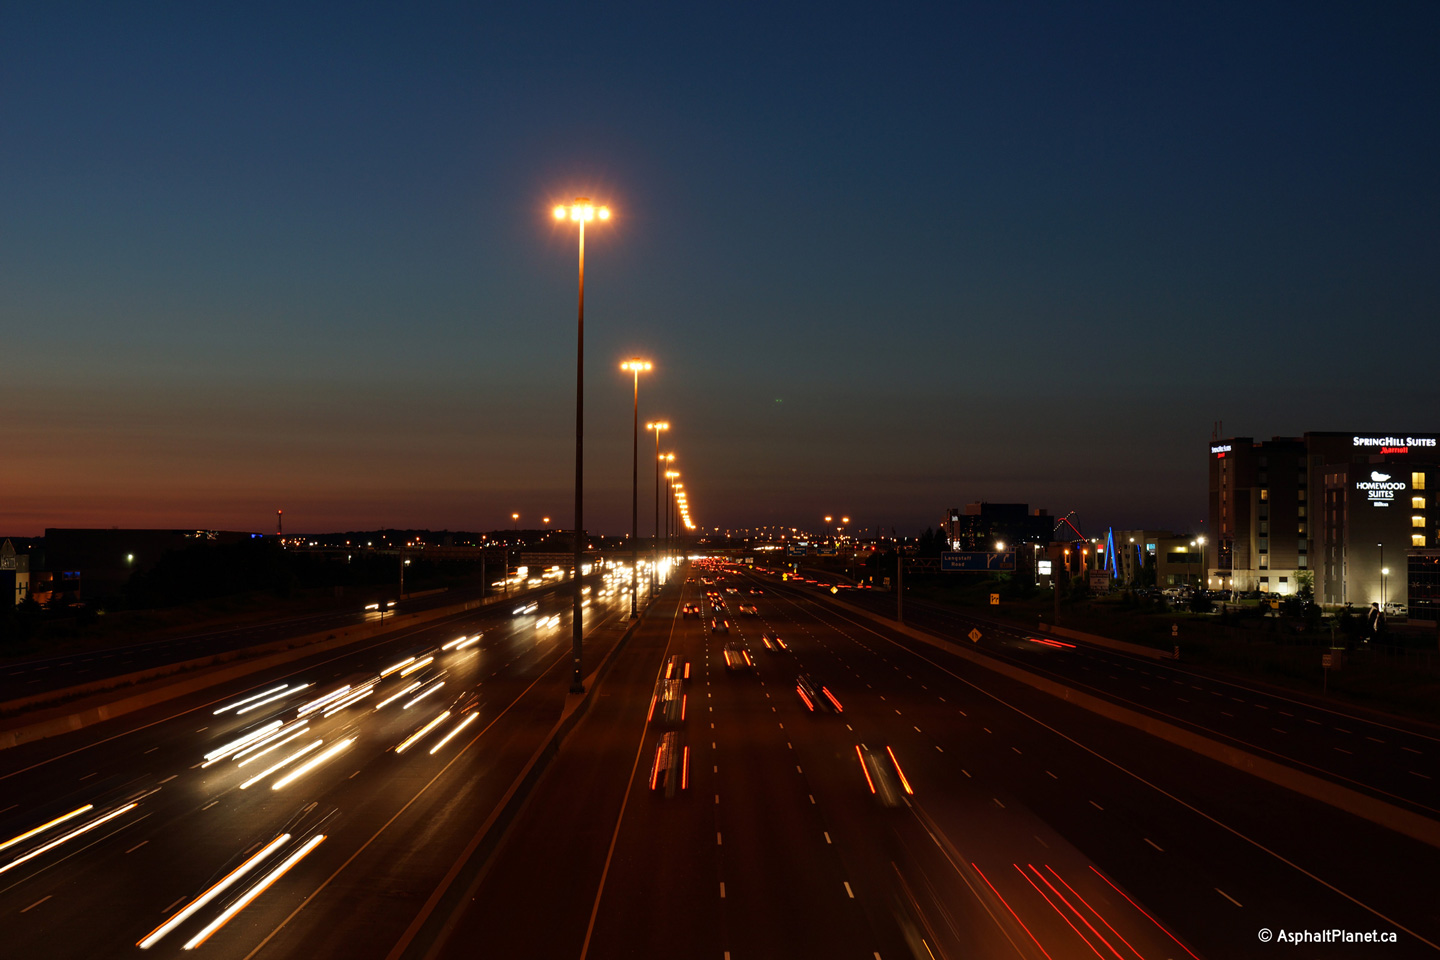
Southerly views from the Portage Parkway overpass, looking south towards
both the Highway 7, and Highway 407 interchange. The Portage Parkway grade
separation was completed in the early fall of 2010 in an effort to reduce congestion along the
Highway 7 corridor.
Daytime photo taken: July 2nd, 2010.
Nighttime photo taken: July 18th, 2013. |

(720x480)
(1440x960)
(2400x1600)
(720x480)
(1440x960)
(2400x1600) |
City of Vaughan
Regional Municipality of York |
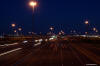
Northerly views from the Portage Parkway overpass.
Daytime photo taken: July 2nd, 2010.
Nighttime photo taken: July 18th, 2013. |
(720x480)
(1440x960)
(2400x1600)

(720x480)
(1440x960)
(2400x1600) |
City of Vaughan
Regional Municipality of York |
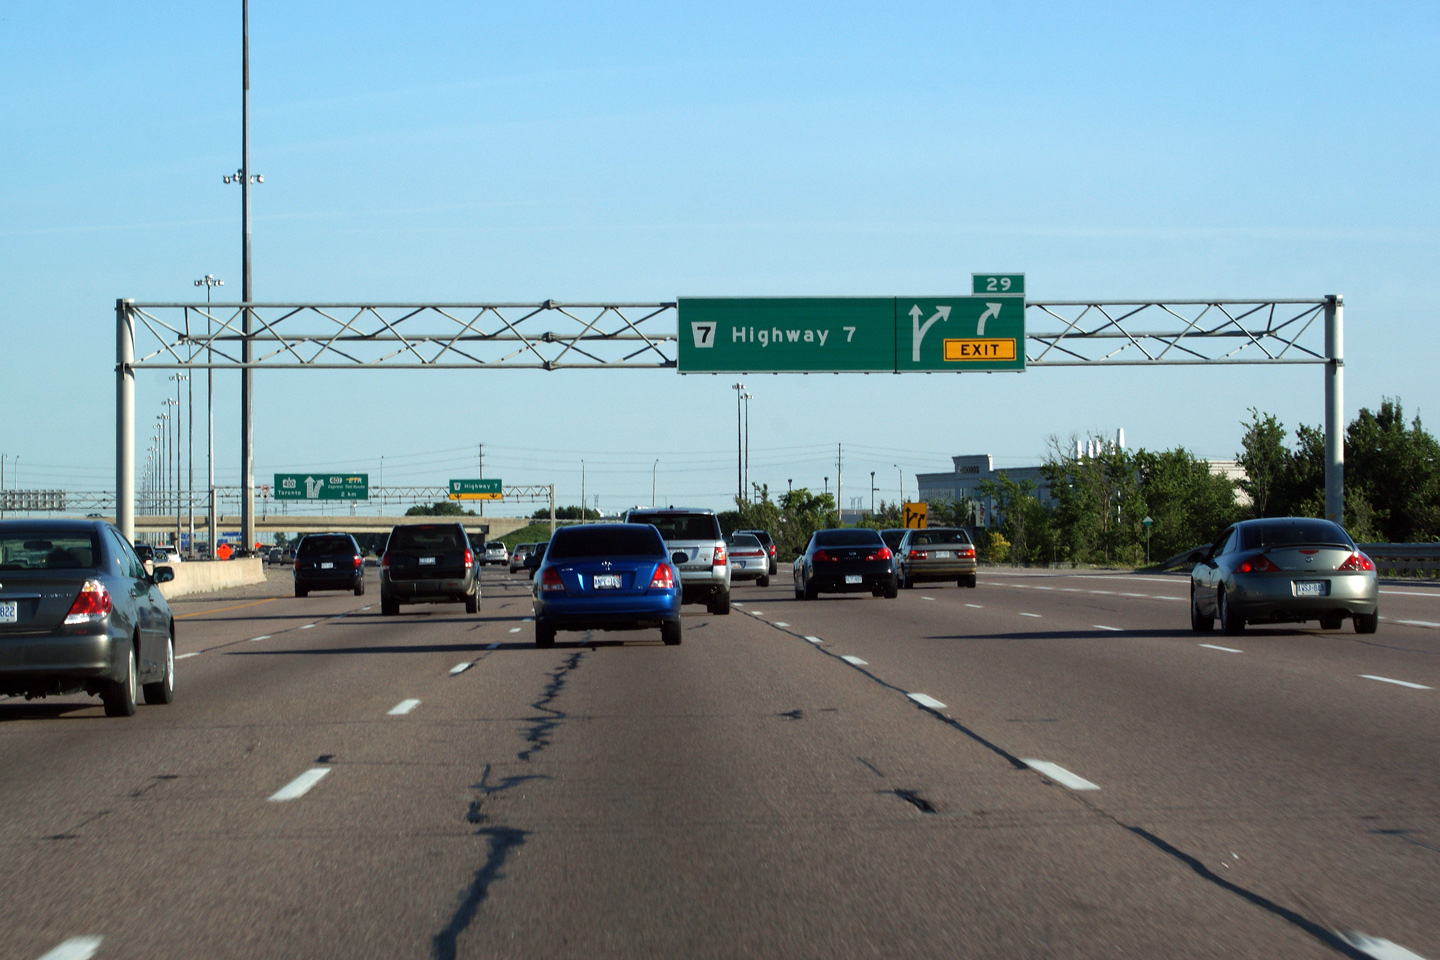
Signage in both the express and collector lanes at the Portage Parkway
overpass. The express lanes are signed with a pre-advanced sign for
the ramp to Highway 407, while the collector lanes are signed with a
turn-off sign for the ramp to Highway 7.
Upper photo taken: June 7th, 2014.
Lower photo taken: June 1st, 2014. |
 (720x480) (720x480)
(1440x960)
(2400x1600)
|
| City of Vaughan Regional
Municipality of York |
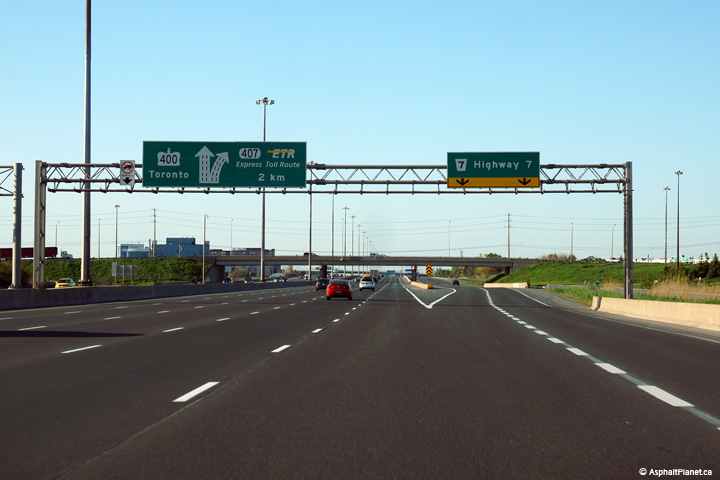
Advanced signage overtop of both the express and collector lanes for both
the express lane ramp to Highway 407 and the collector lane ramp to Highway
7. It is atypical to see a blue sign overtop of the express lanes.
Upper photo taken: June 7th, 2014.
Lower photo taken: June 1st, 2014. |
 (720x480) (720x480)
(1440x960)
(2400x1600)
|
| City of Vaughan Regional
Municipality of York |
Looking south along Highway 400 from the Langstaff Road overpass.
Highway 400's brief collector lanes end at Langstaff Road. Photo taken: June 20th, 2005. |
(720x480)
(1440x960)
(2400x1600) |
| City of Vaughan Regional
Municipality of York |
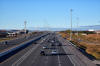
Looking north from the Langstaff Road overpass in Vaughan. Langstaff
Road is located roughly at kilometre marker 30. The Langstaff Road overpass
was designed prior to the determination of exactly what type of
cross-section Highway 400 was to ultimately have through Vaughan. The
eastern abutment (adjacent to the northbound lanes), was designed in such a
way that an adjacent span could be built immediately to the east of the
existing
structure. This would allow the existing eastern bridge abutment to be
converted to a pier between a set of express and collector lanes.
Additional structures that were constructed north of Langstaff Road have not
been designed with a similar provision for an extension of the collector
lanes.
Photos taken: July 2nd, 2010. |
(720x480)
(1440x960)
(2400x1600)
(720x480)
(1440x960)
(2400x1600) |
| City of Vaughan Regional
Municipality of York |
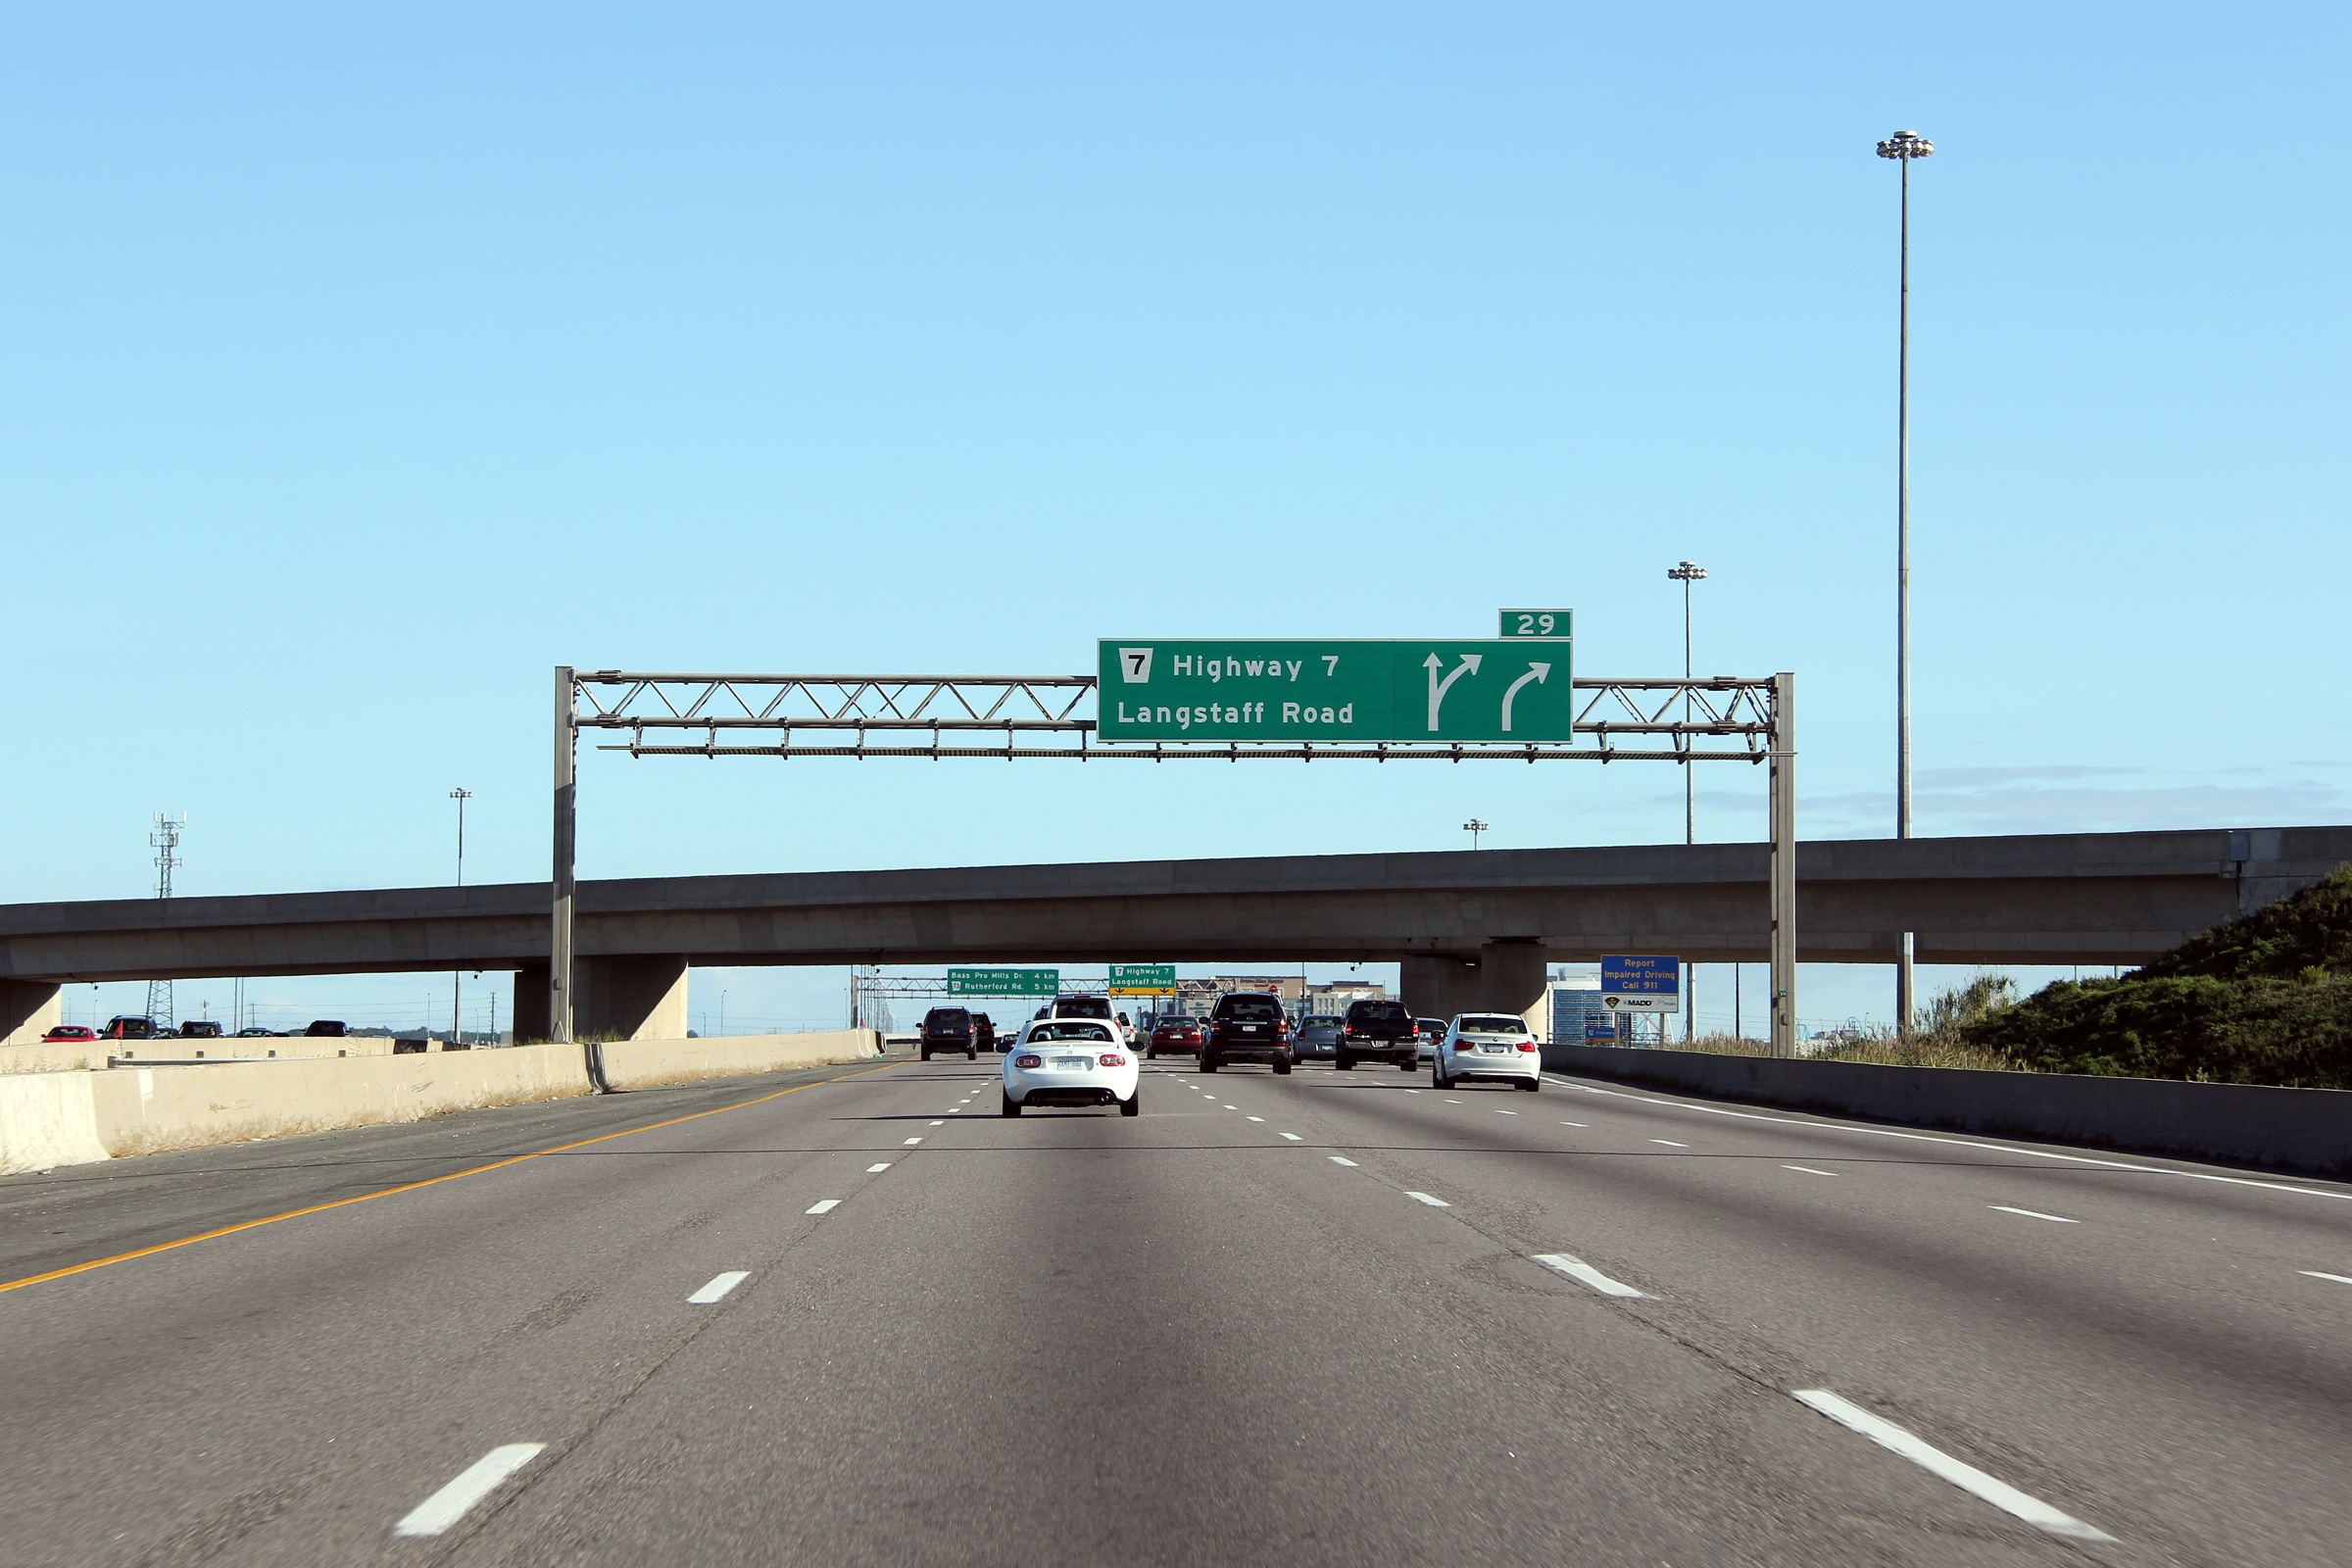
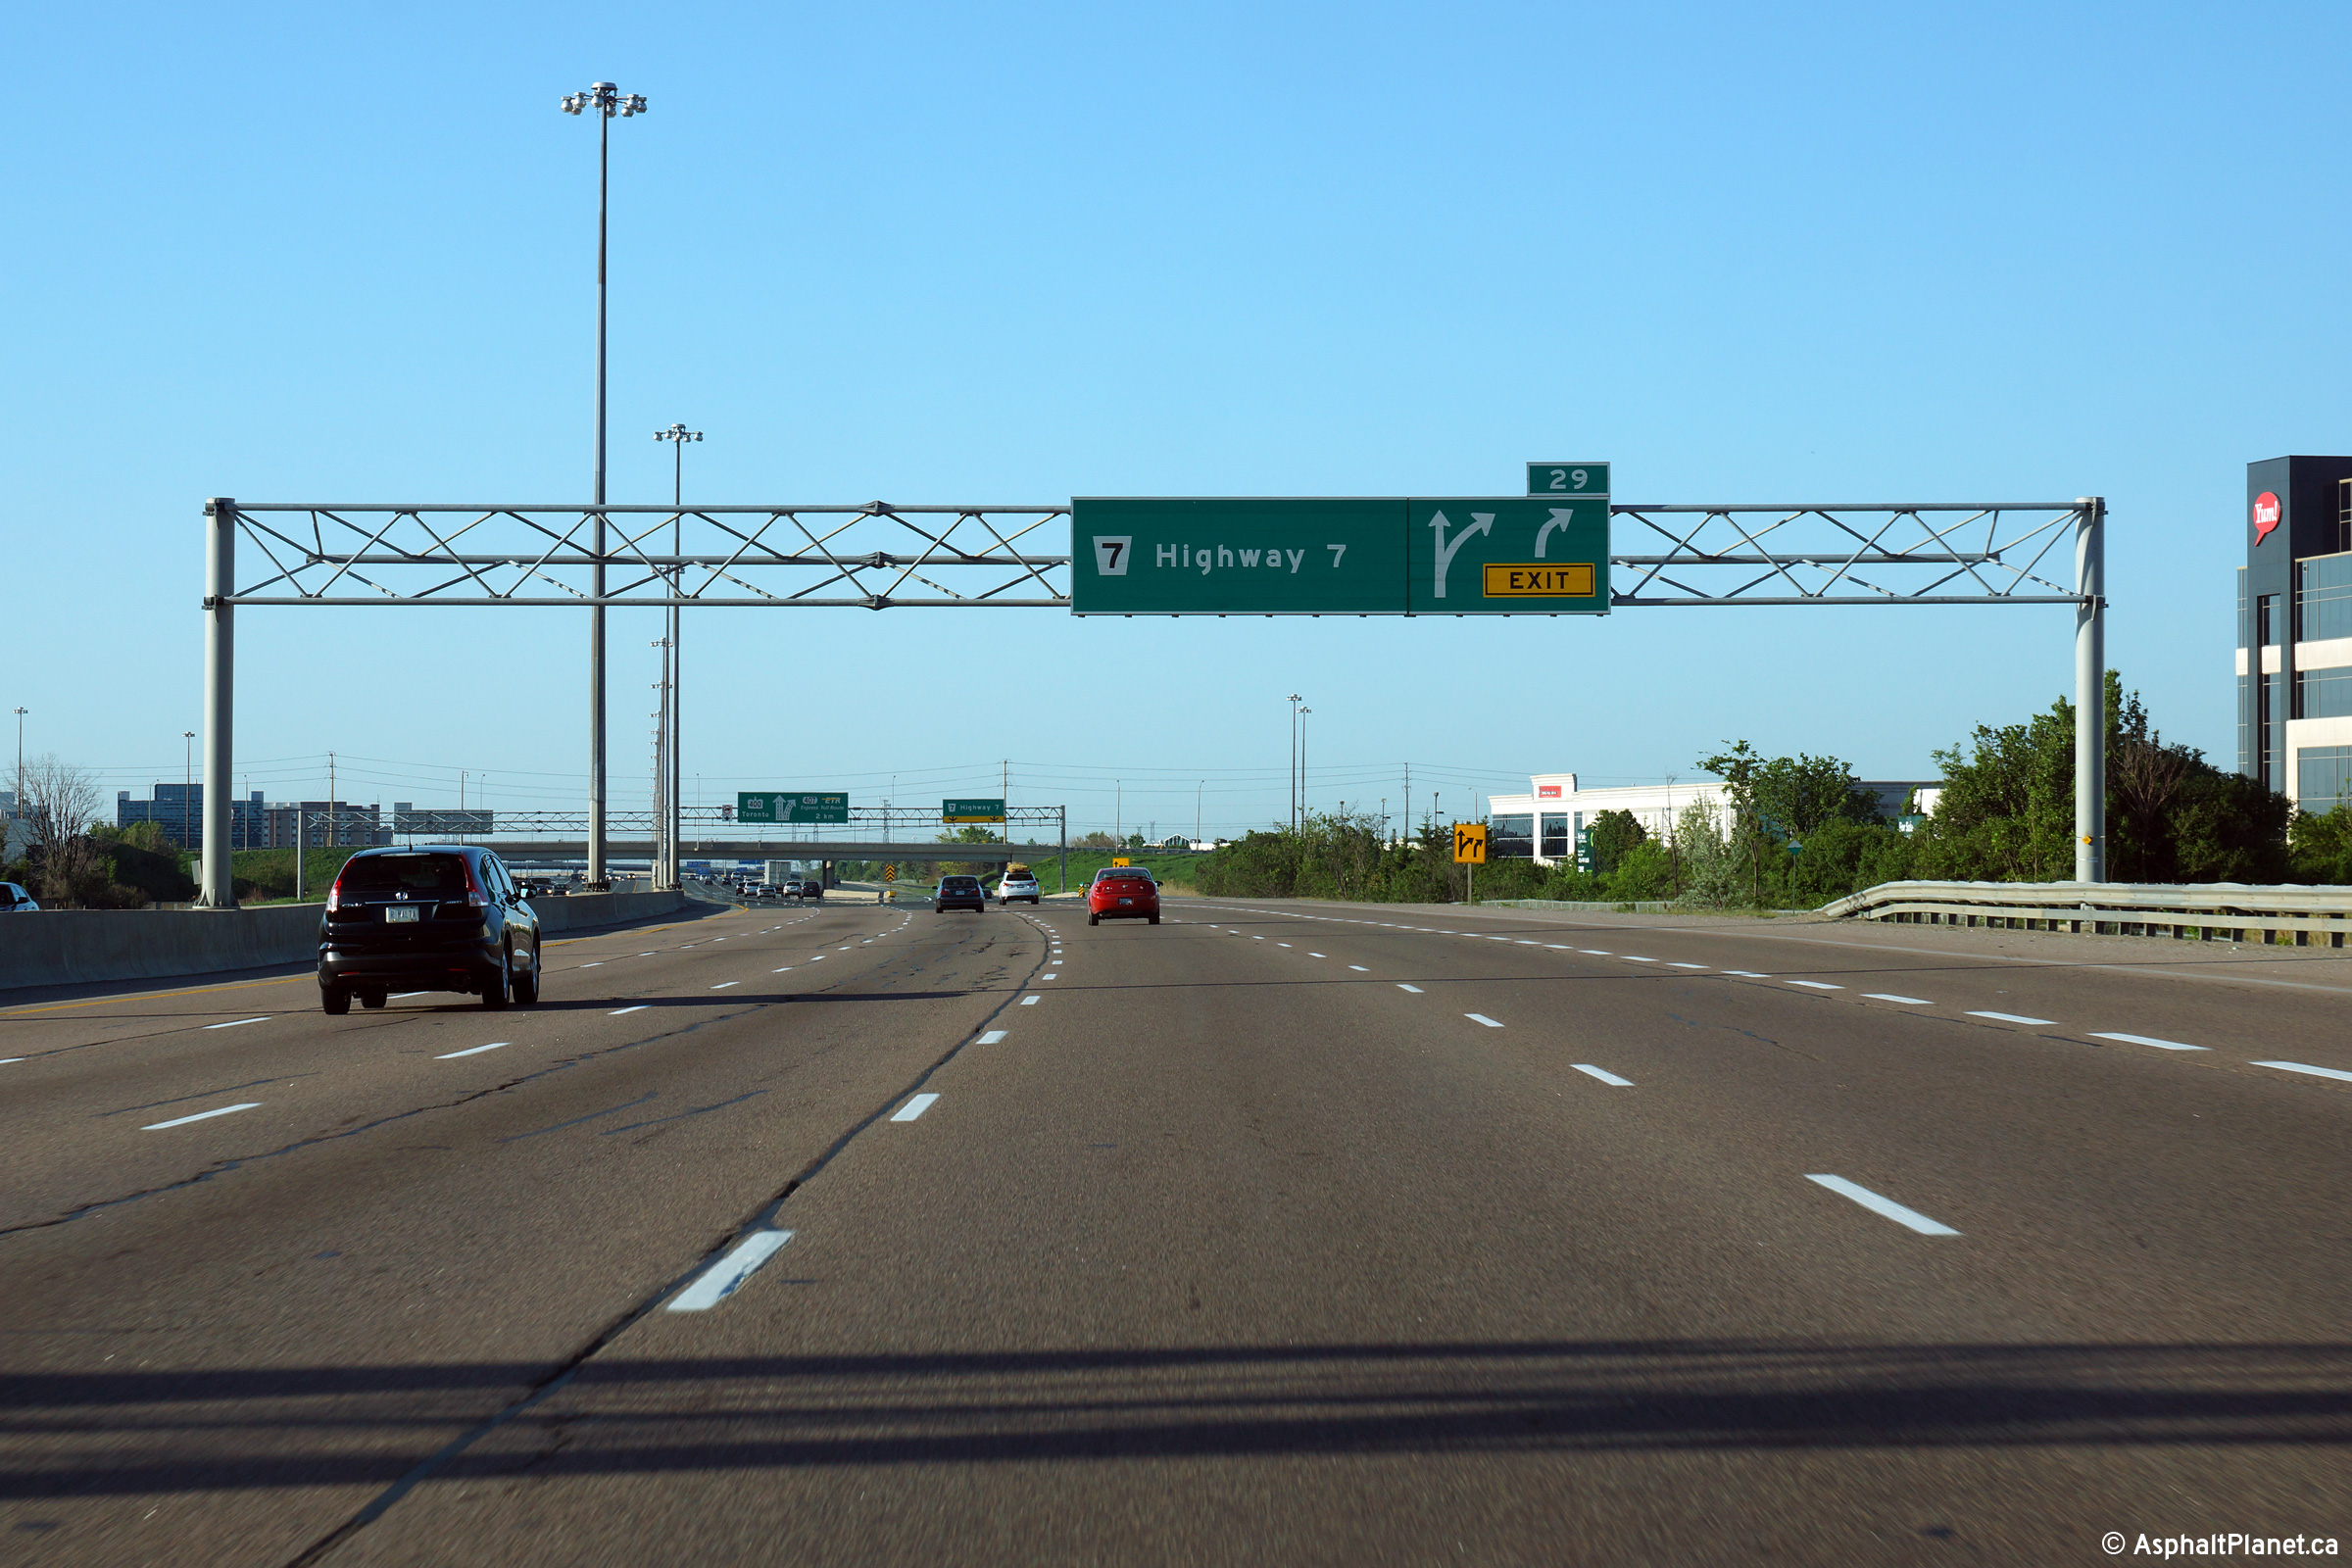
Overhead signage for the Highway 7 interchange. Highway 407 is only
accessible from the Highway 400 Express Lanes. Click
here for an earlier incarnation of this signage,
taken in July, 2010.
Photo taken: June 1st, 2014. |
 (720x480) (720x480)
(1440x960)
(2400x1600) |
| City of Vaughan Regional
Municipality of York |
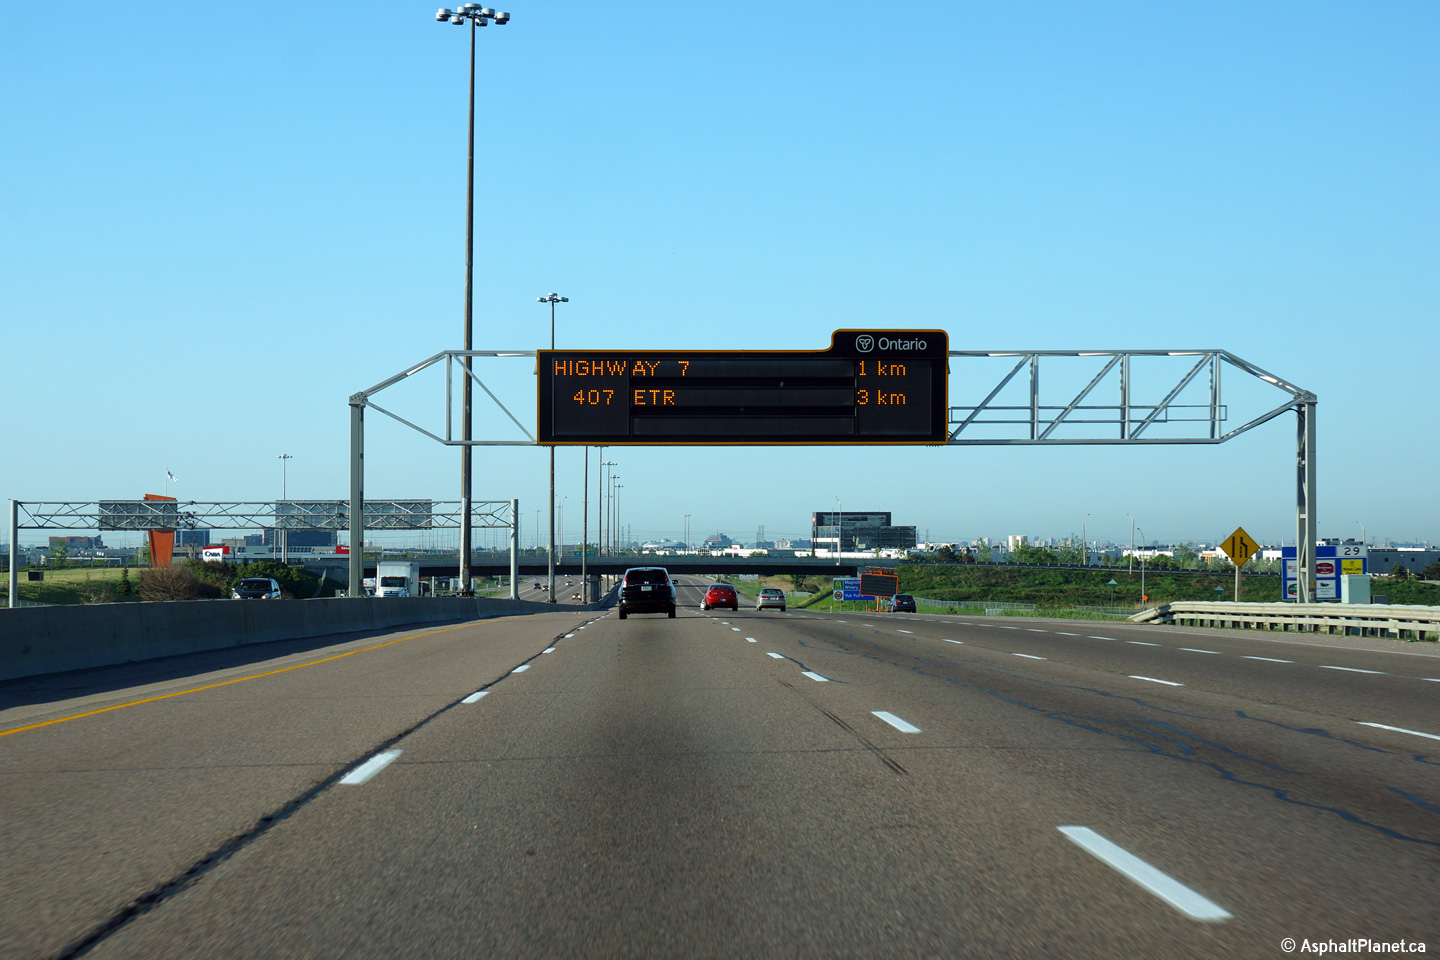
Southbound advanced signage for the Highway 7 interchange. Typical of
the MTO, nothing on this signage indicates that this interchange in fact
leads to a short set of collector lanes. Click
here for an earlier incarnation of this signage,
taken in July, 2010.
Photo taken: June 1st, 2014. |
 (720x480) (720x480)
(1440x960)
(2400x1600) |
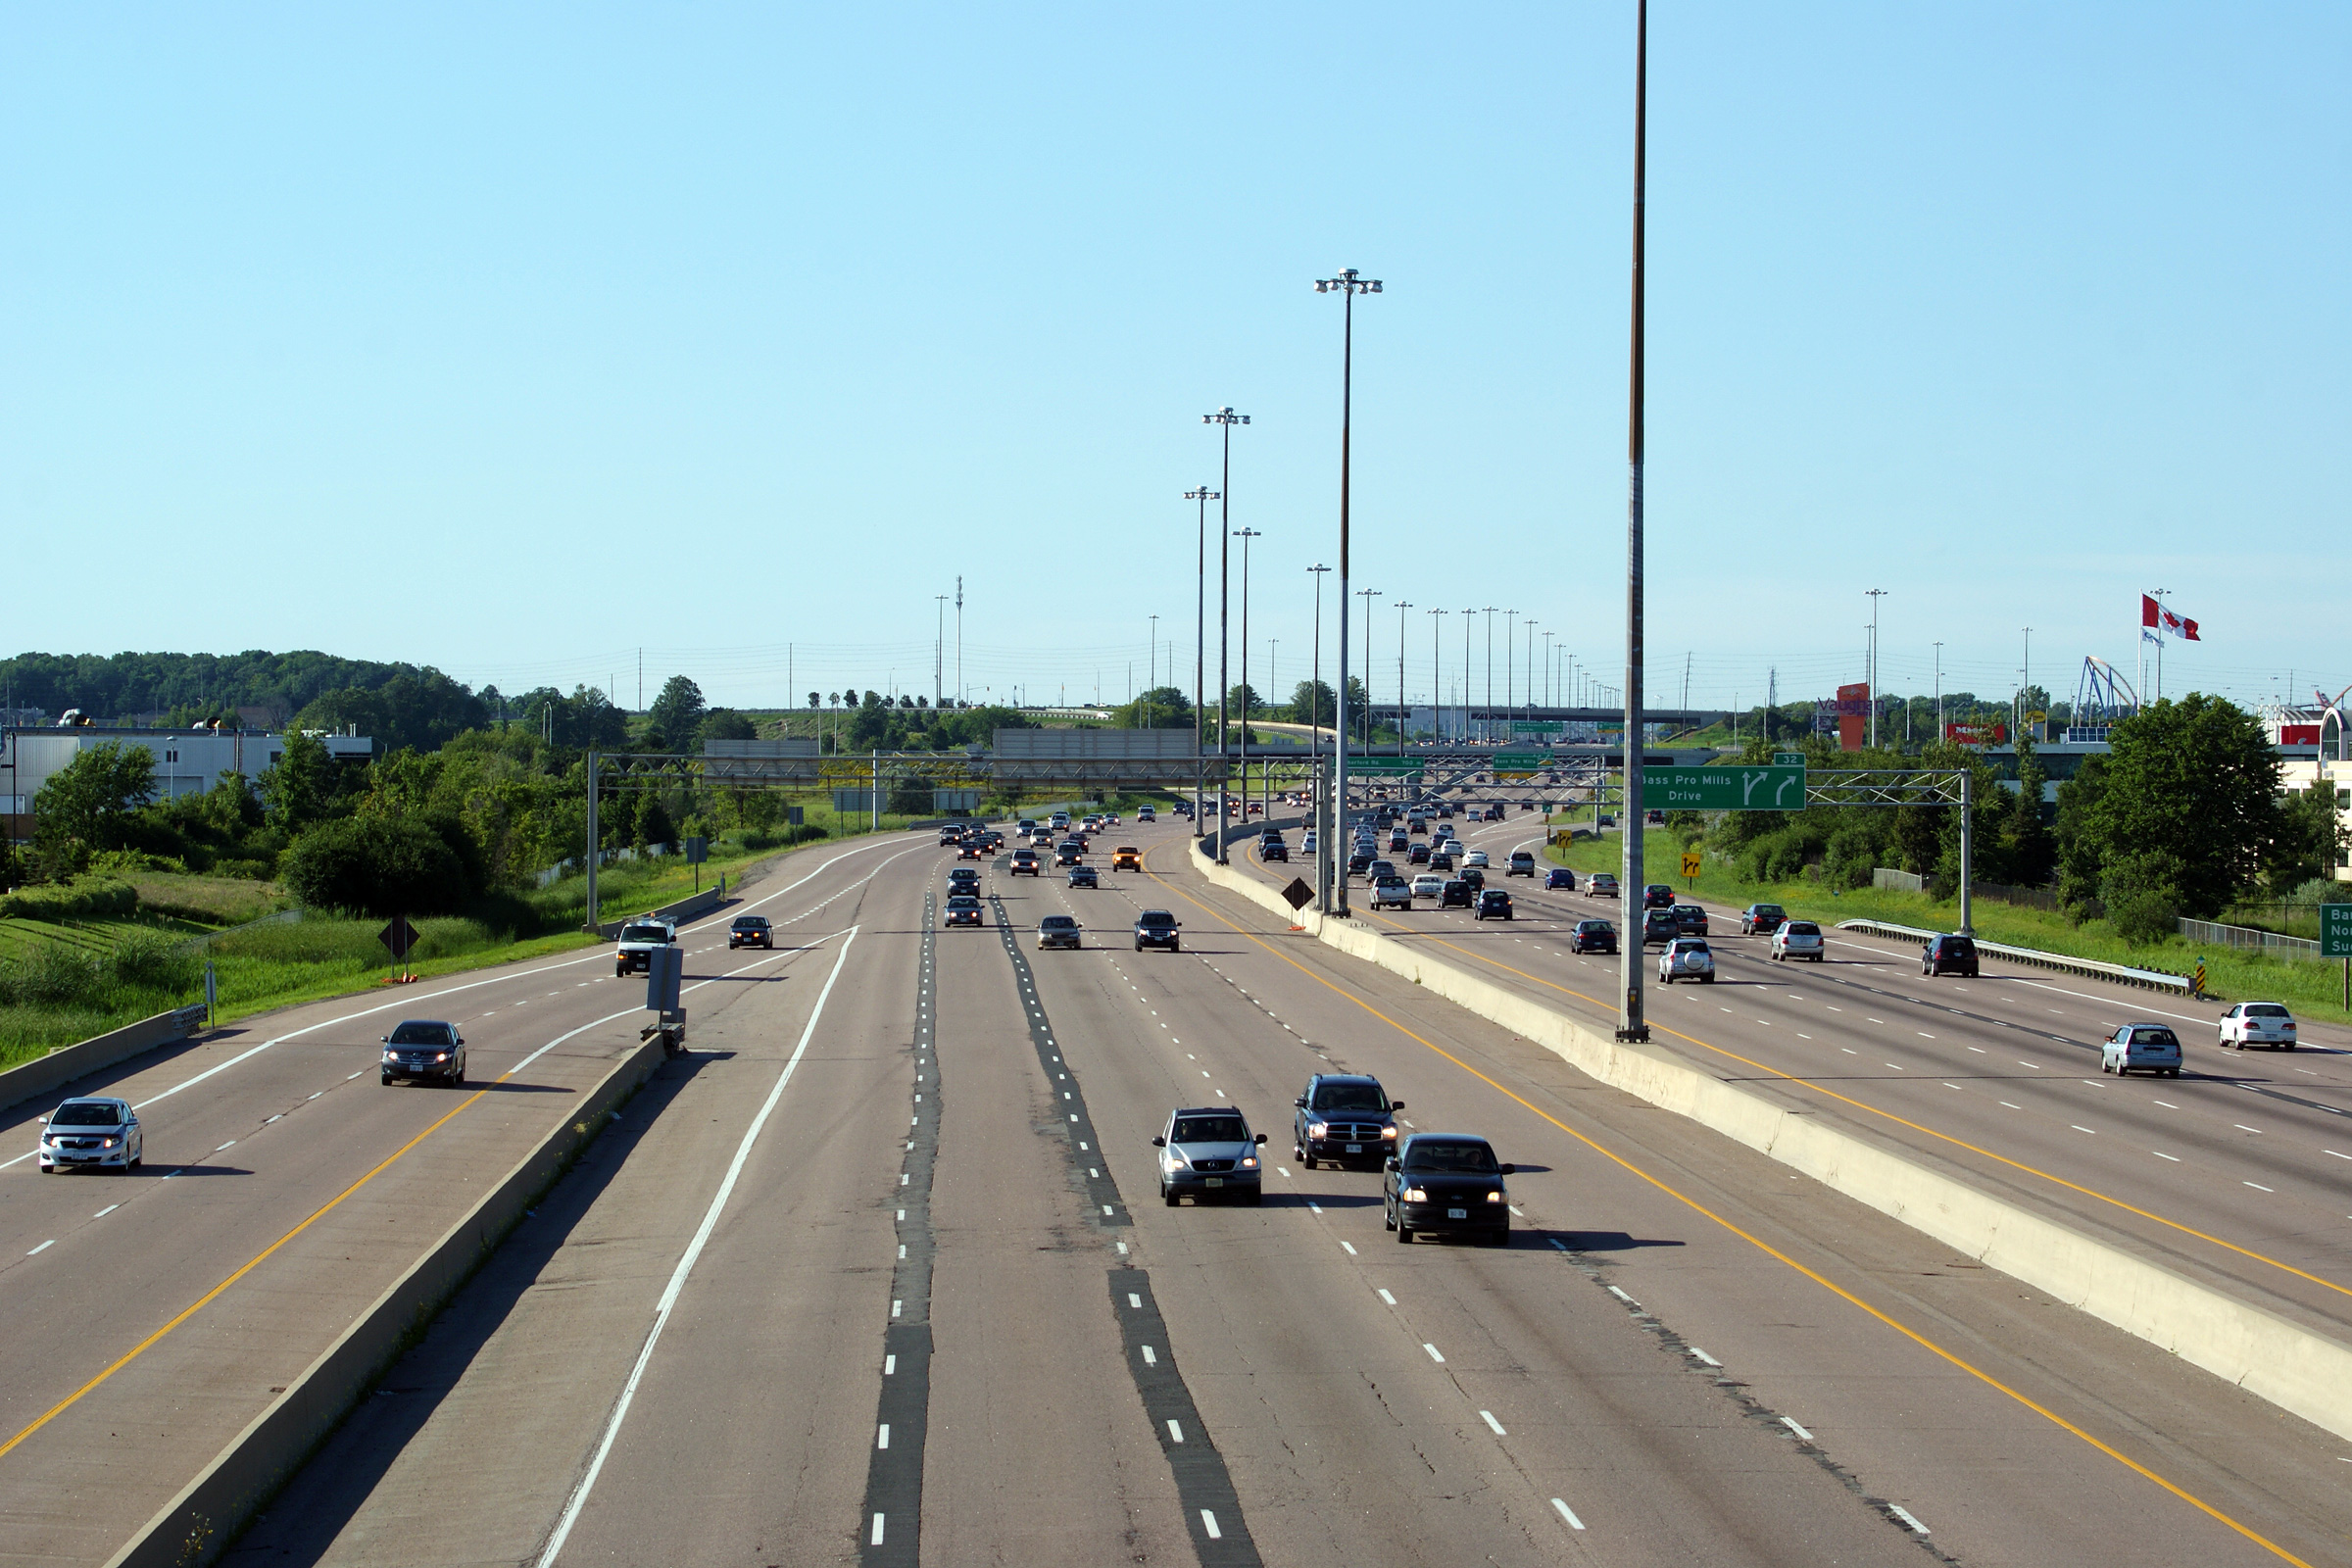
| City of Vaughan Regional
Municipality of York |
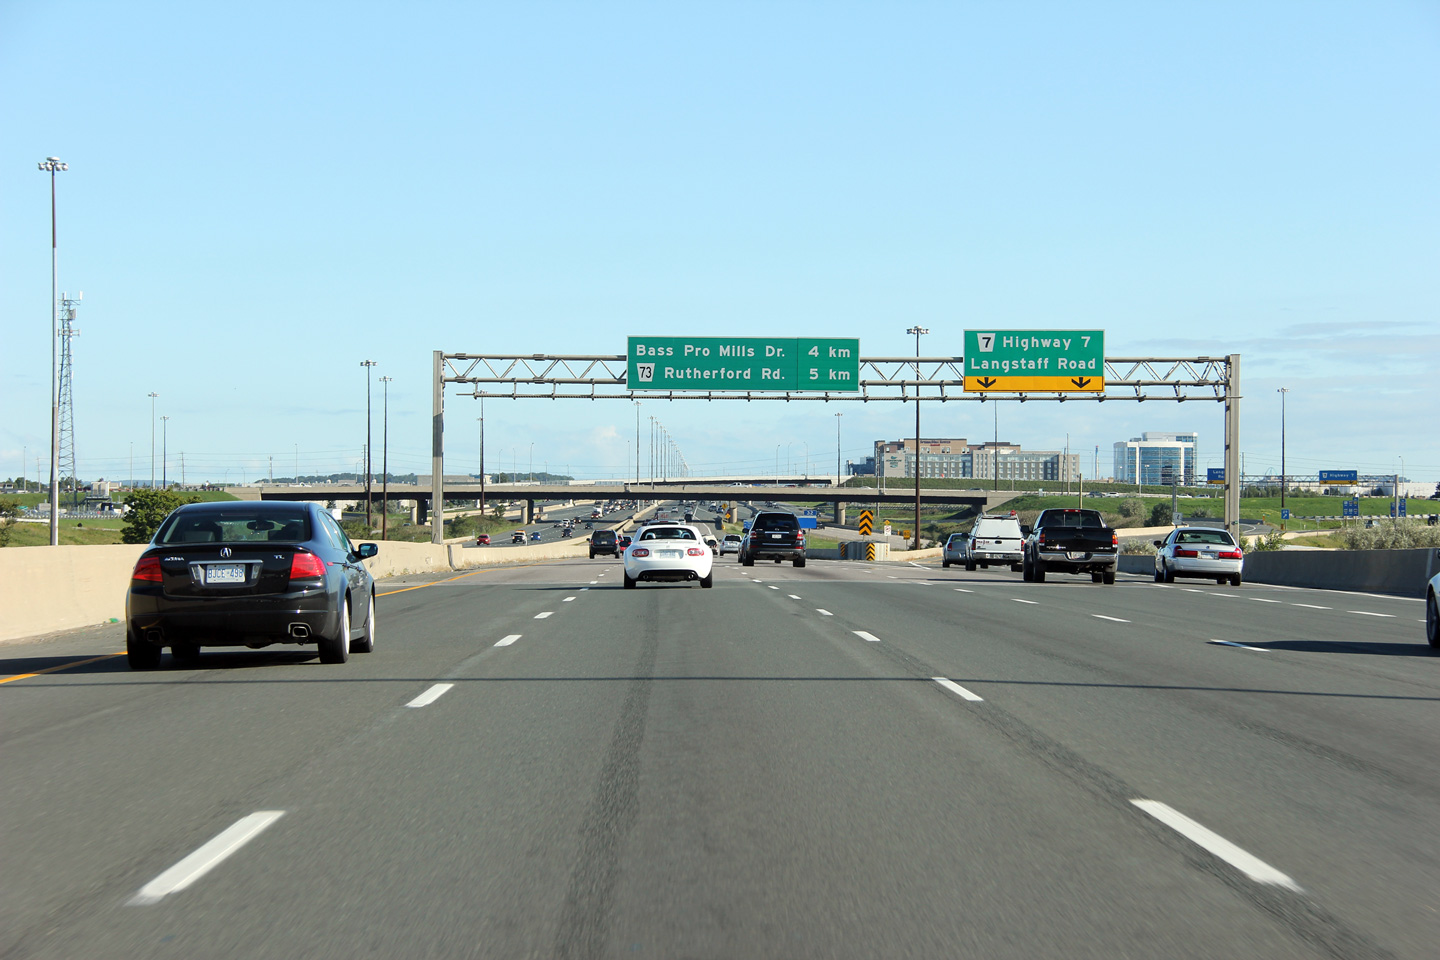
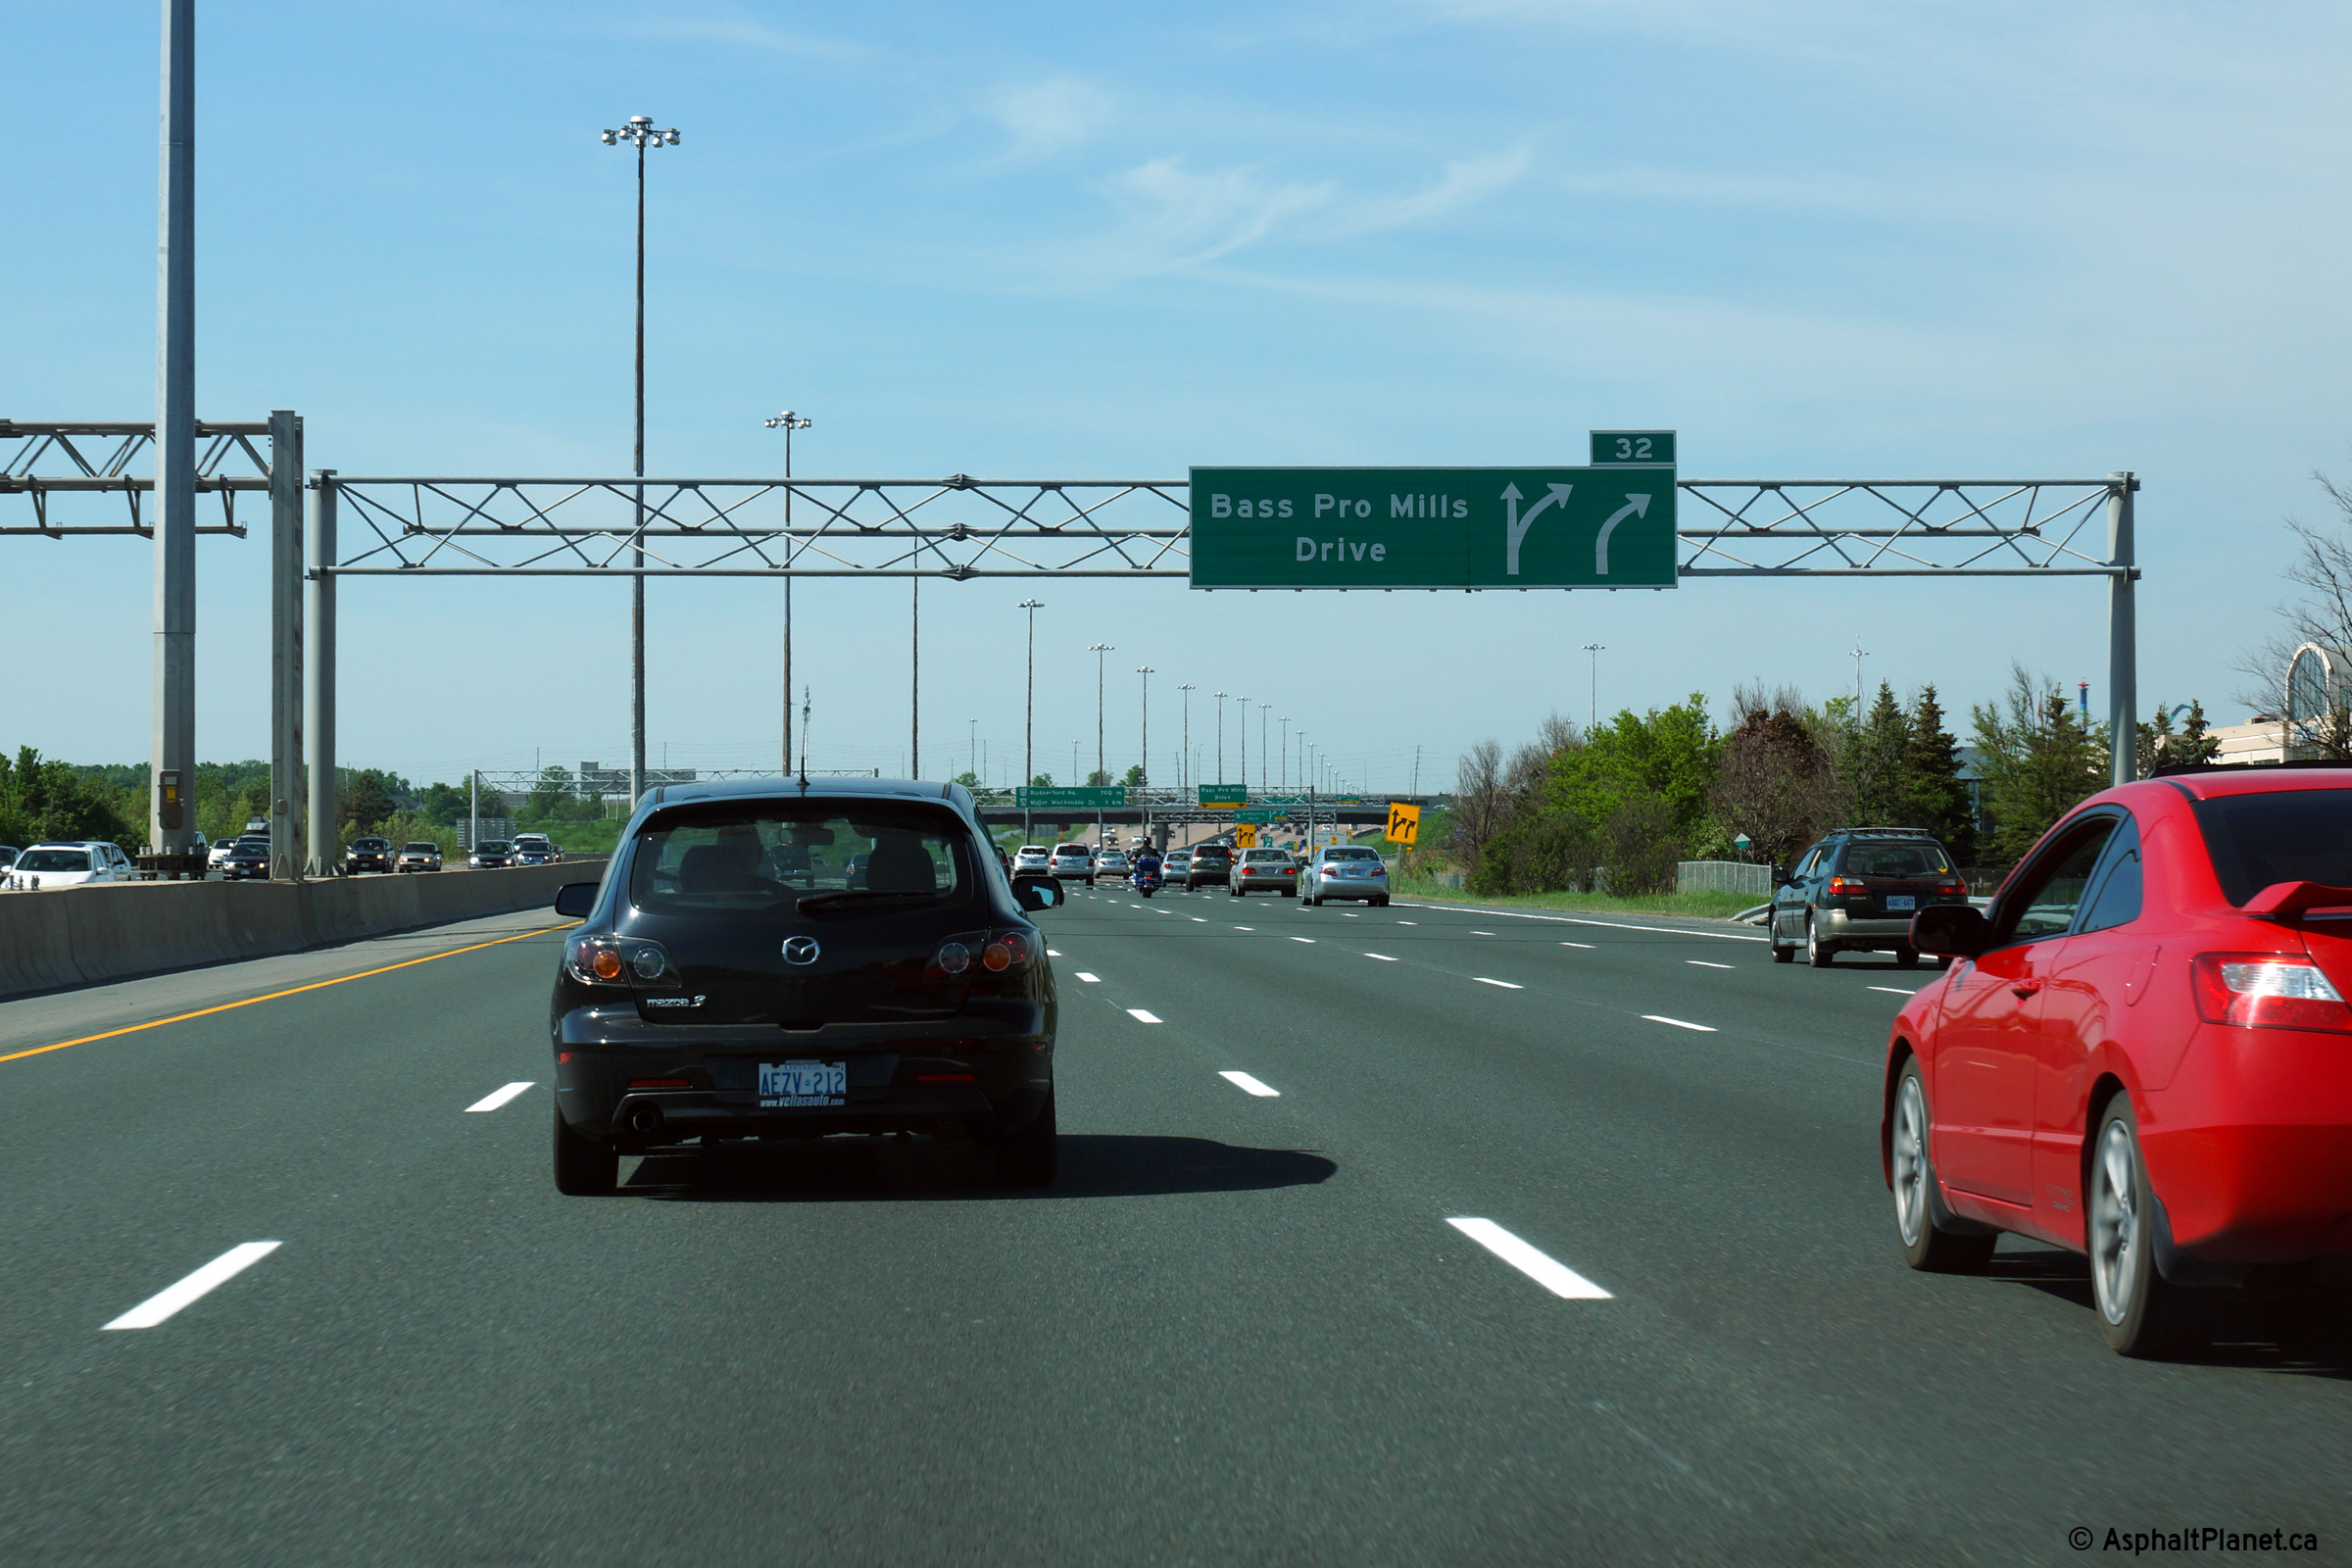
Northbound advanced signage for the off-ramp to Bass Pro Mills Road.
The sixth northbound lane departs the freeway at Bass Pro Mills Road.
Photo taken: May 31st, 2014. |
 (720x480) (720x480)
(1440x960)
(2400x1600) |
| City of Vaughan Regional
Municipality of York |
Signage at the northbound off-ramp to Bass Pro-Mills Road.
Photo taken: May 31st, 2014. |
 (720x480) (720x480)
(1440x960)
(2400x1600) |
| City of Vaughan Regional
Municipality of York |
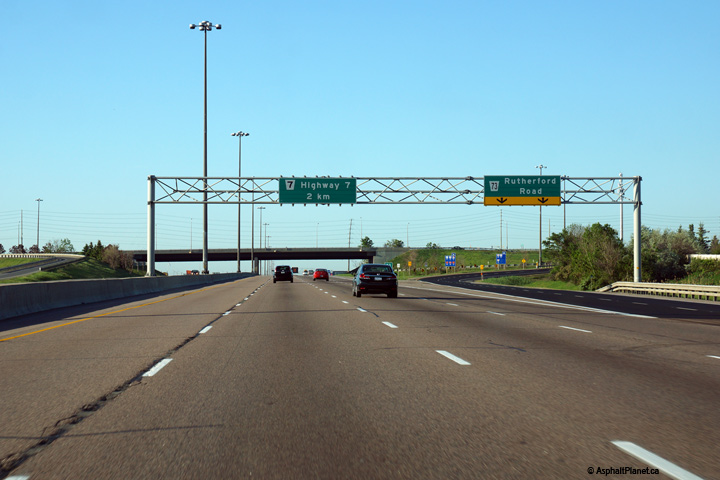
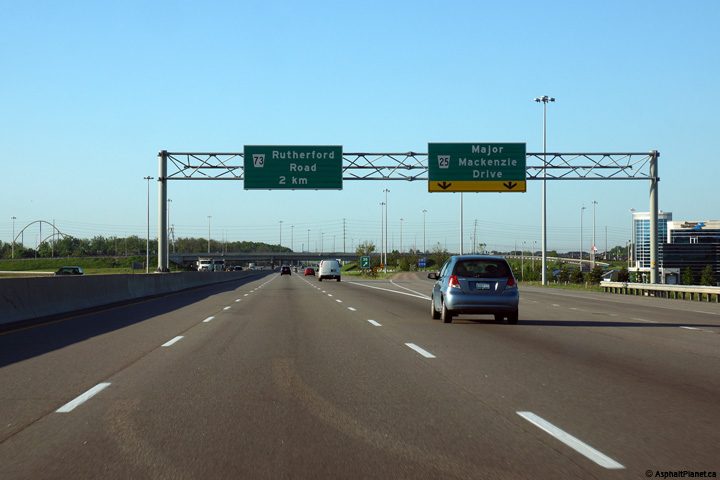
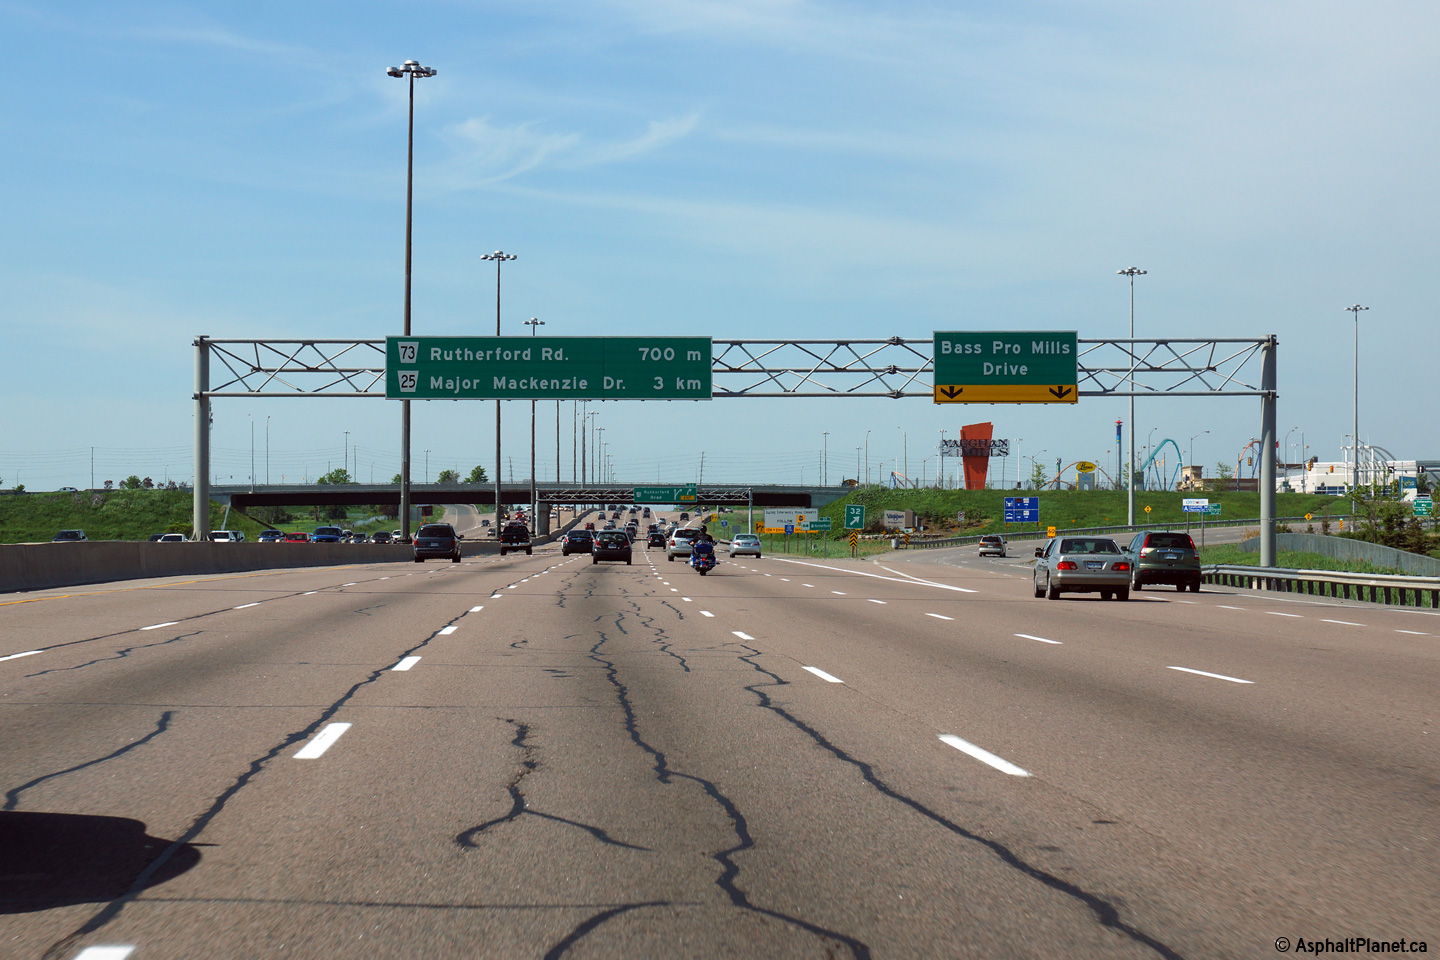
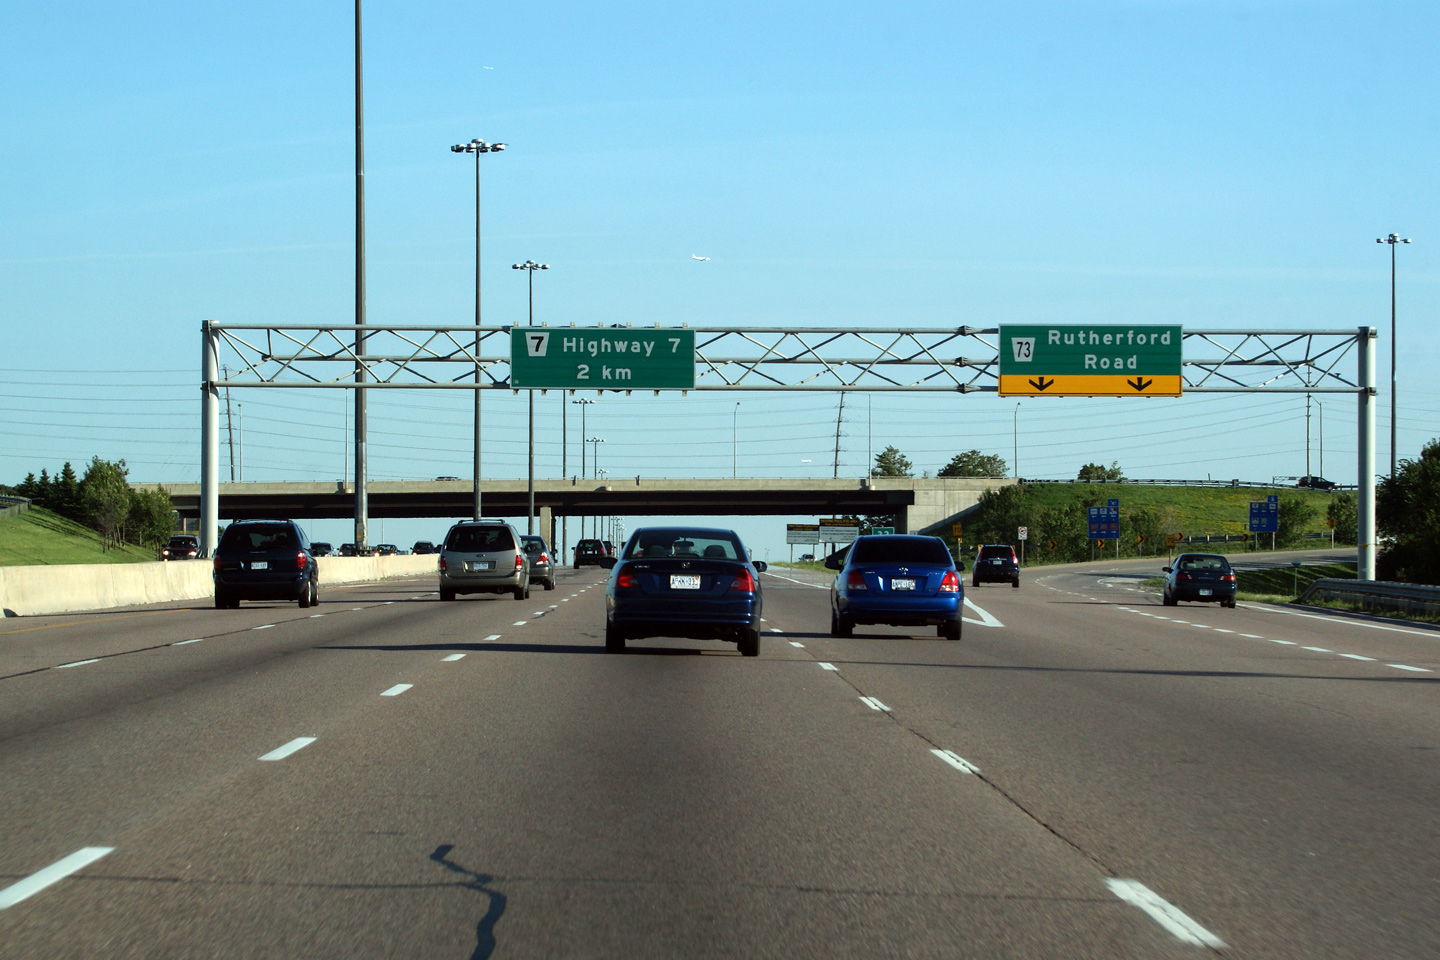
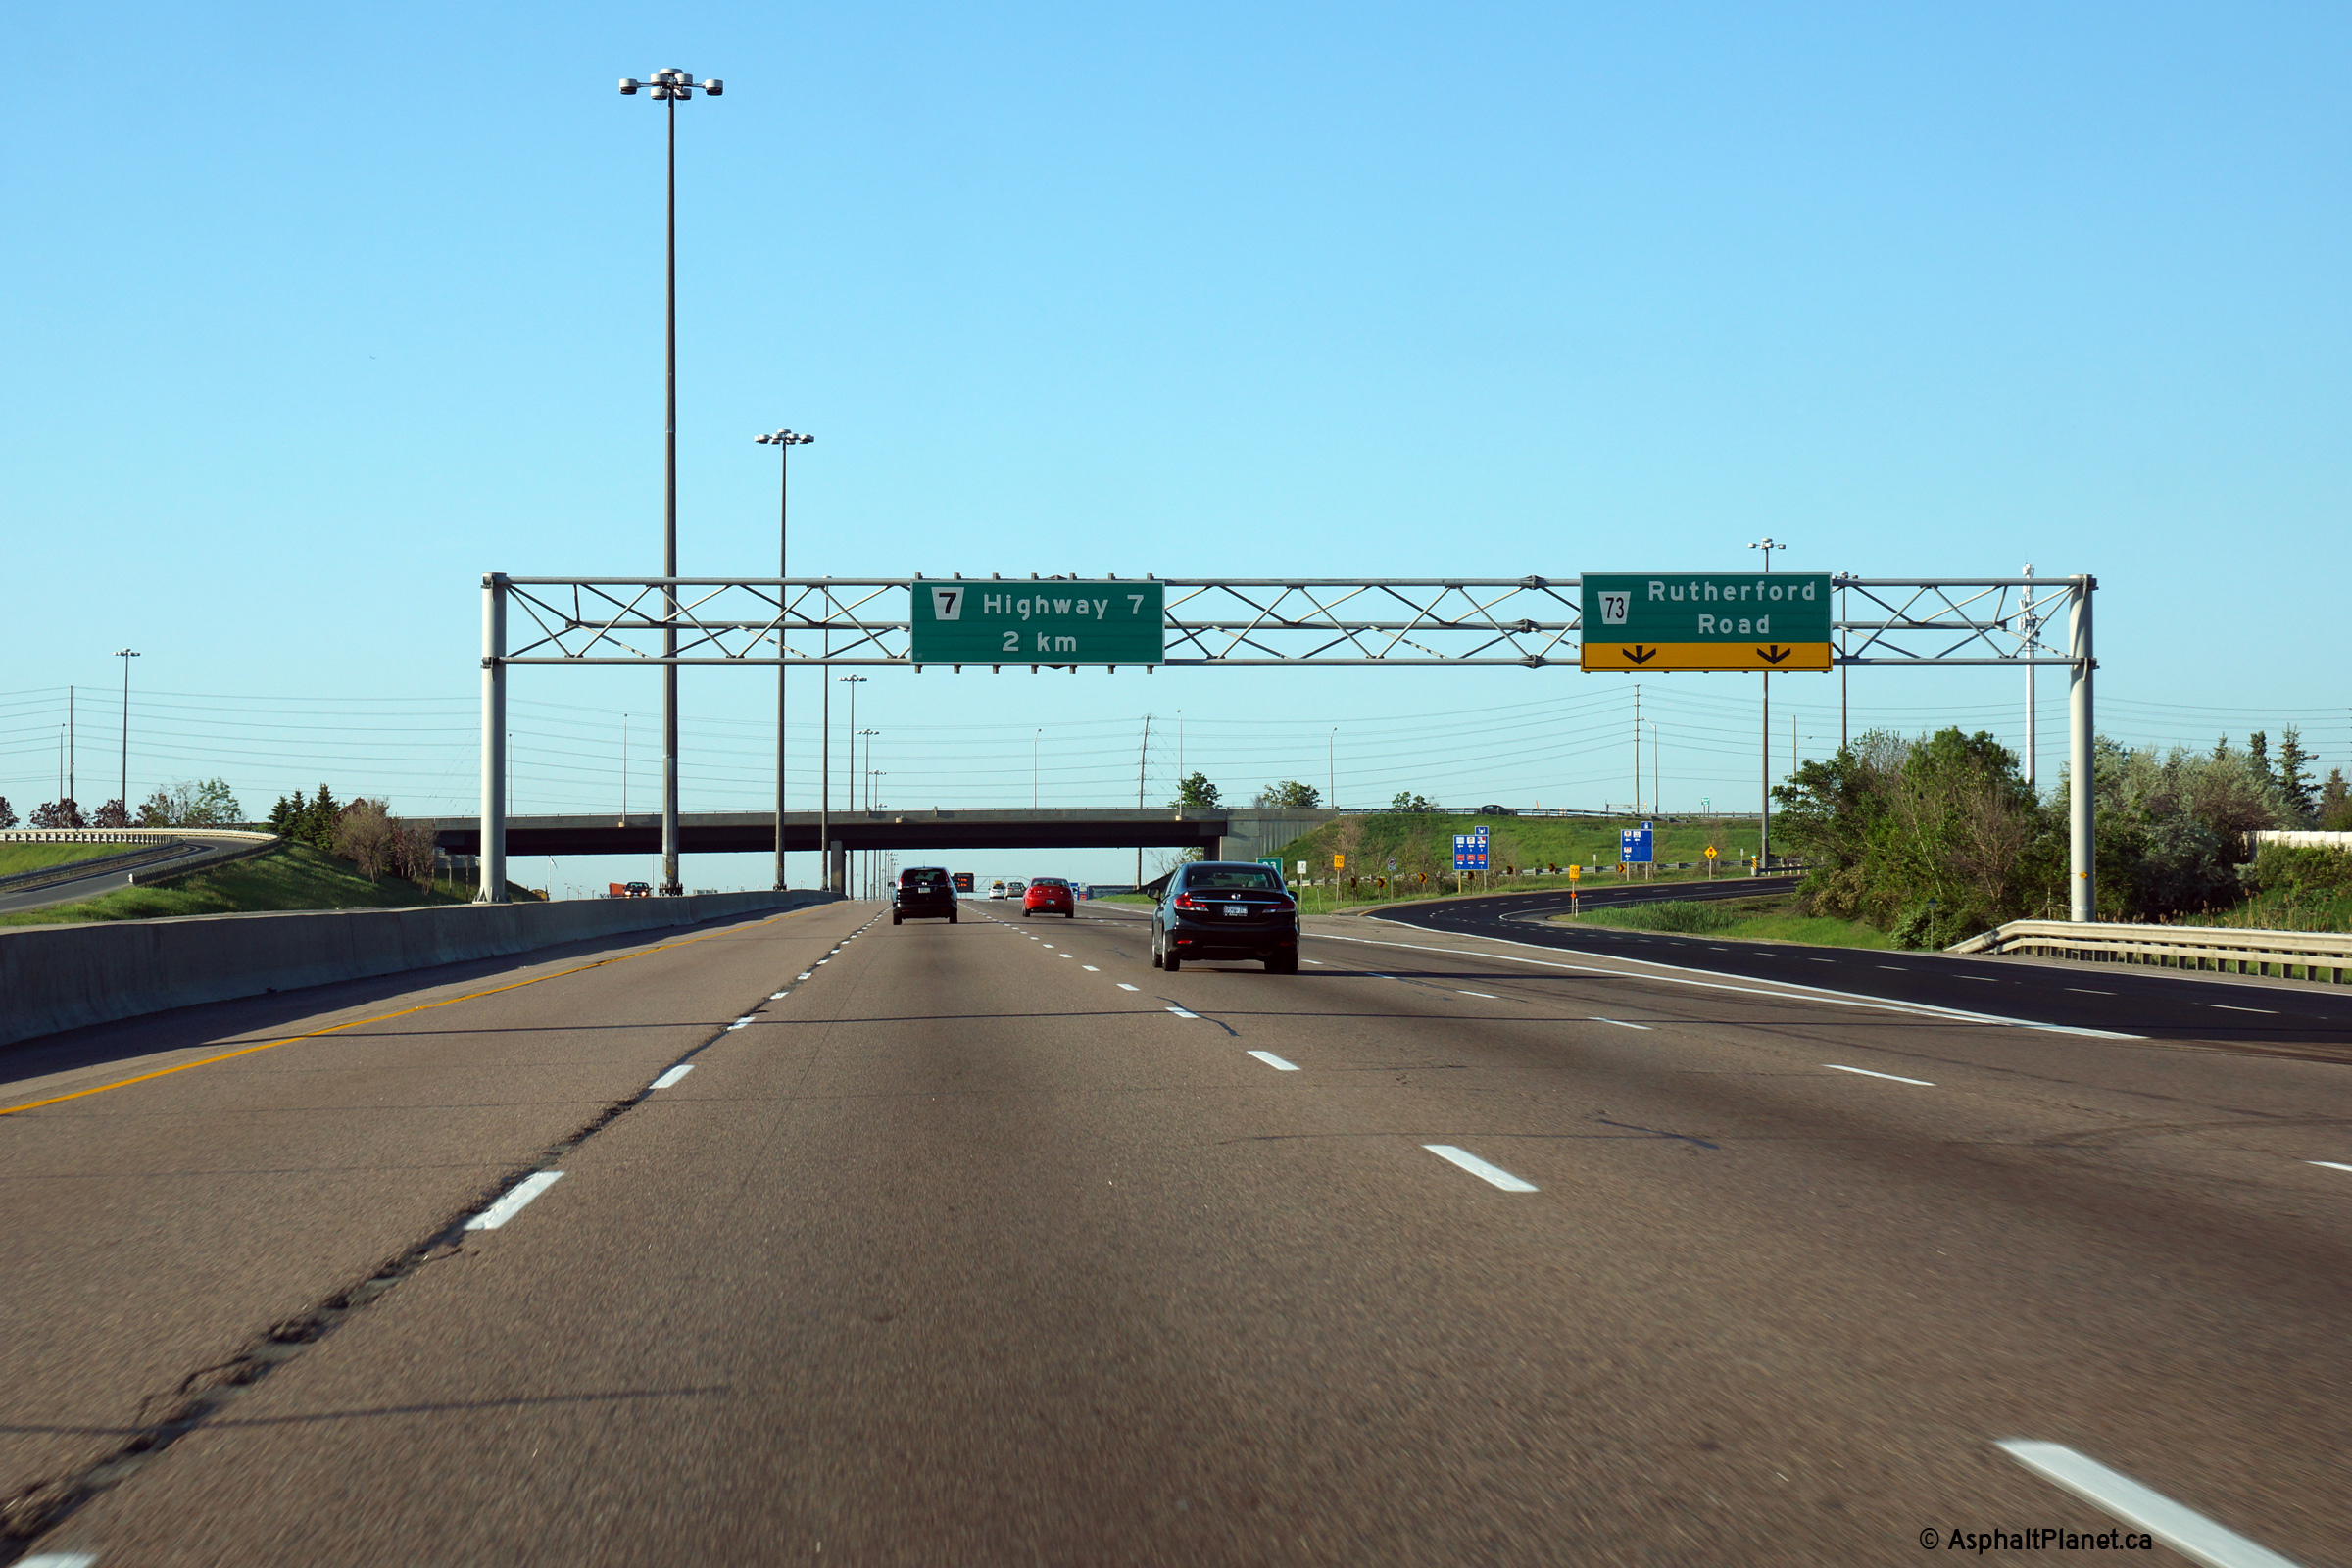
Northbound advanced signage for the off-ramp to Rutherford Road.
Photo taken: May 31st, 2014. |
 (720x480) (720x480)
(1440x960)
(2400x1600) |
| City of Vaughan Regional
Municipality of York |
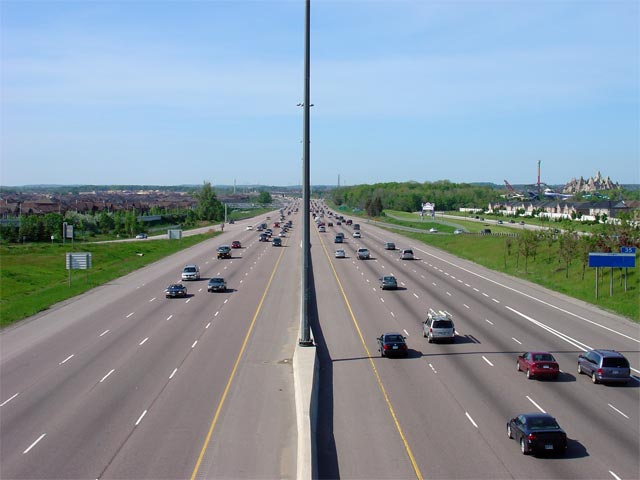
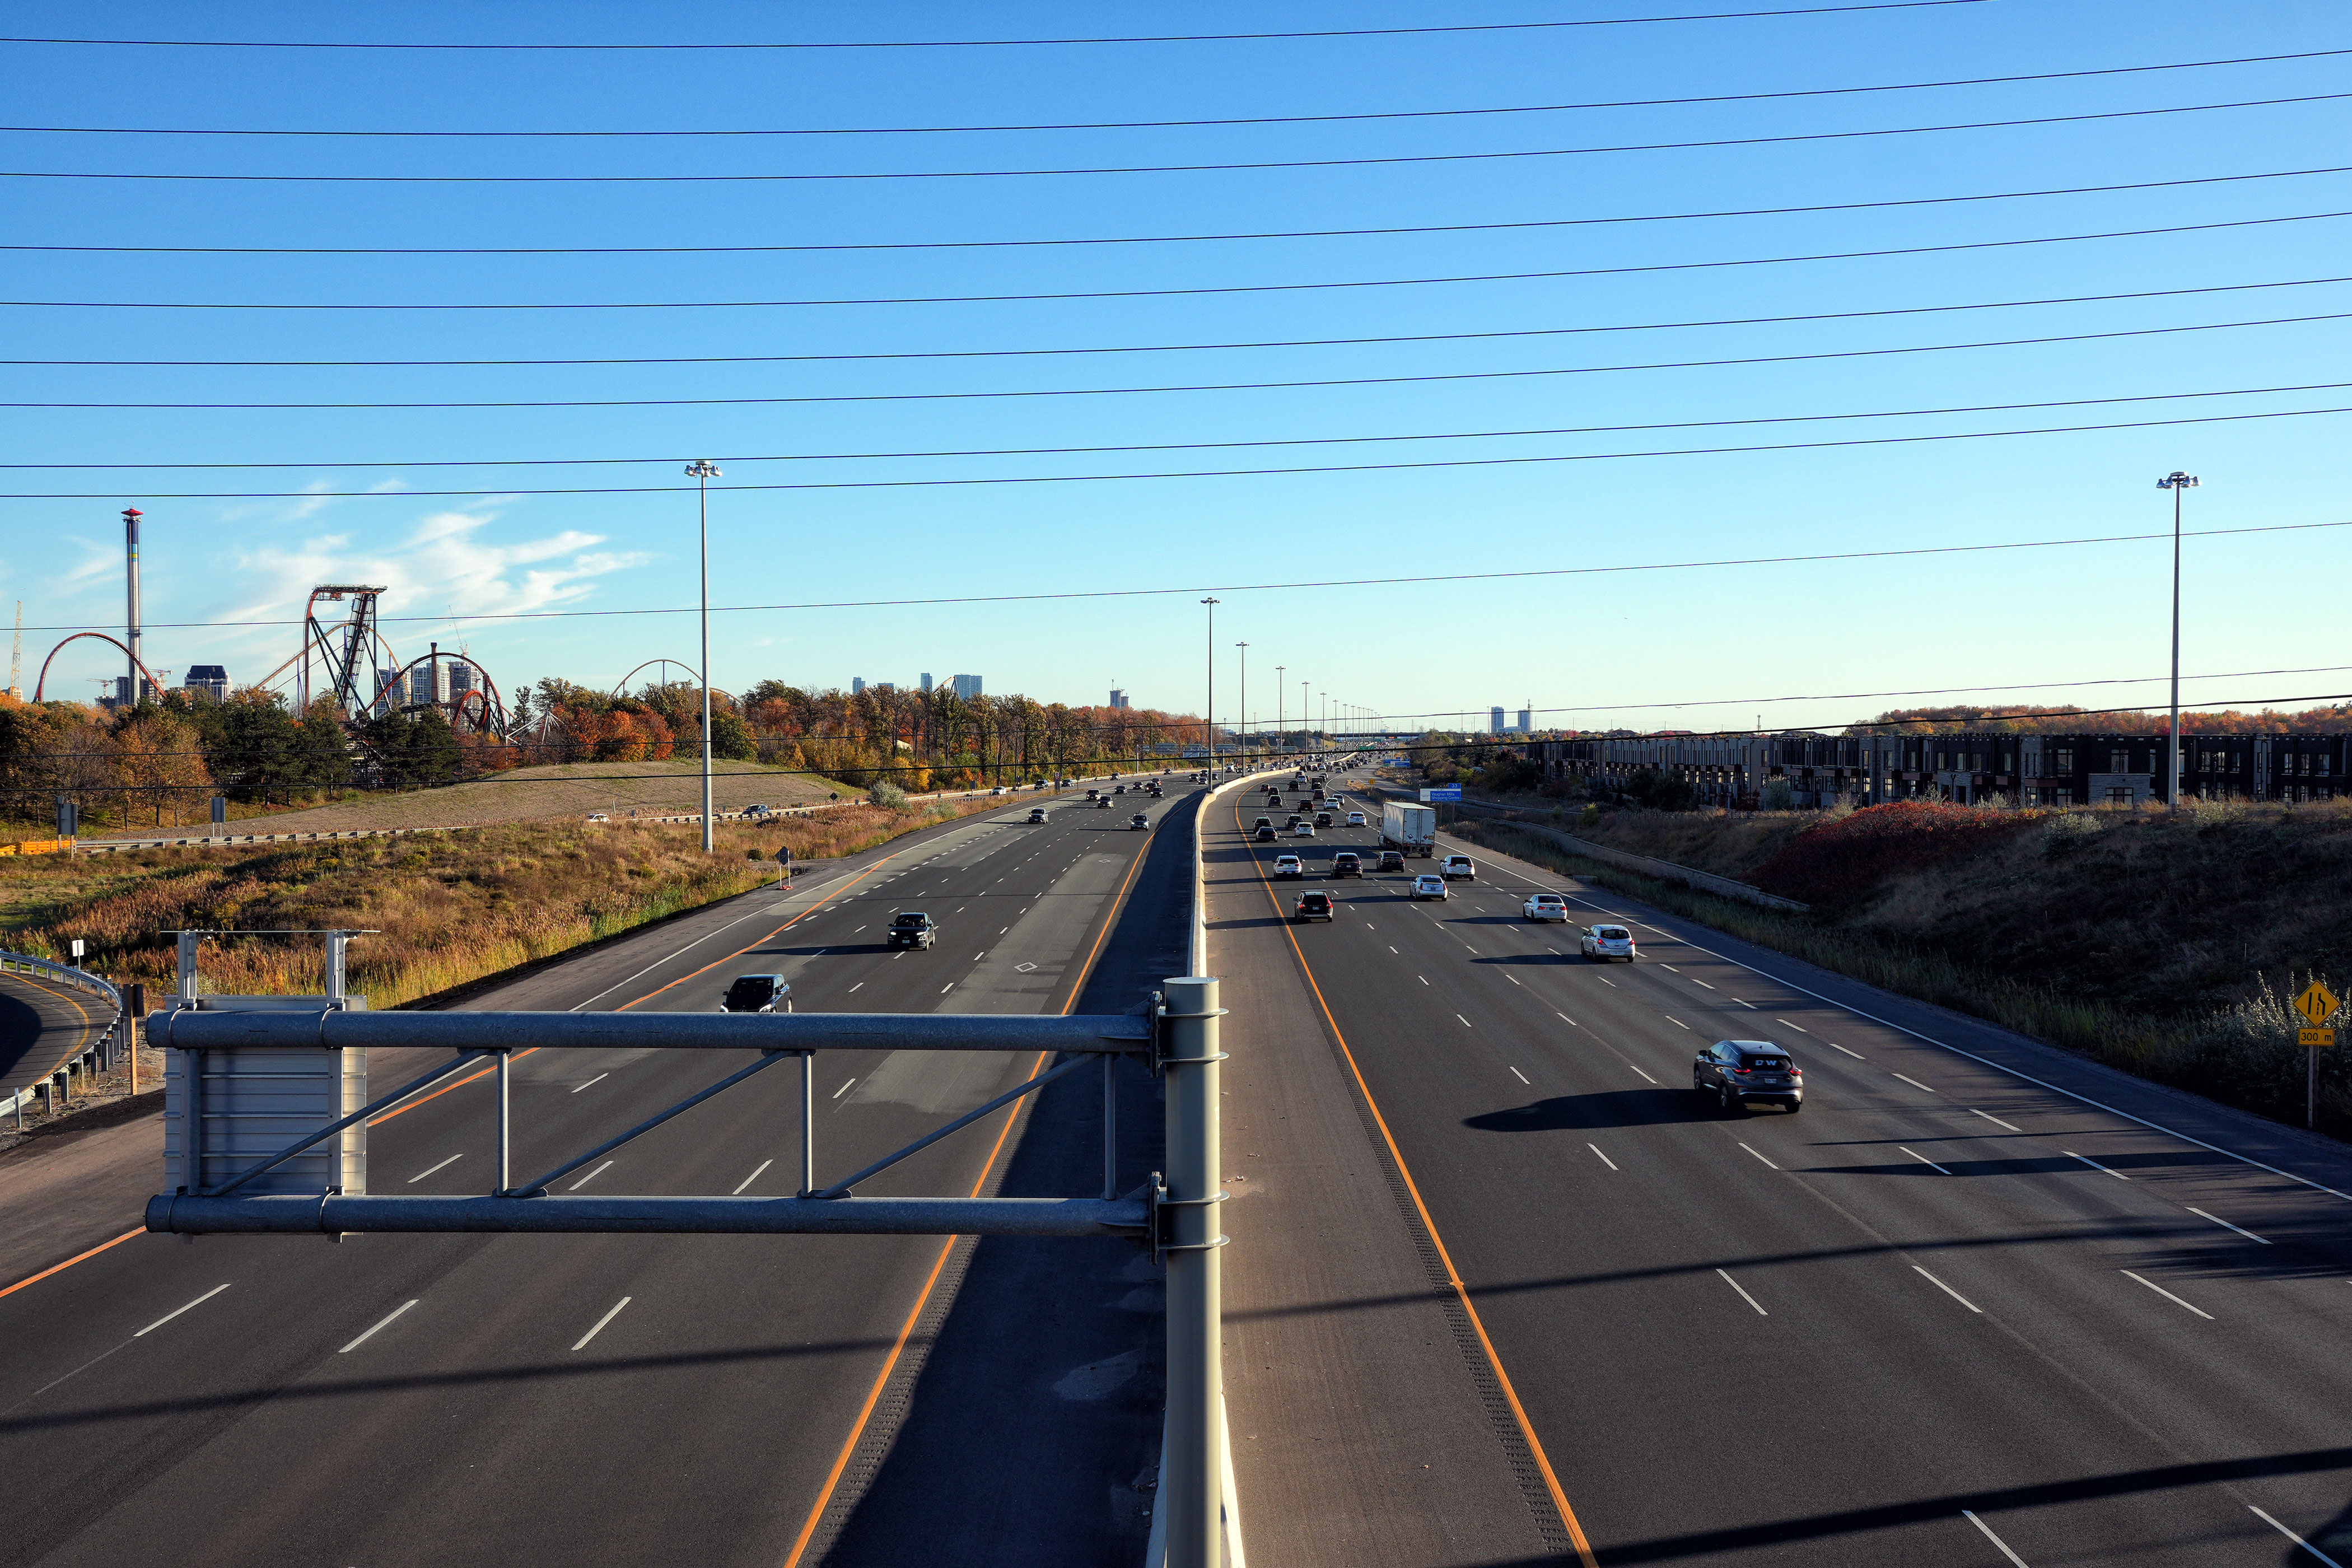
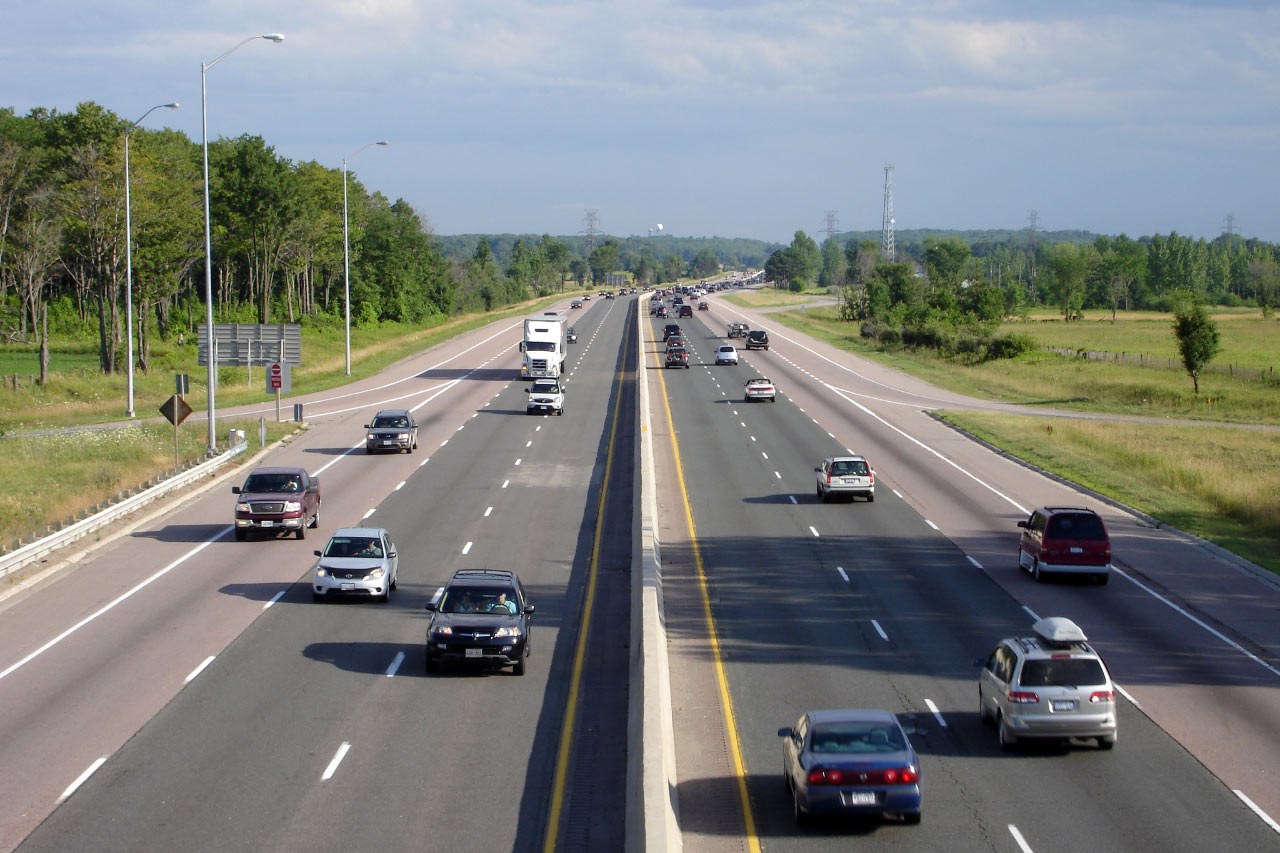
View looking southerly along Highway 400 from Vaughan Mills Road. The
City of Vaughan quickly enveloped the Highway 400 corridor during the 1990s
and 2000s. Photo taken: May 27th, 2006. |

(720x480)
(1440x960) |
| City of Vaughan Regional
Municipality of York |
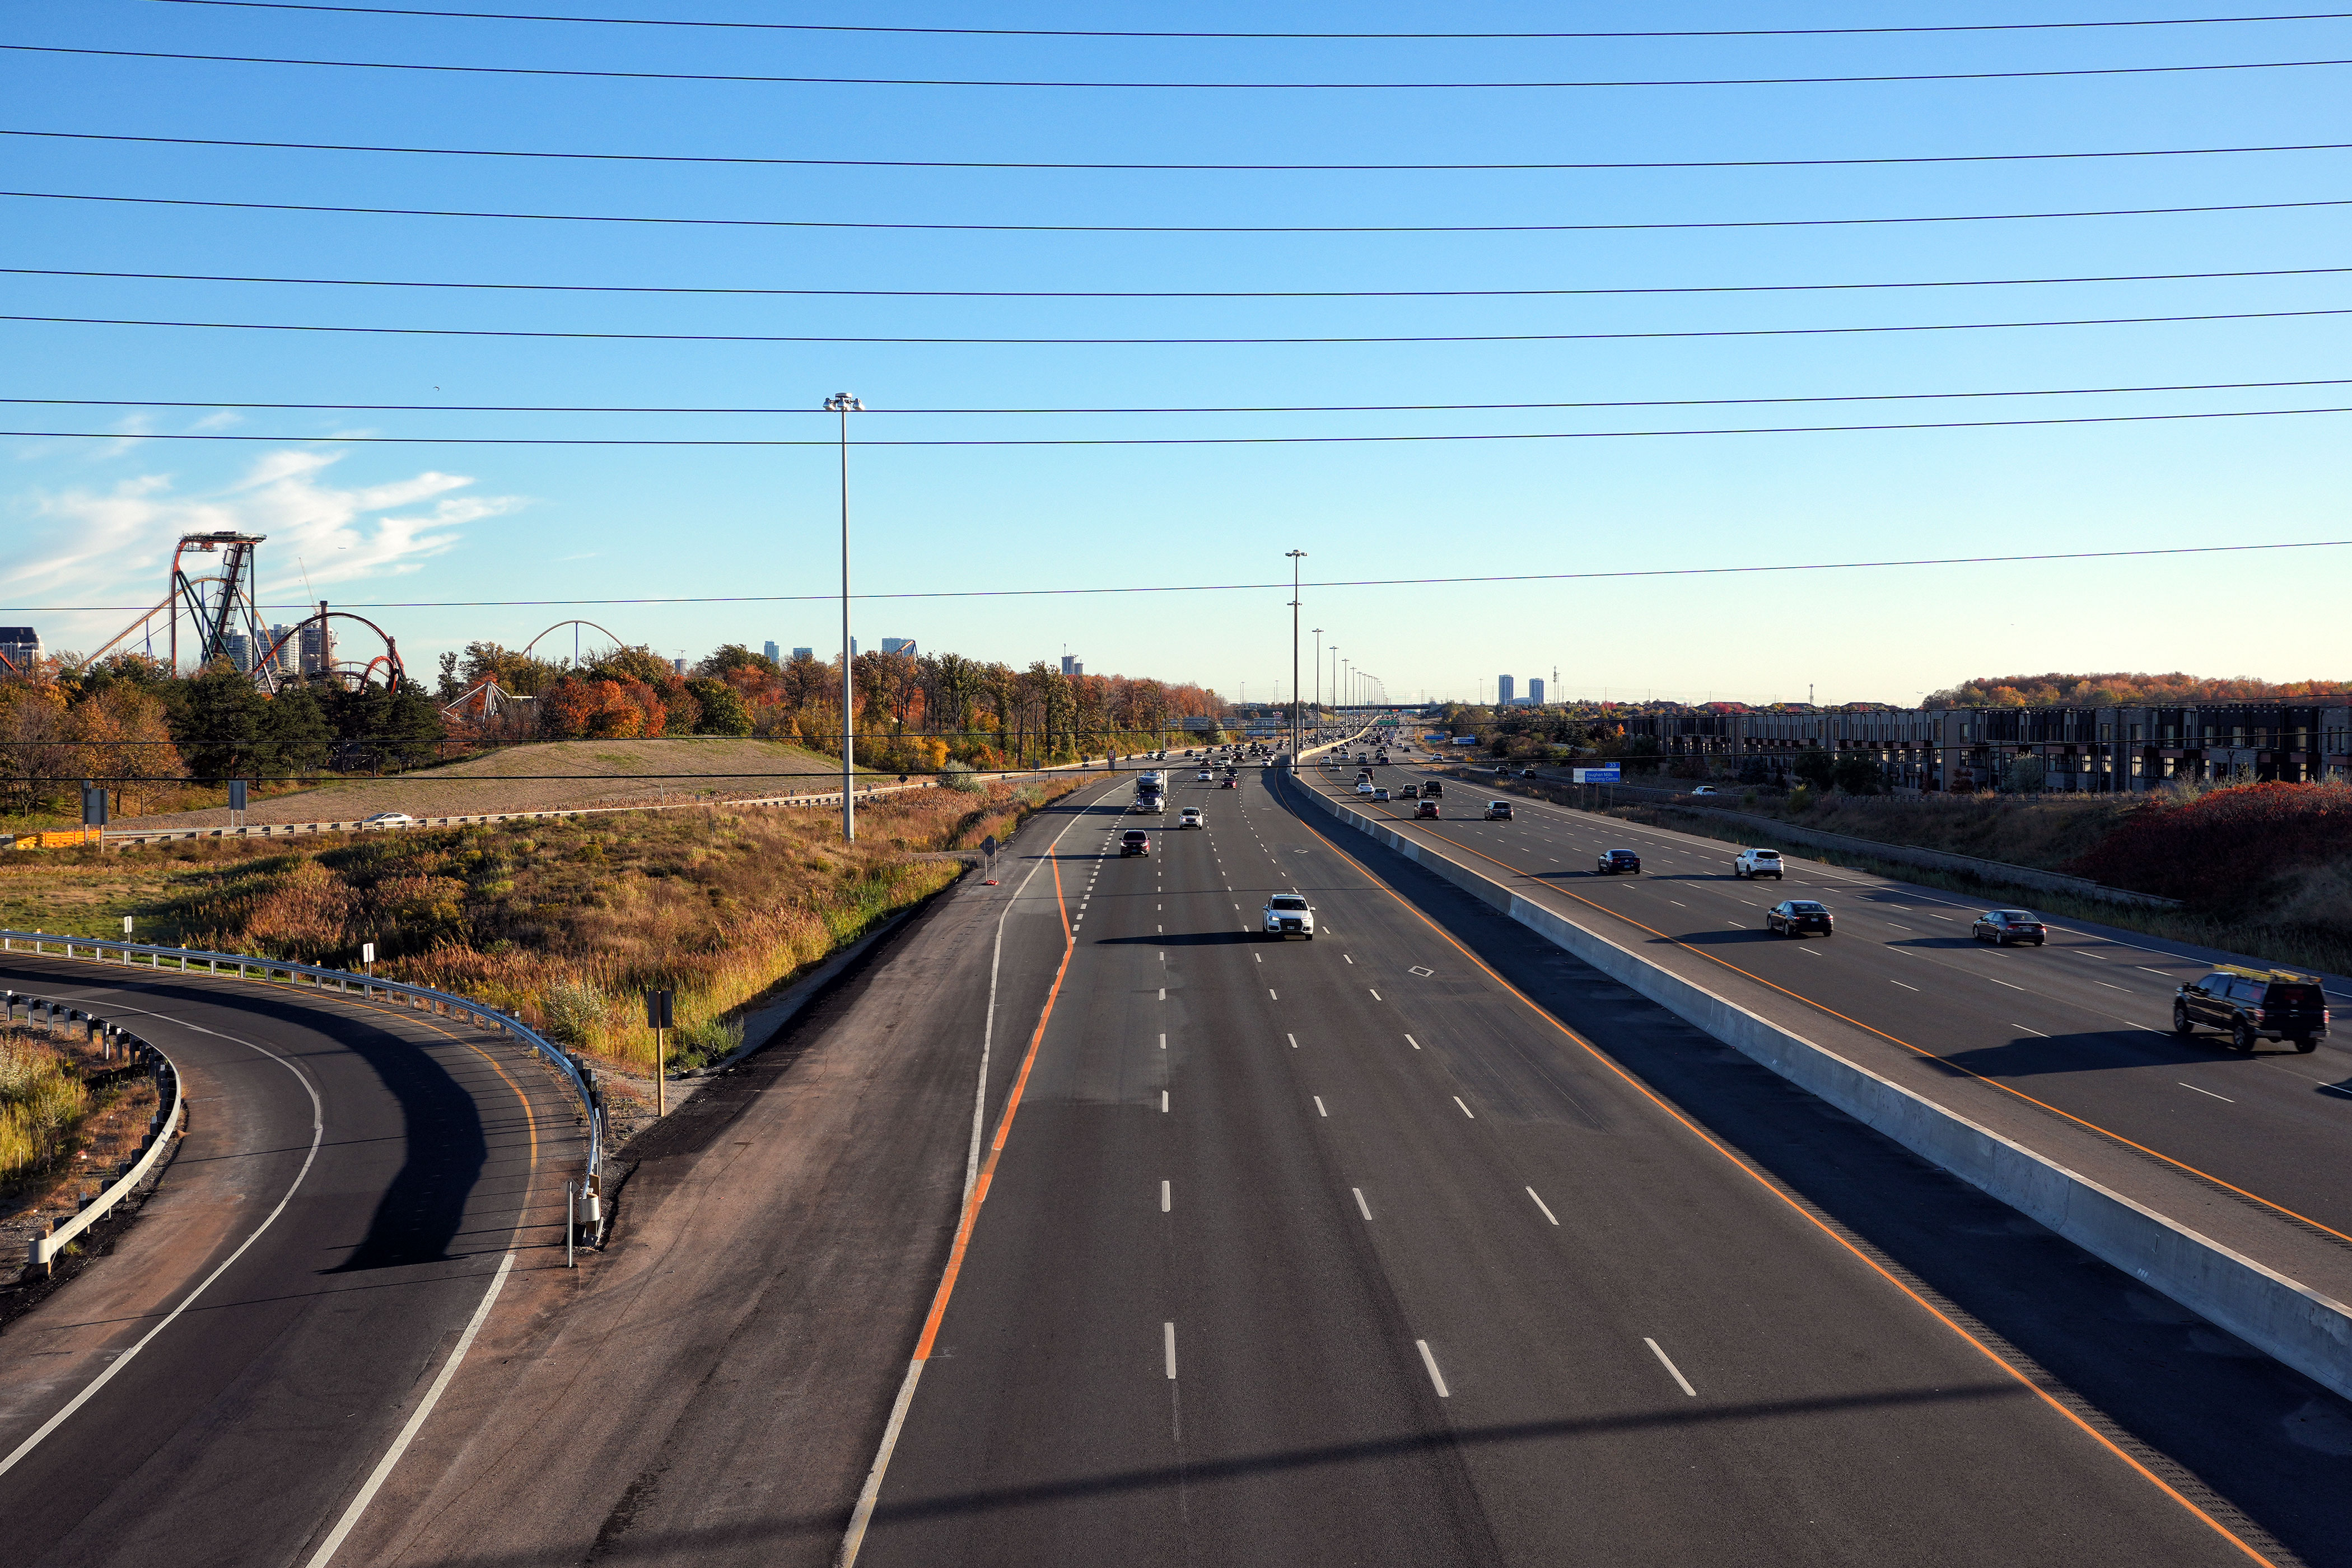
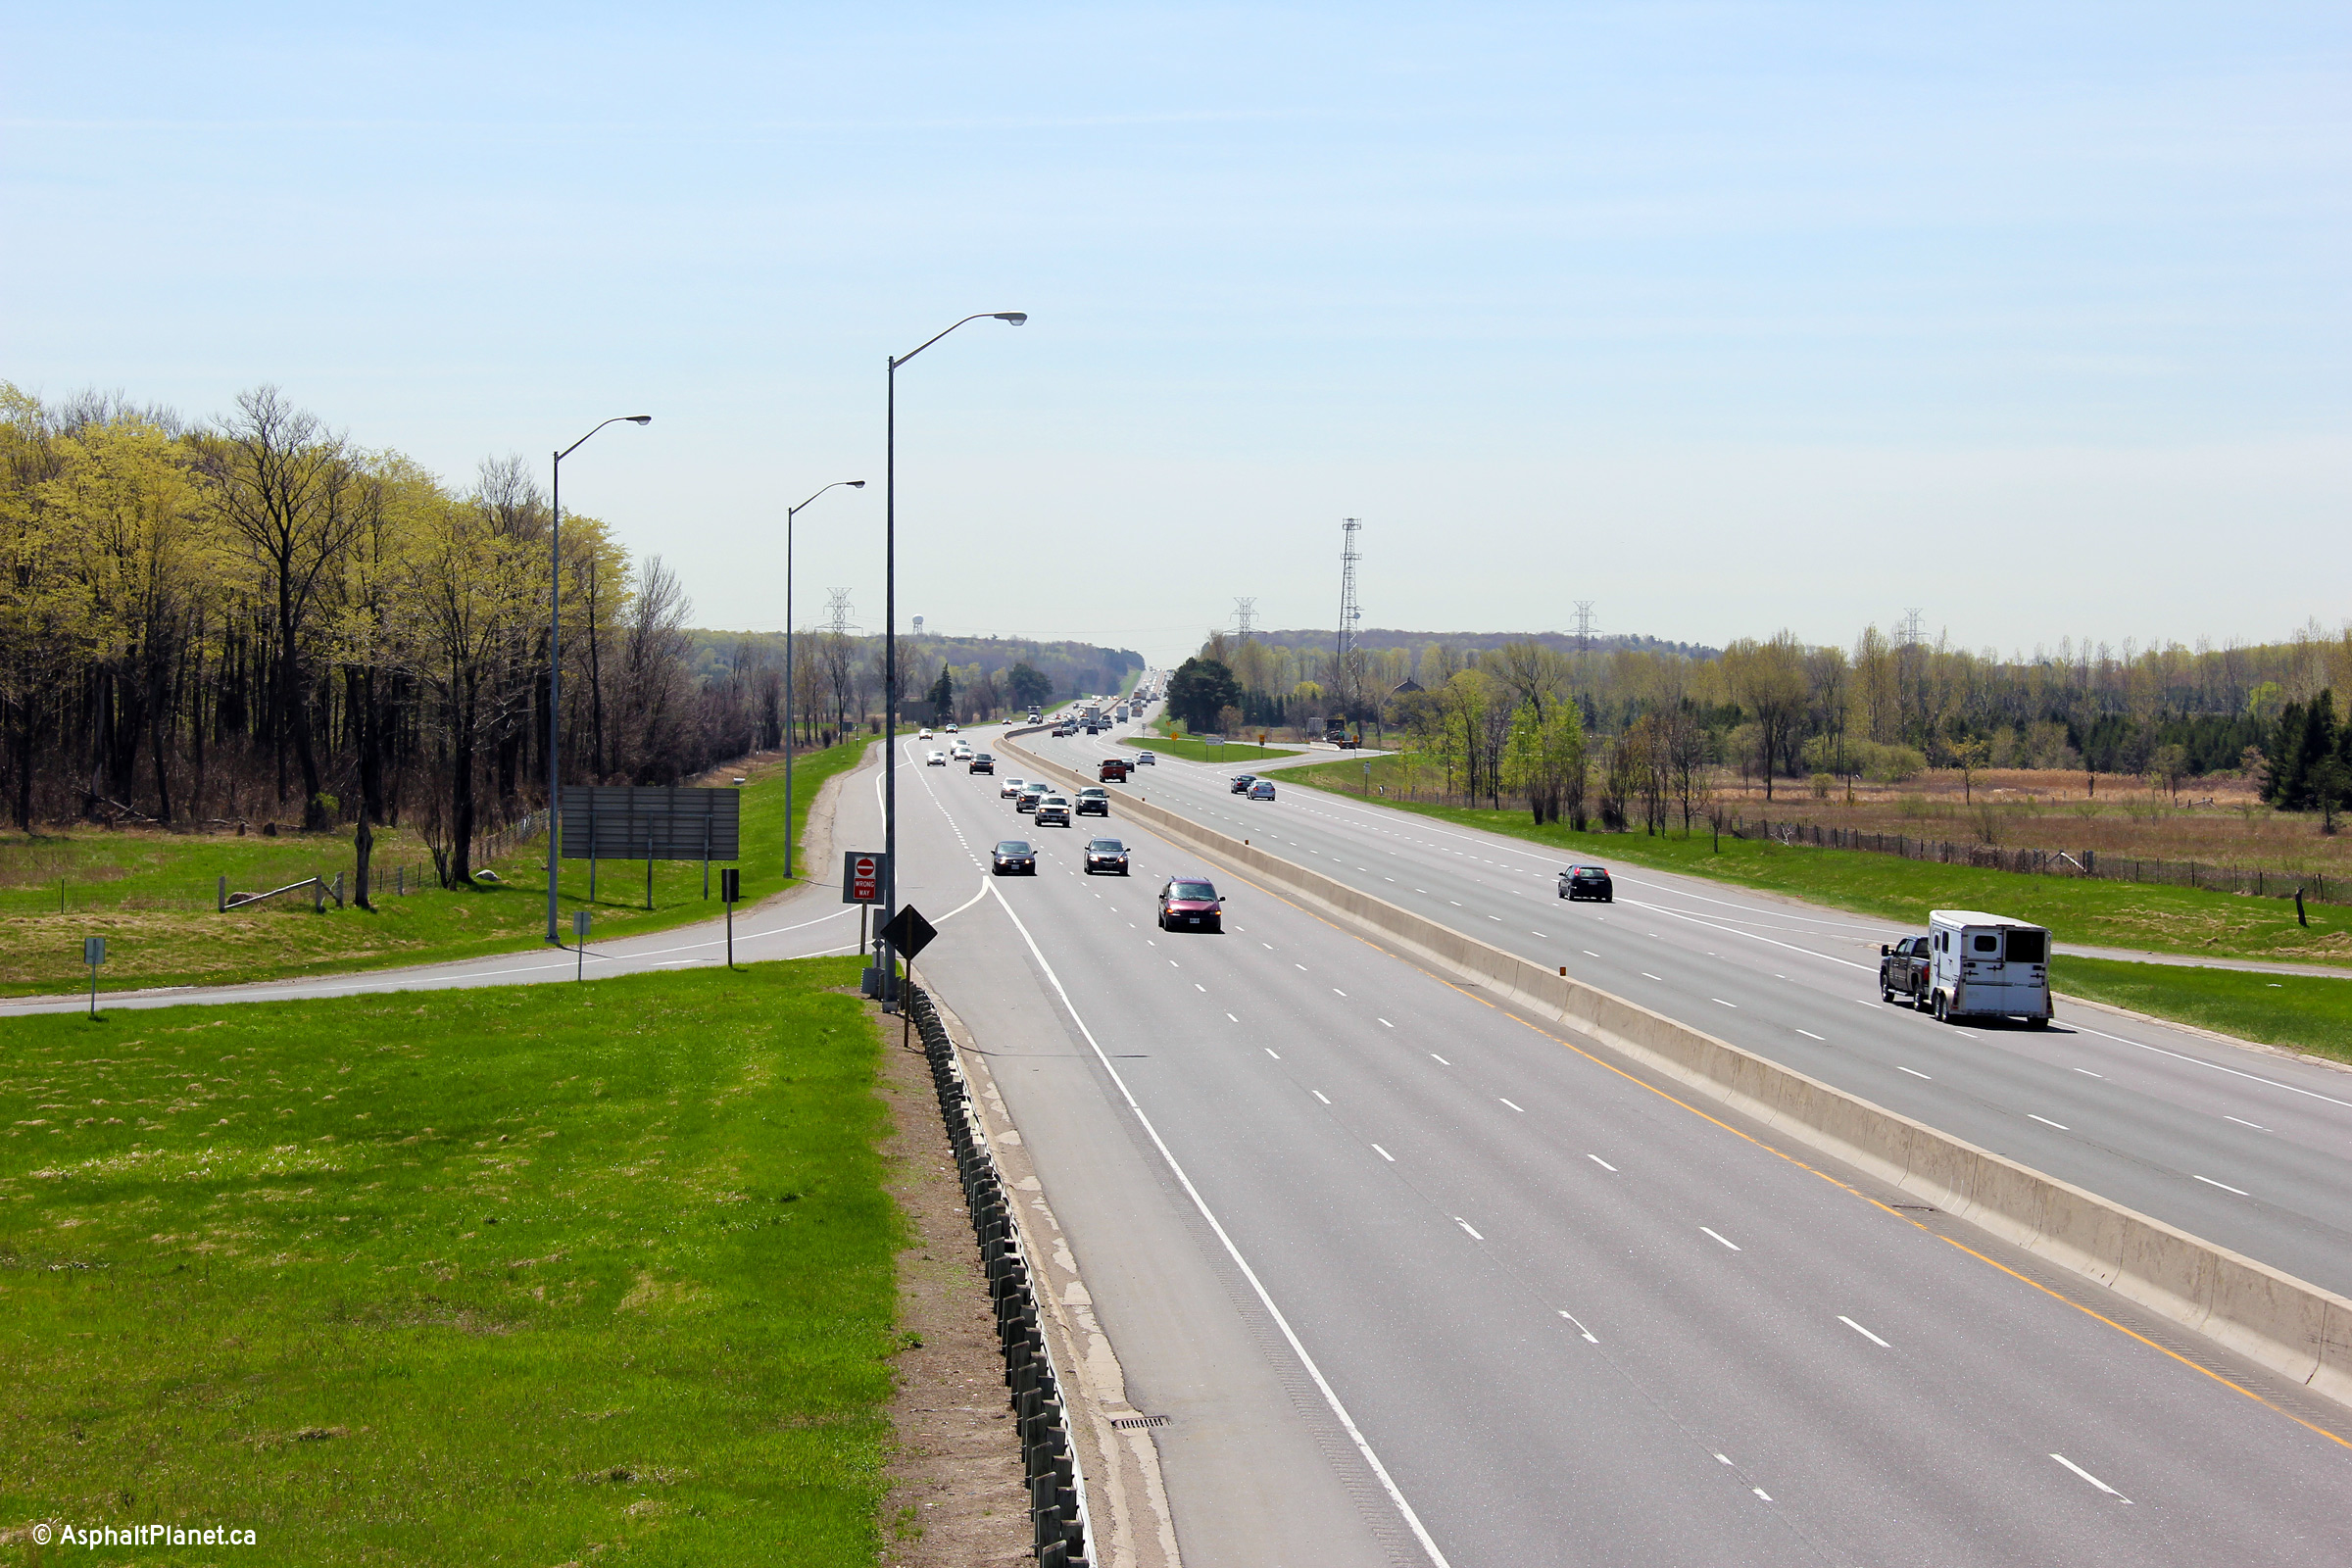
Looking north from Bass Pro Mills Road towards Rutherford Road. Bass
Pro Mills Road and its southbound partial interchange was completed in the
Fall of 2004, in conjunction with the Vaughan Mills Mall.
Photo taken: May 27th, 2006. |

(720x480)
(1440x960) |
| City of Vaughan Regional
Municipality of York |
This southbound changeable message sign is situated just south of the
Rutherford Road interchange. During peak hours, this sign advises
motorists of congestion along the southbound lanes of the 400. The
southbound 400 is prone to congestion during peak hours approaching the
Highway 401 interchange.
Photo taken: June 1st, 2015. |
 (720x480) (720x480)
(1440x960)
(2400x1600) |
| City of Vaughan Regional
Municipality of York |
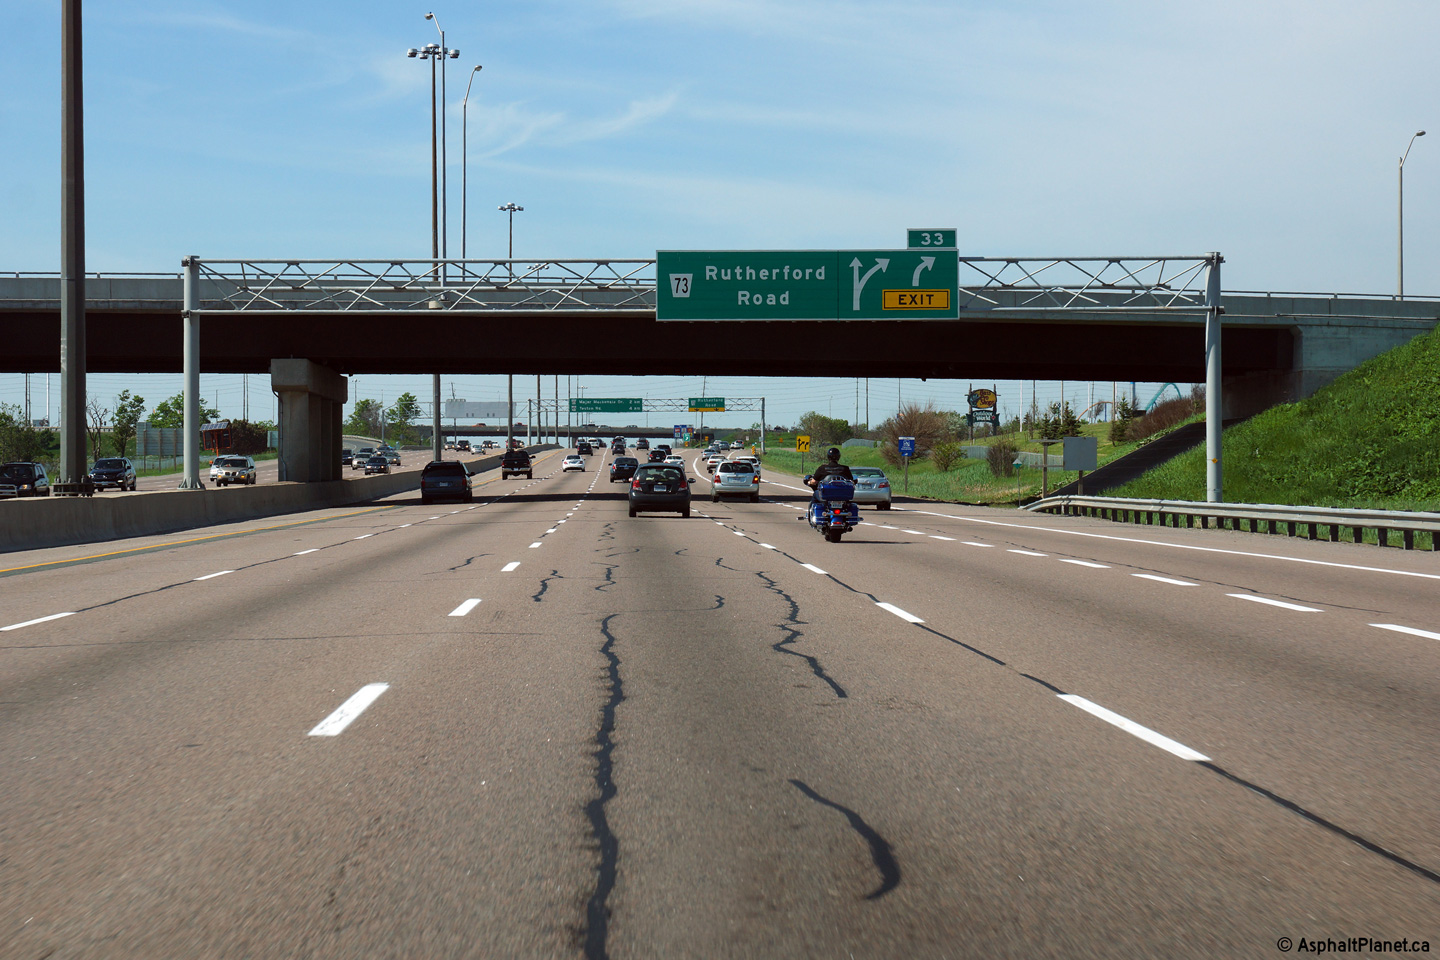
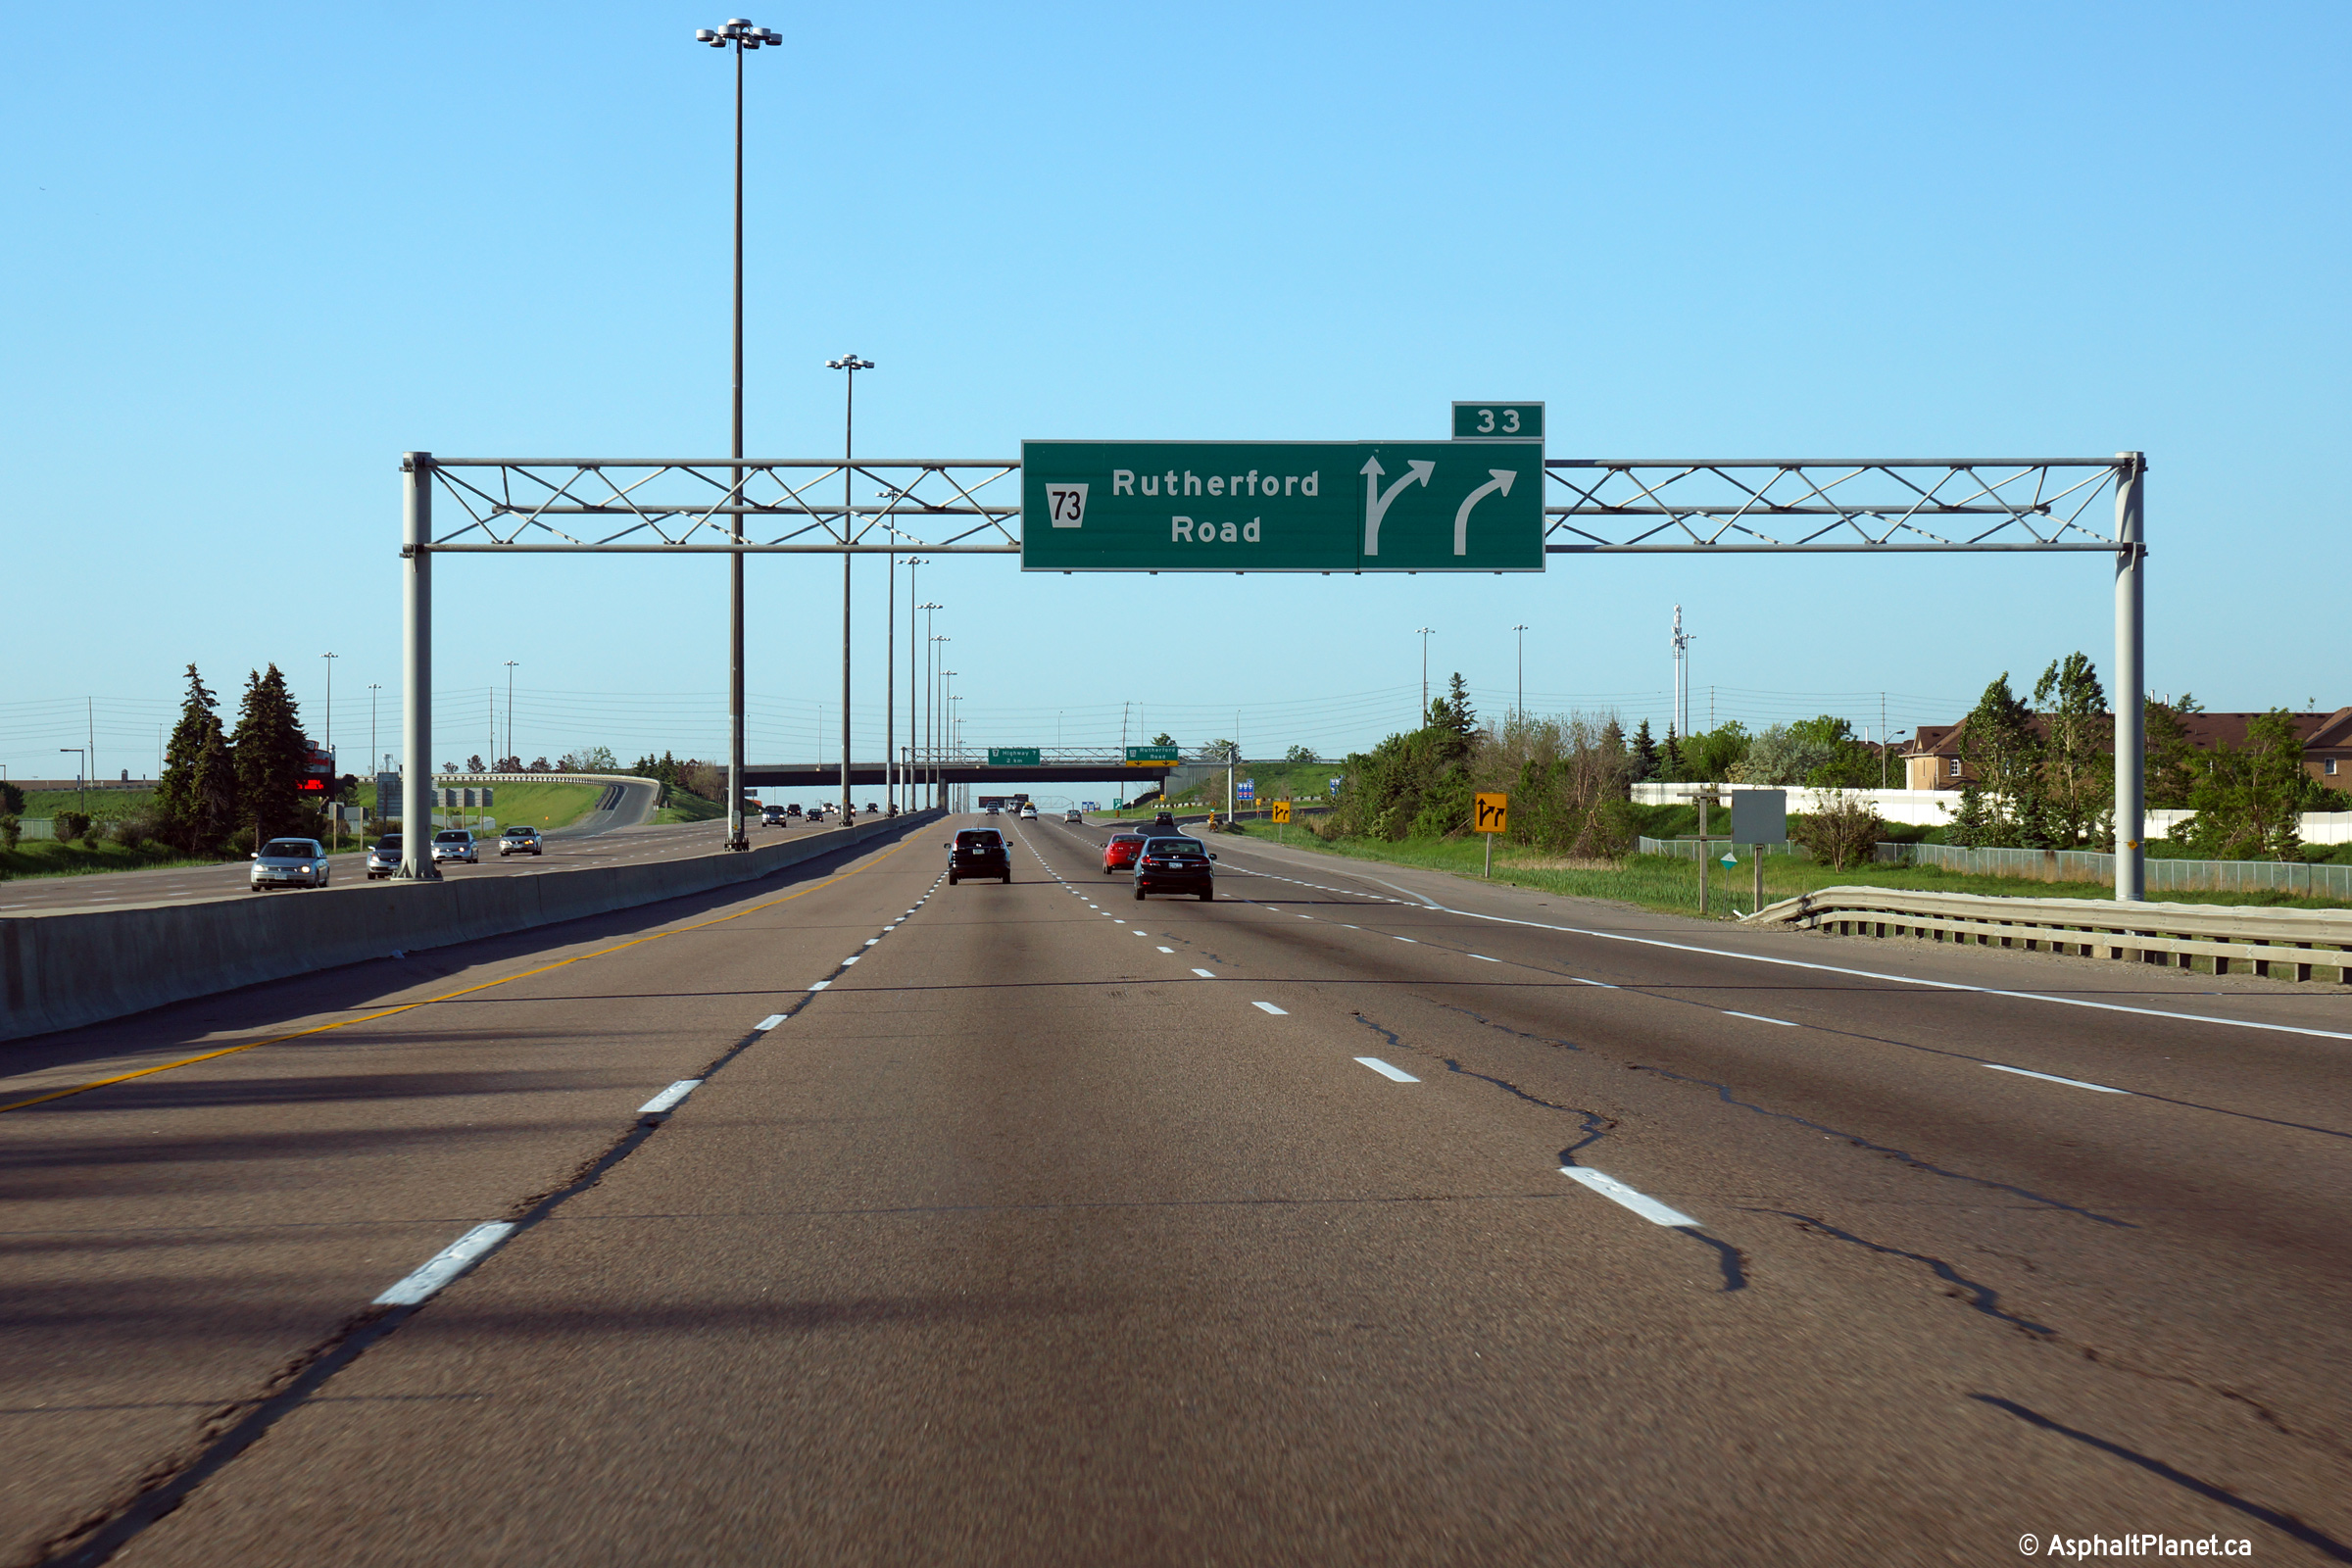
Northerly view at the off-ramp to Rutherford Road. The fifth
northbound lane exits the freeway at Rutherford Road.
Photo taken: May 31st, 2014. |
 (720x480) (720x480)
(1440x960)
(2400x1600) |
| City of Vaughan Regional
Municipality of York |
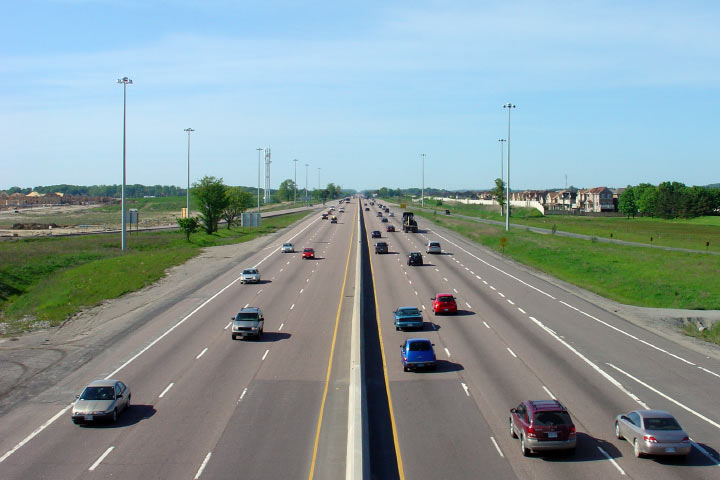
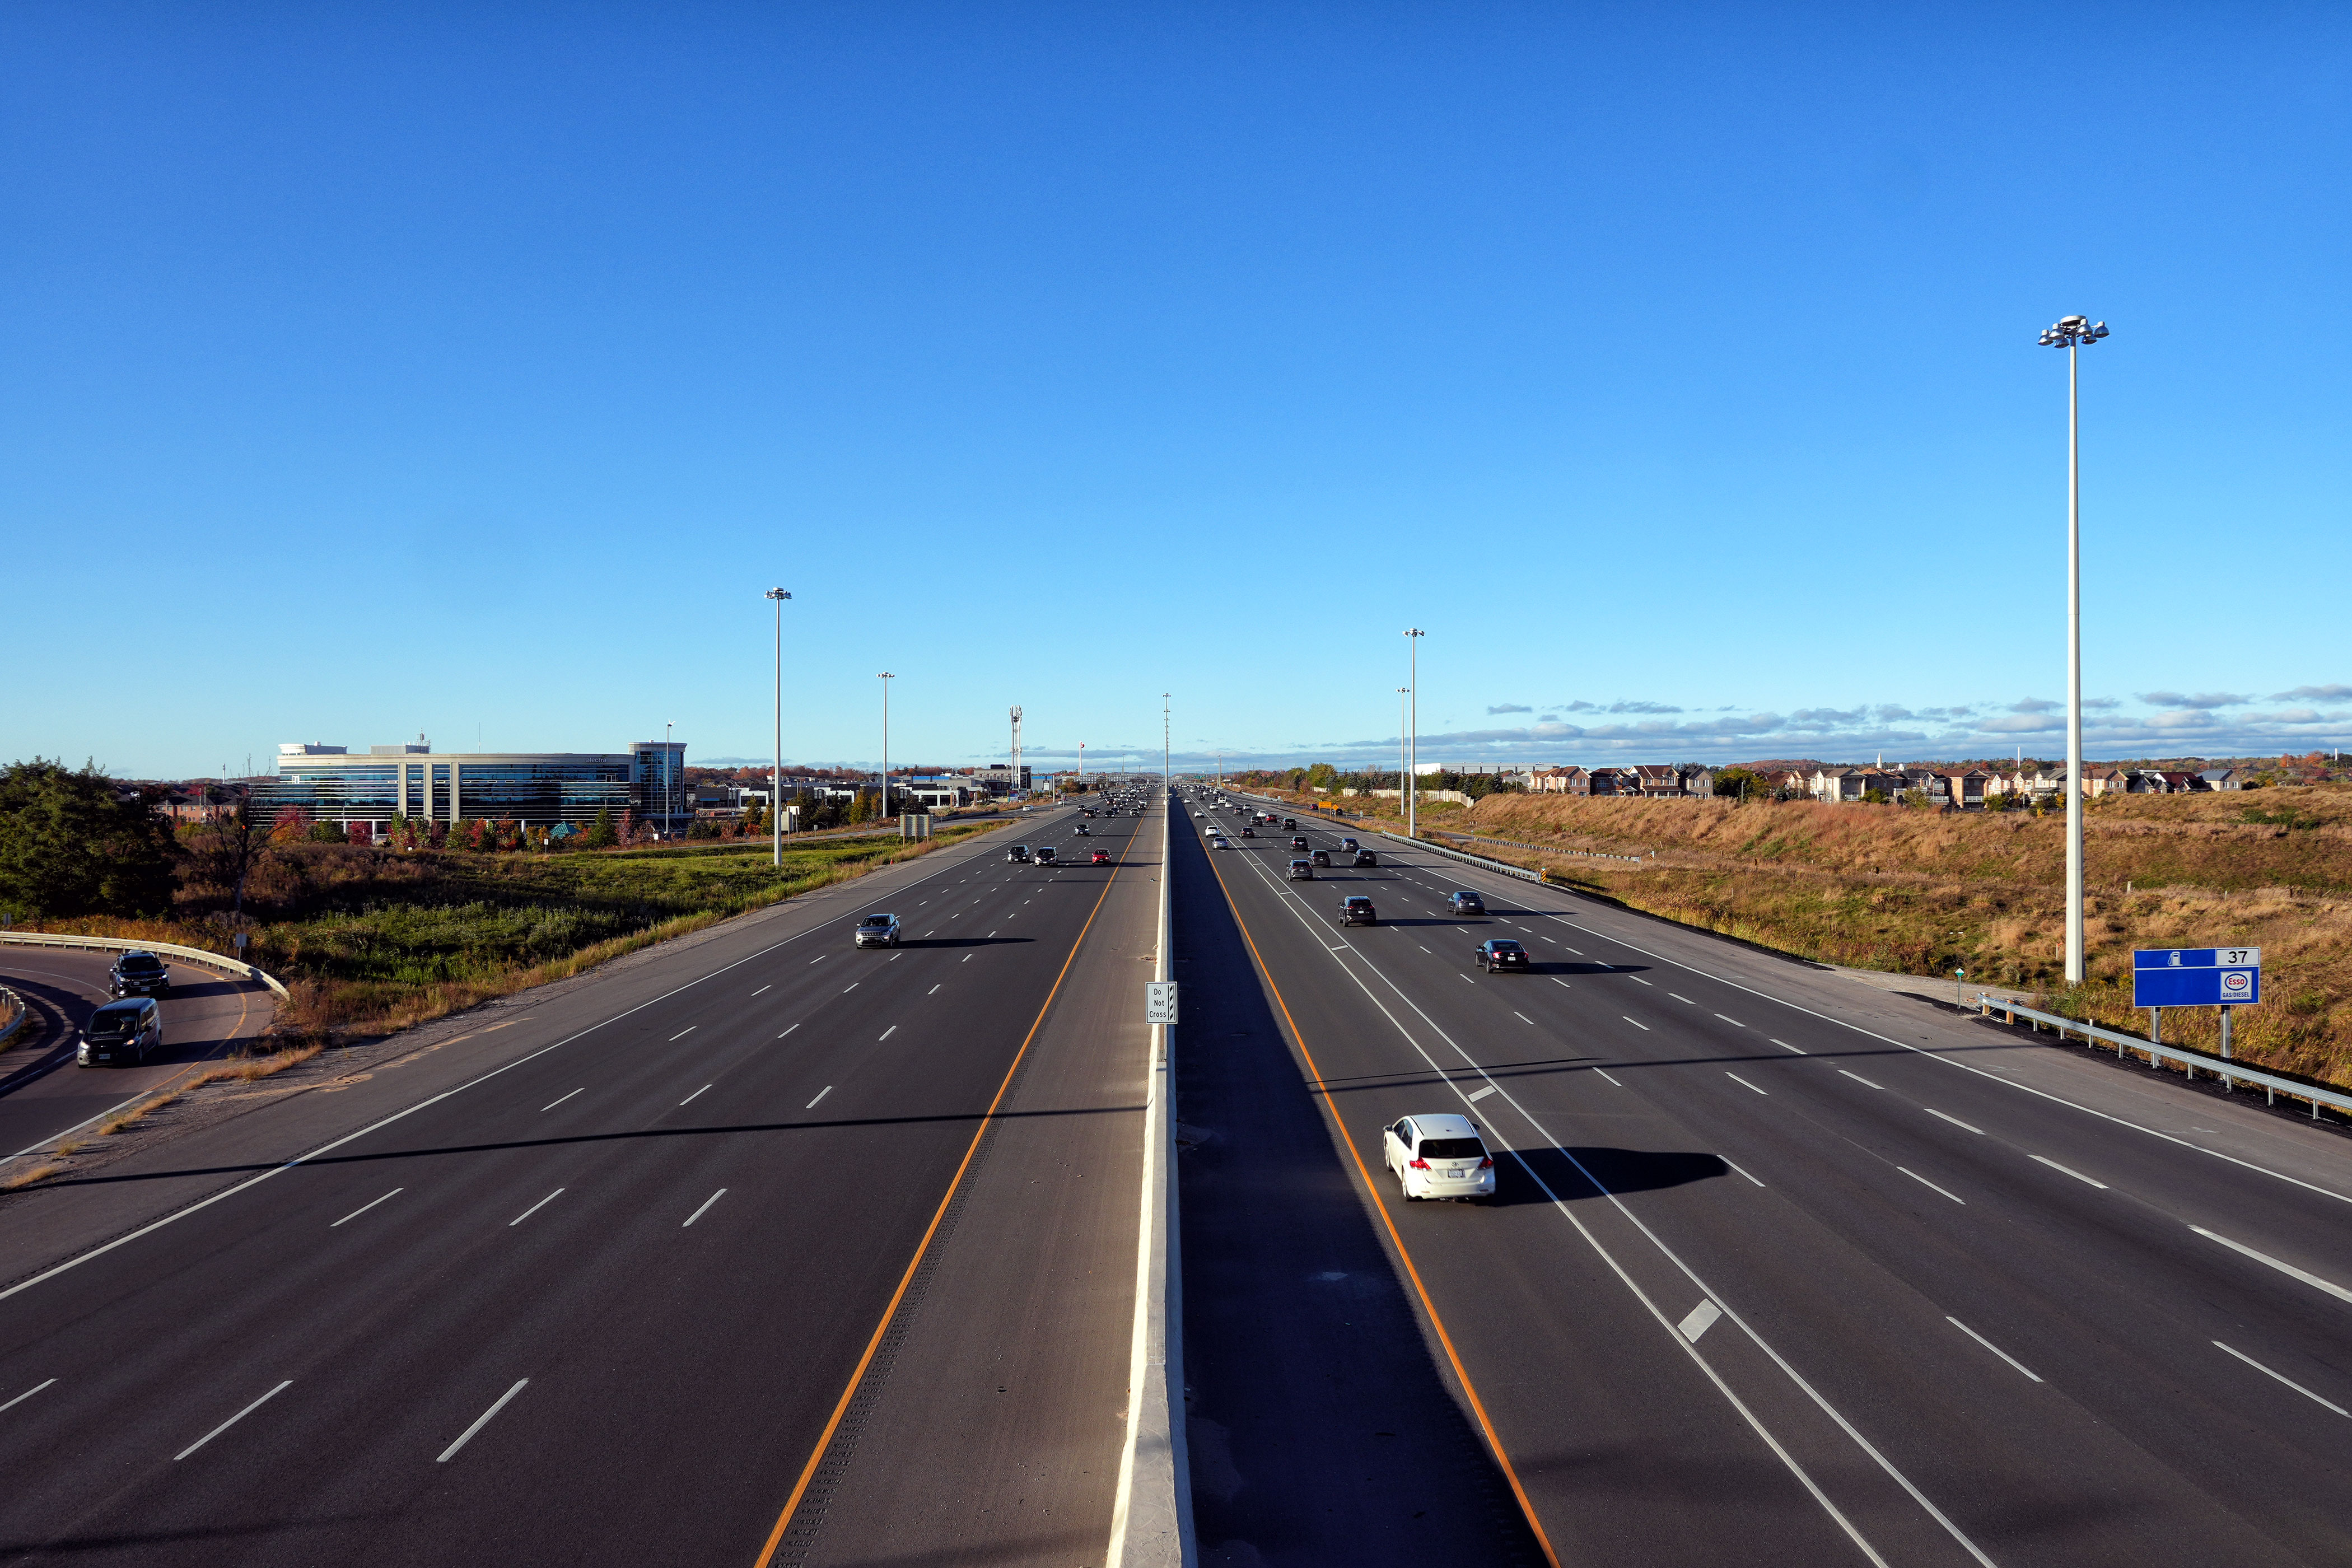
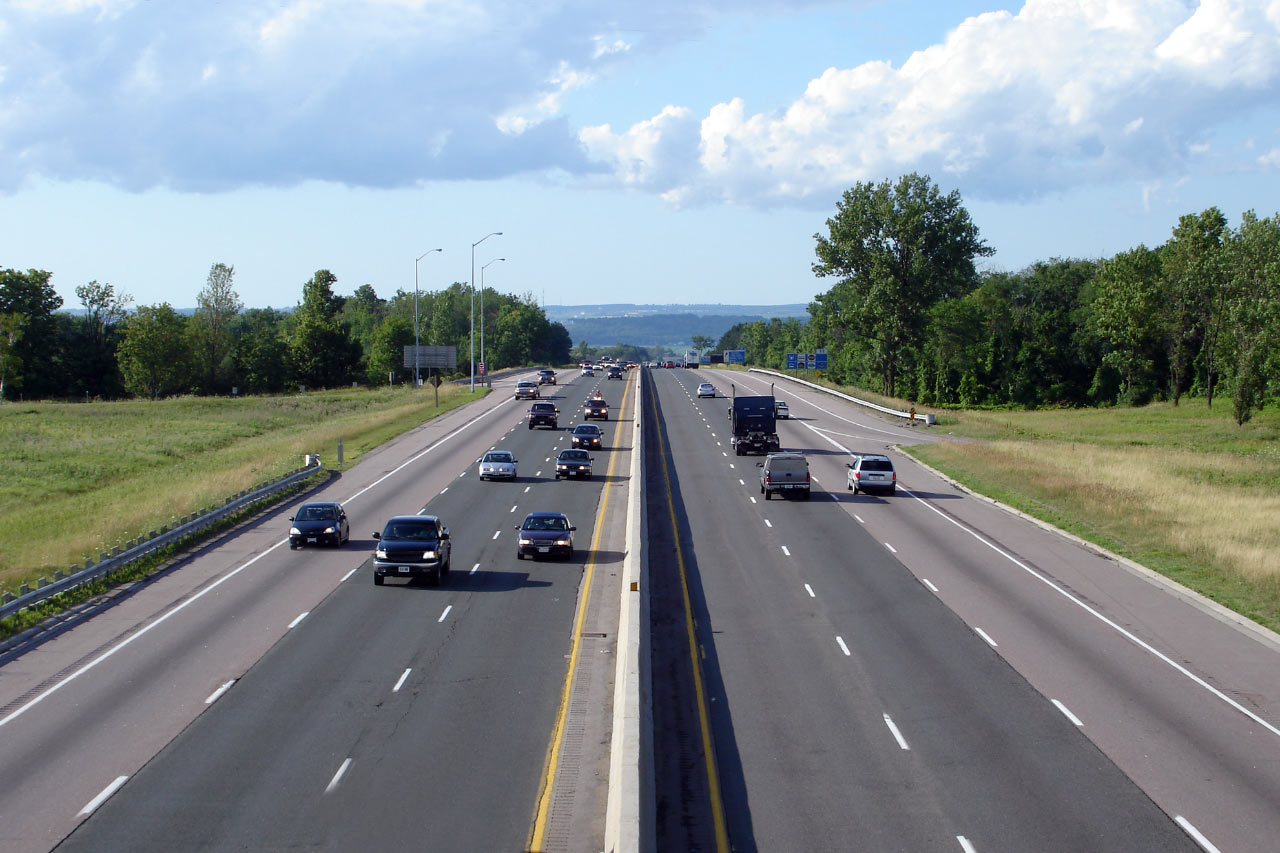
Looking southerly from the Rutherford Road overpass. Highway 400 was
widened to eight lanes in 2001/02 between Langstaff Road and Major Mackenzie
Drive. Photo taken: May 27th, 2006. |
(720x480)
(1440x960) |
| City of Vaughan Regional
Municipality of York |
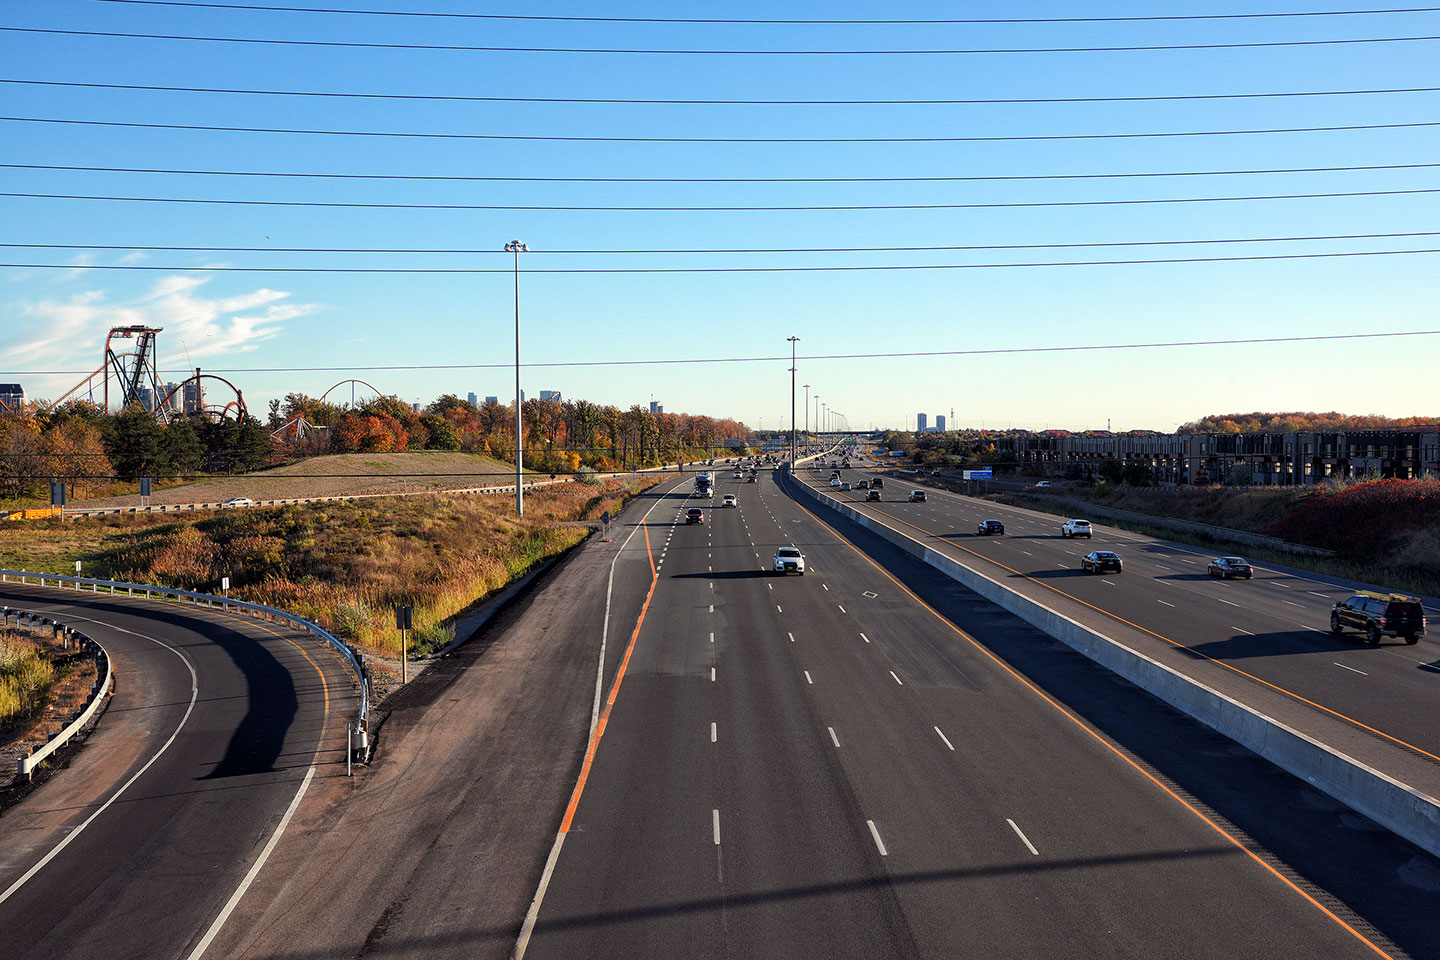
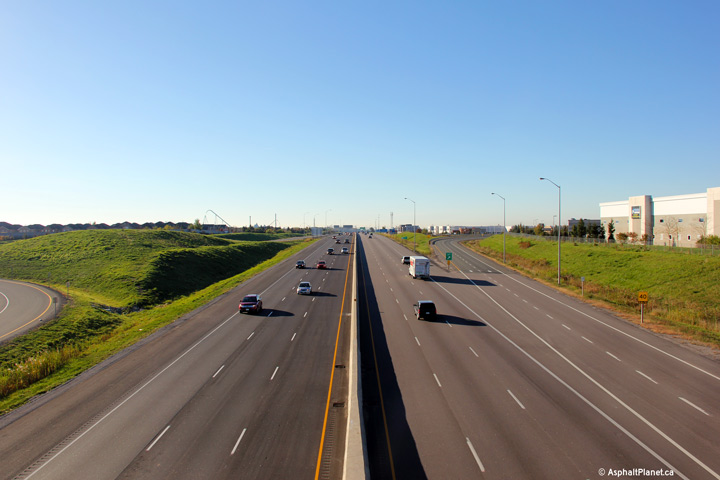
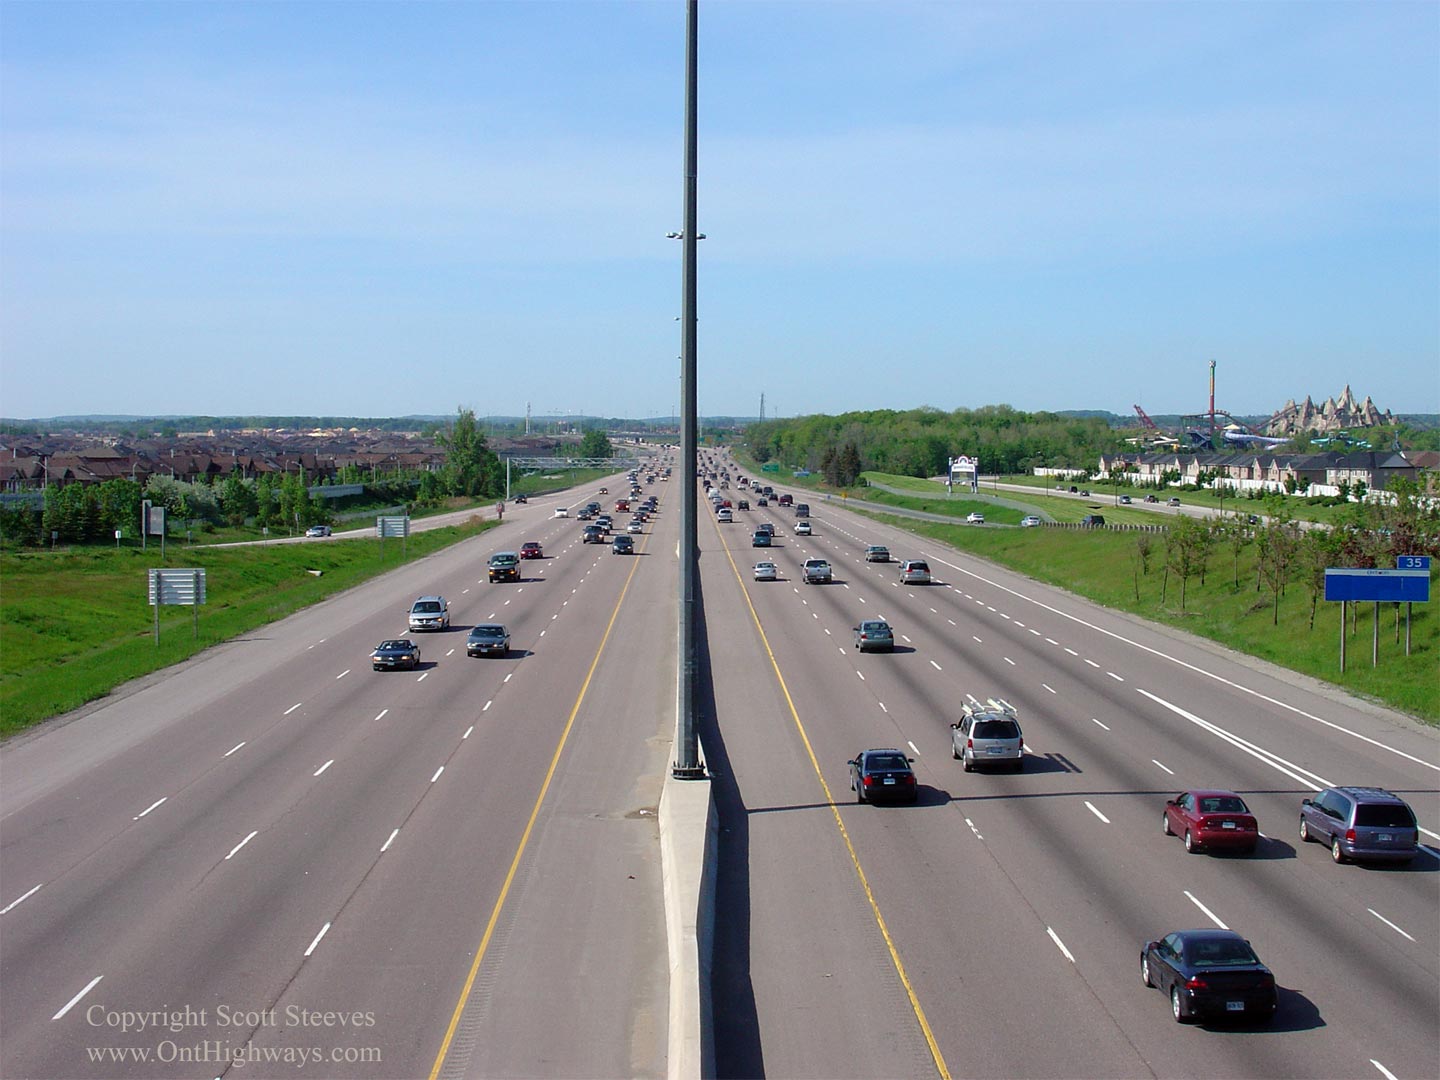
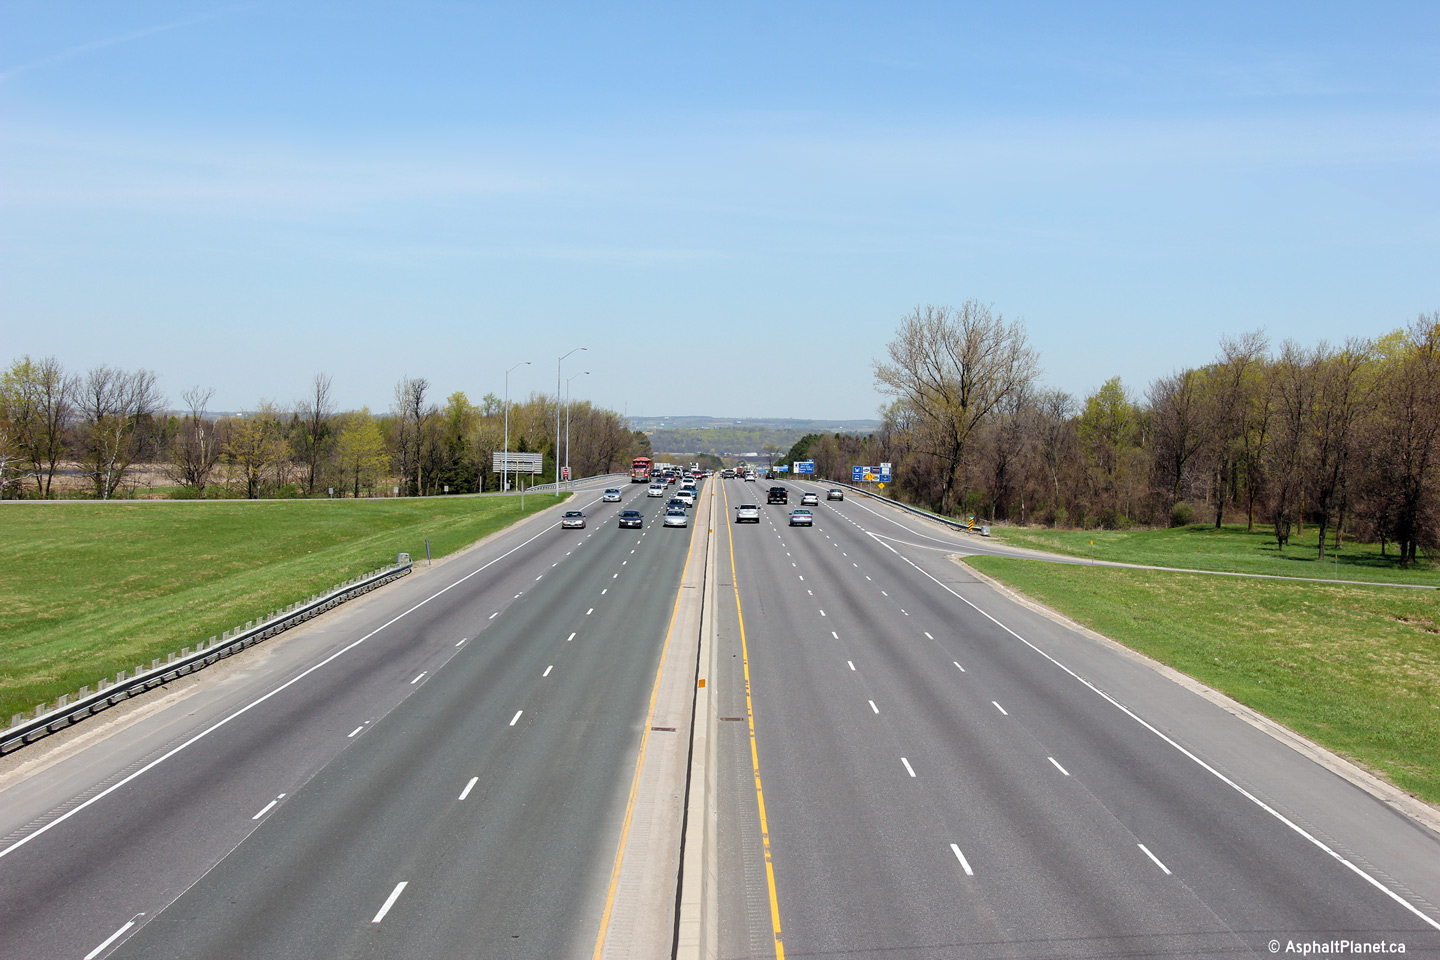
Looking north from Rutherford Road along Highway 400. Canada's
Wonderland is visible on the right side of the highway. Photo taken: May
27th, 2006. |
(720x480)
(1440x960) |
City of Vaughan
Regional Municipality of York |
Southbound exit signage for the Rutherford Road interchange -- signed with a
pre-advanced sign for the Highway 7 interchange. Neither Bass Pro
Mills Road nor Langstaff Road are accessible from the southbound lanes of
Highway 400. Click here for an earlier incarnation of this signage,
taken in July, 2010.
Photo taken: June 1st, 2014. |
 (720x480) (720x480)
(1440x960)
(2400x1600) |
City of Vaughan
Regional Municipality of York |
Southbound advanced signage for the Rutherford Road interchange.
Photo taken: June 1st, 2014. |
 (720x480) (720x480)
(1440x960)
(2400x1600) |
| City of Vaughan Regional
Municipality of York |
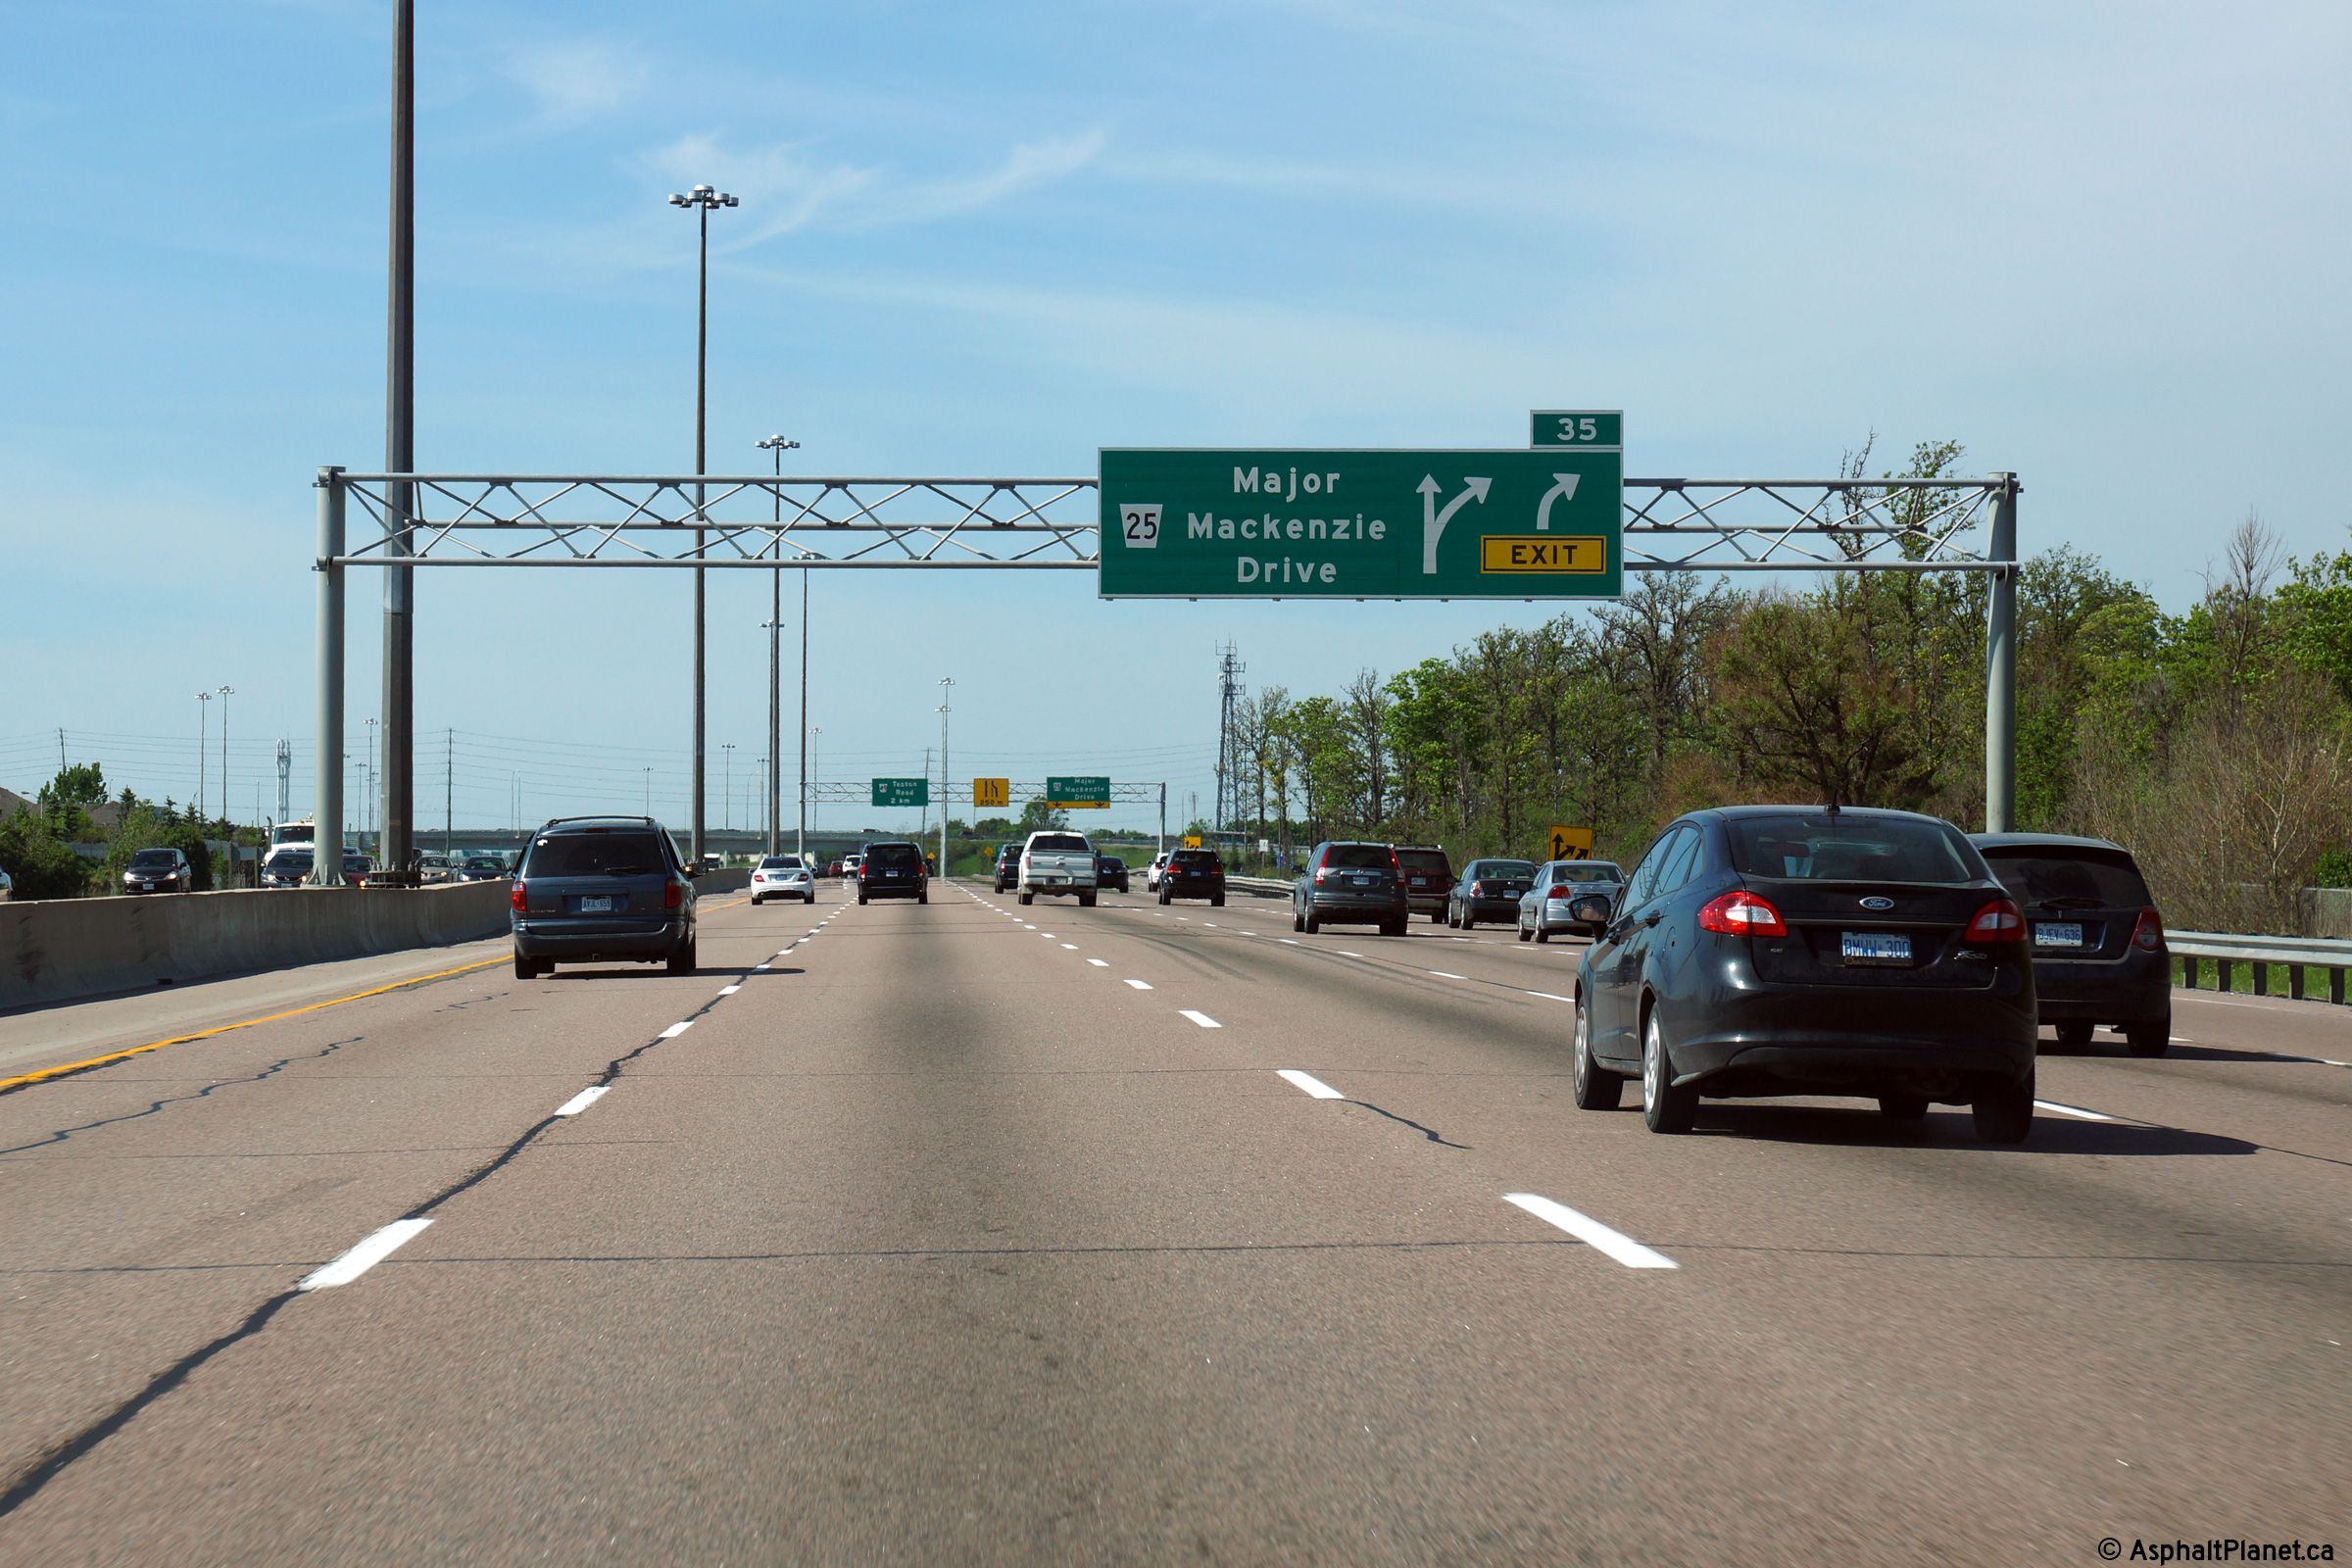
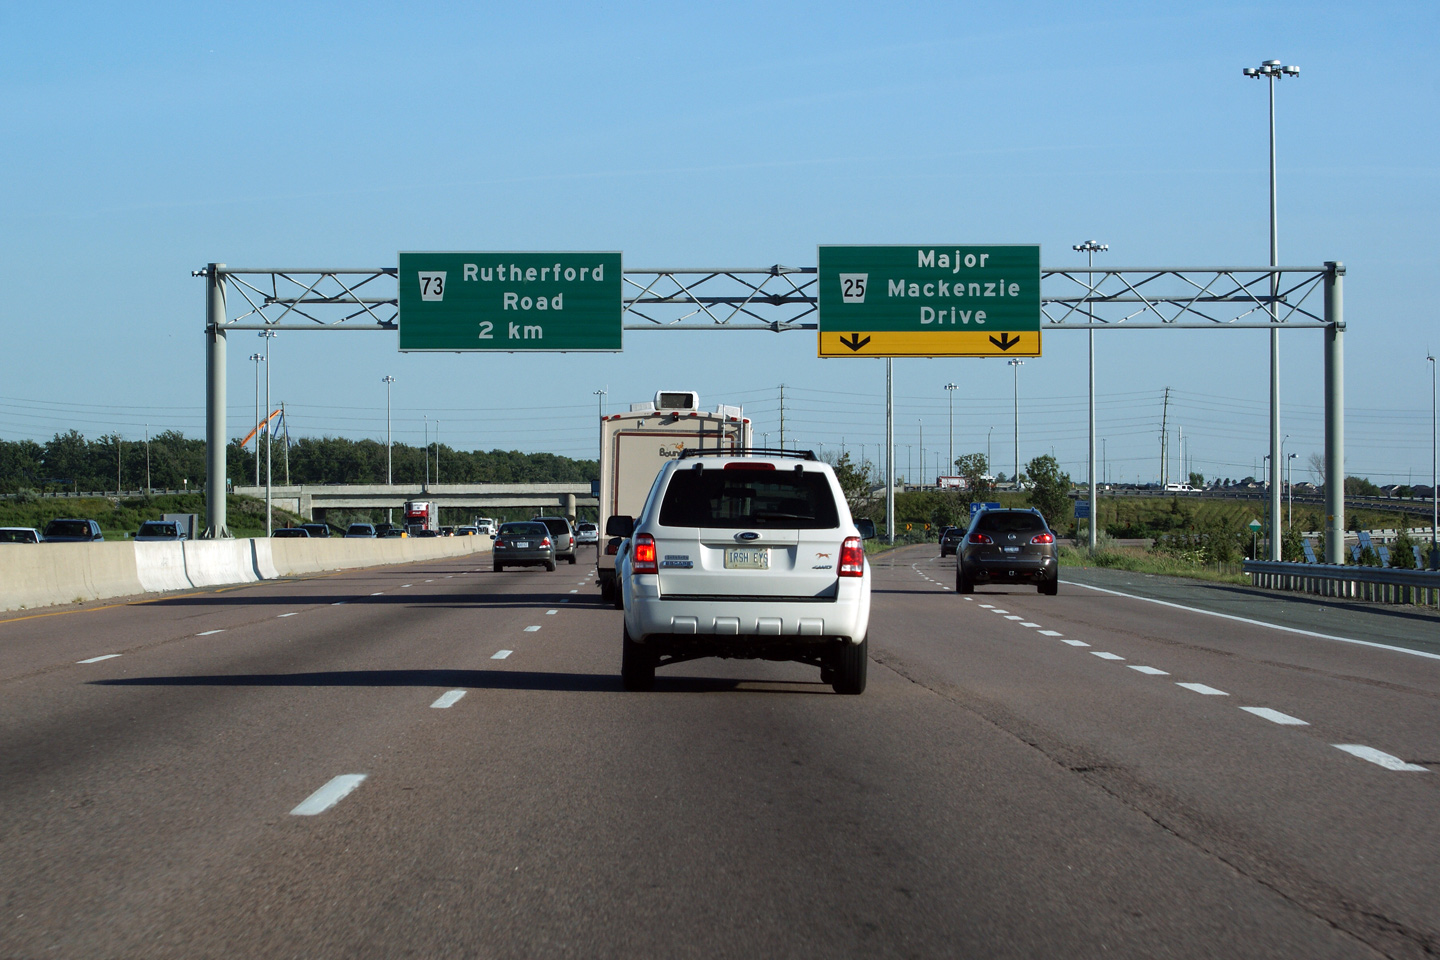
Northbound advanced signage approaching the Major Mackenzie Drive
interchange.
Photo taken: May 31st, 2014. |
 (720x480) (720x480)
(1440x960)
(2400x1600) |
| City of Vaughan Regional
Municipality of York |
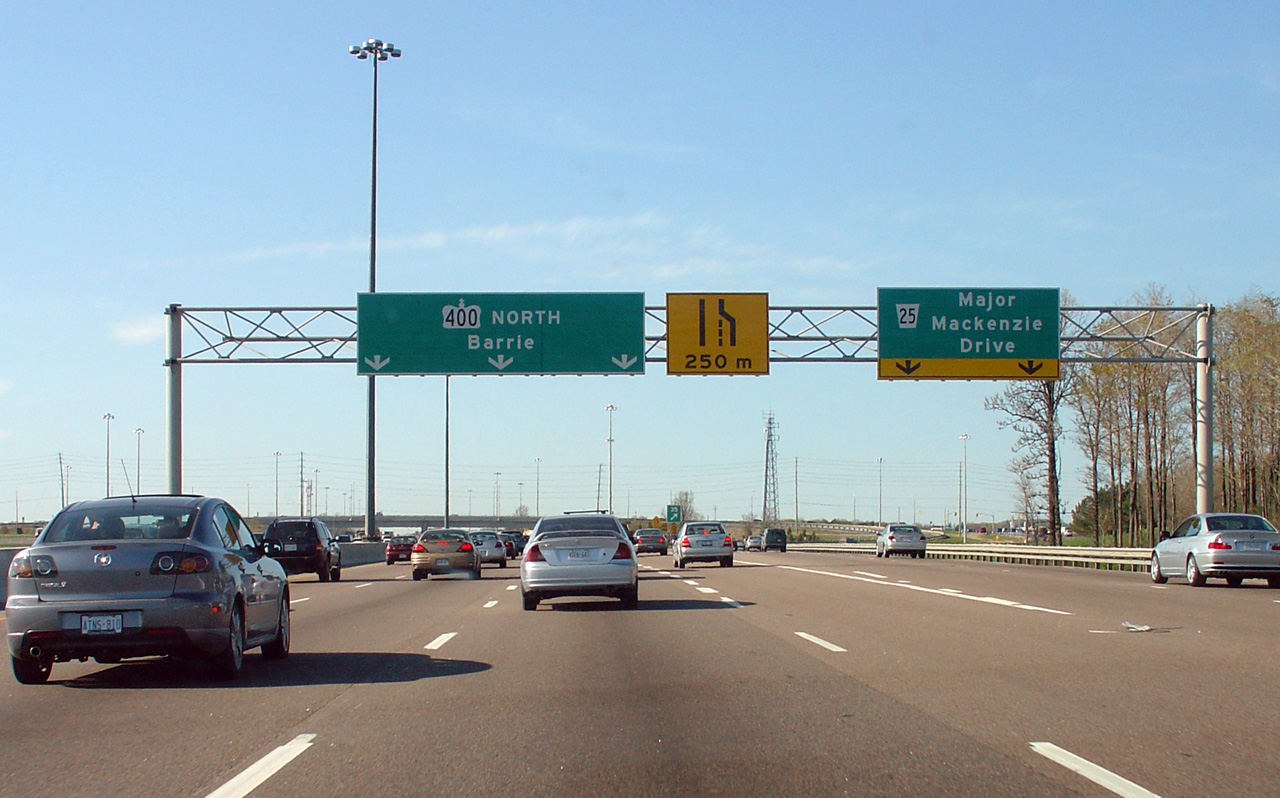
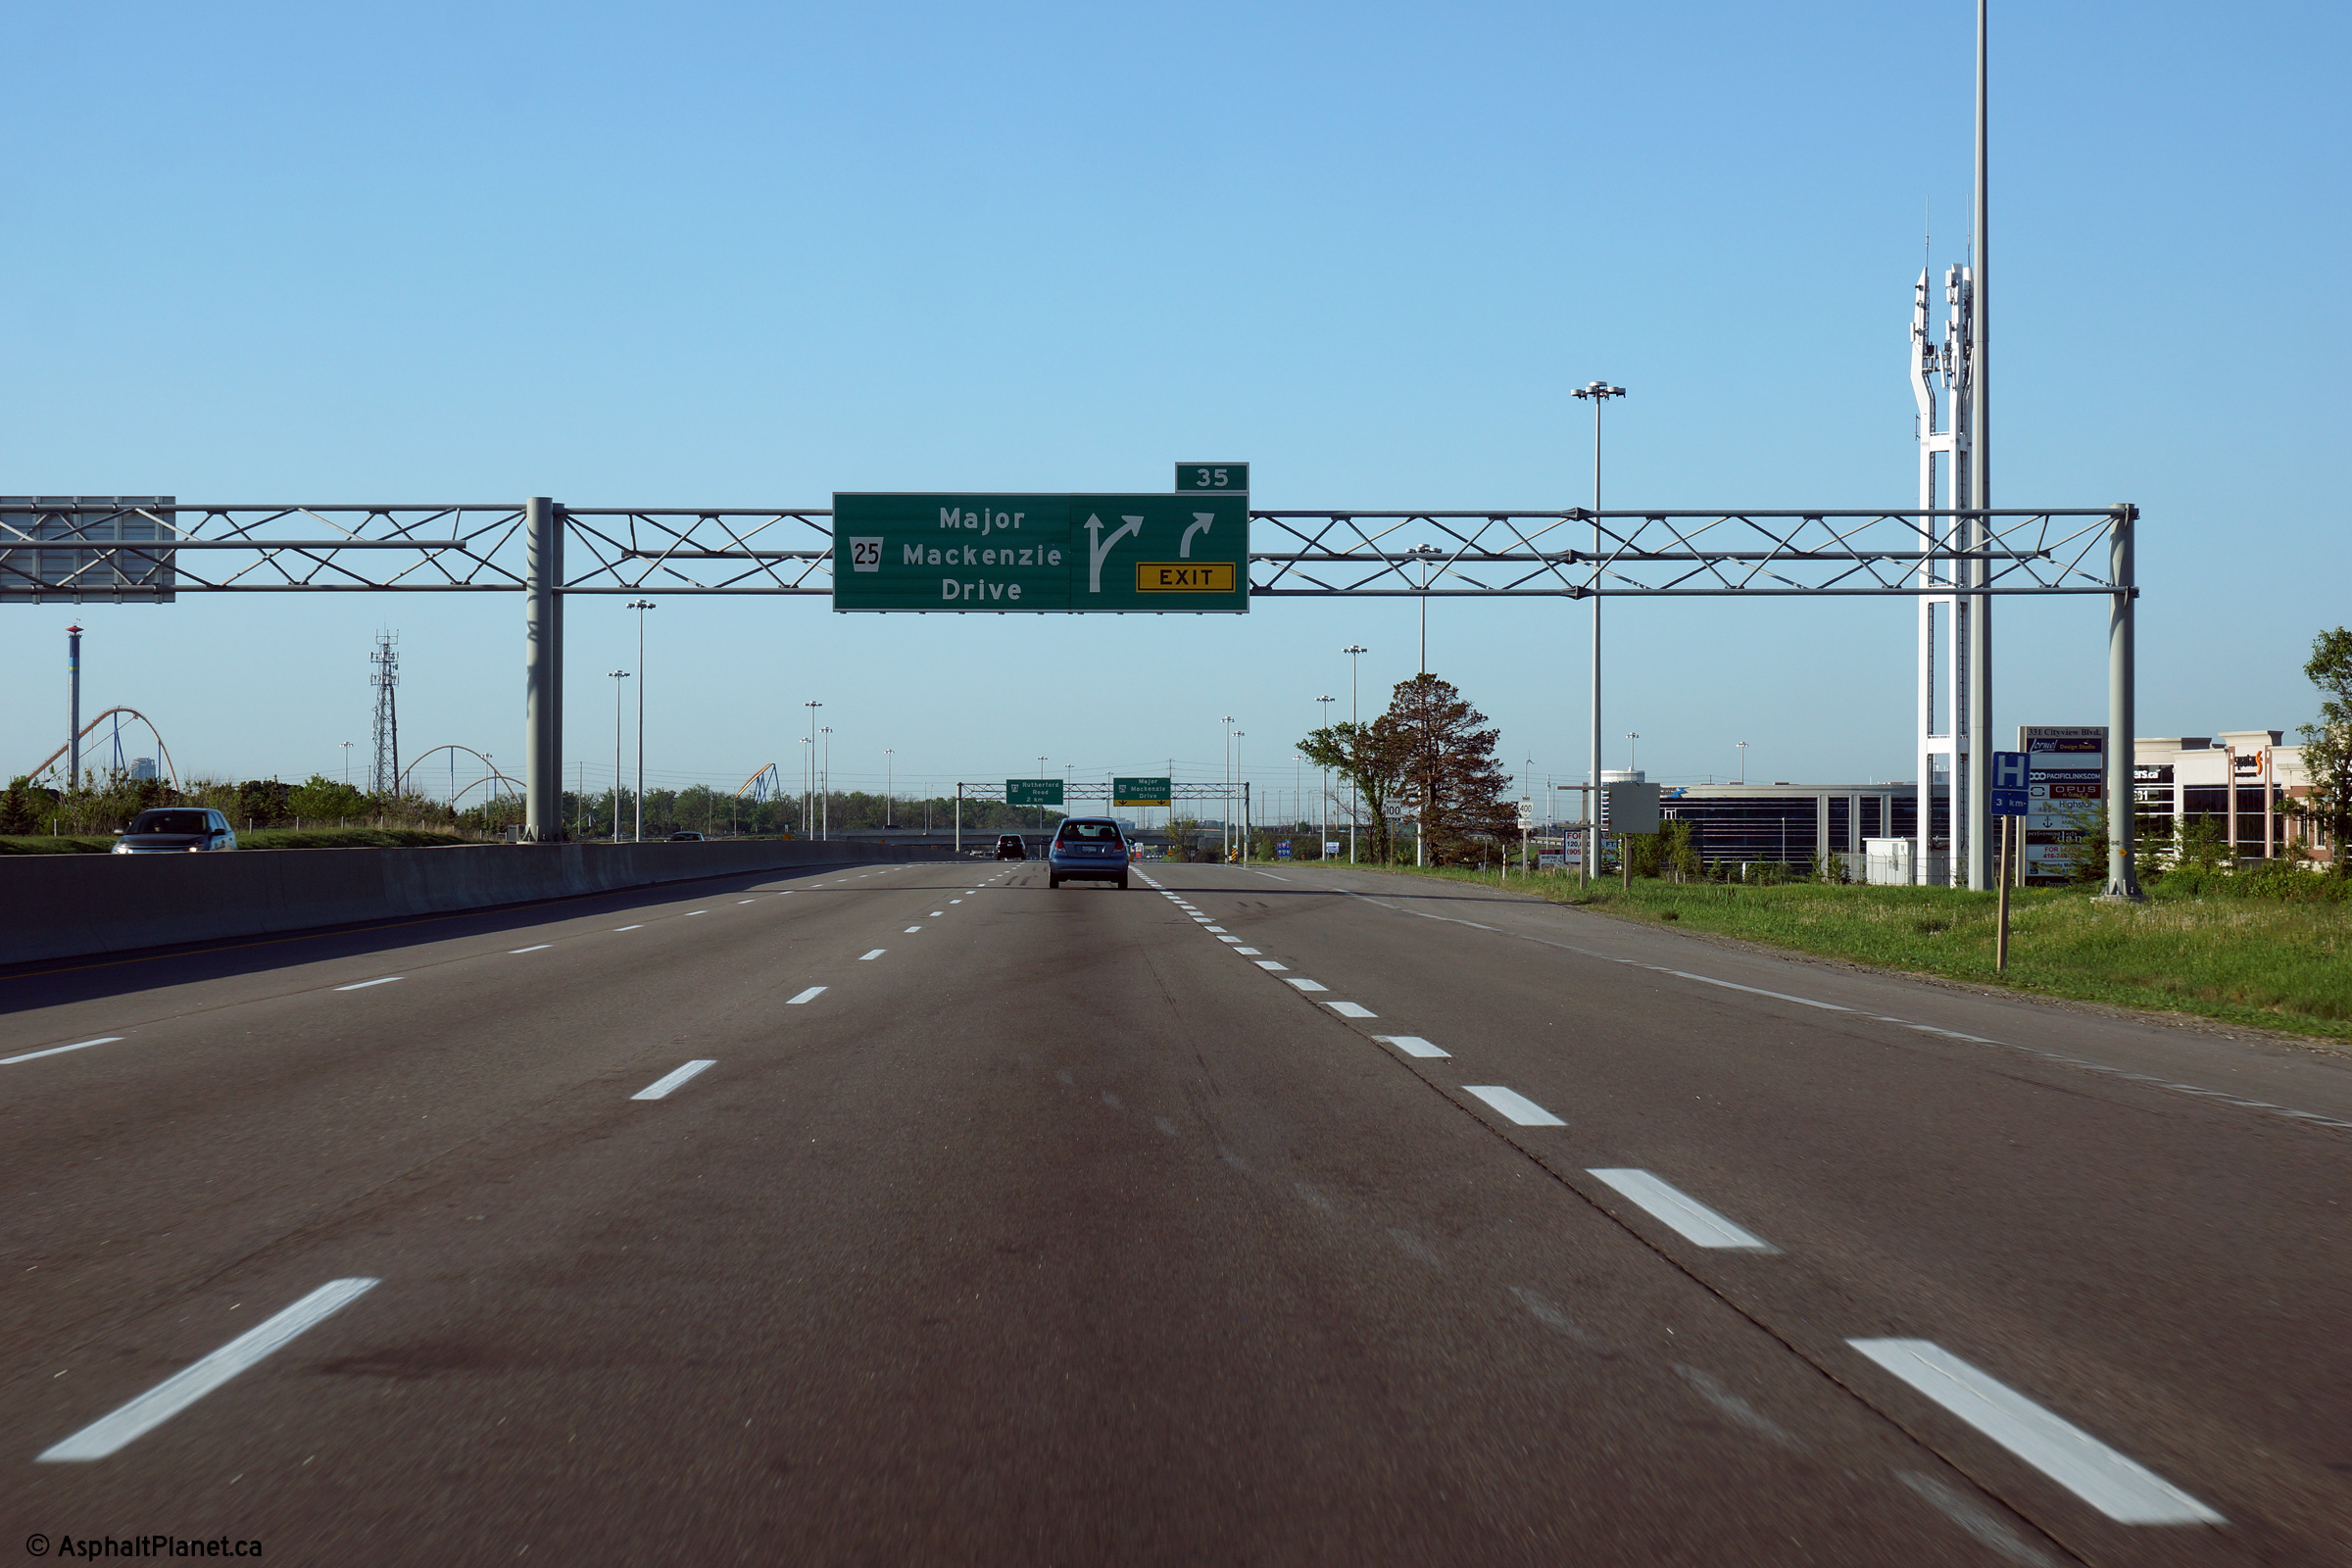
Northbound signage for the ramp to Major Mackenzie Drive.
Click here for an additional
photo of this signage, taken in May, 2005, prior to the completion of the
Teston Road interchange.
Photo taken: May 31st, 2014. |
 (720x480) (720x480)
(1440x960)
(2400x1600) |
| City of Vaughan Regional
Municipality of York |
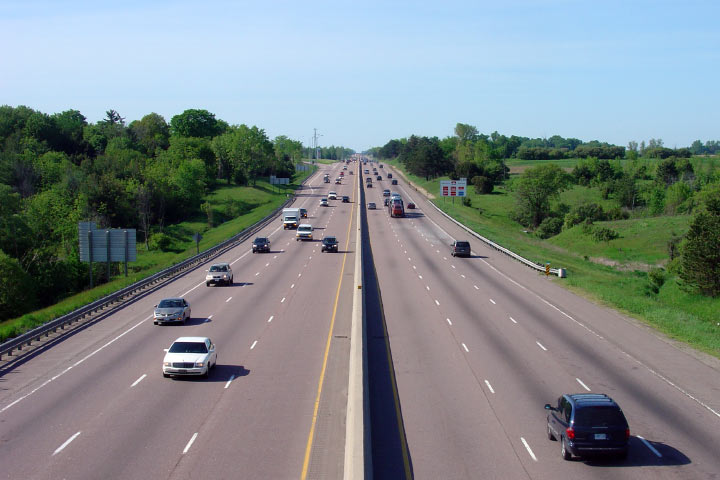
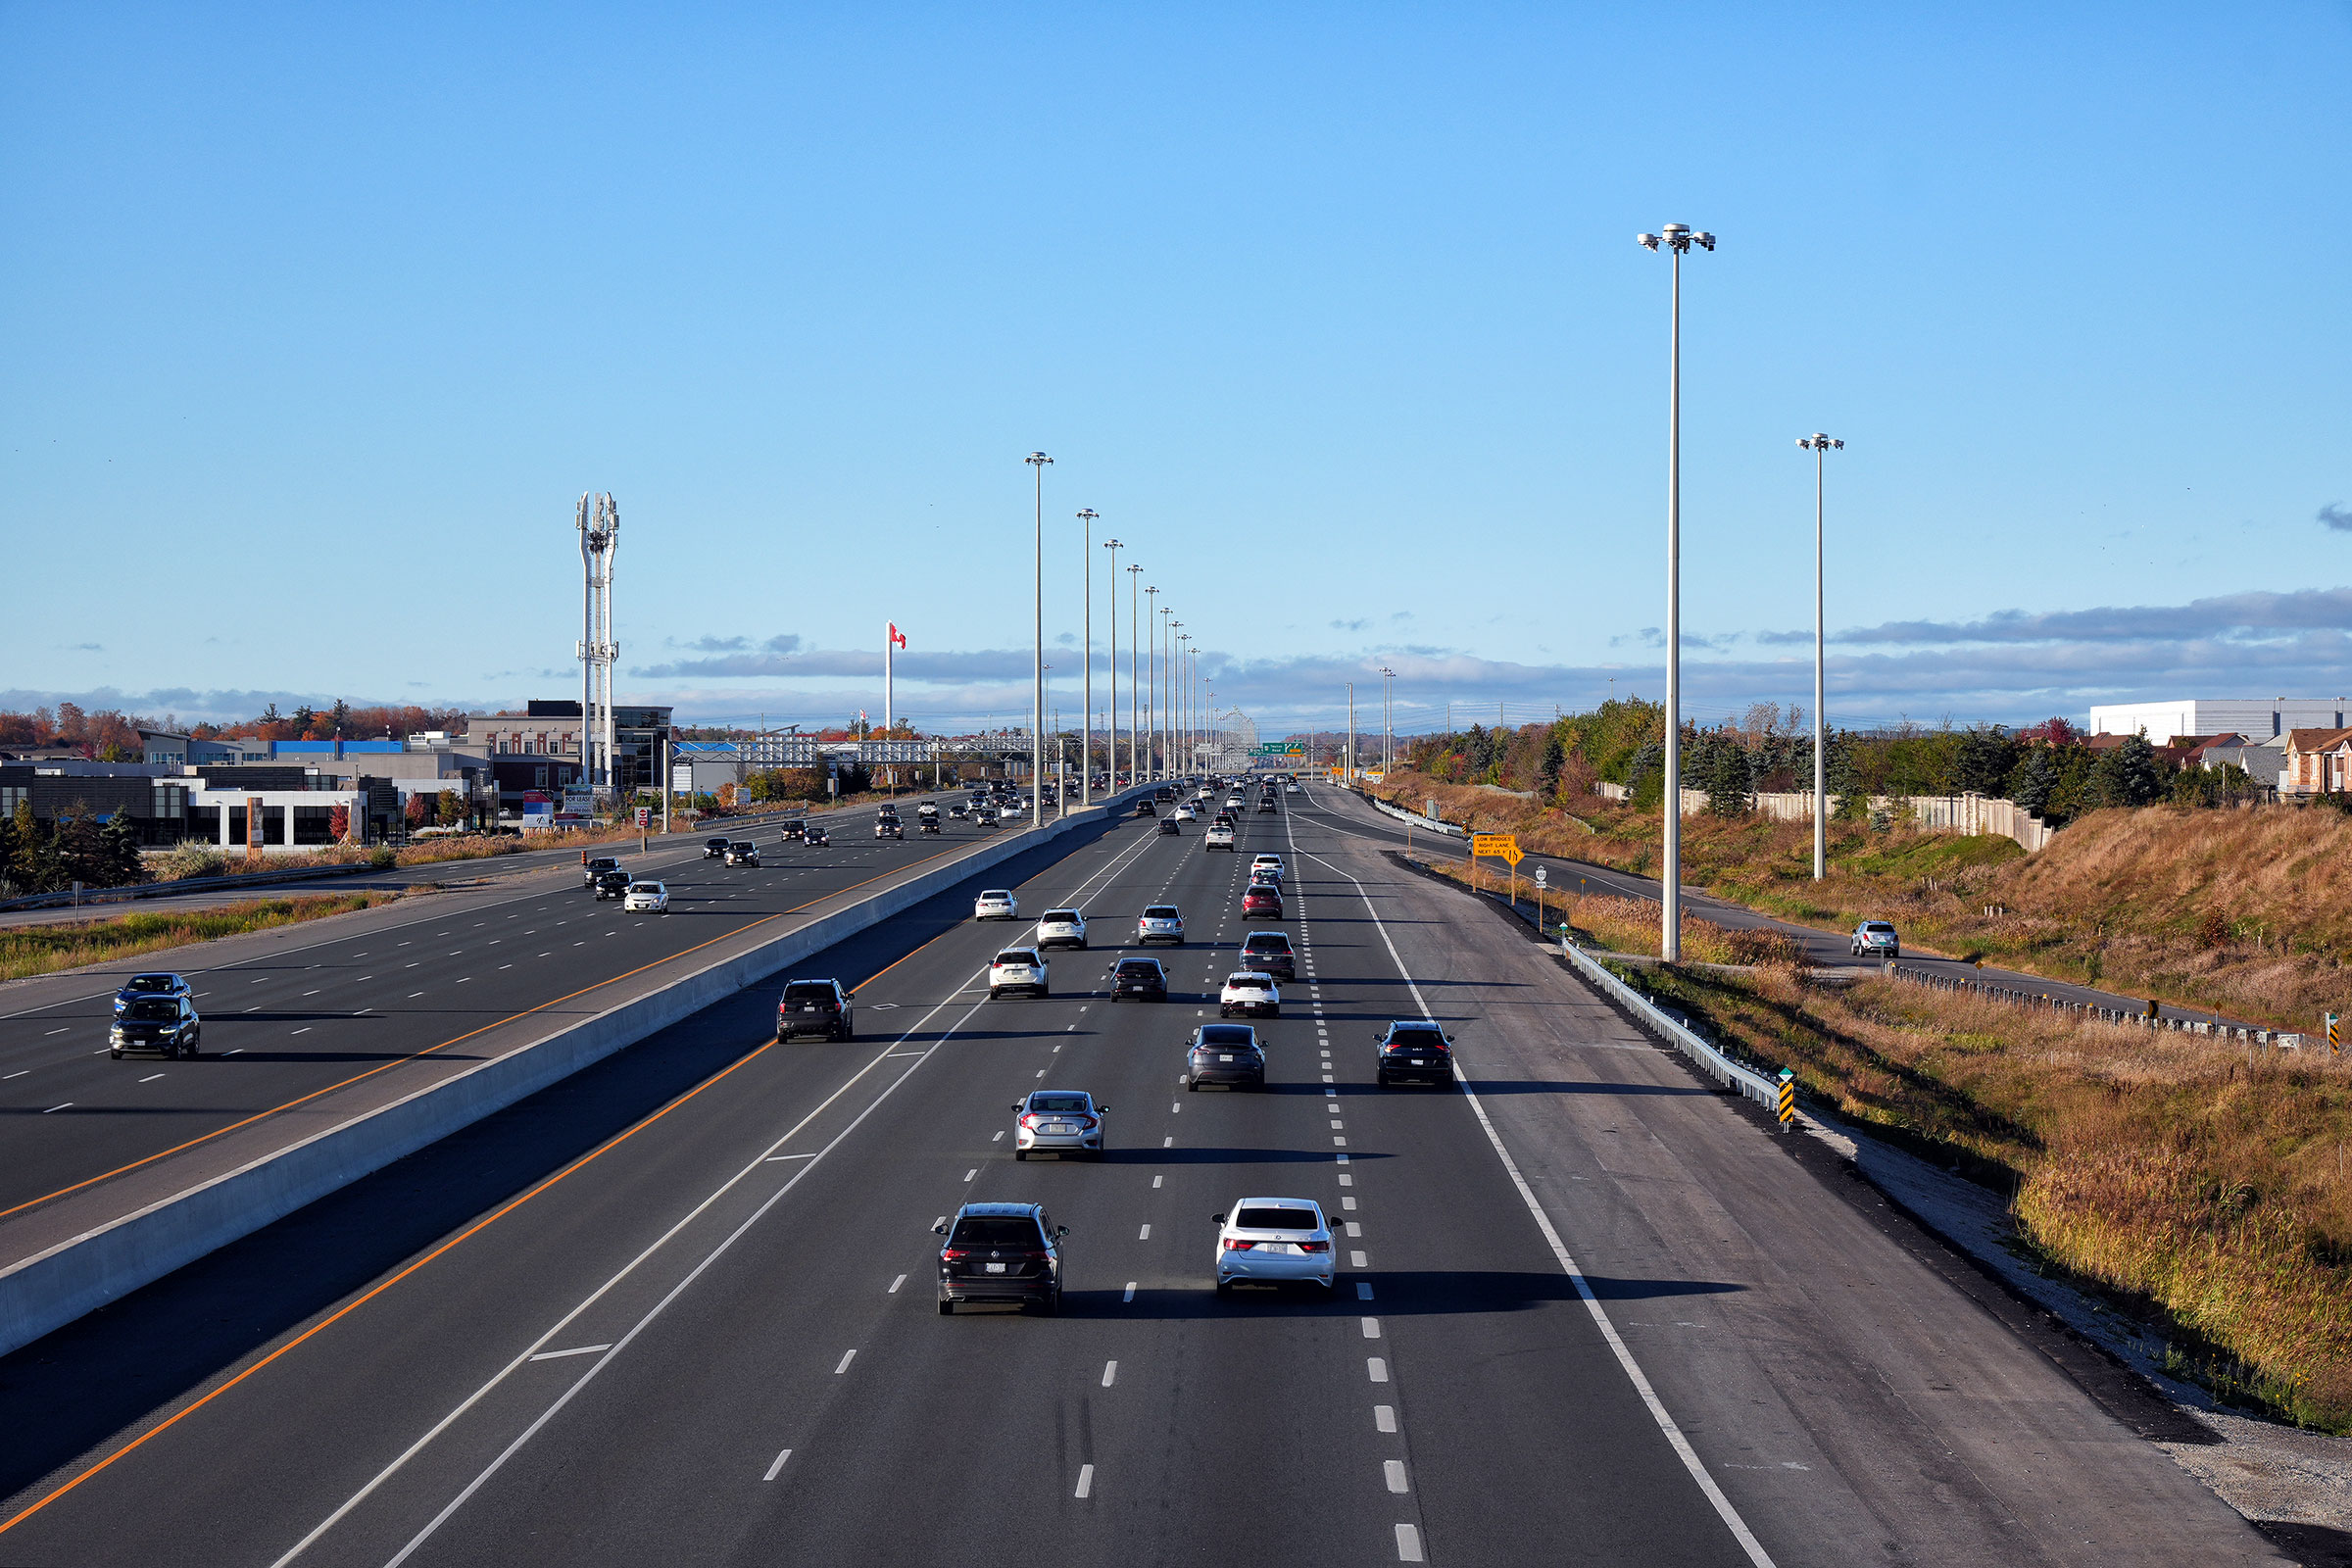
Looking south from the Major Mackenzie Drive overpass. Completed in
2021, a new HOV lane starts and ends at the Major Mackenzie Drive
interchange.
Upper photo taken: May 27th, 2006. Lower photos taken: October 22nd, 2023. |

(1440x960)
(2400x1600)
(4200x2800)

(1440x960)
(2400x1600)
(4200x2800)
|
| City of Vaughan Regional
Municipality of York |
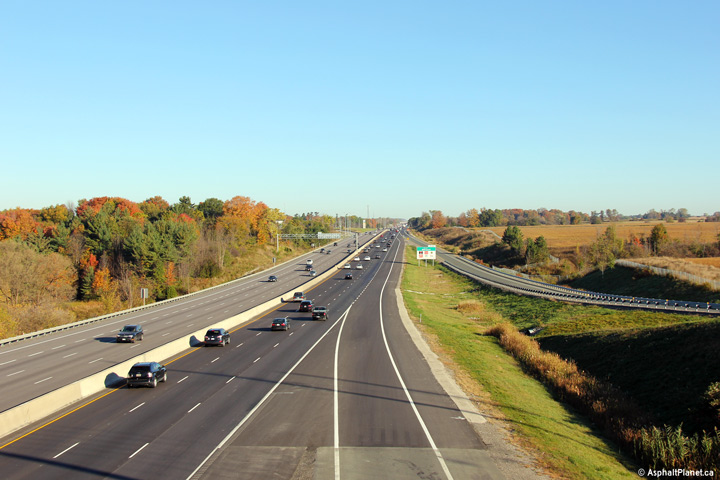
Opposing view from the Major Mackenzie Drive overpass. Take notice of
the new homes being constructed to the left of Highway 400. Urban
Vaughan is extending northerly at an astounding rate.
Upper photo taken: May 27th, 2006. Lower photos taken: October 22nd, 2023. |
(1440x960)
(2400x1600)
(4200x2800)
(1440x960)
(2400x1600)
(4200x2800)
(1440x960)
(2400x1600)
(4200x2800)
|
| City of Vaughan Regional
Municipality of York |
Southbound signage at the ramp to Major Mackenzie Drive. Major Addison
Alexander Mackenzie was a veteran of the first Great War, who later served
as a member of the Village of Woodbridge Council, and as the Member of
Provincial Parliament for electoral district of York North. Click
here for an earlier incarnation of this signage,
taken in July, 2010.
Photo taken: June 1st, 2014. |
 (720x480) (720x480)
(1440x960)
(2400x1600) |
| City of Vaughan Regional
Municipality of York |
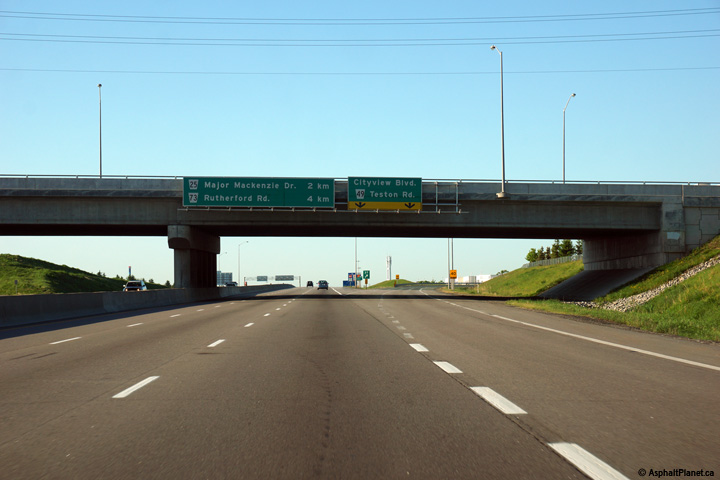
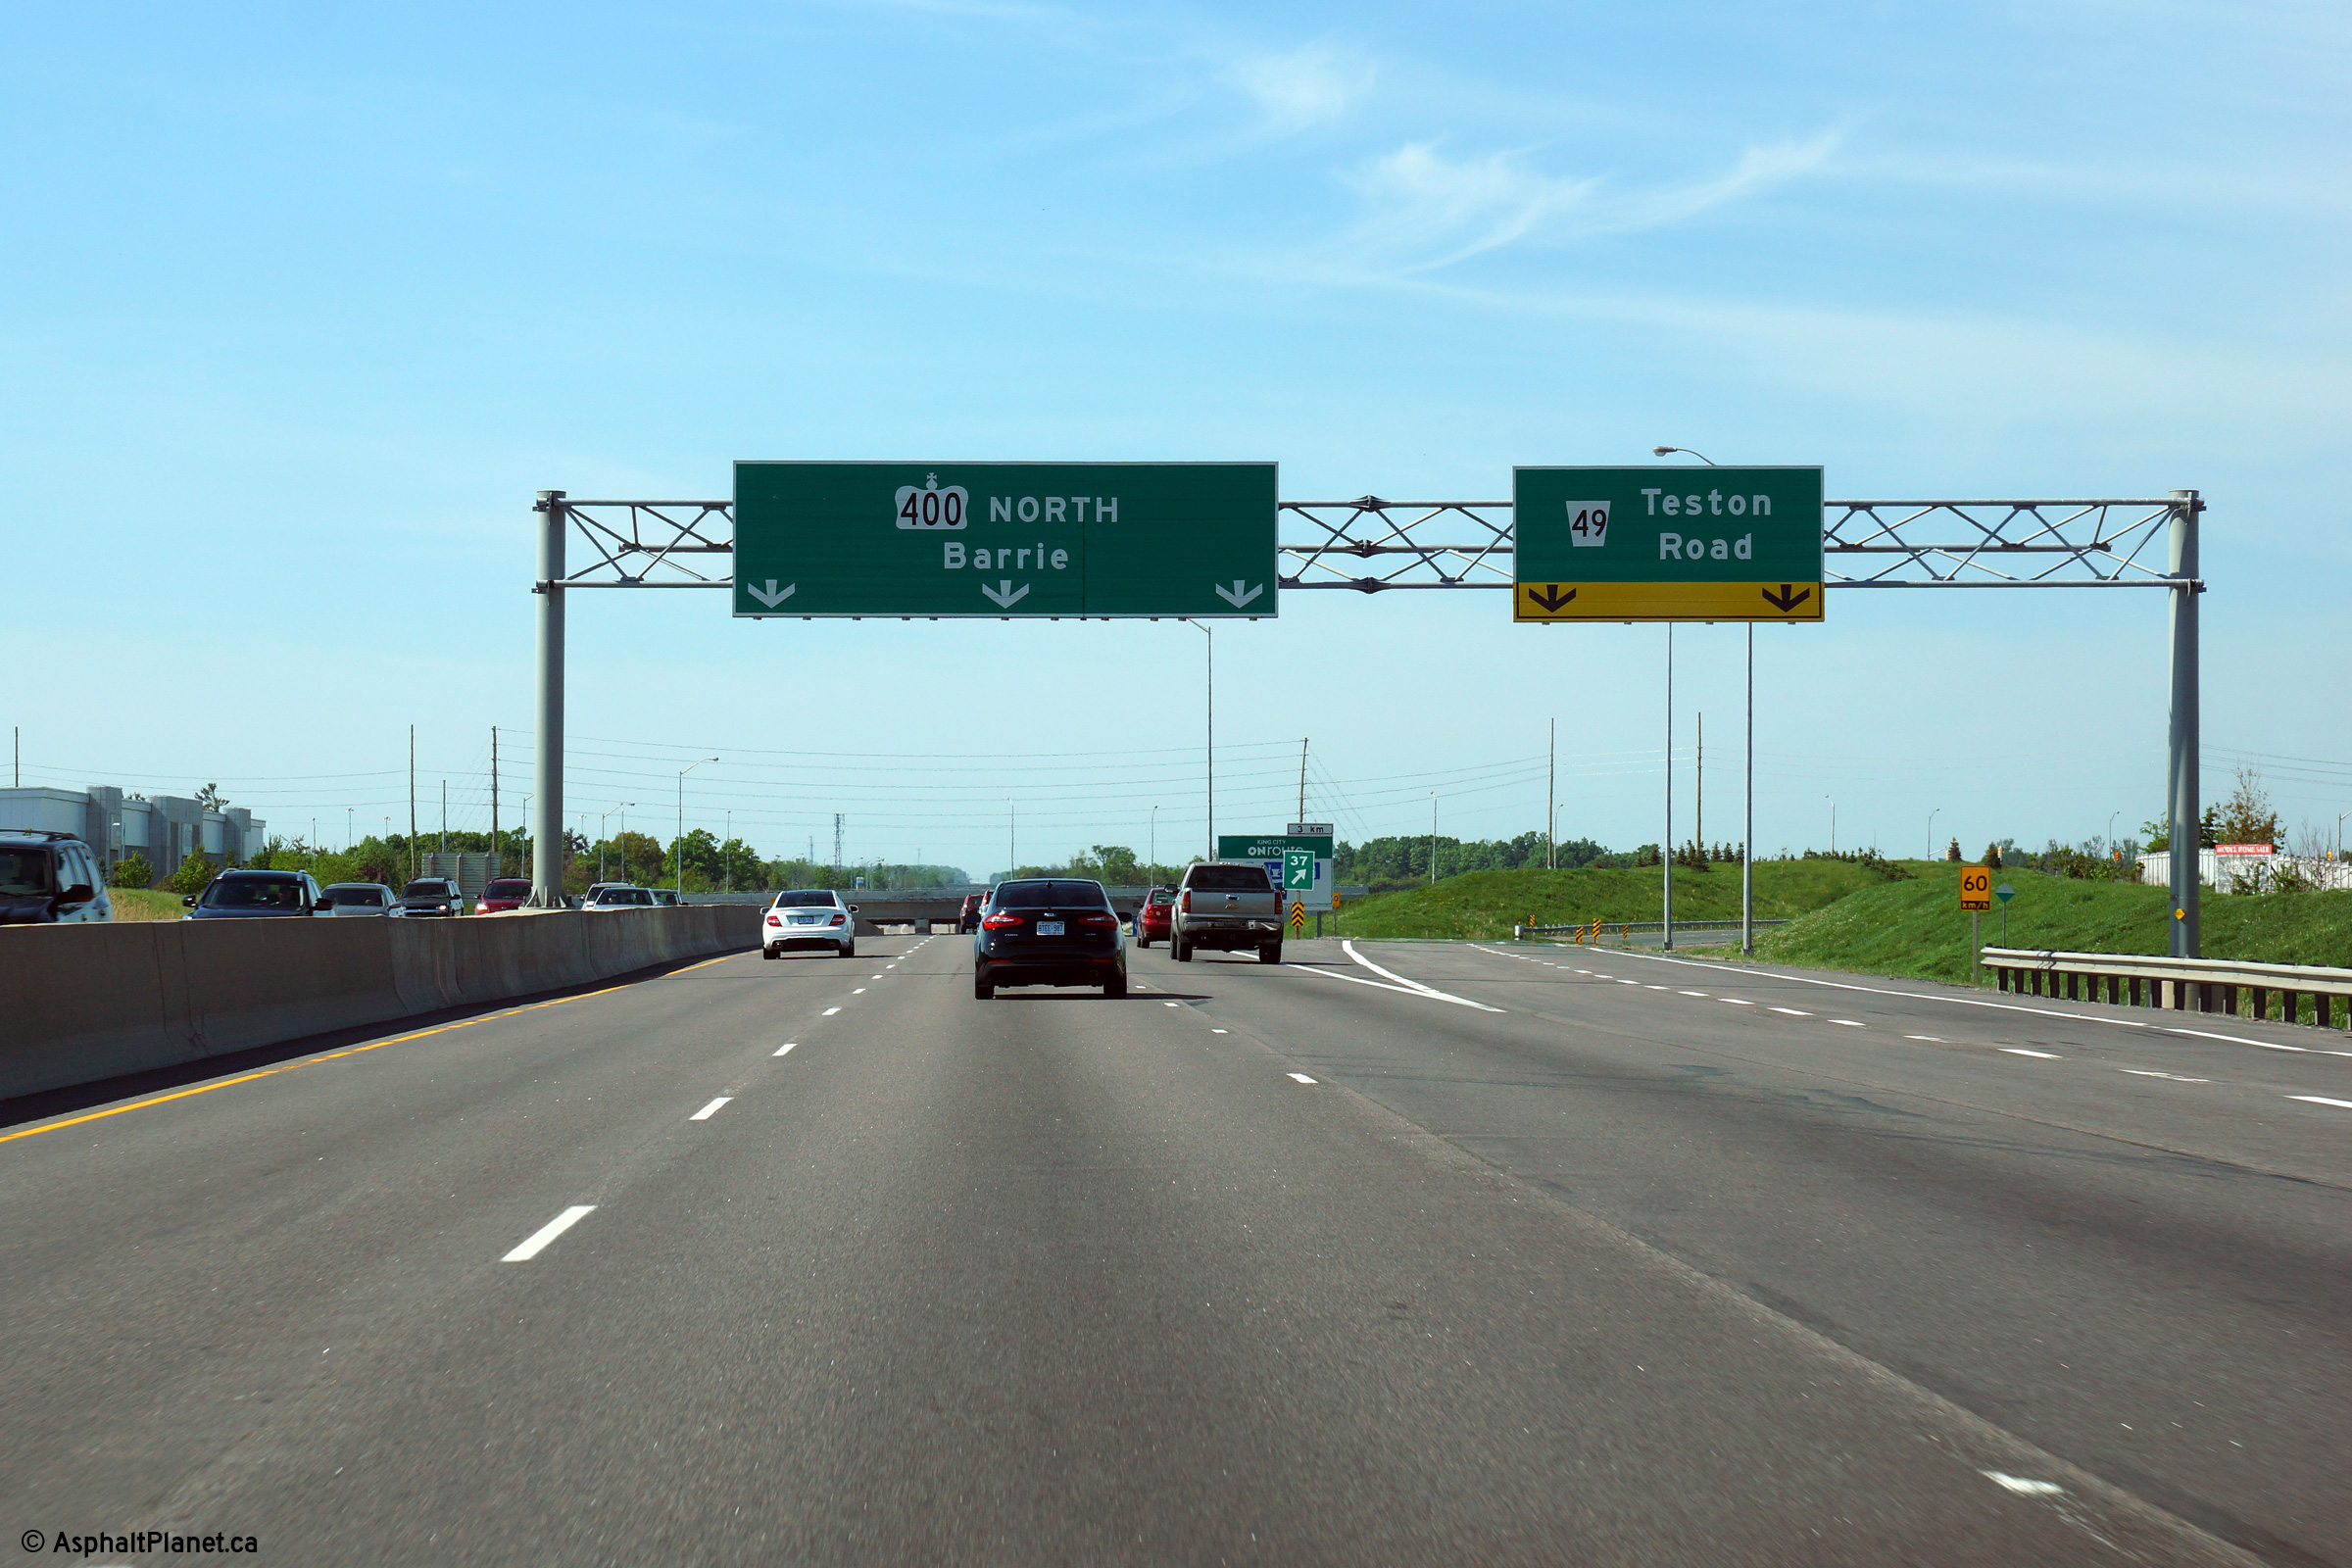
Southbound advanced signage for Major Mackenzie Drive from the Teston Road
on-ramp. Click here for an earlier incarnation of this signage,
taken in July, 2010.
Photo taken: June 1st, 2014. |
 (720x480) (720x480)
(1440x960)
(2400x1600) |
| City of Vaughan Regional
Municipality of York |
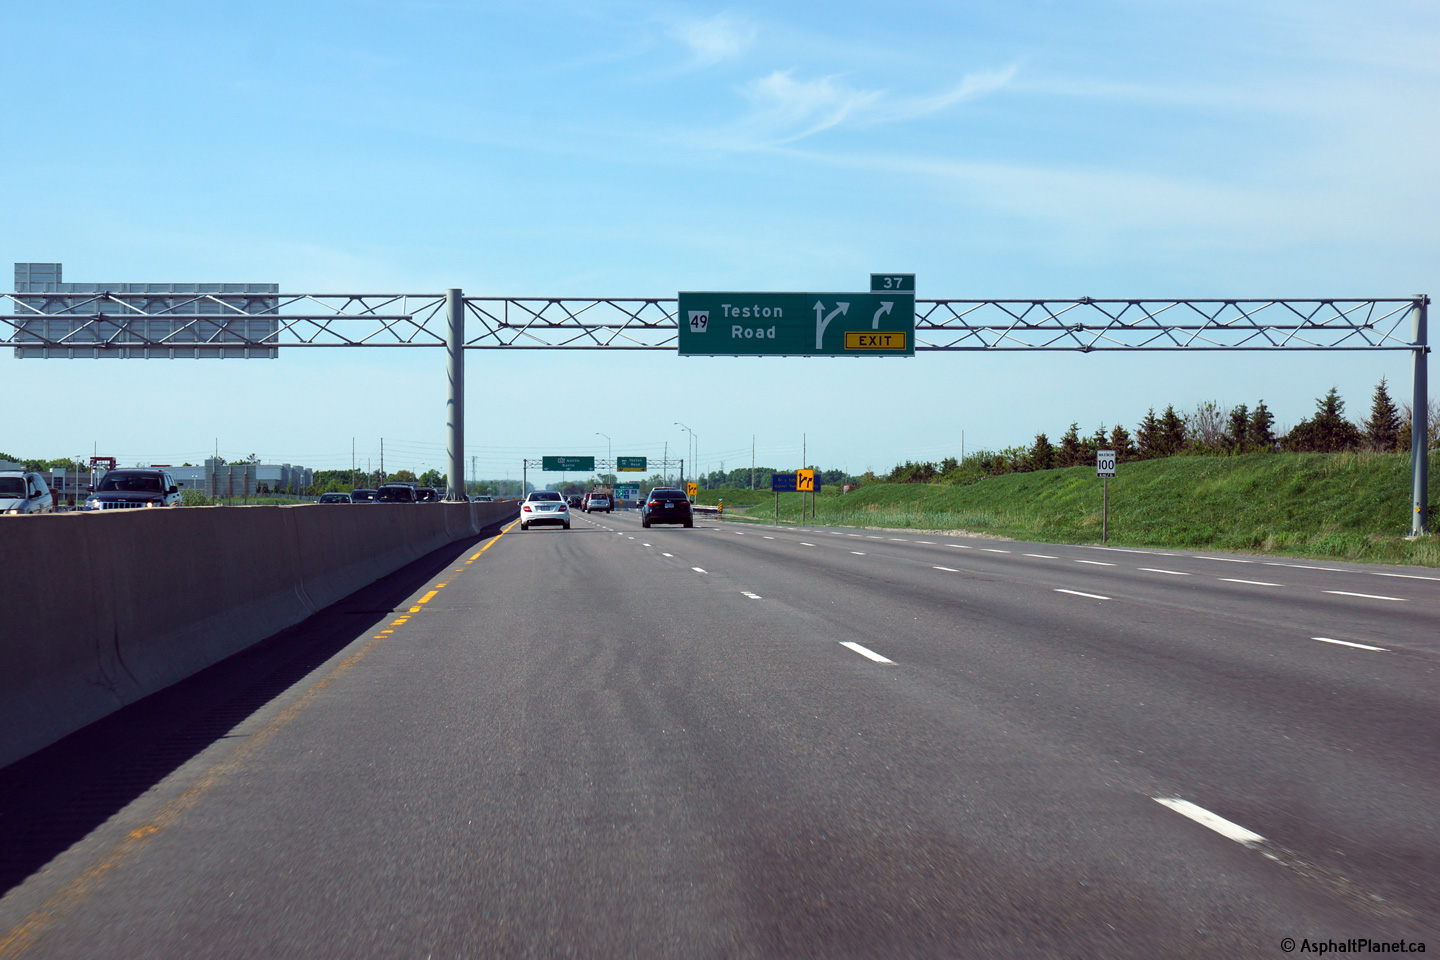
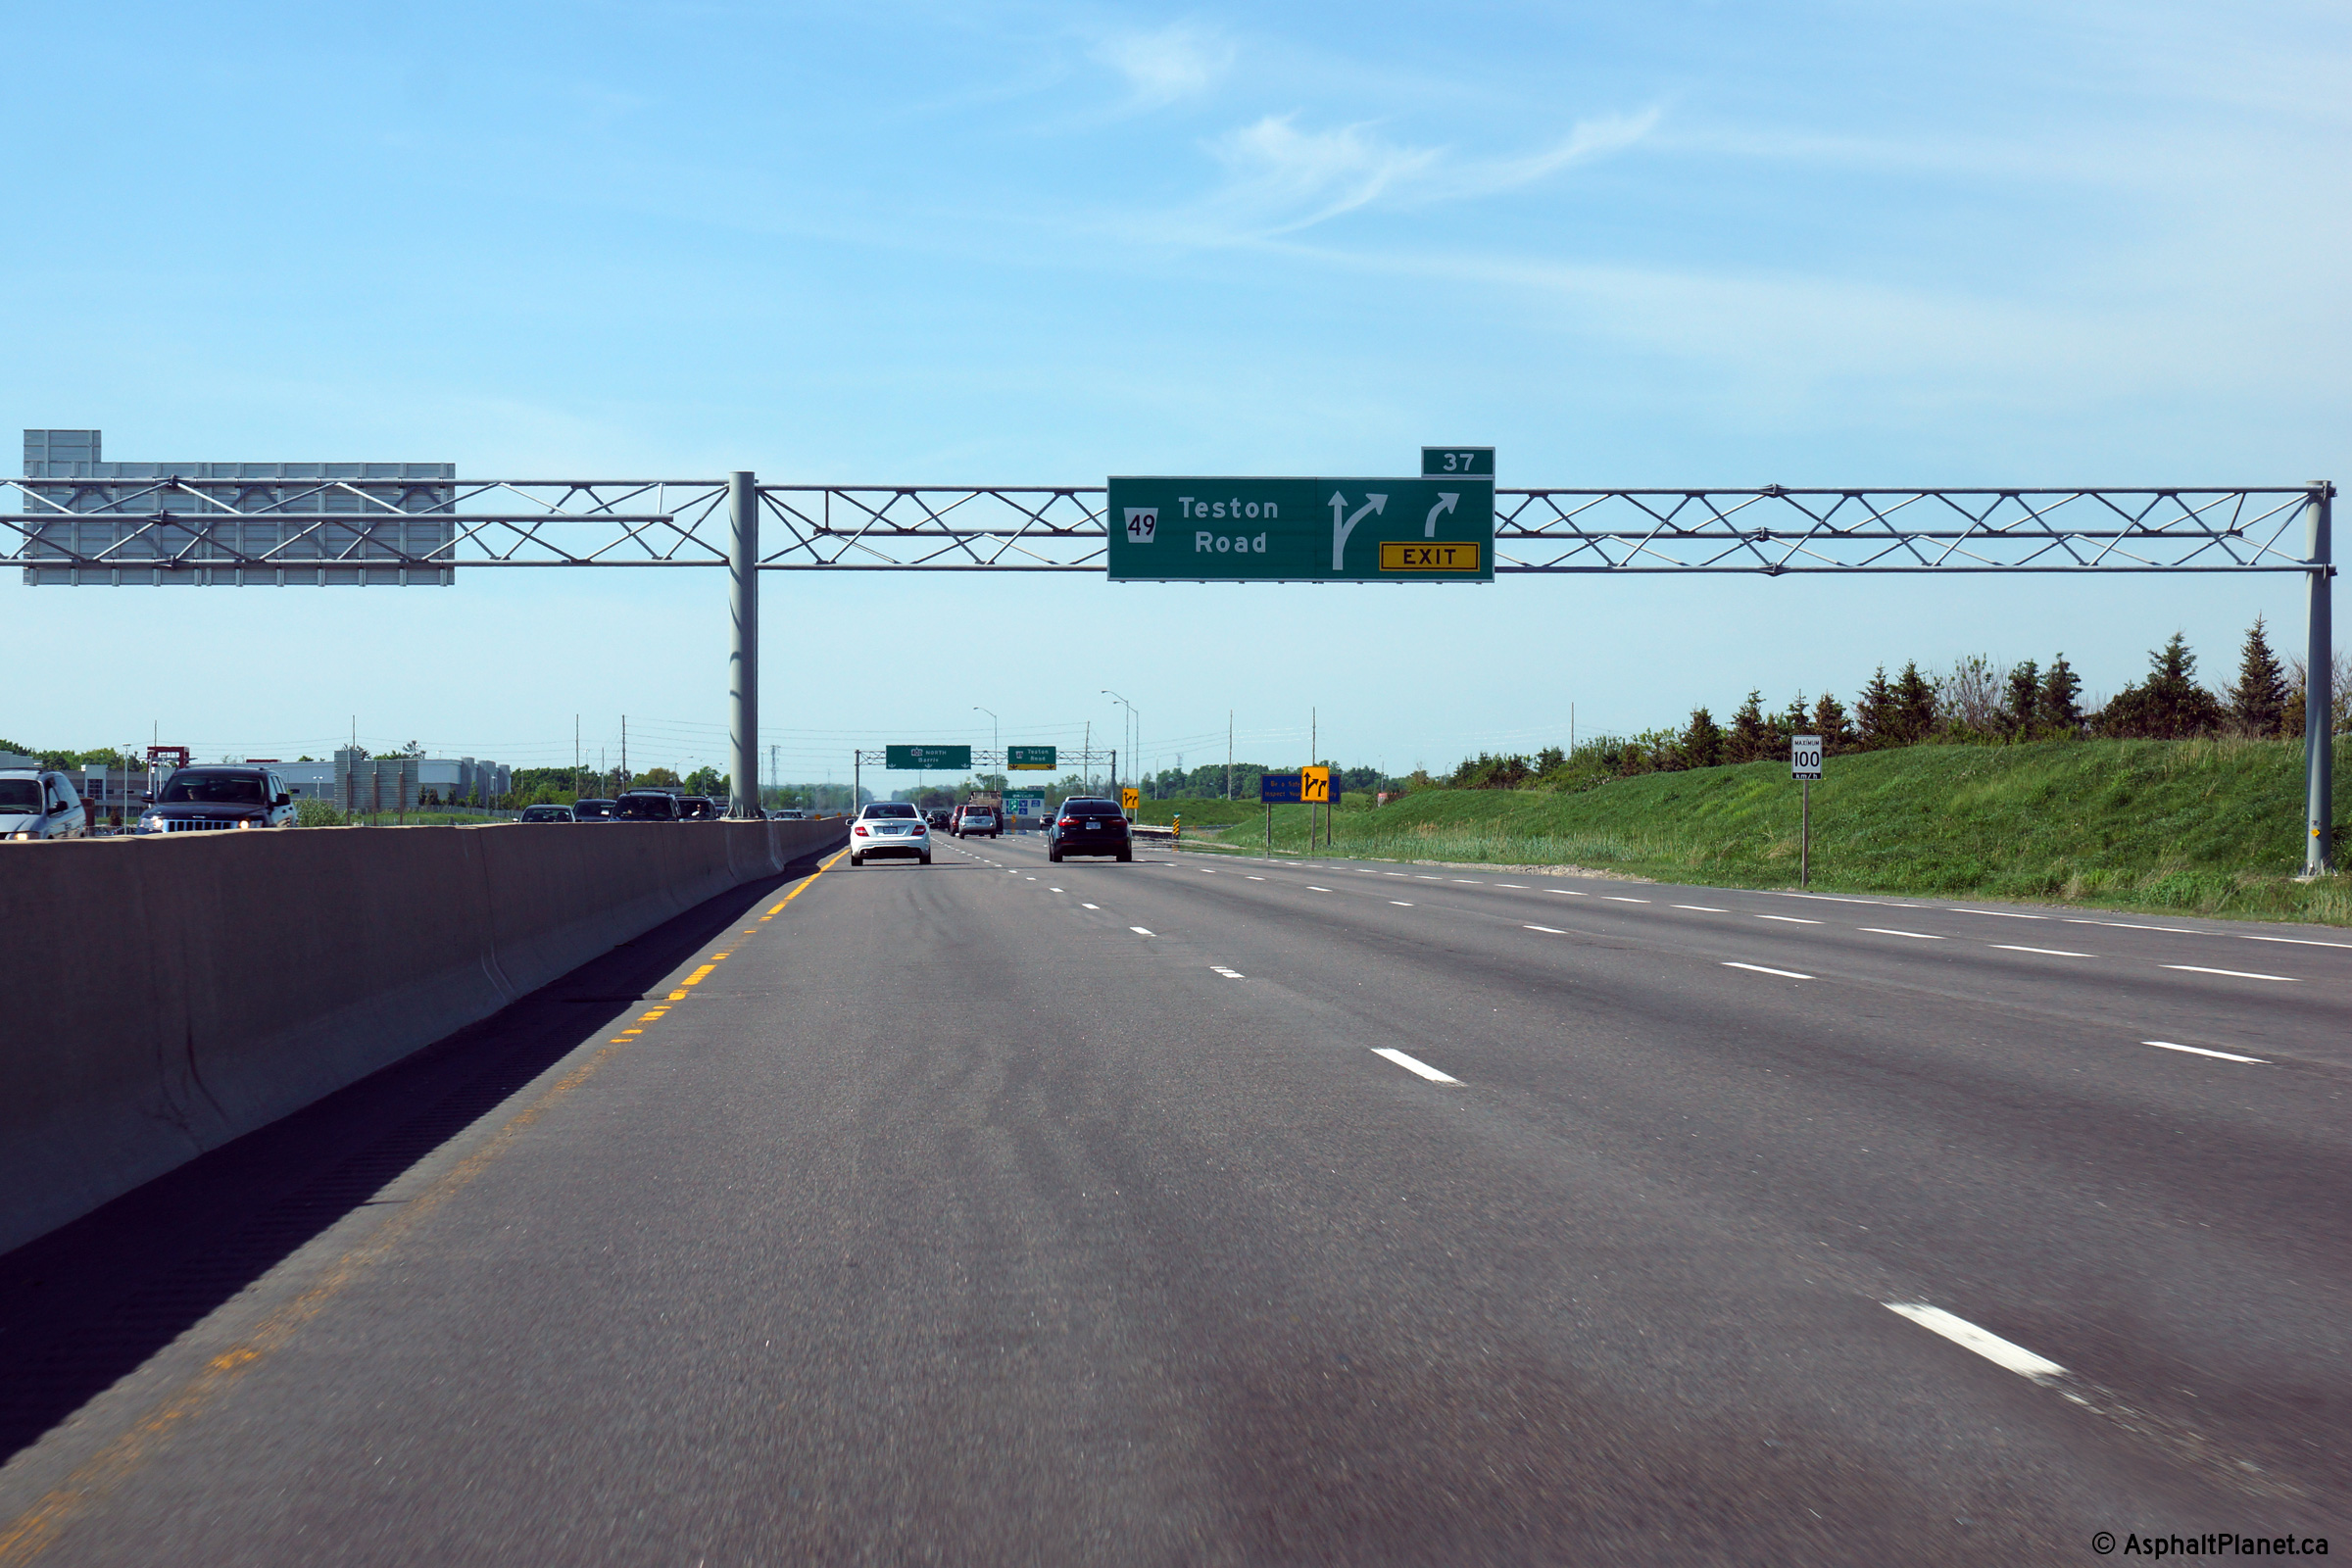
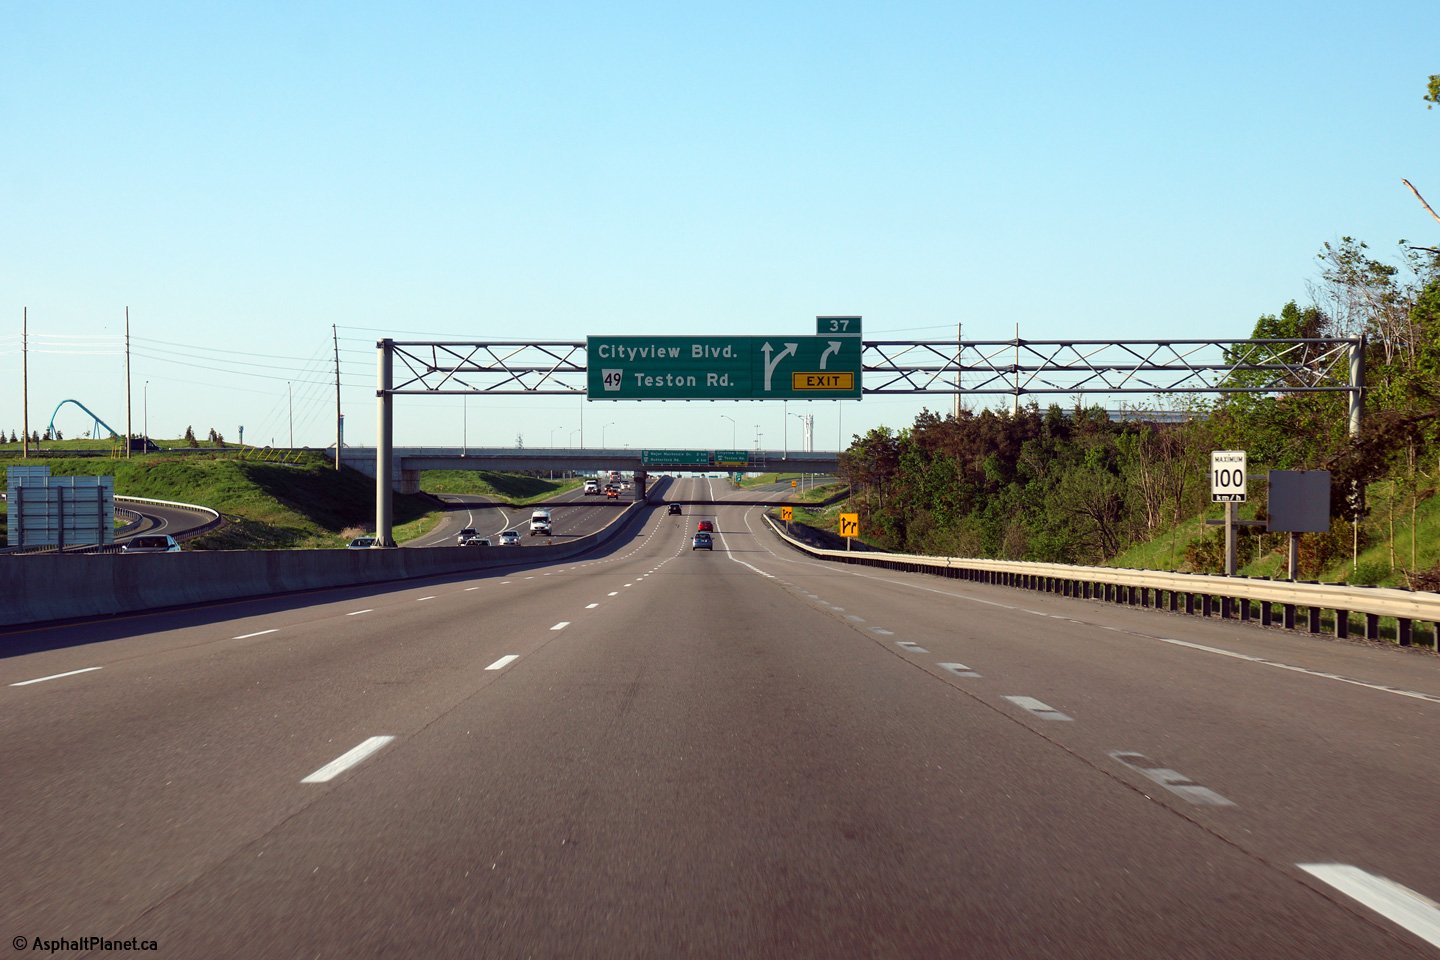
Northbound advanced signage for the Teston Road interchange.
Photo taken: May 31st, 2014. |
 (720x480) (720x480)
(1440x960)
(2400x1600) |
| City of Vaughan Regional
Municipality of York |
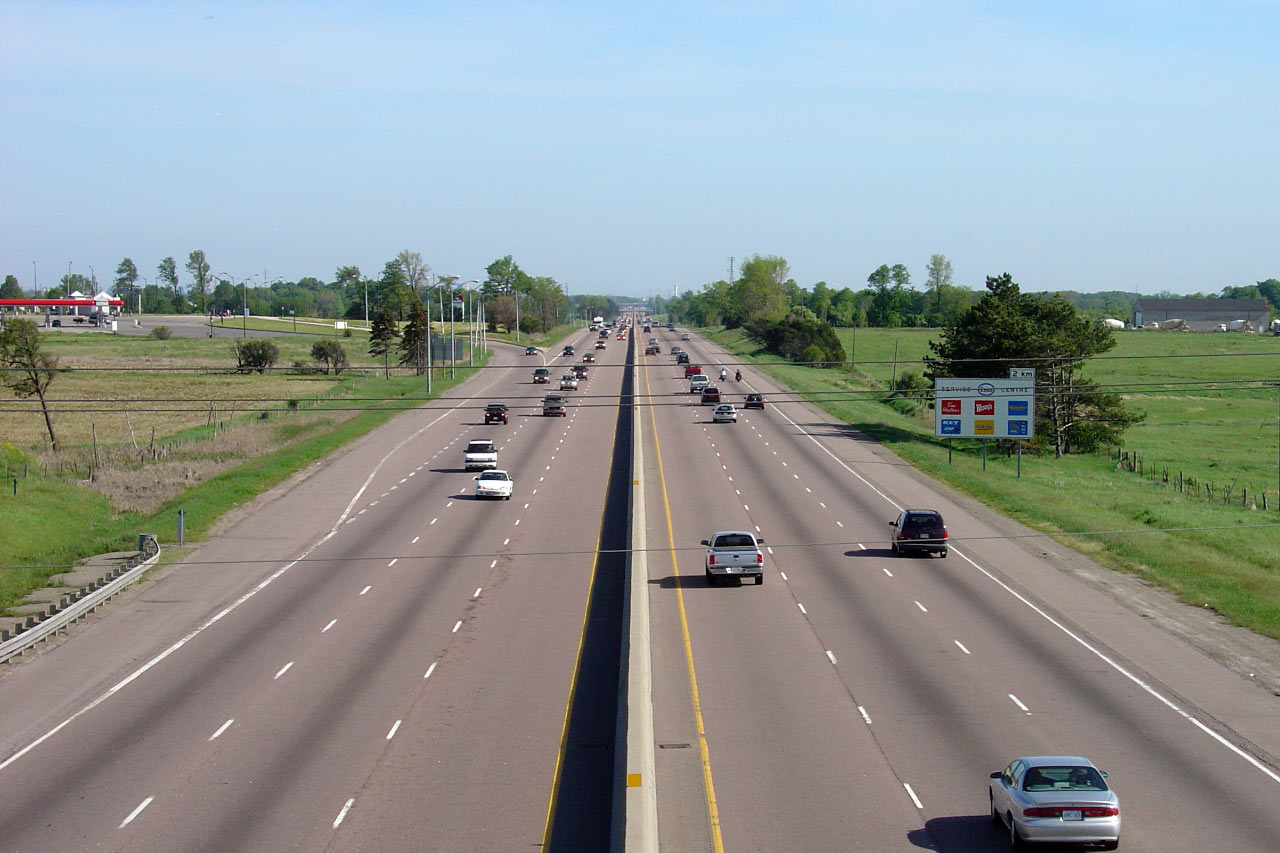
View looking northerly at the off-ramp to Teston Road.
Photo taken: May 31st, 2014.
|
 (720x480) (720x480)
(1440x960)
(2400x1600) |
| City of Vaughan Regional
Municipality of York |
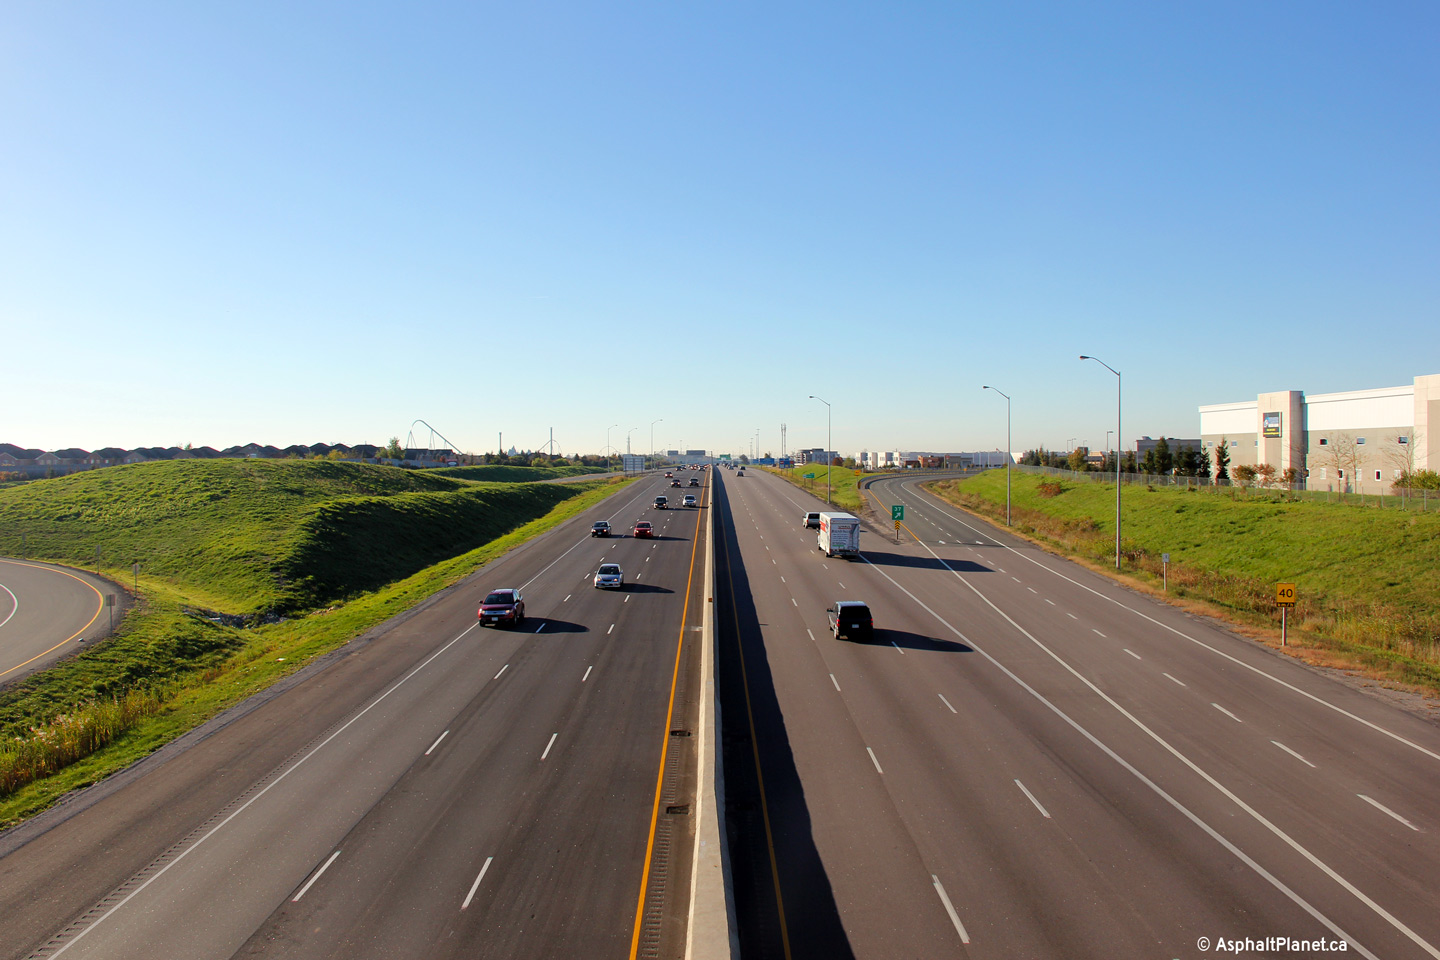
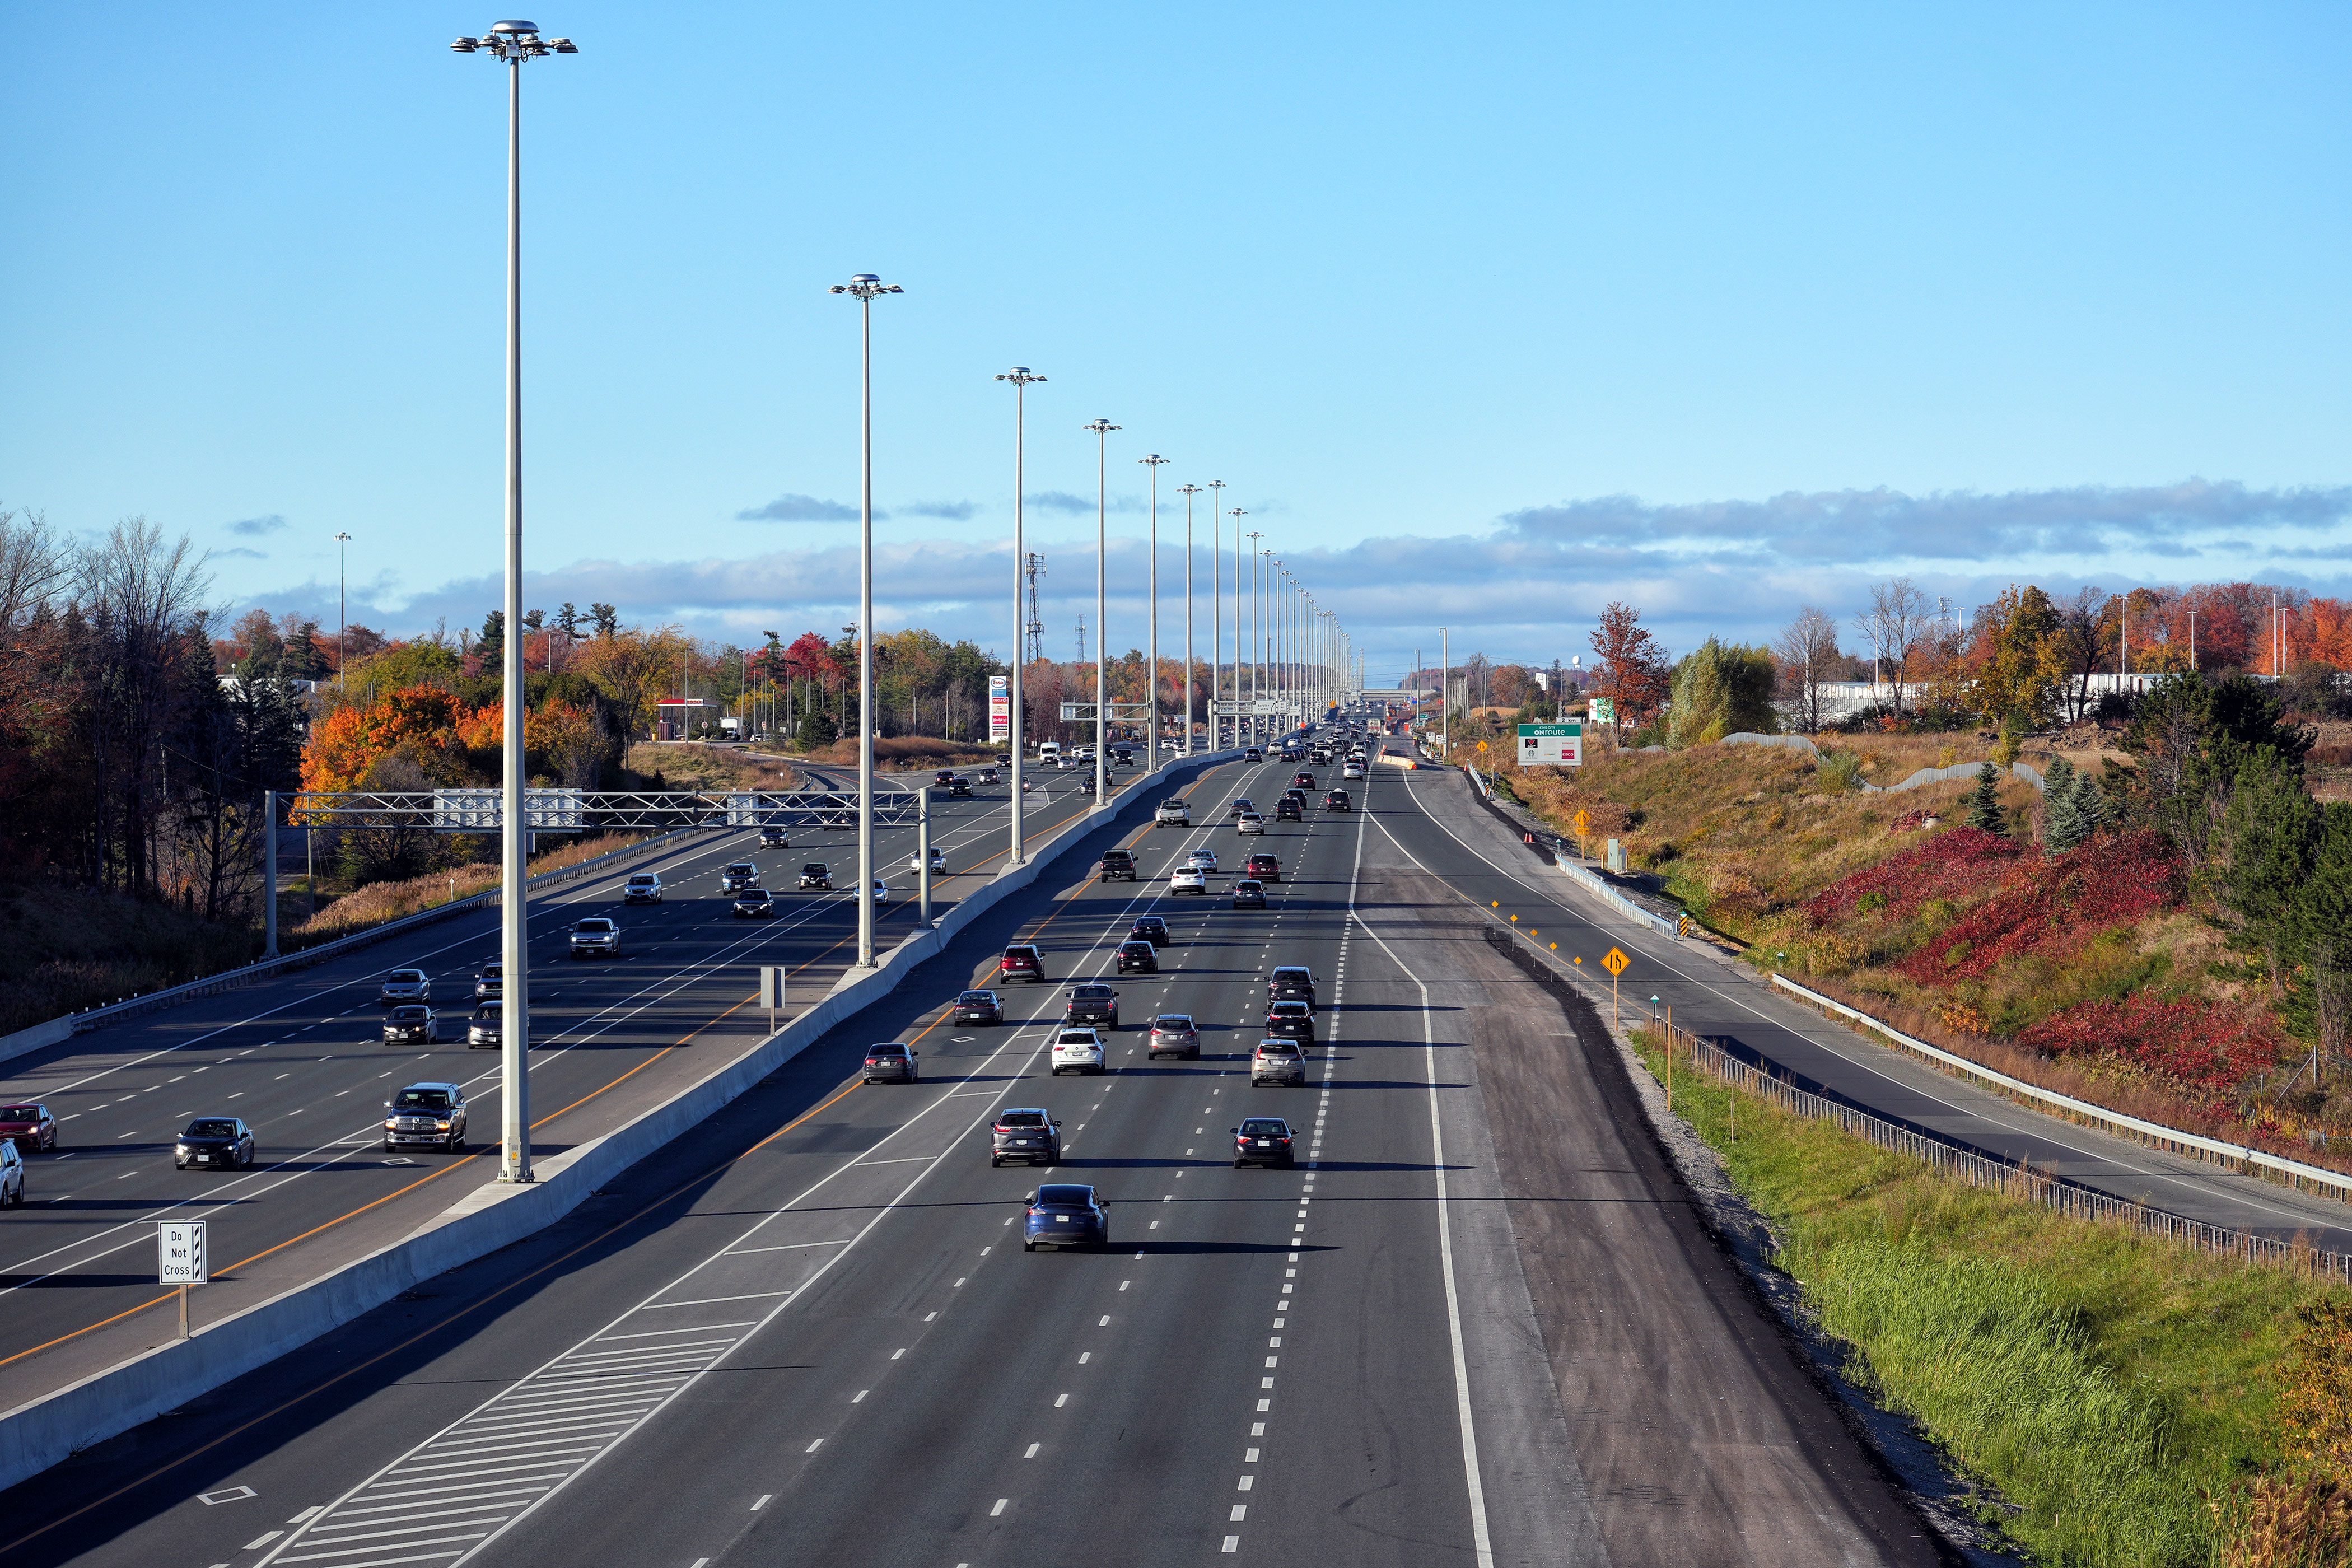
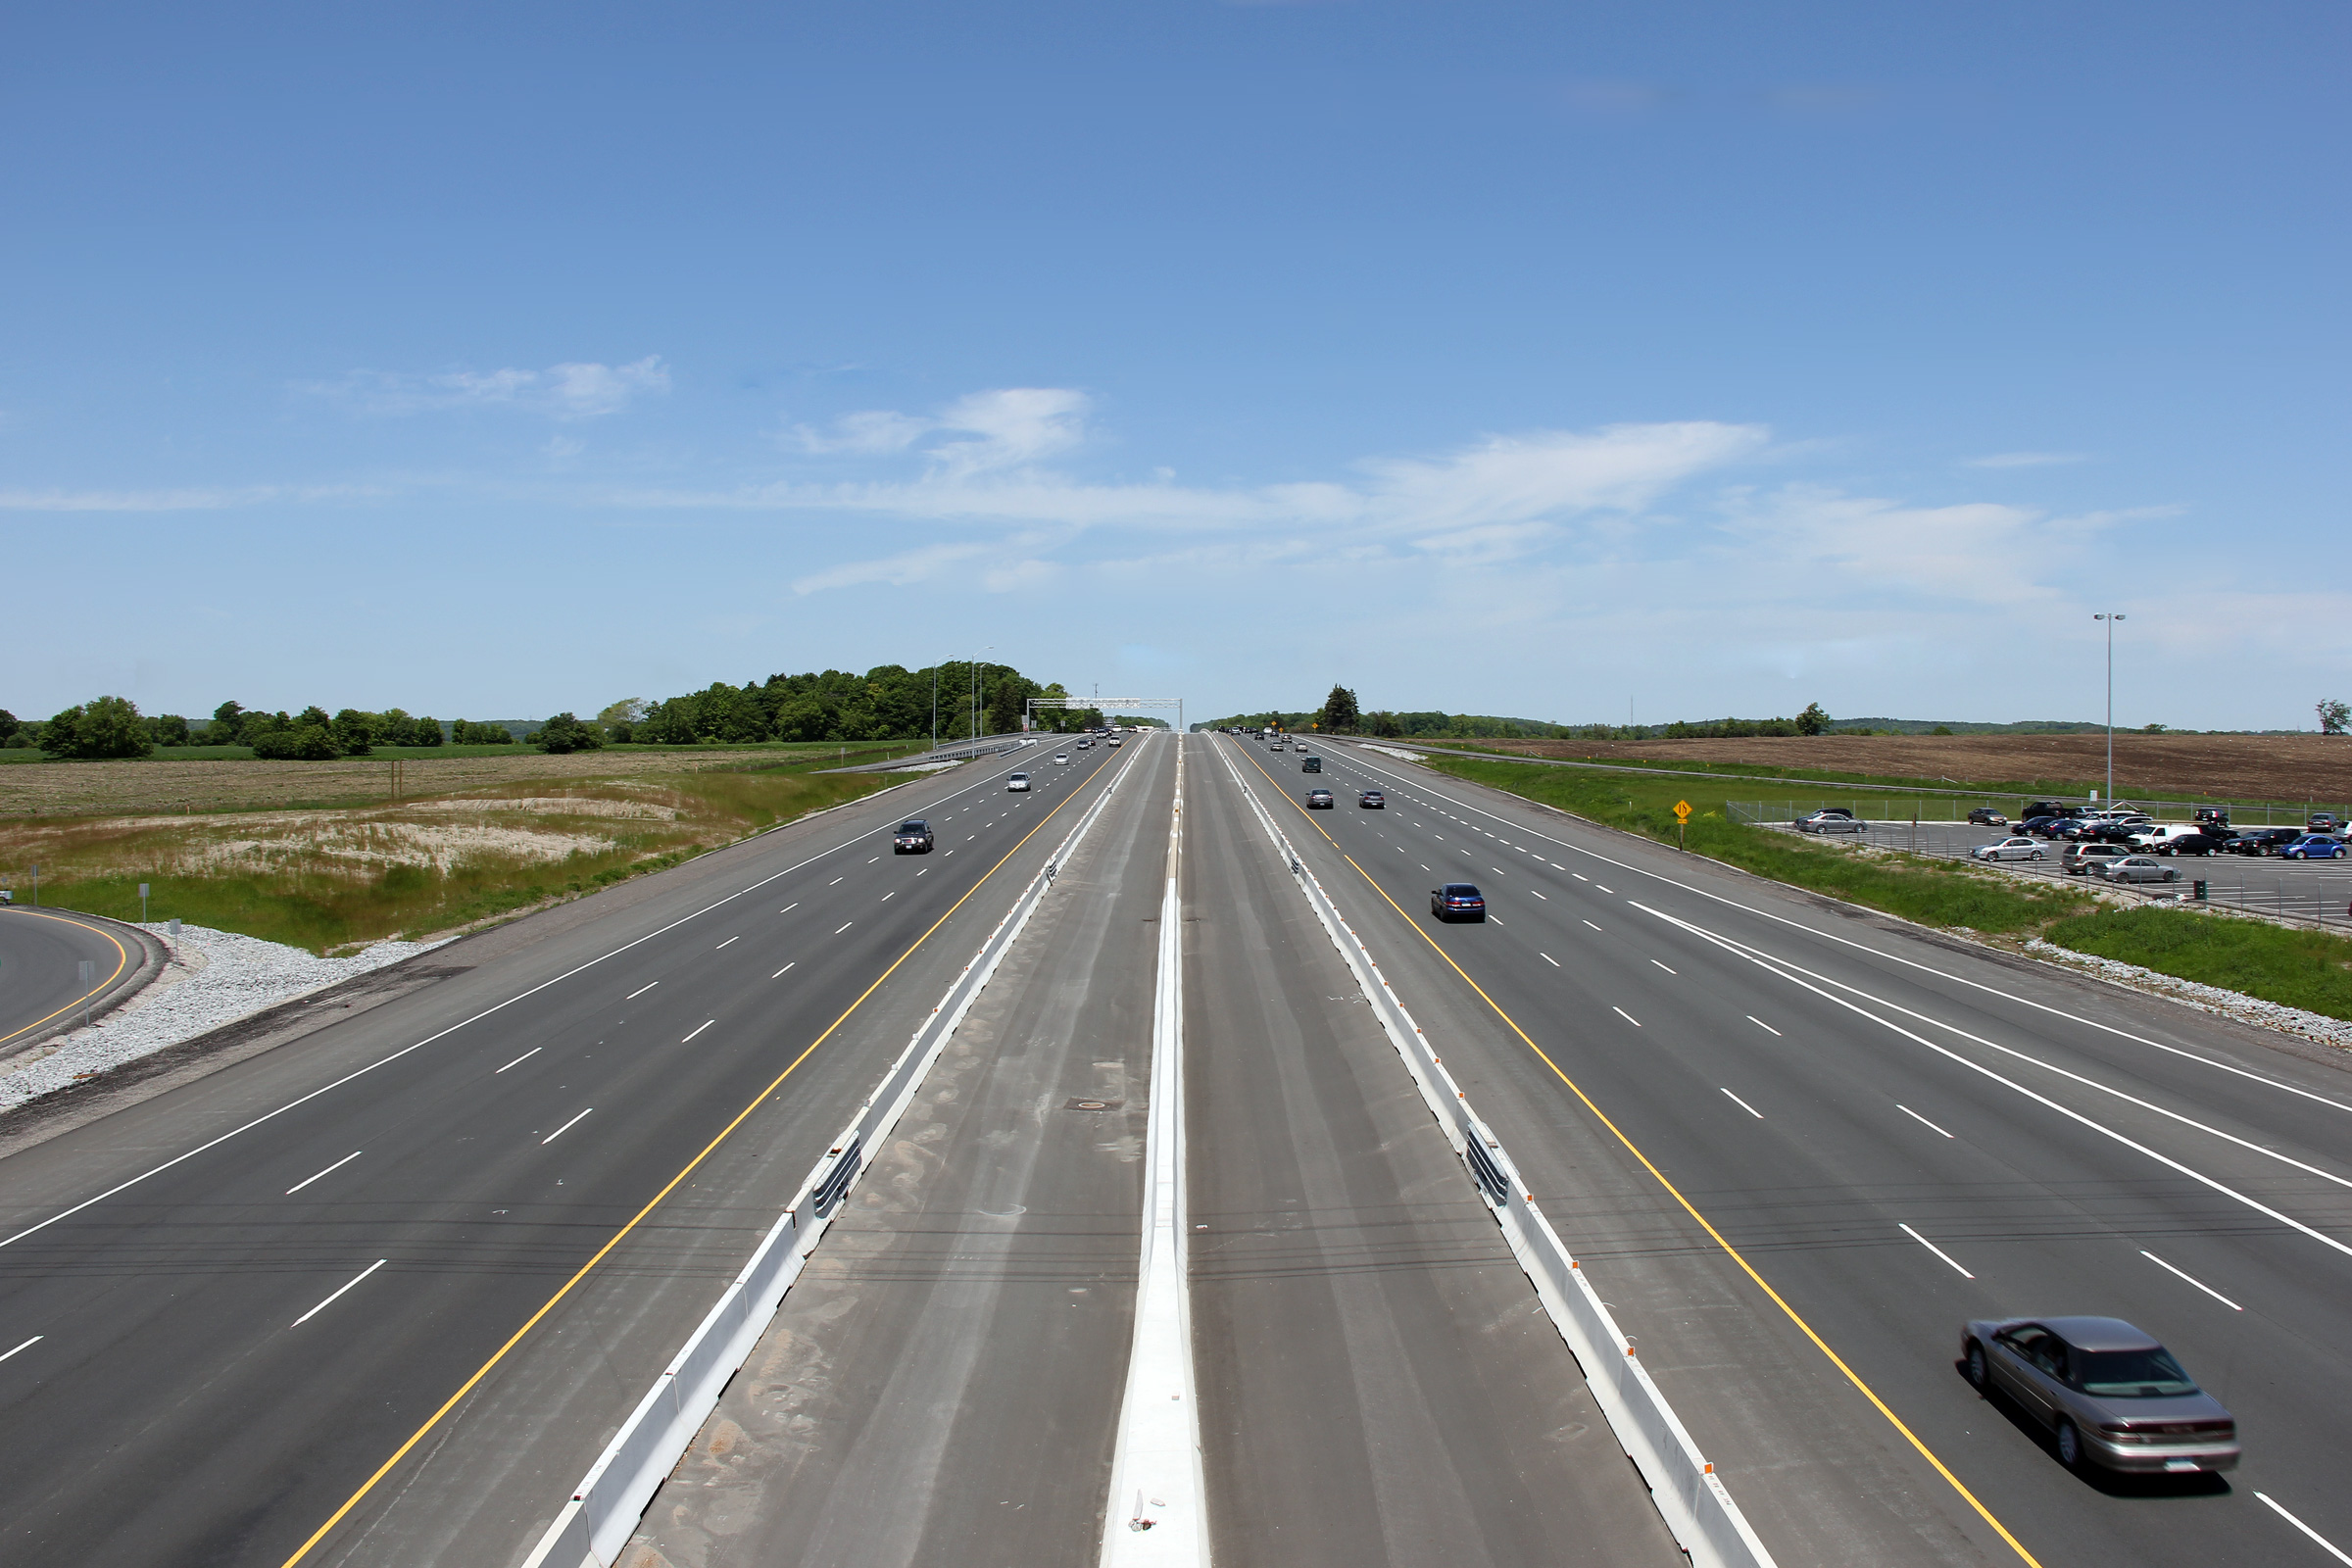
Looking south from the Teston Road overpass. There are two photos
taken from the Teston Road overpass on display here. The upper photo
was shot prior to the completion of the Teston Road interchange. The
middle photo shows the highway after the completion of the interchange. The
lower photo shows the highway after the completion of the HOV lane between
Major Mackenzie Drive and King Road interchanges. Unique to Highway
400, the HOV ingress and egress locations have a special speed change lane
between the the through HOV lane and the regular general purpose lanes.
Upper photo taken: May 27th, 2006.
Lower photo taken: October 12th, 2013. |
(1440x960)
(2400x1600)
(4200x2800)
|
| City of Vaughan Regional
Municipality of York |
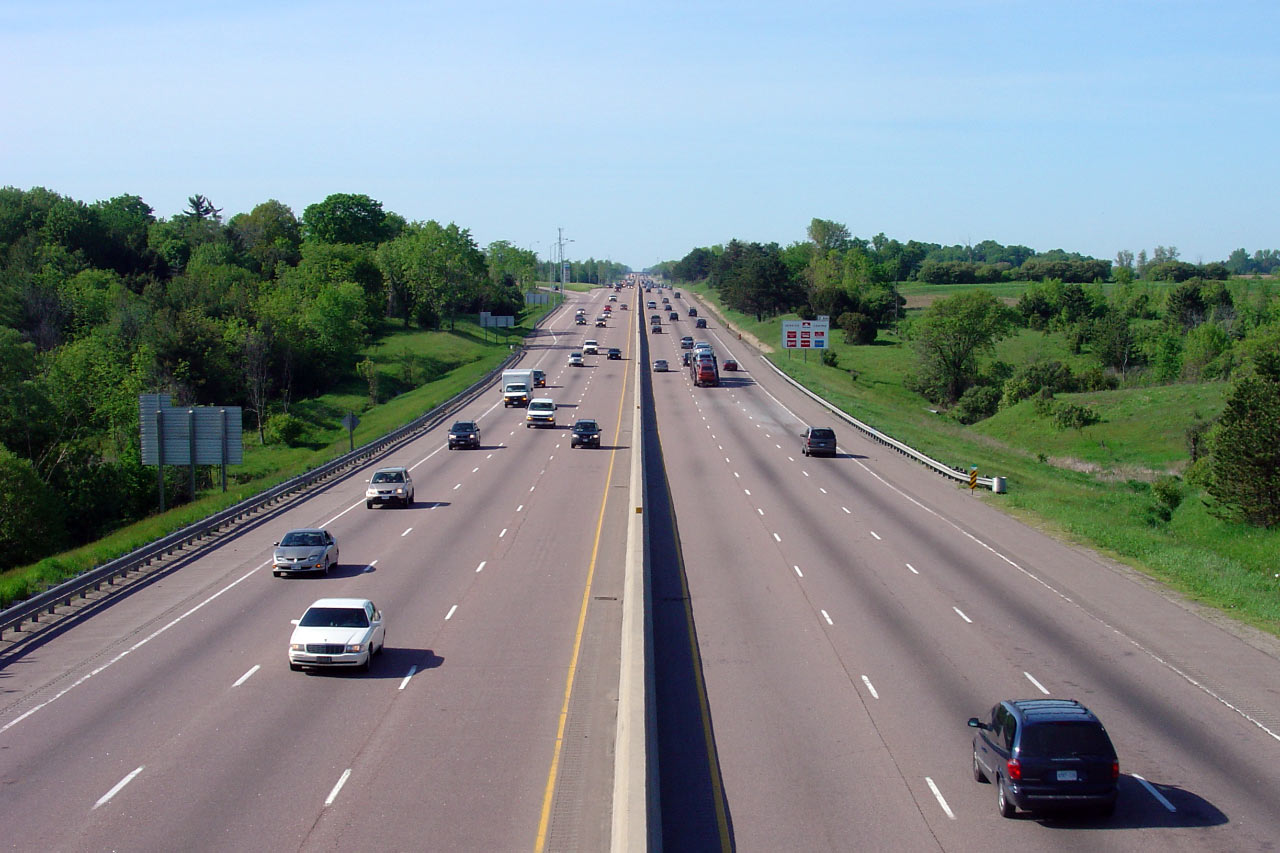
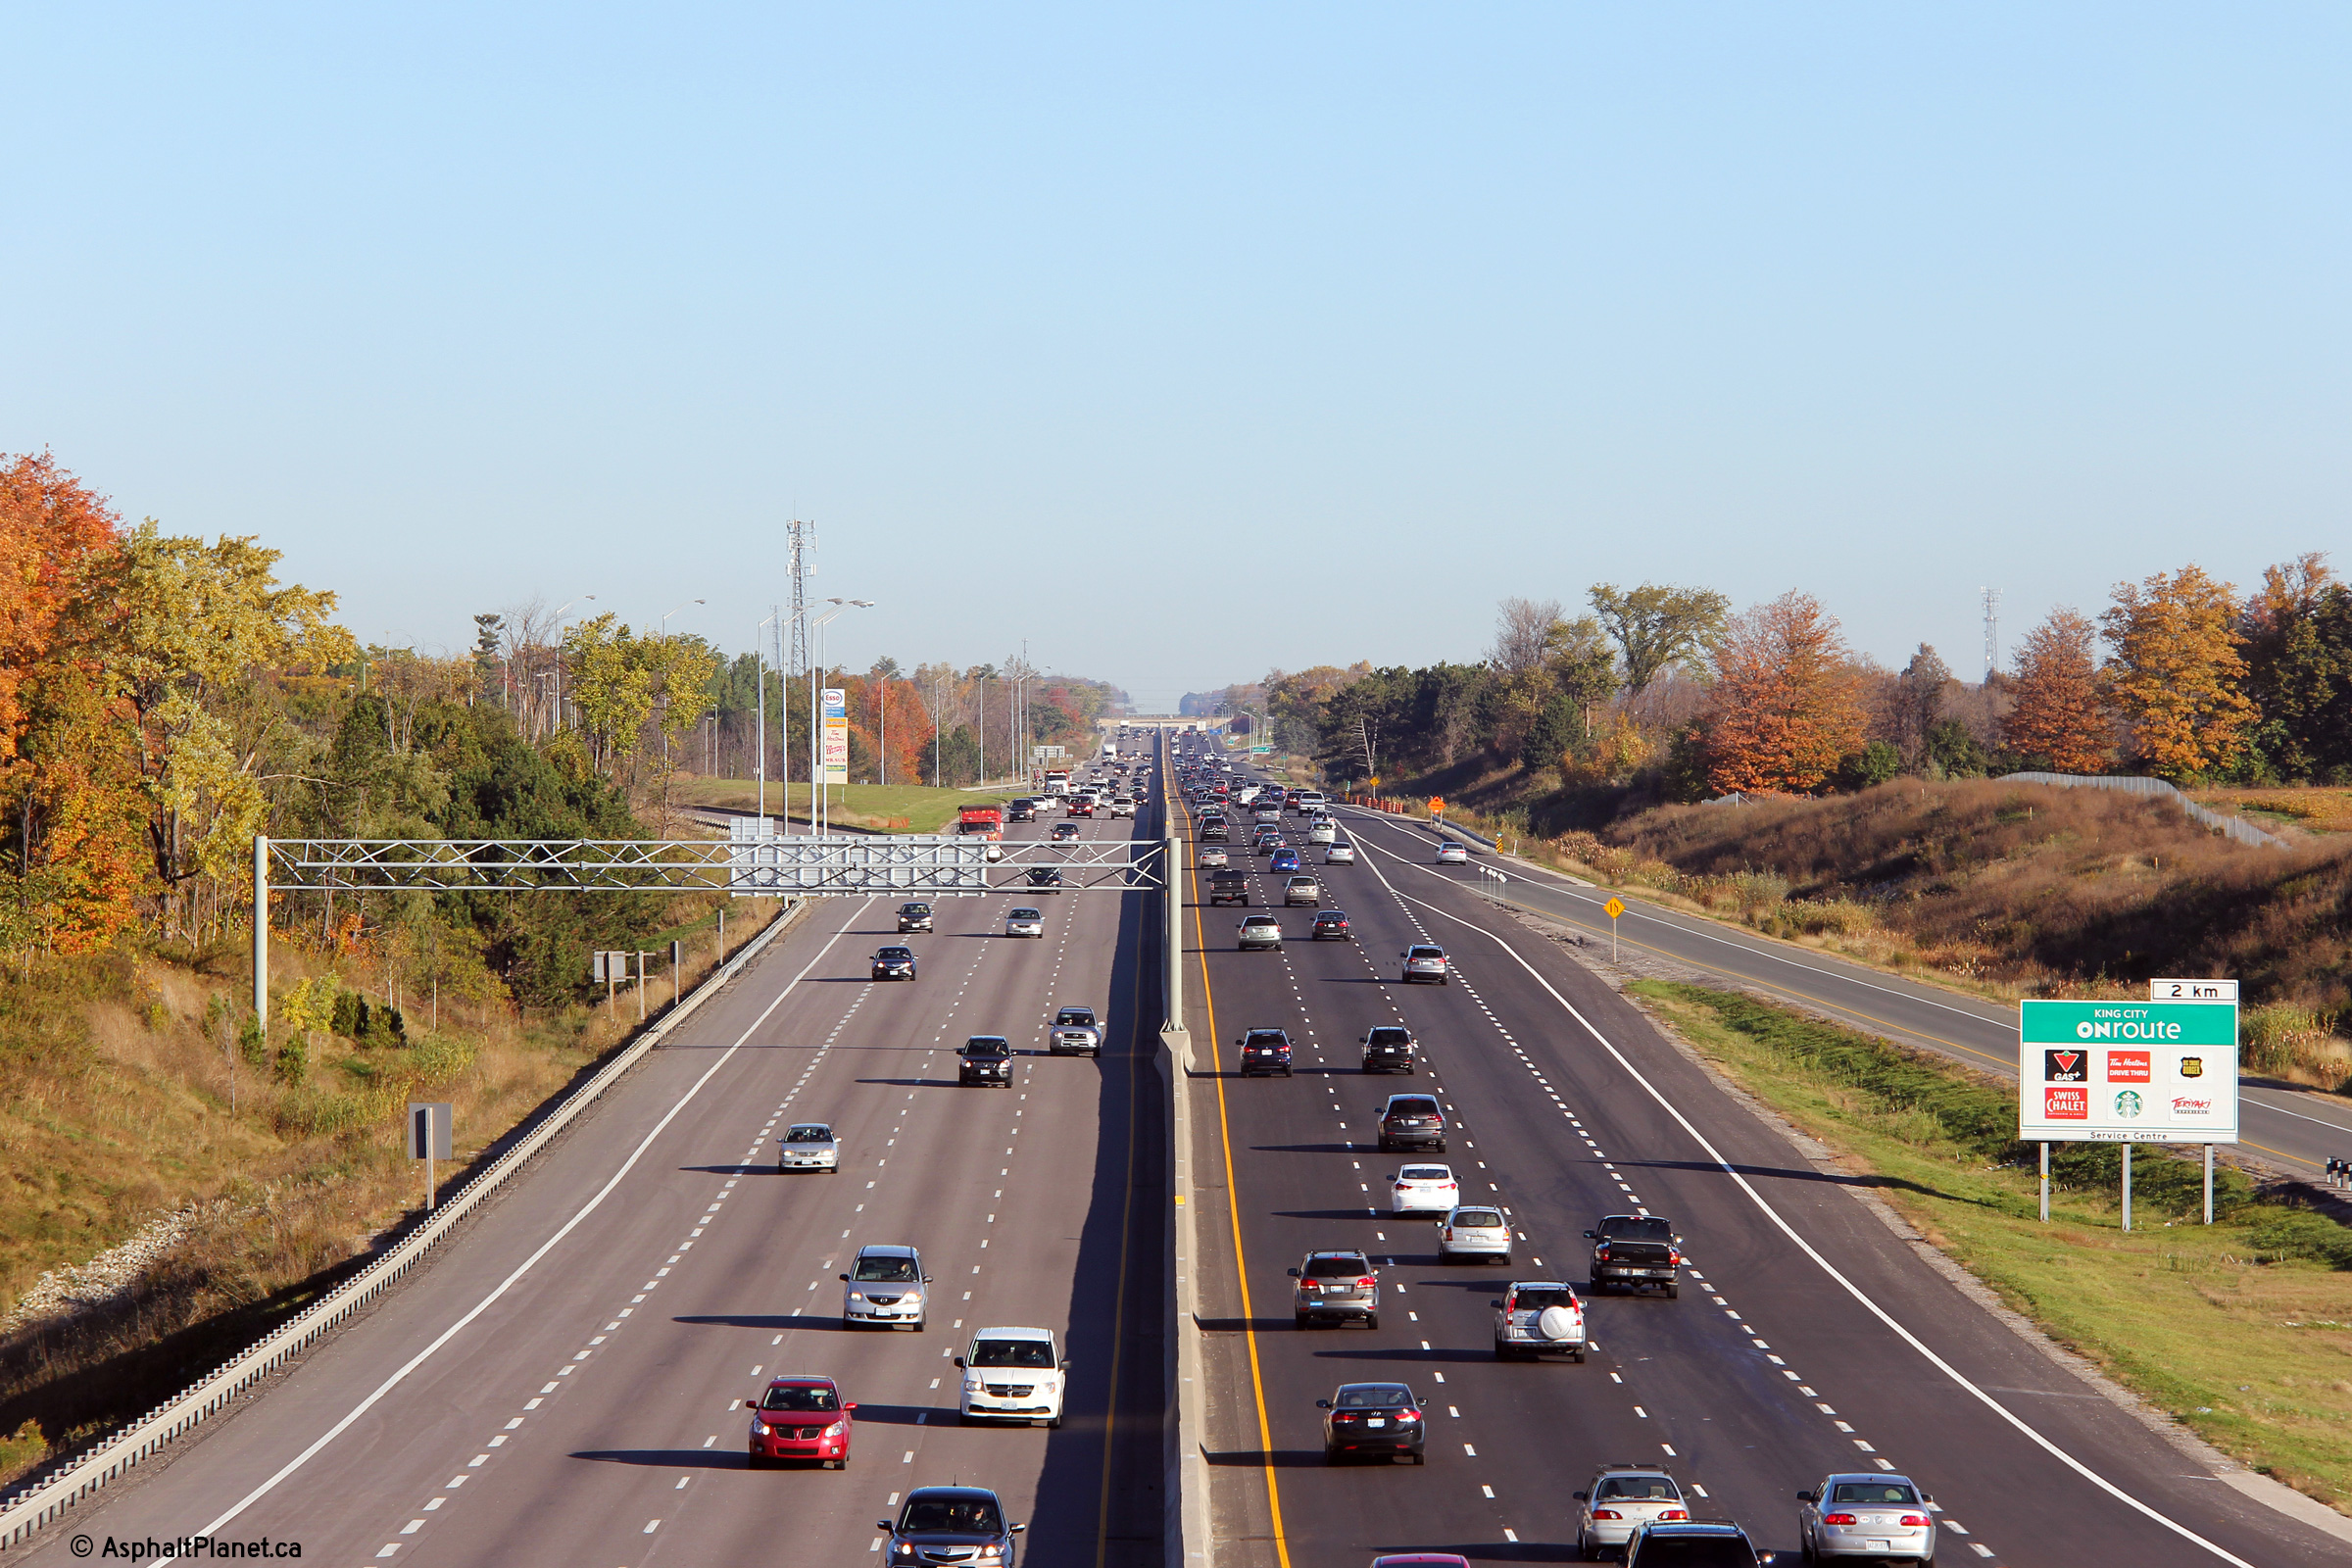
Looking north from Teston Road. Note the Southbound Service Centre.
Aside from Highway 401, Highway 400 is (unfortunately, in my opinion) the
only freeway in Ontario with direct services. Upper photo taken: May 27th,
2006. Middle photos taken: October 12th, 2013. Lower photo taken:
October 23rd, 2023. |
(1440x960)
(2400x1600)
(4200x2800)
|
| City of Vaughan Regional
Municipality of York |
Southbound signage for the off-ramp to Teston Road. The southbound
off-ramp has a long tangential segment before curving to meet Cityview Road.
Such a long tangential segment was utilized in order to minimize future
modifications to the exit ramp that would otherwise be necessary when
Highway 400's cross-section is widened.
Photo taken: June 1st, 2014. |
 (720x480) (720x480)
(1440x960)
(2400x1600) |
| City of Vaughan Regional
Municipality of York |
Southbound advanced signage for the Teston Road interchange. An over
height truck struck this overhead sign in October, 2014 forcing the
temporary closure of the highway, and the removal of this sign.
Photo taken: June 1st, 2014. |
 (720x480) (720x480)
(1440x960)
(2400x1600) |
| City of Vaughan Regional
Municipality of York |
Northerly view towards the King-Vaughan Sideroad overpass. The fact
that the the King-Vaughan Sideroad overpass is an arched rigid frame
structure belies the fact that this structure was actually constructed
several years after Highway 400 was opened to traffic.
Photo taken: September 26th, 2013. |
 (720x480) (720x480)
(1440x960)
(2400x1600) |
| City of Vaughan Regional
Municipality of York |
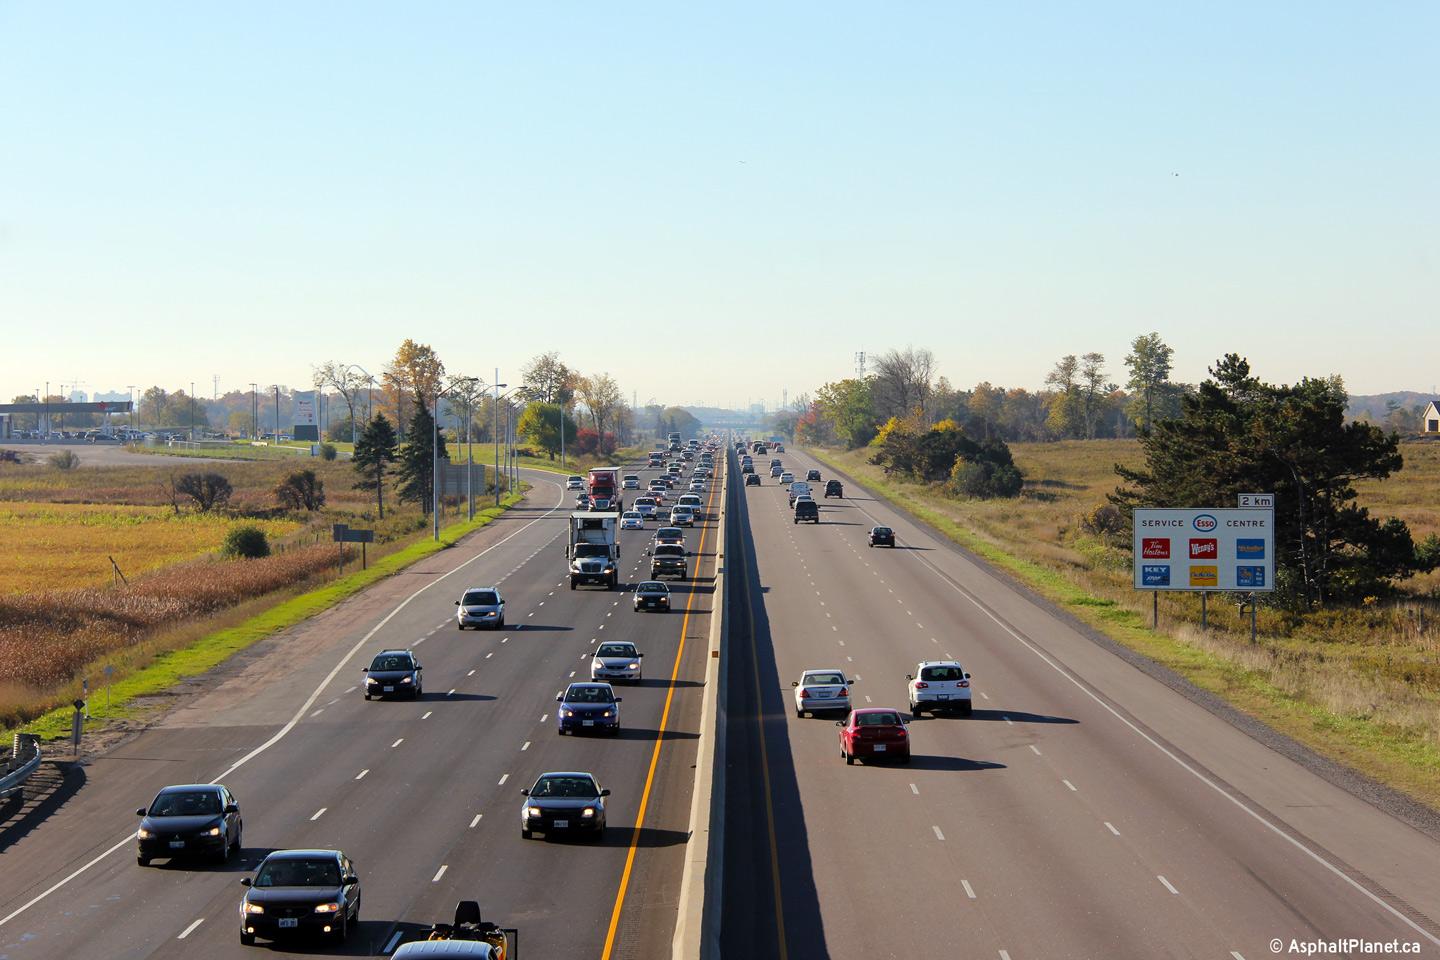
Southerly view from the King-Vaughan Sideroad overpass. Highway 400
Service Centre's are extremely well used. Click
here
for an additional view from this vantage point, taken May 27th, 2006.
Photo taken: October 12th, 2013. |
(720x480)
(1440x960)
(2400x1600) |
| City of Vaughan Regional
Municipality of York |
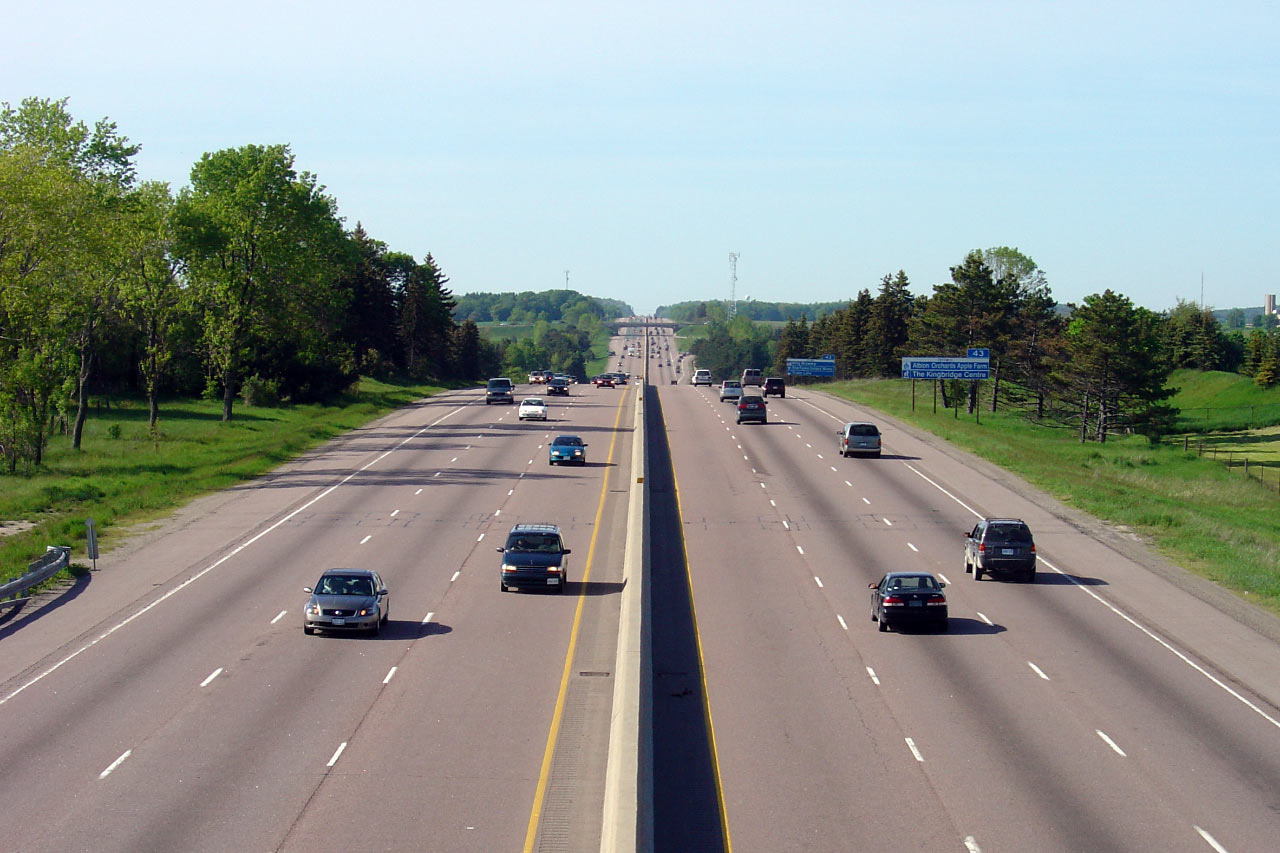
Looking north from the King-Vaughn Sideroad overpass. The King Road
interchange is visible in the distance of these photos. Upper photo taken: May
27th, 2006. Lower photo taken: October 12th, 2013. |
(720x480)
(1440x960)
(2400x1600) |
| Township of King Regional
Municipality of York |
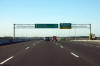
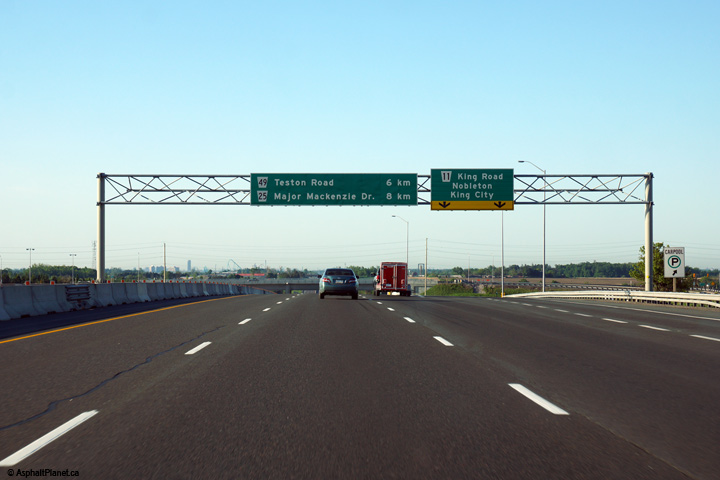
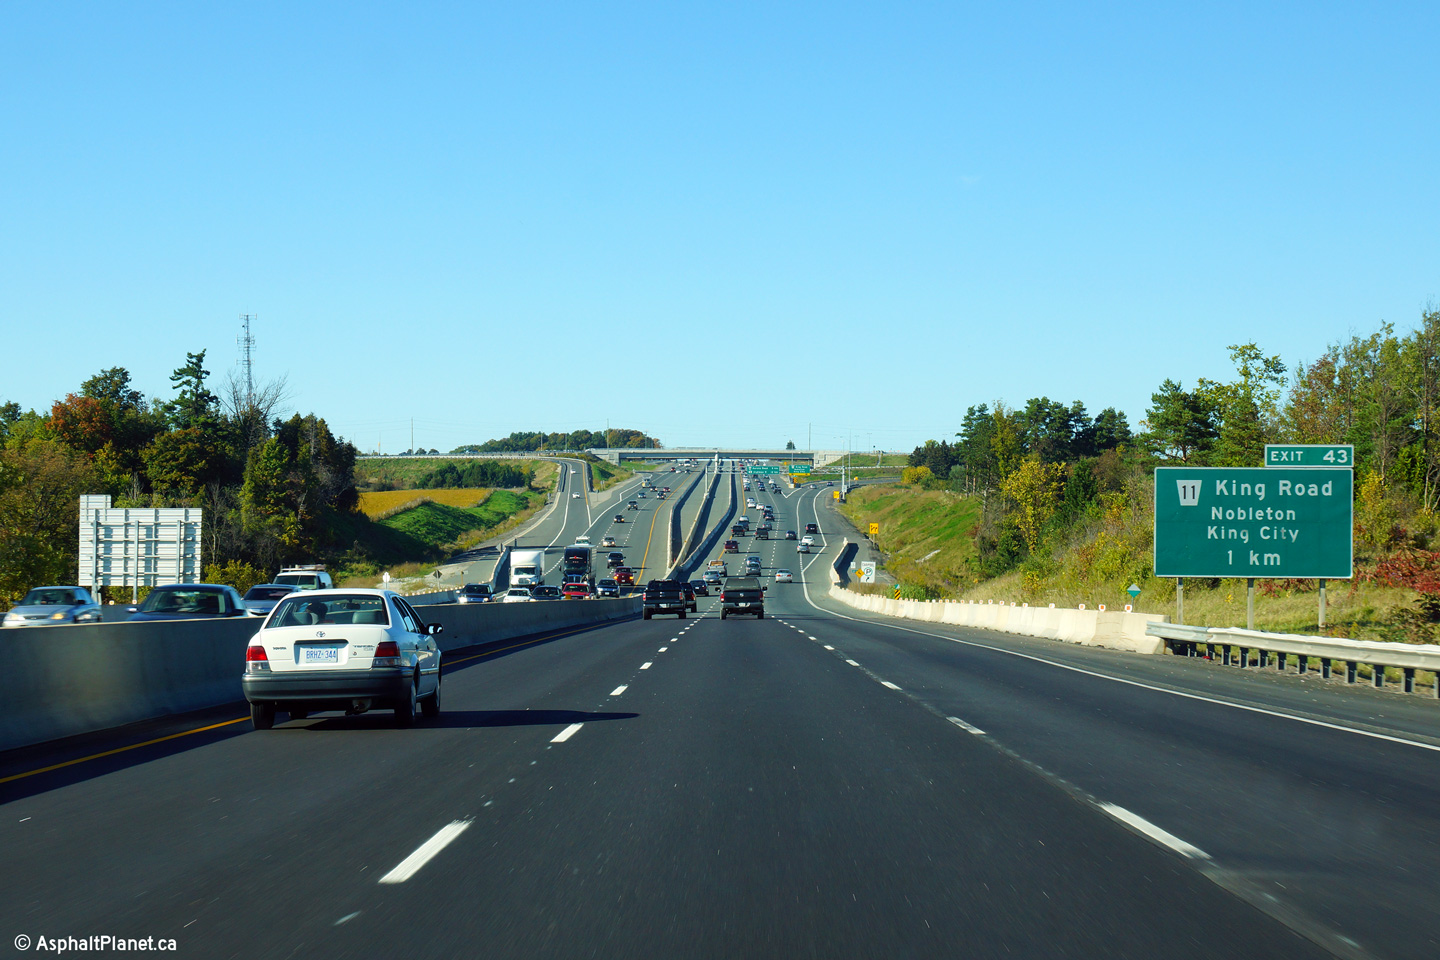
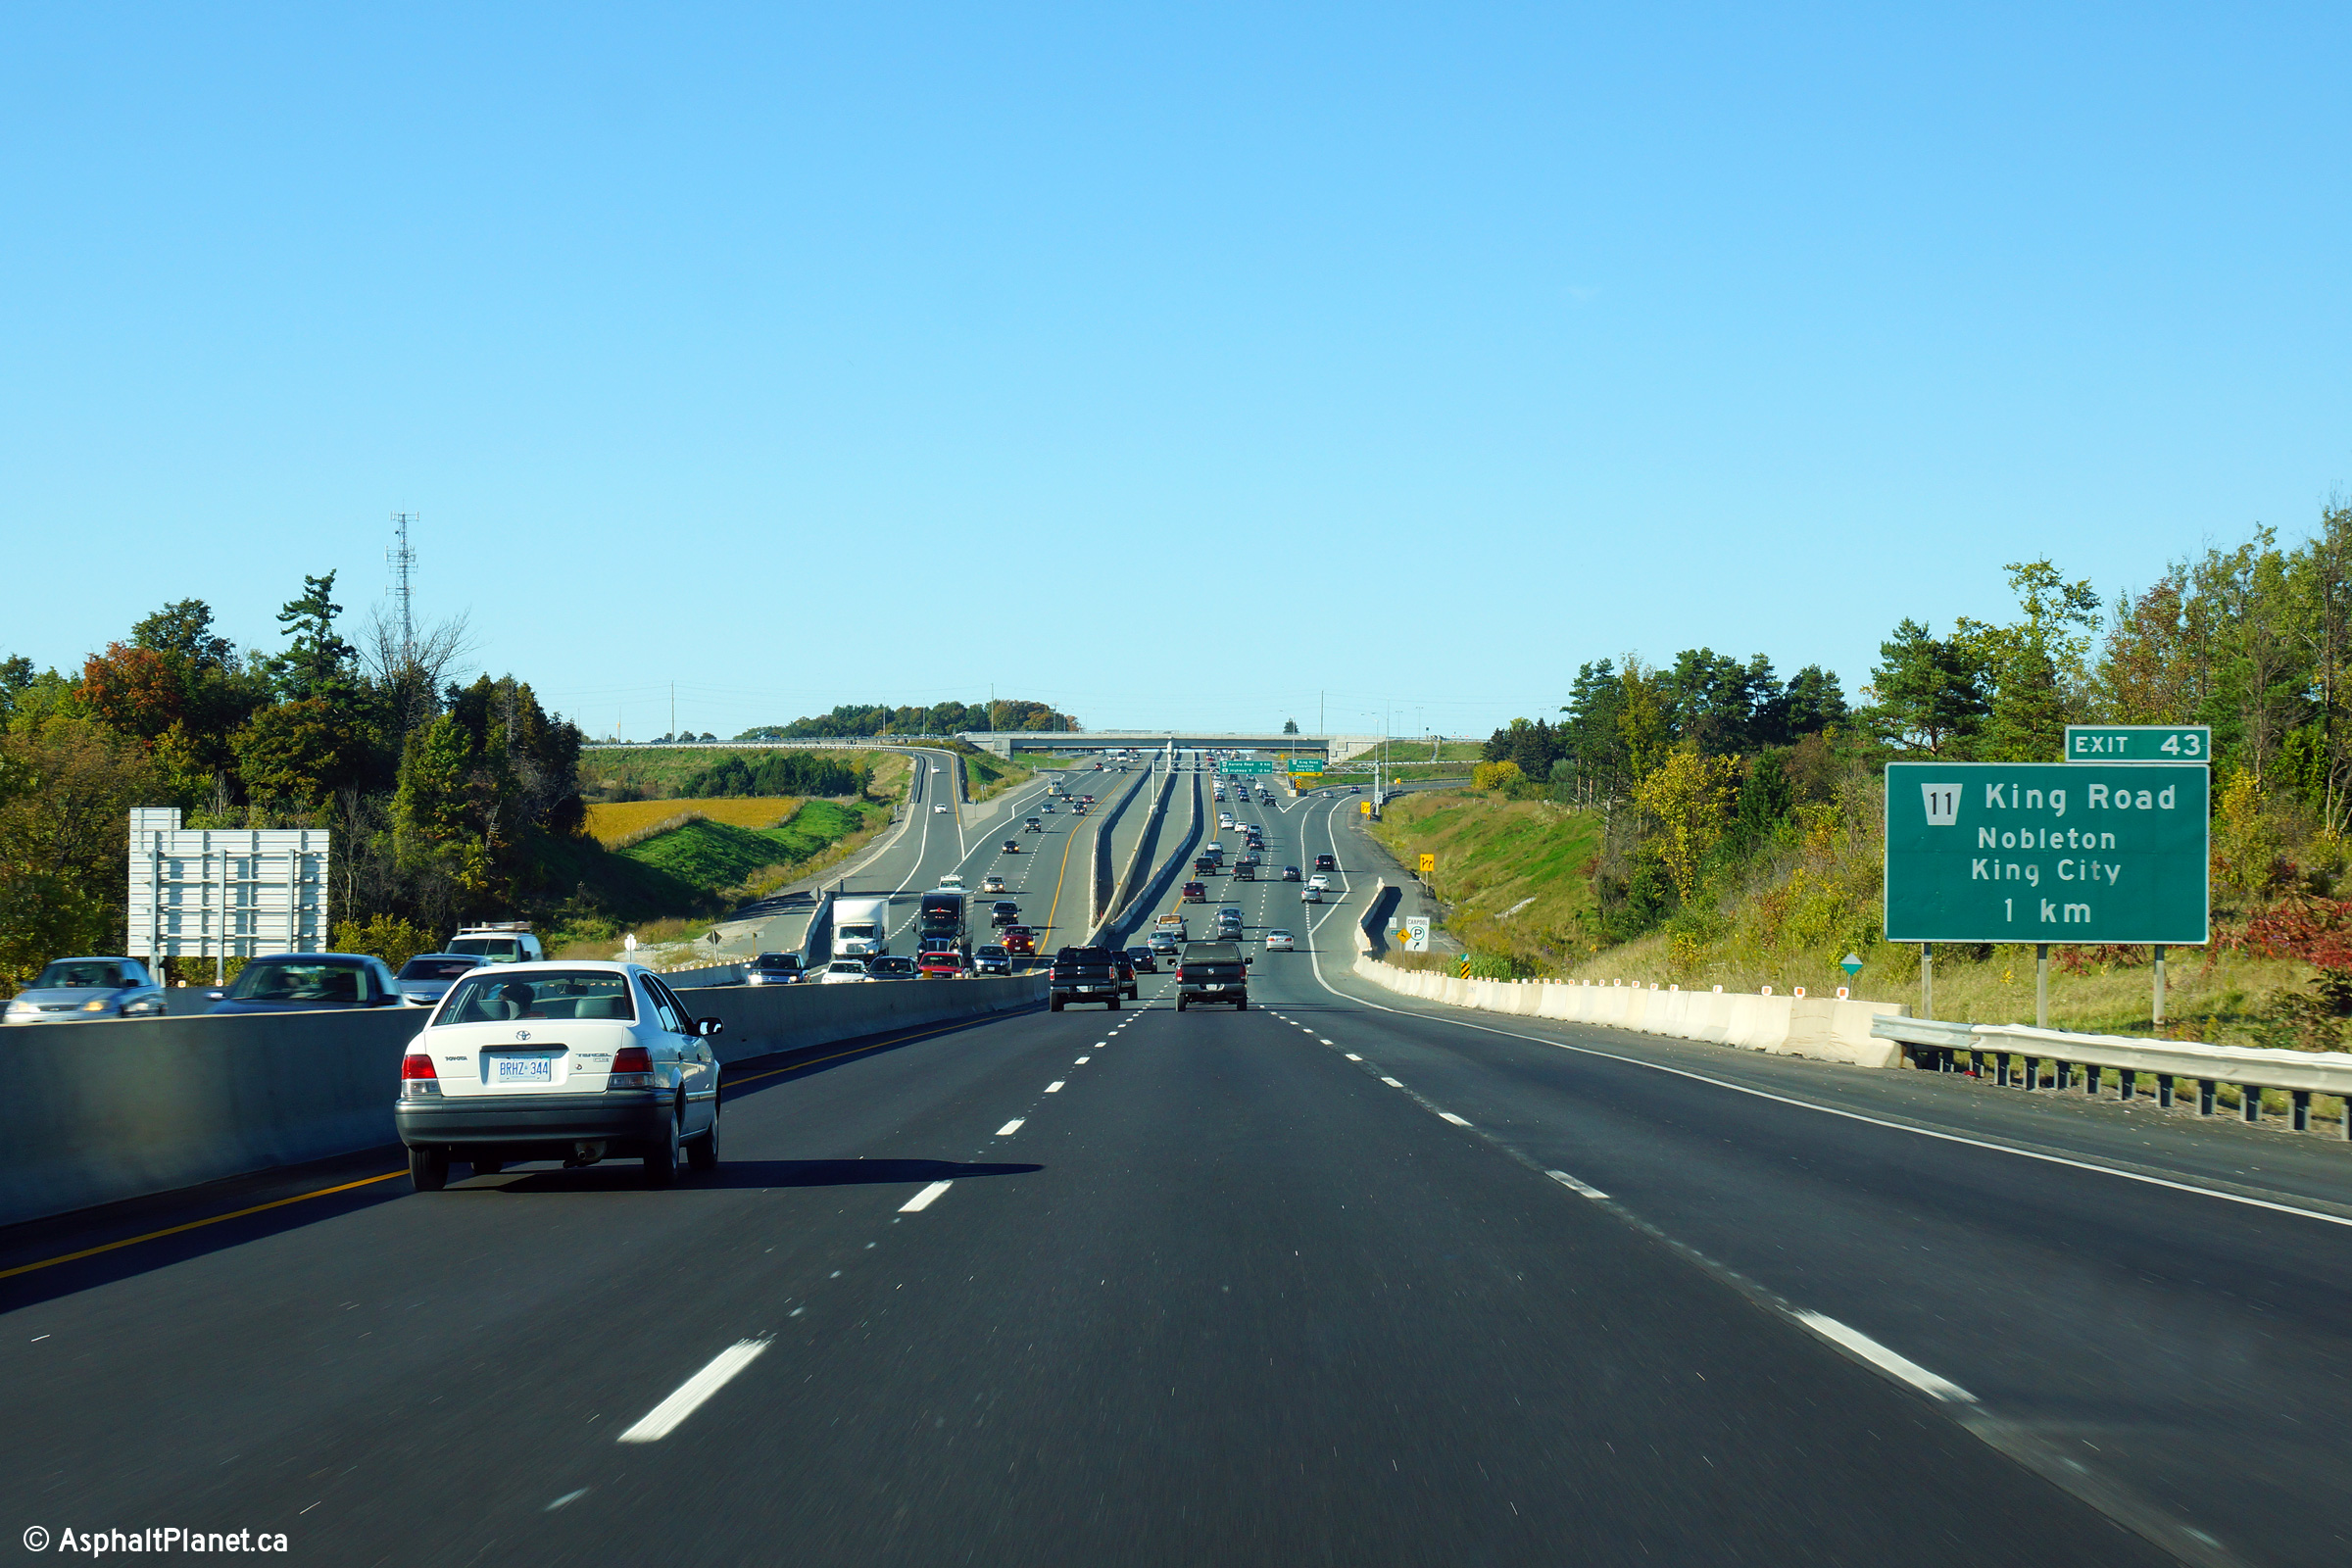
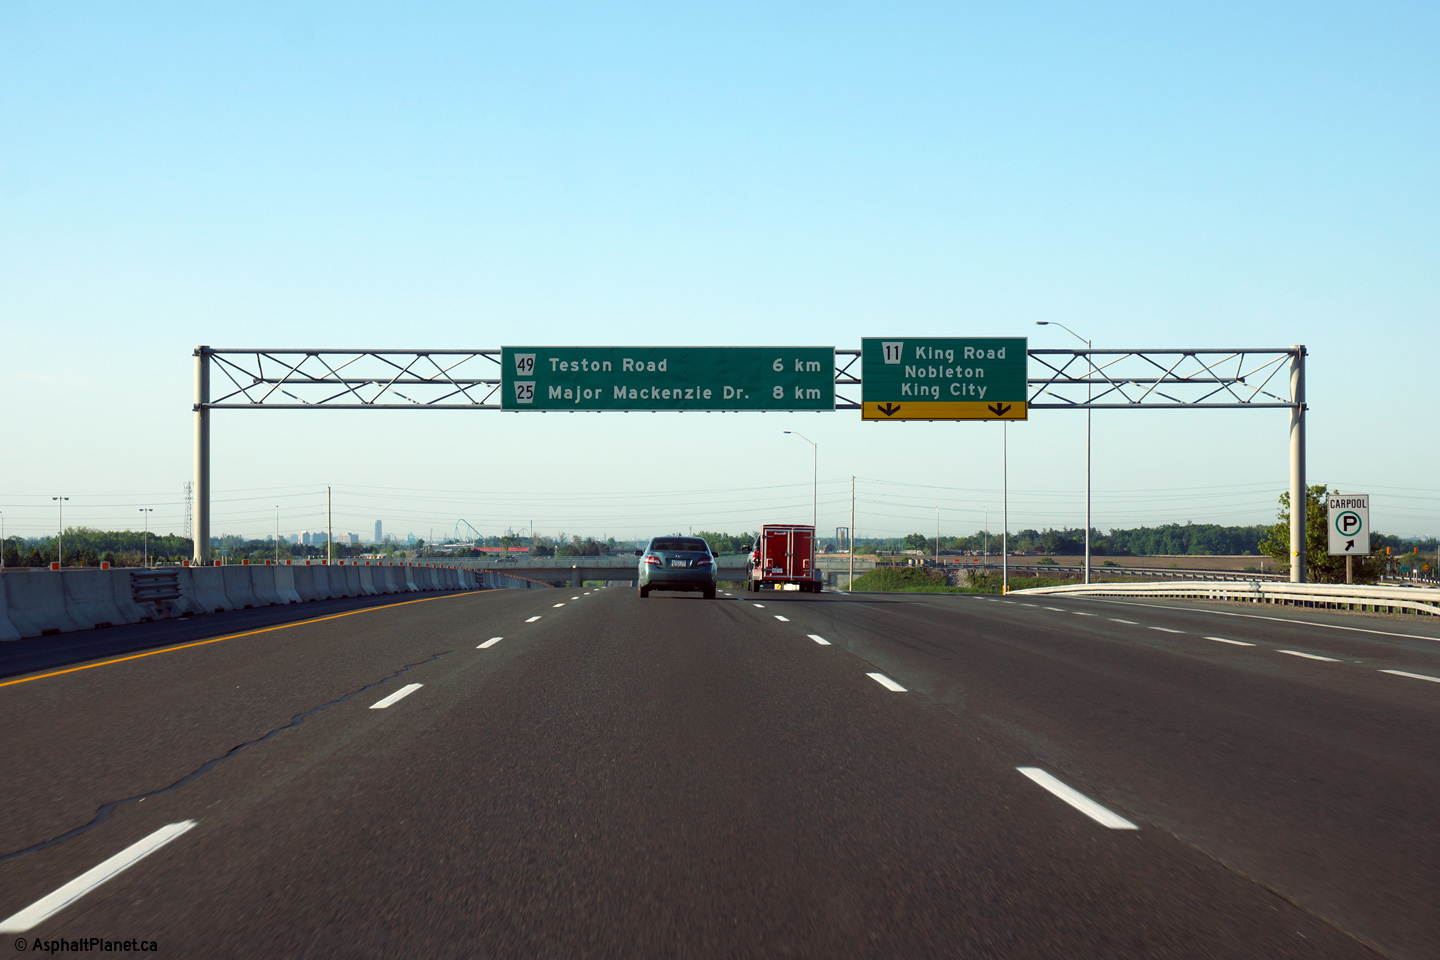
Northbound advanced signage for the King Road interchange. The ground
mounted signage in the northbound direction was left in place as unlike the
signage for the southbound direction, Highway 400's cross-section was not
modified at the future location of the eventual overhead signage.
Photo taken: September 26th, 2013. |
 (720x480) (720x480)
(1440x960)
(2400x1600) |
| Township of King Regional
Municipality of York |
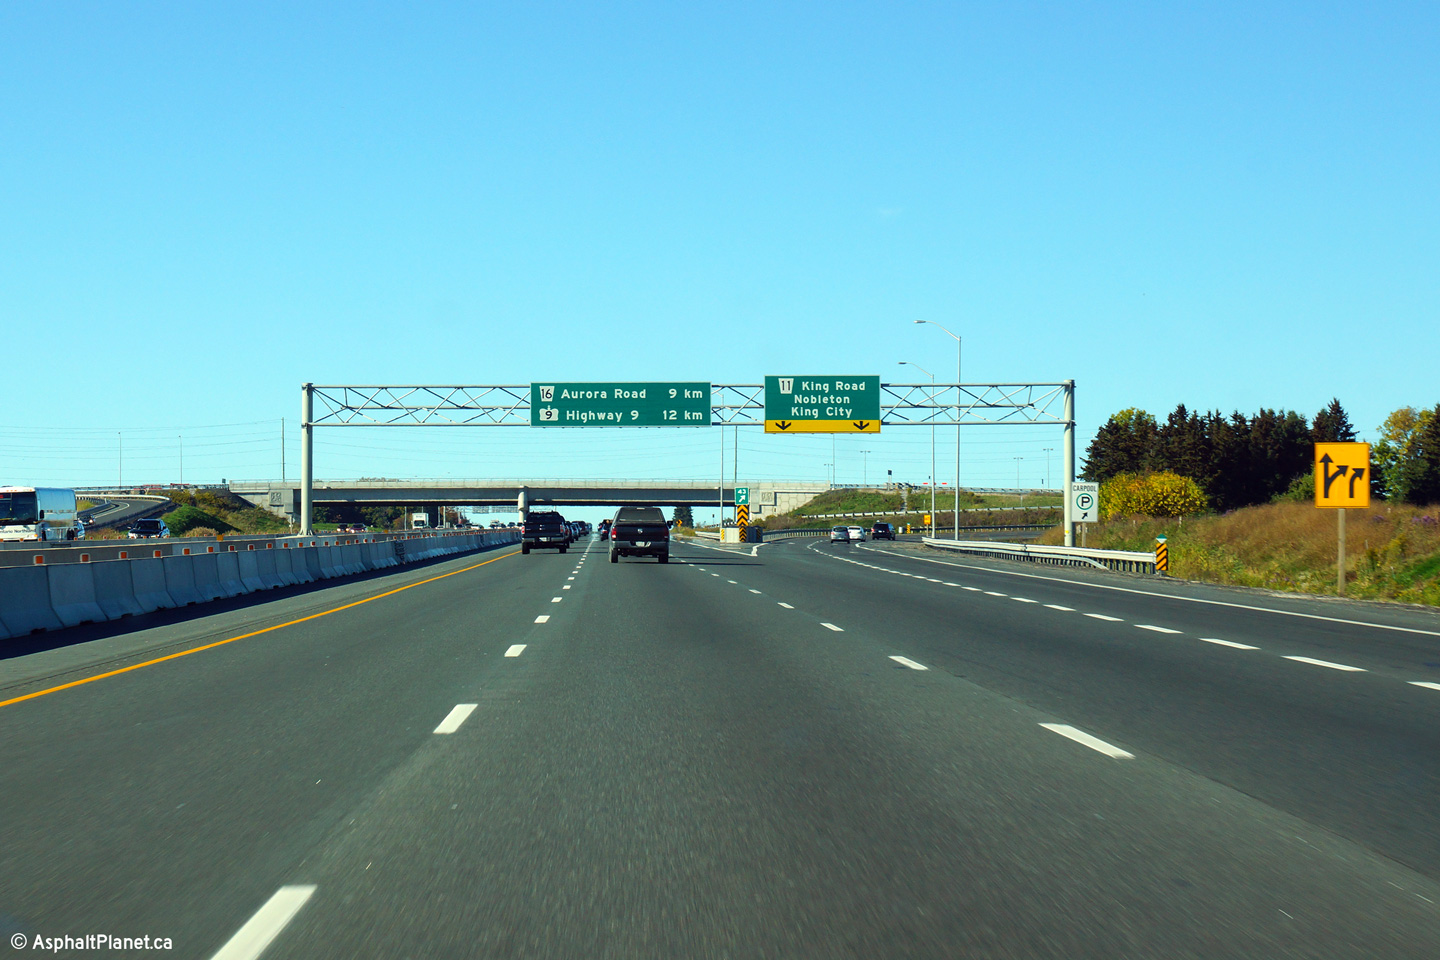
Northbound guide signage for the King Road interchange.
Photo taken: September 26th, 2013. |
 (720x480) (720x480)
(1440x960)
(2400x1600) |
| Township of King Regional
Municipality of York |
Southbound view from the King Road overpass. What is now a carpool lot
situated in the interchange 9in the upper photo) was first Highway 400's oldest northbound
Service Centre. When the King Road interchange was reconstructed in
2009/2010, the carpool lot was moved to a larger site in the northeast
quadrant of the interchange. The location of Highway 400's first
service centre is now a storm water management facility. Upper photo taken: May 27th, 2006. Lower photo taken:
June 5th, 2011. |
(720x480)
(1440x960)
(2400x1600) |
| Township of King Regional
Municipality of York |
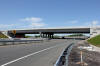
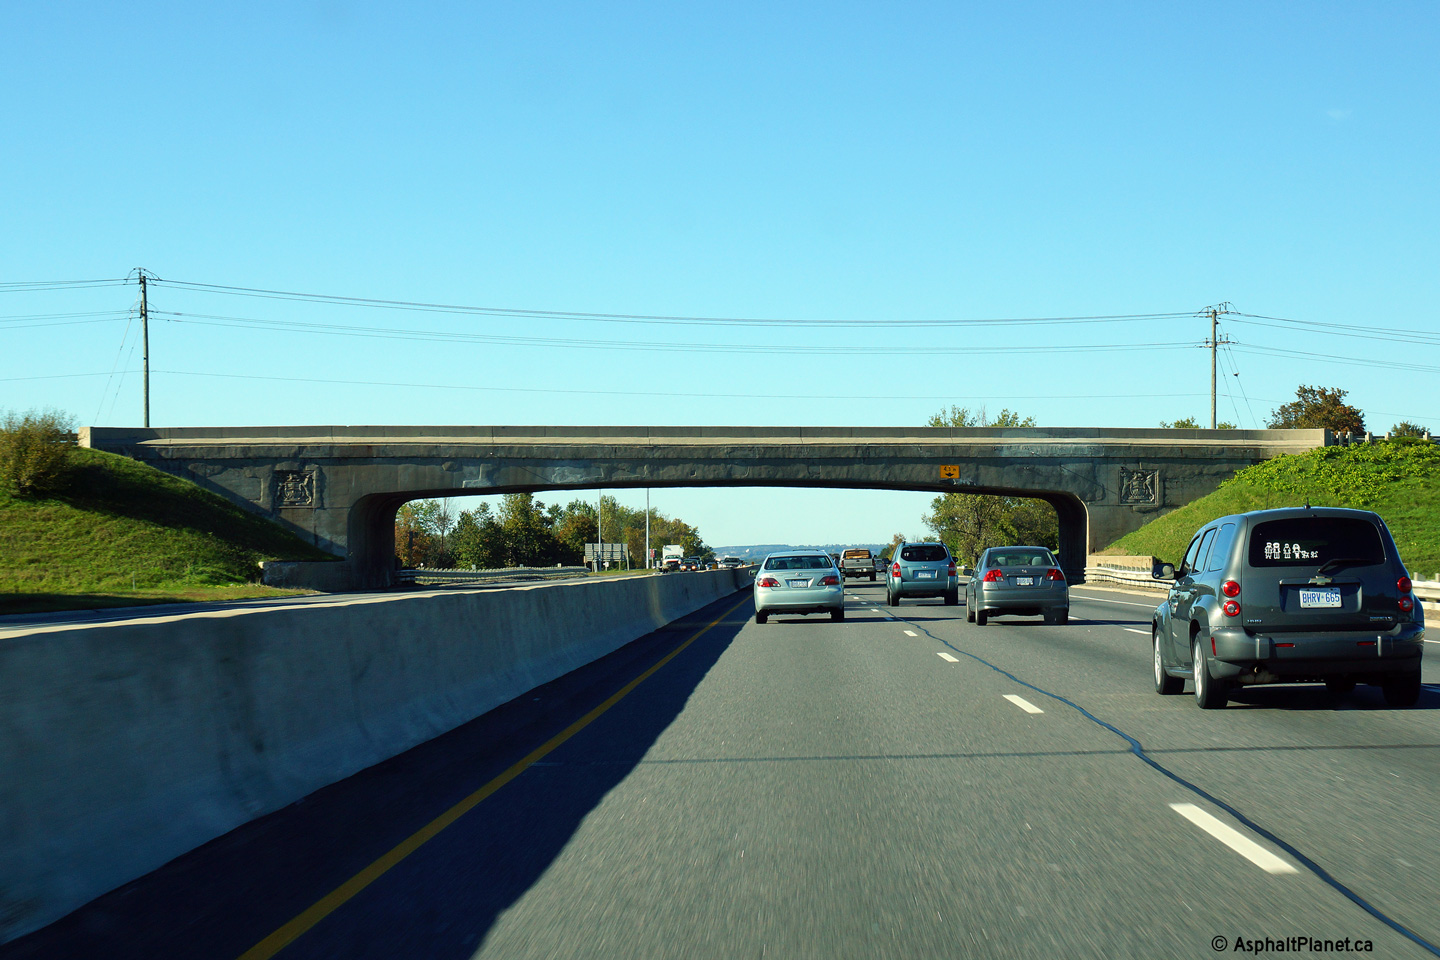
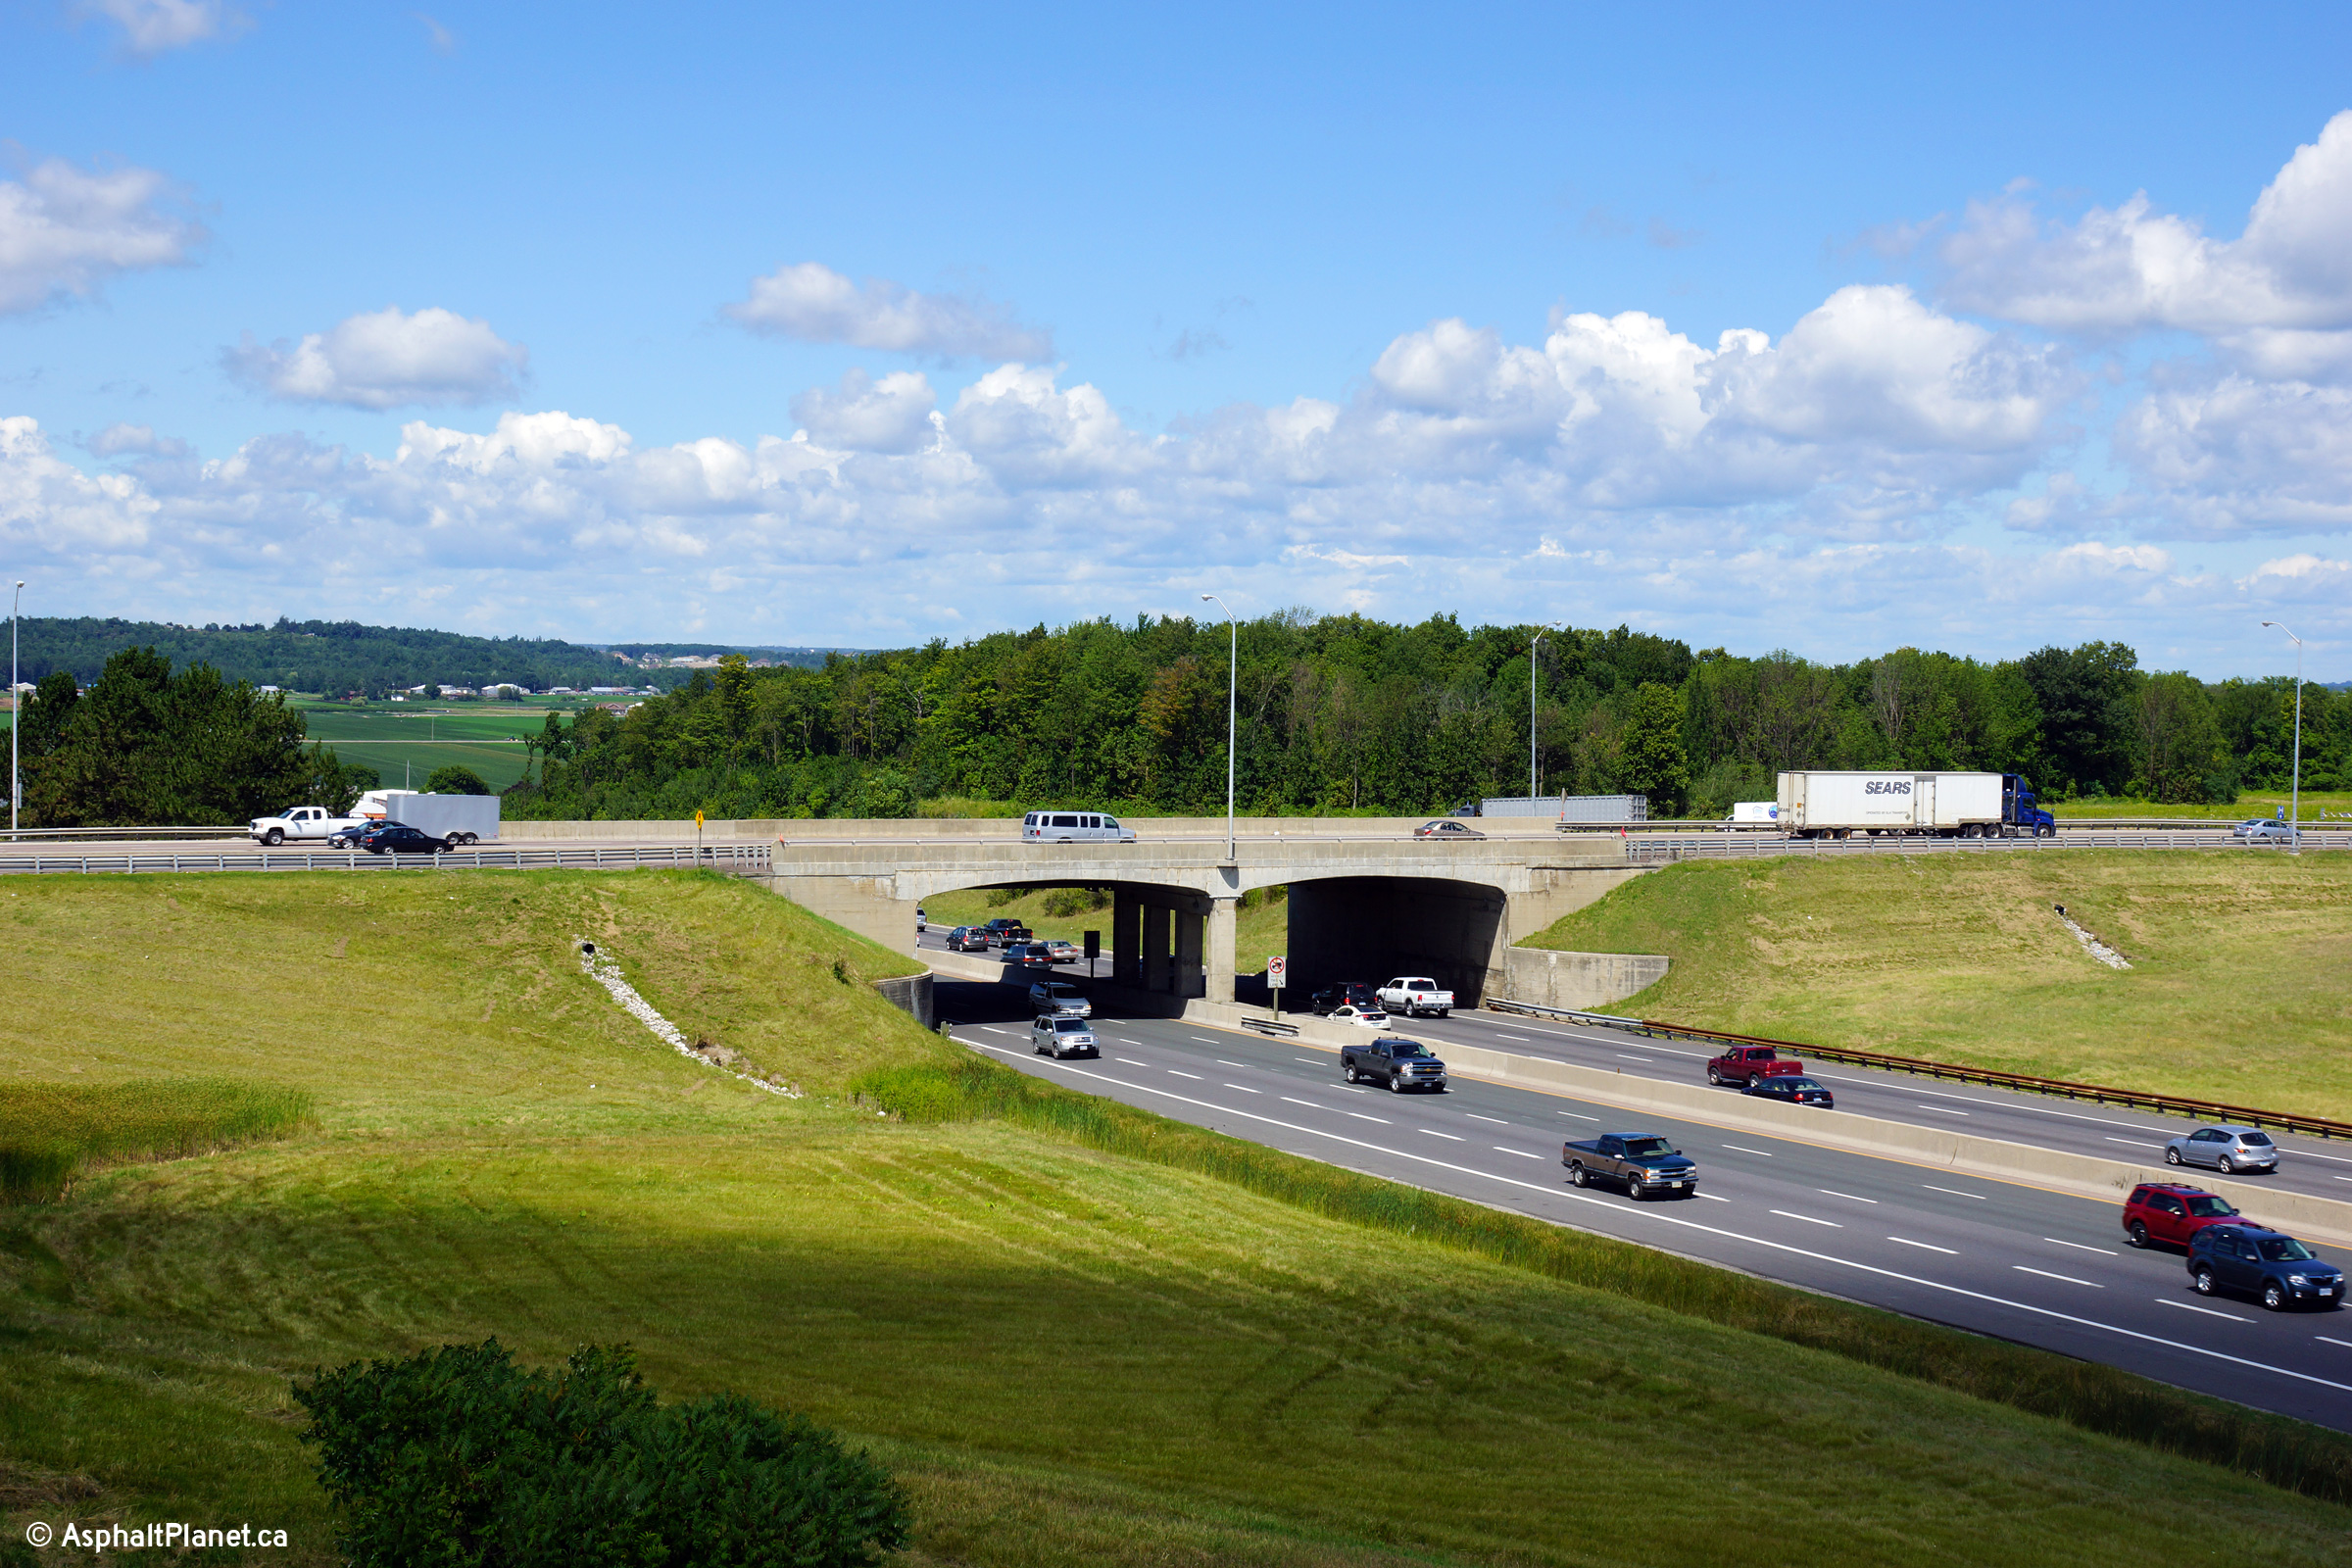
View looking northerly through the King Road structure. This structure
was completed in 2010 replacing a much narrower single span arch bridge.
A photo of the old structure is available
here.
Photo taken: June 5th, 2011. |
(720x480)
(1440x960)
(2400x1600) |
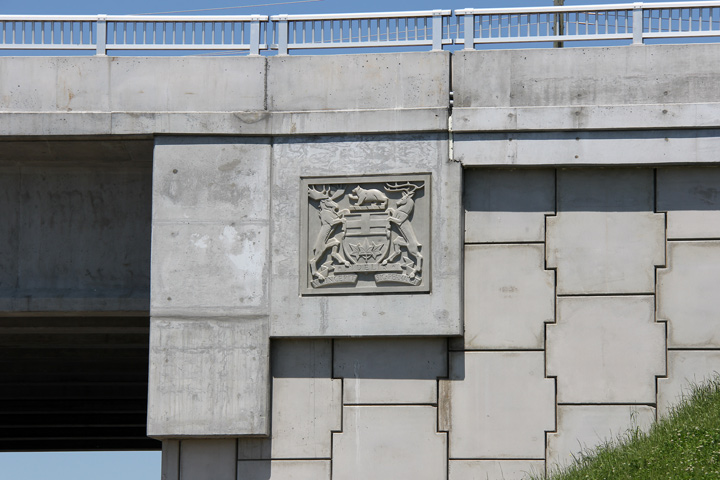
| Township of King Regional
Municipality of York |
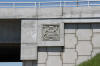
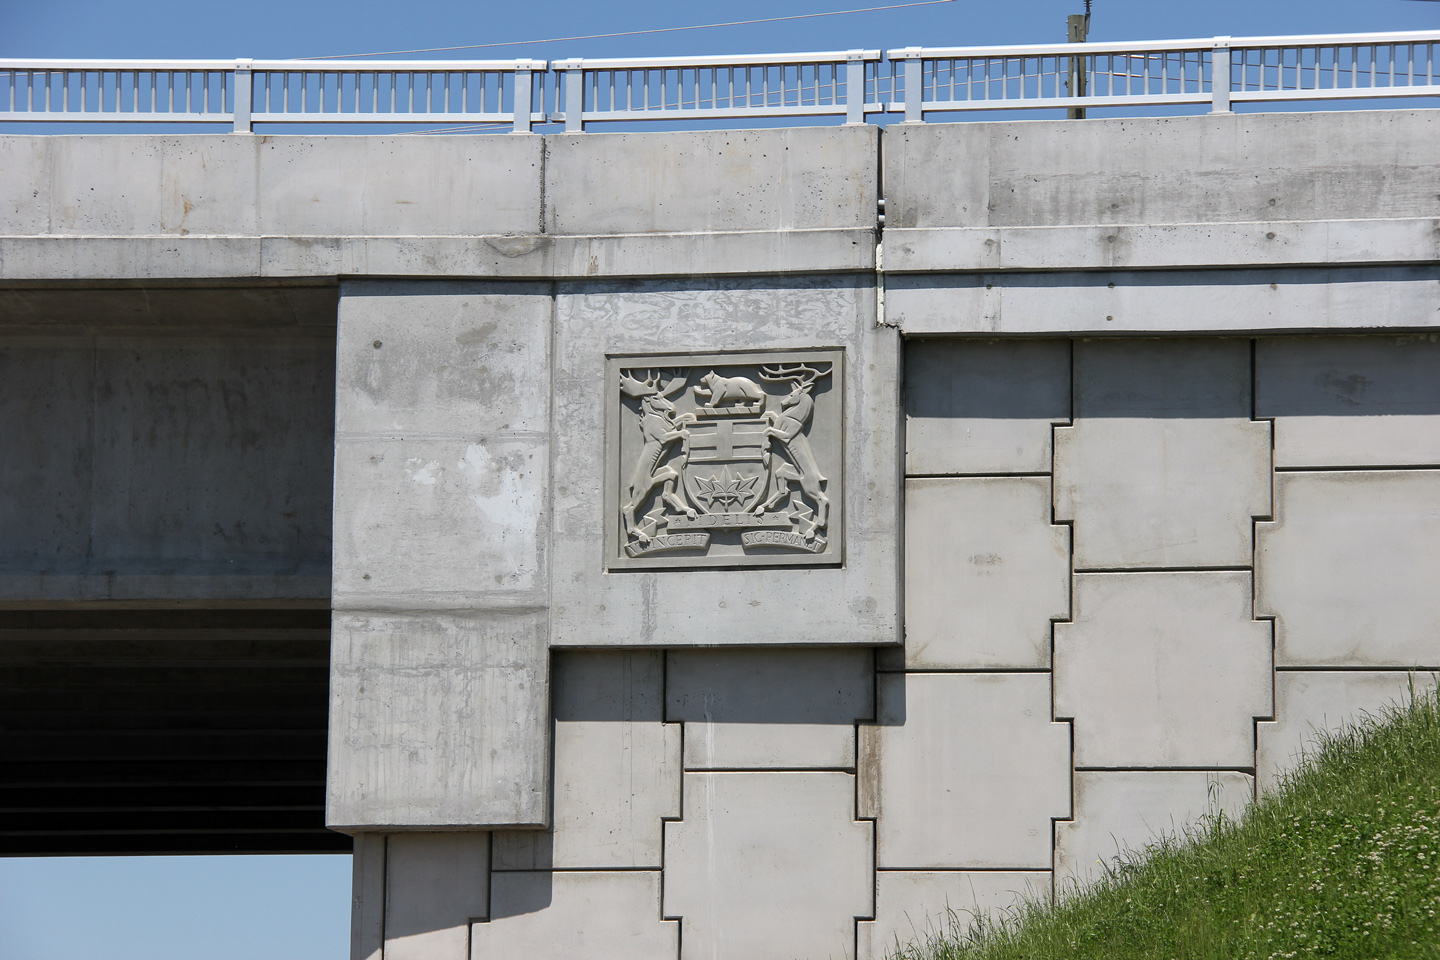
The Ontario Coat of Arms has been imprinted into the concrete abutments of
the King Road structure. The provincial Coat of Arms were stamped into
the abutments of many early
freeway structures in Ontario.
Photo taken: June 5th, 2011. |
(720x480)
(1440x960) |
| Township of King Regional
Municipality of York |
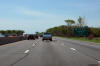
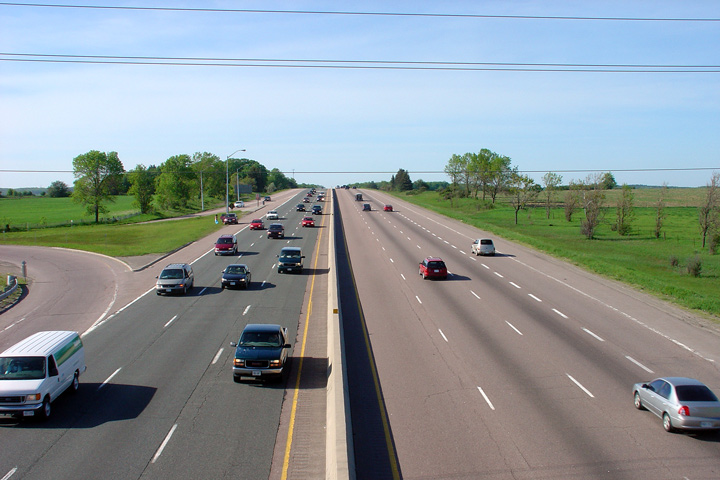
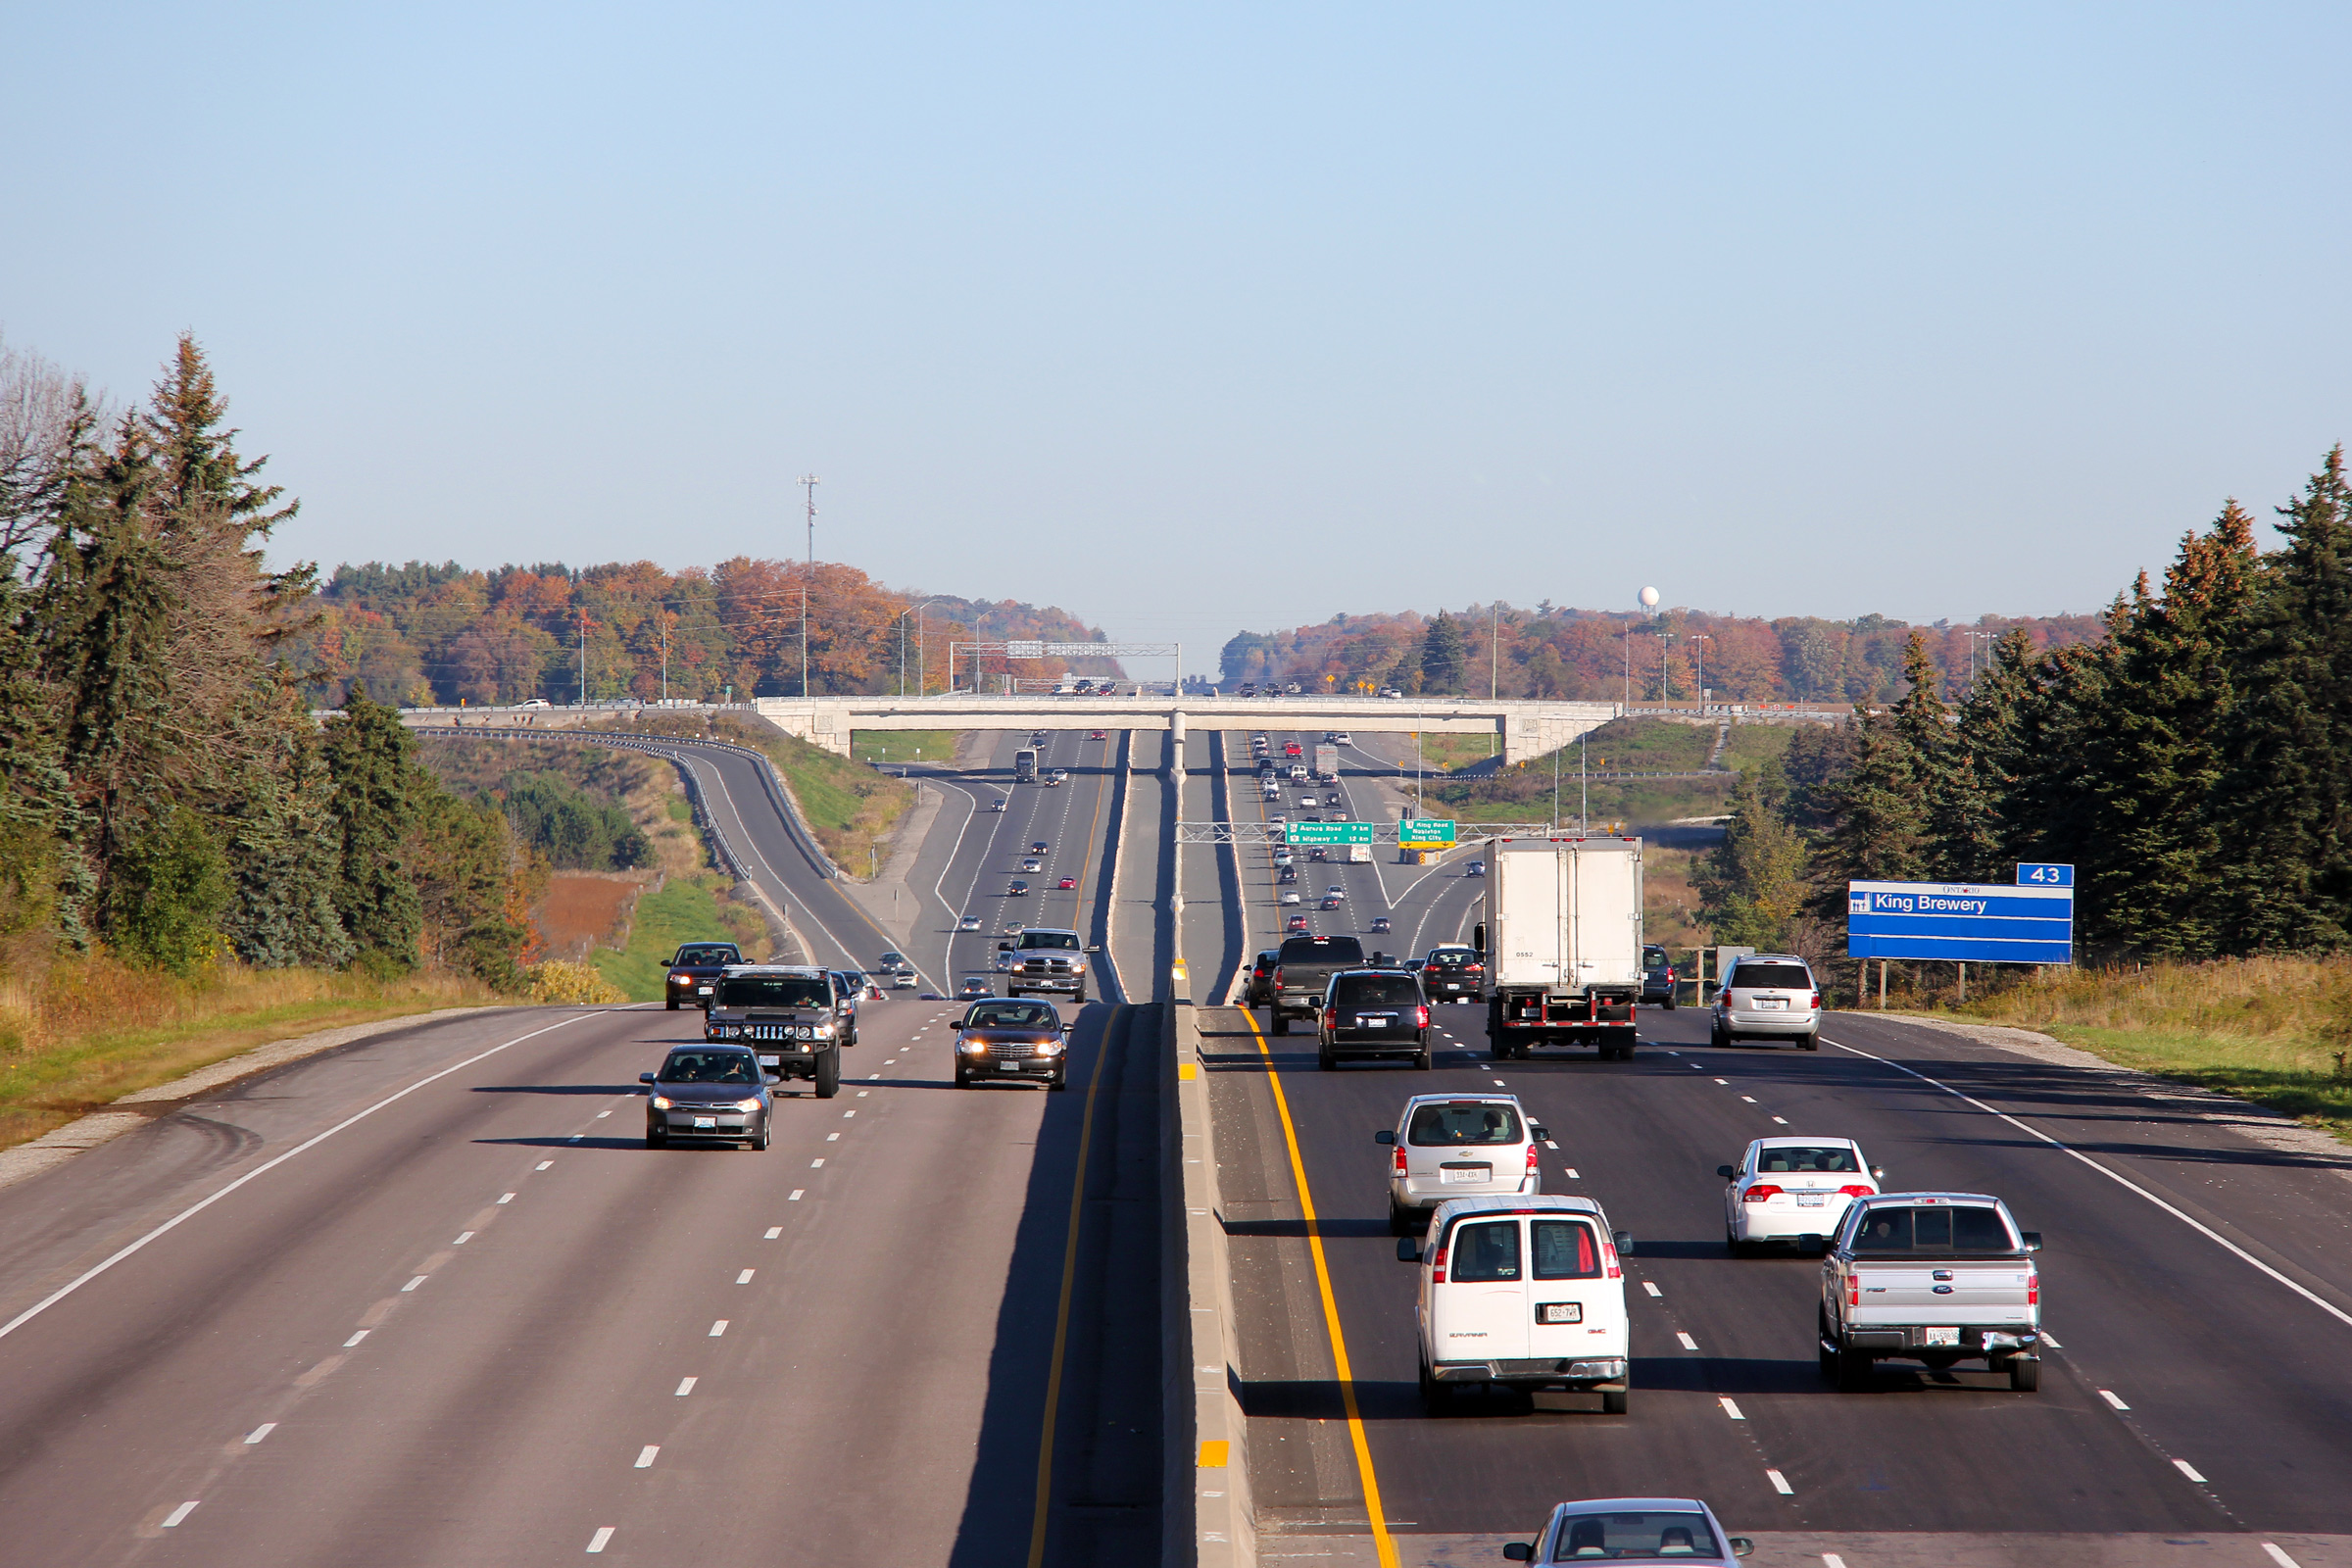
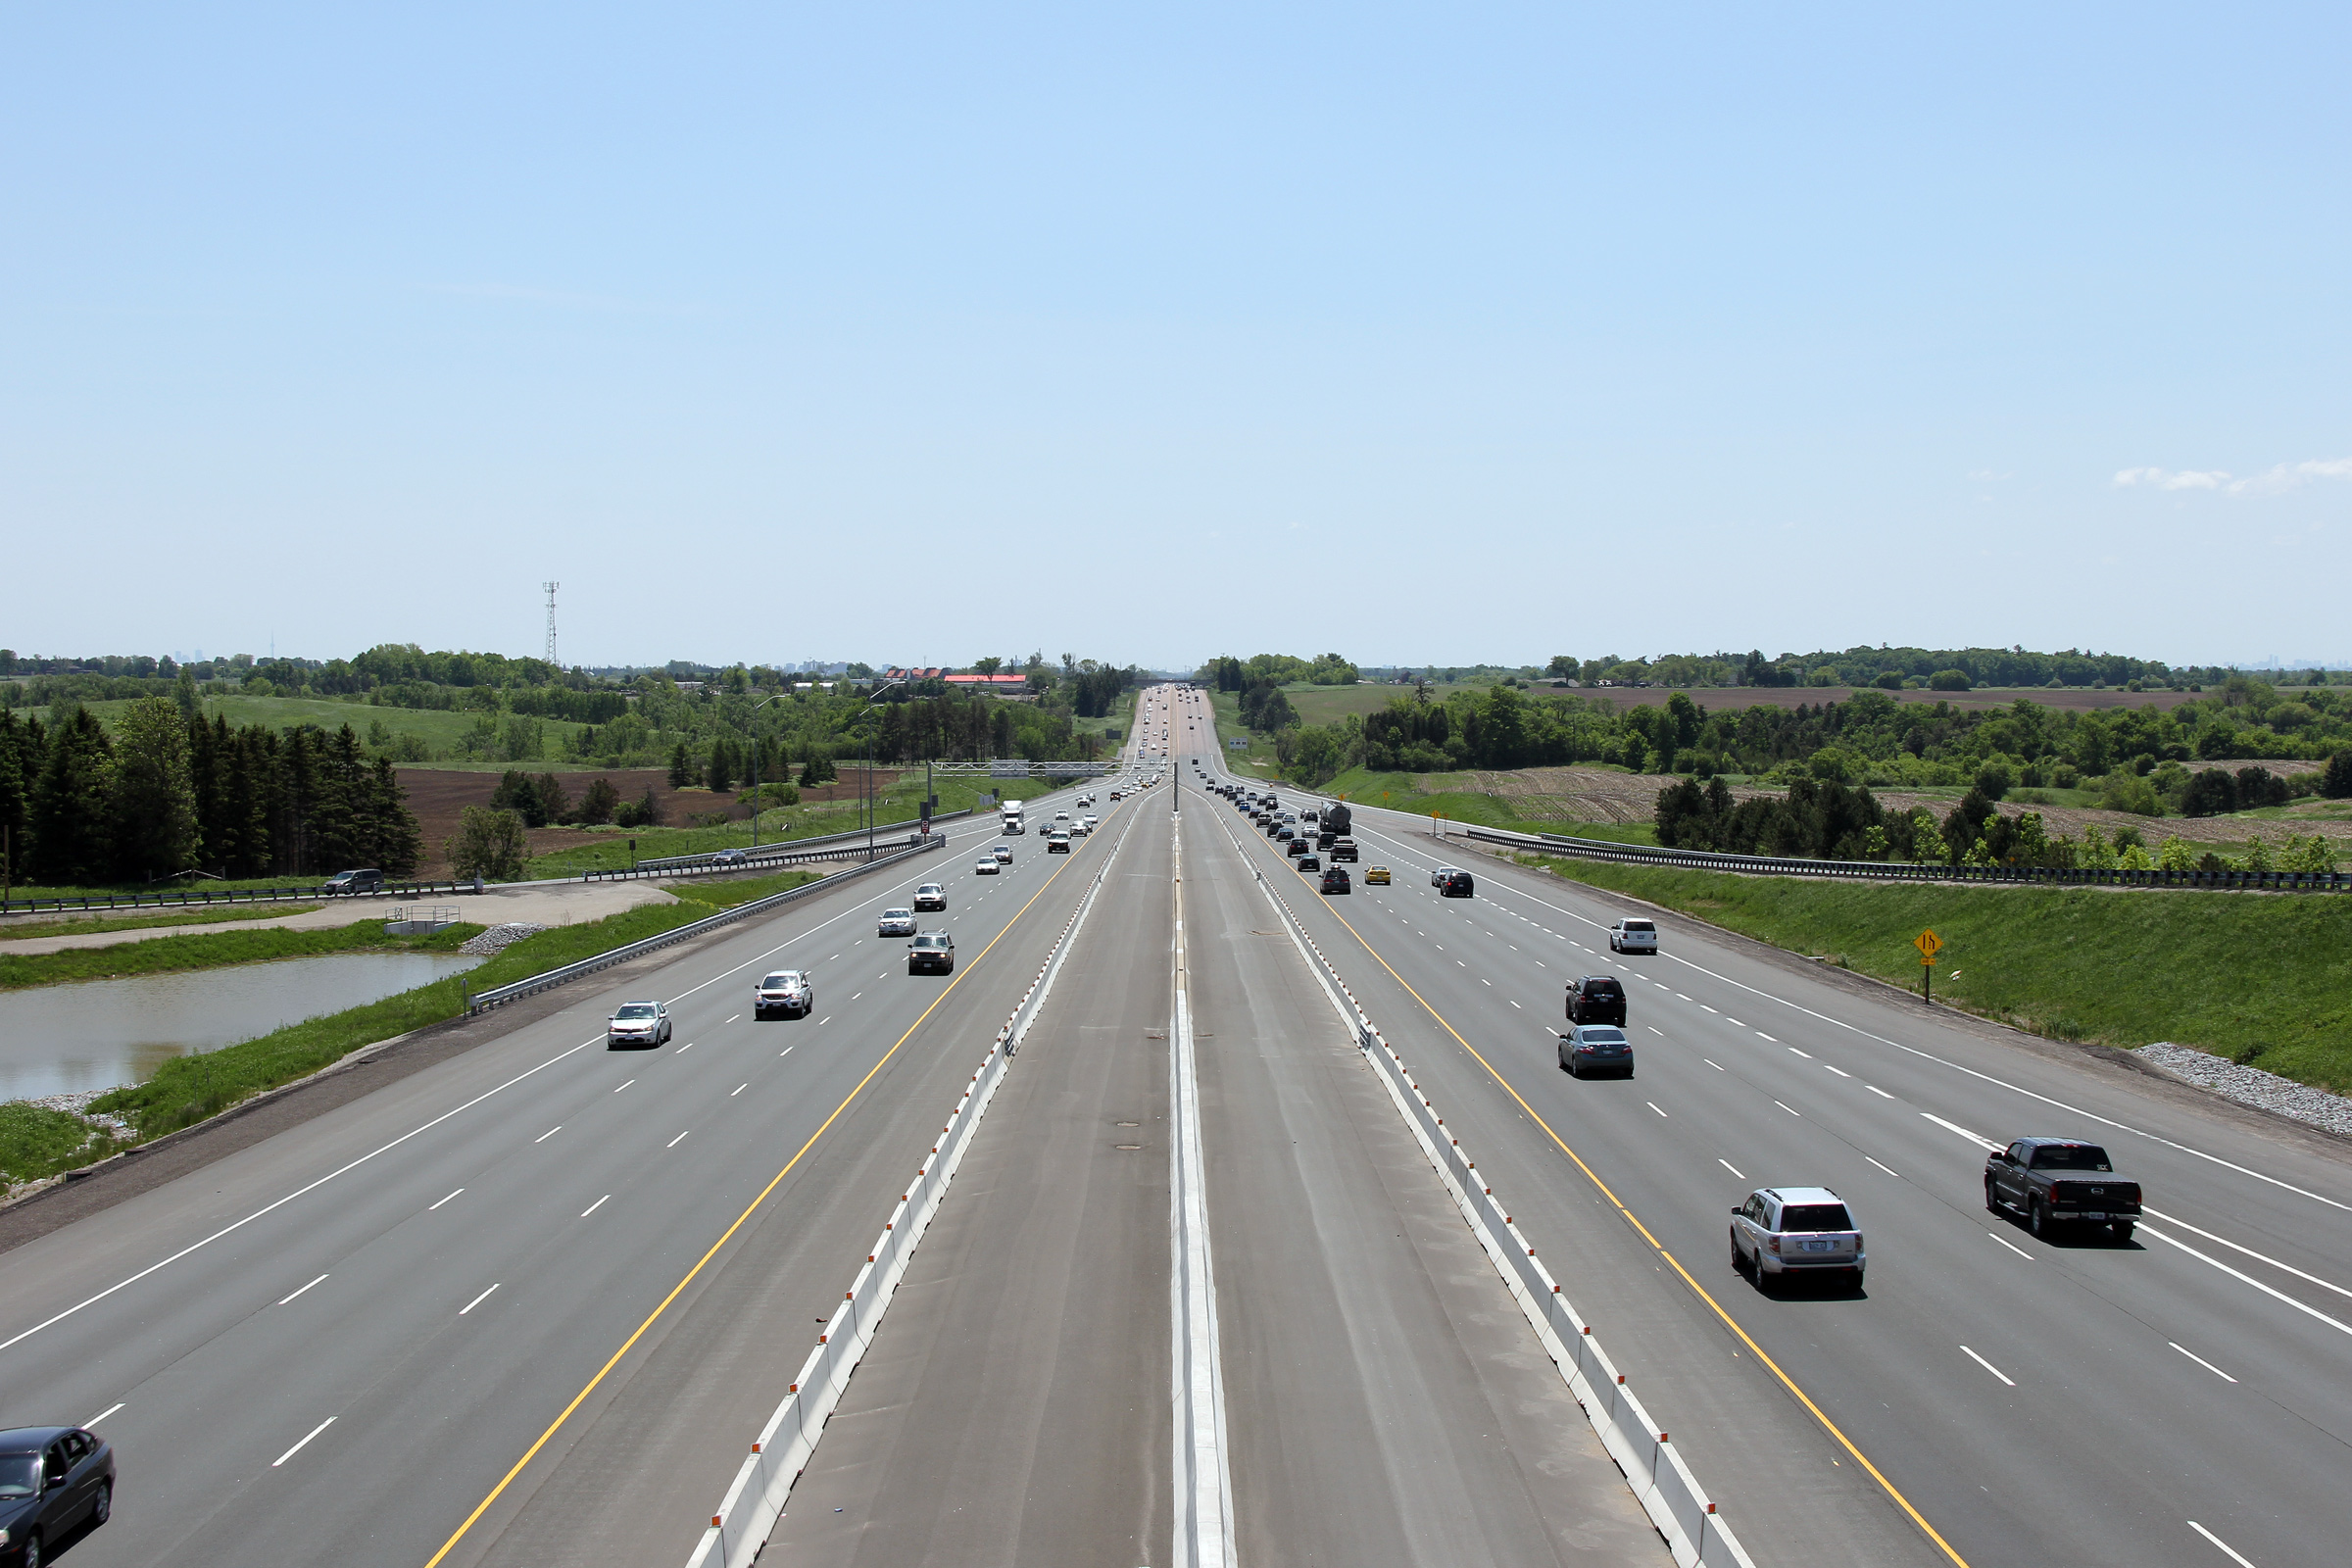
View looking north from King Road. Highway 400 was changed quite
minimally when it was widened to six lanes in the 1960s and 70s. It
was more changed more substantially in the 2000s when the King Road
interchange was reconstructed. Upper photo
taken: May 27th, 2006. Lower photo taken: June 5th, 2011. |

(720x480)
(1440x960)
(2400x1600) |
| Township of King Regional
Municipality of York |
Southerly view at the off-ramp to King Road.
Photo taken: June 1st, 2014. |
 (720x480) (720x480)
(1440x960)
(2400x1600) |
| Township of King Regional
Municipality of York |
Southbound advanced signage for the King Road interchange.
Photo taken: June 1st, 2014. |
 (720x480) (720x480)
(1440x960)
(2400x1600) |
| Township of King Regional
Municipality of York |
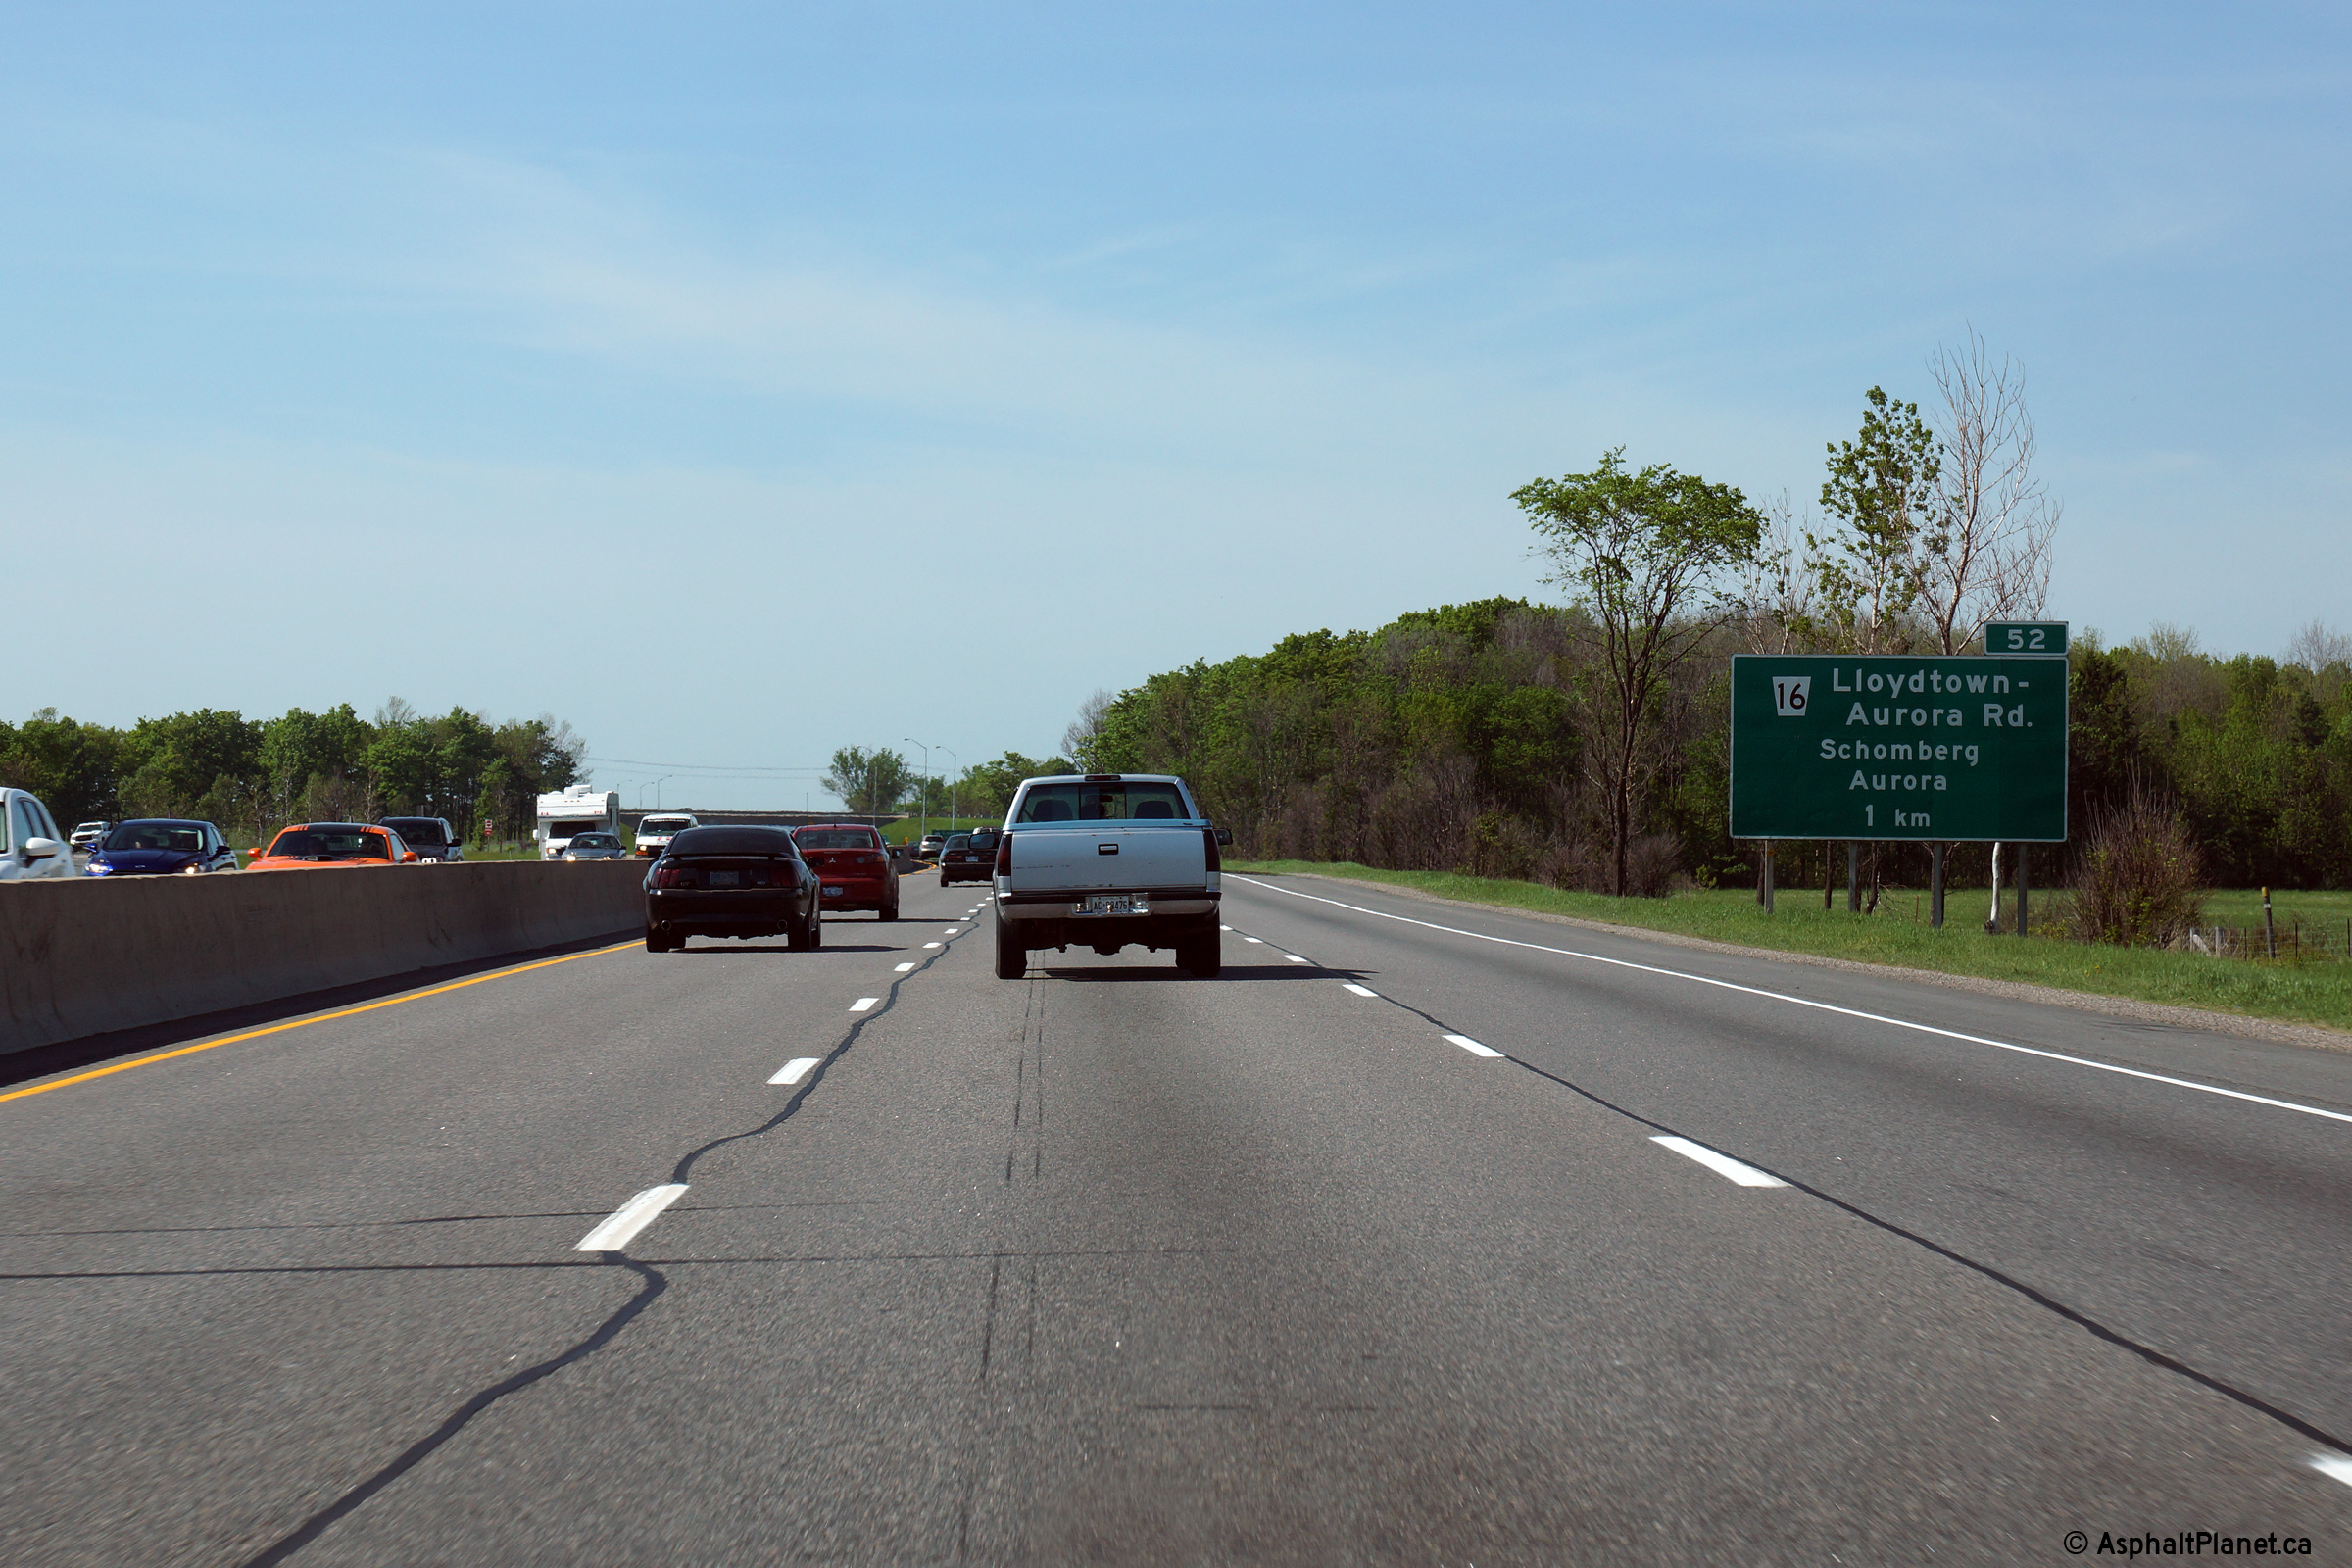
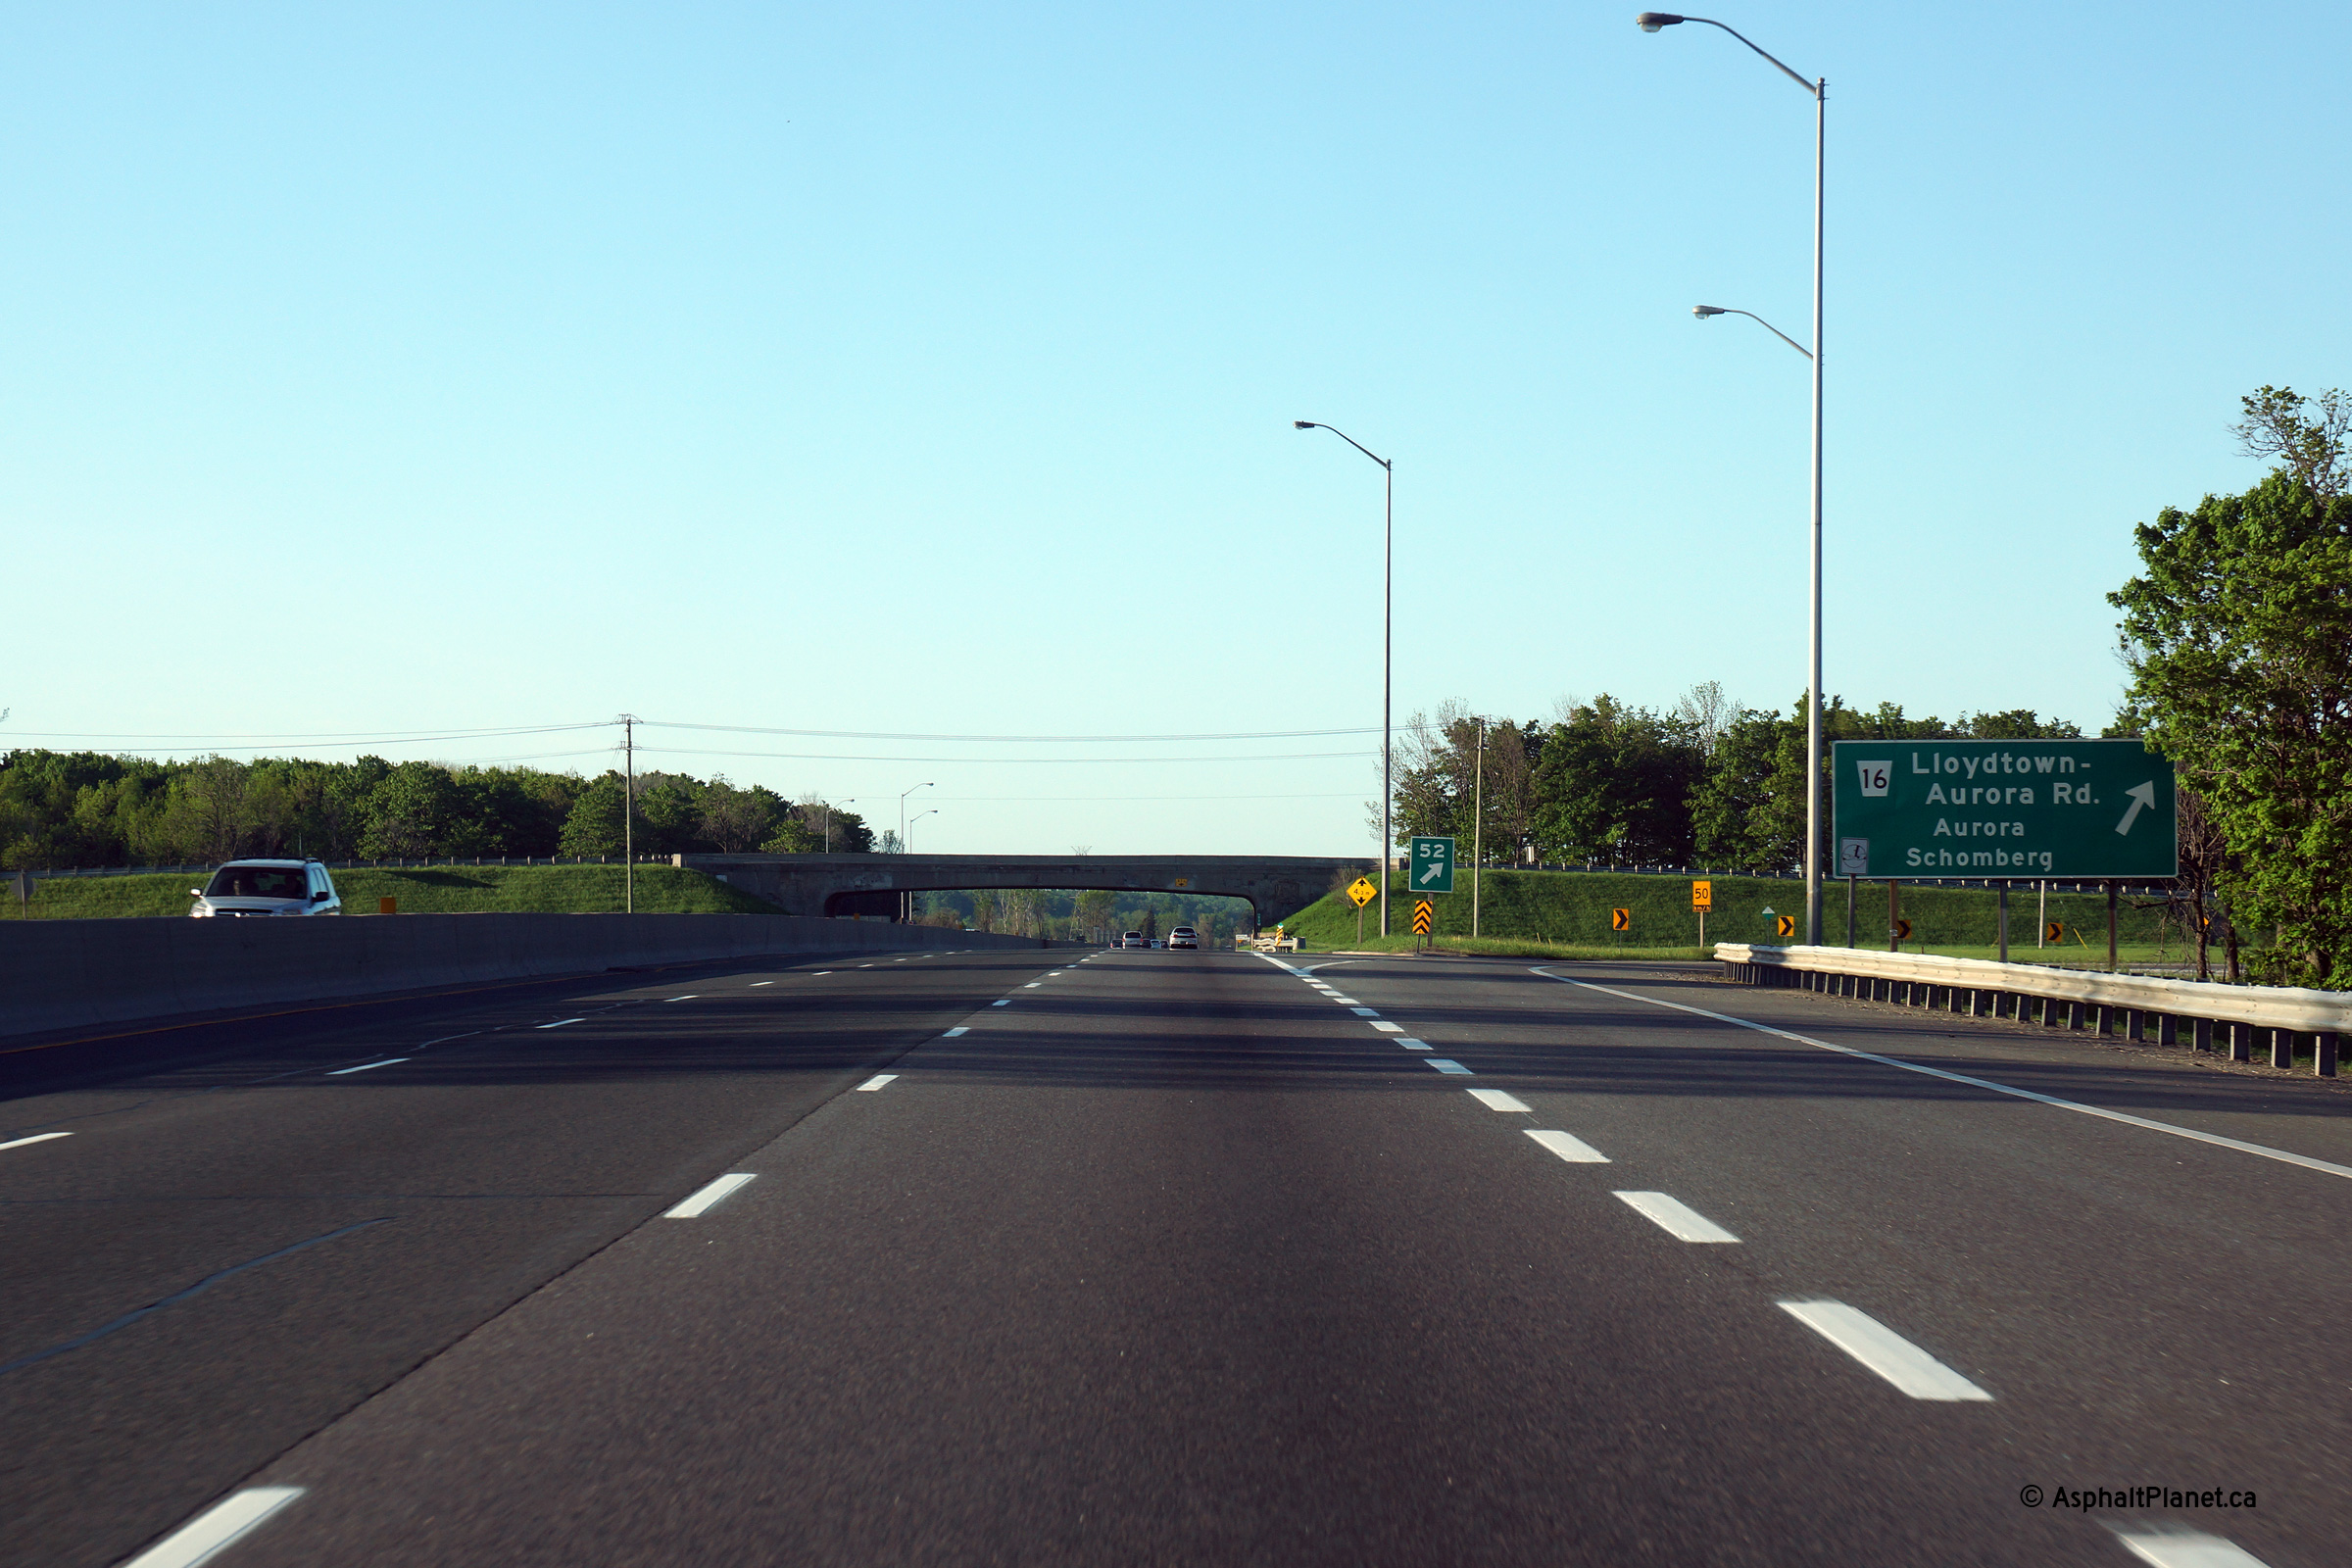
Northbound signage in advance of the Lloydtown-Aurora Road interchange.
Photo taken: May 31st, 2014. |
 (720x480) (720x480)
(1440x960)
(2400x1600) |
| Township of King Regional
Municipality of York |
Signage at the northbound off-ramp to Lloydtown-Aurora Road.
Photo taken: May 31st, 2014. |
 (720x480) (720x480)
(1440x960)
(2400x1600) |
| Township of King Regional
Municipality of York |
Northerly view as Highway 400 passes beneath the Lloydtown-Aurora Road
overpass
Photo taken: September 26th, 2013. |
 (720x480) (720x480)
(1440x960)
(2400x1600) |
| Township of King Regional
Municipality of York |
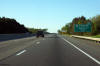
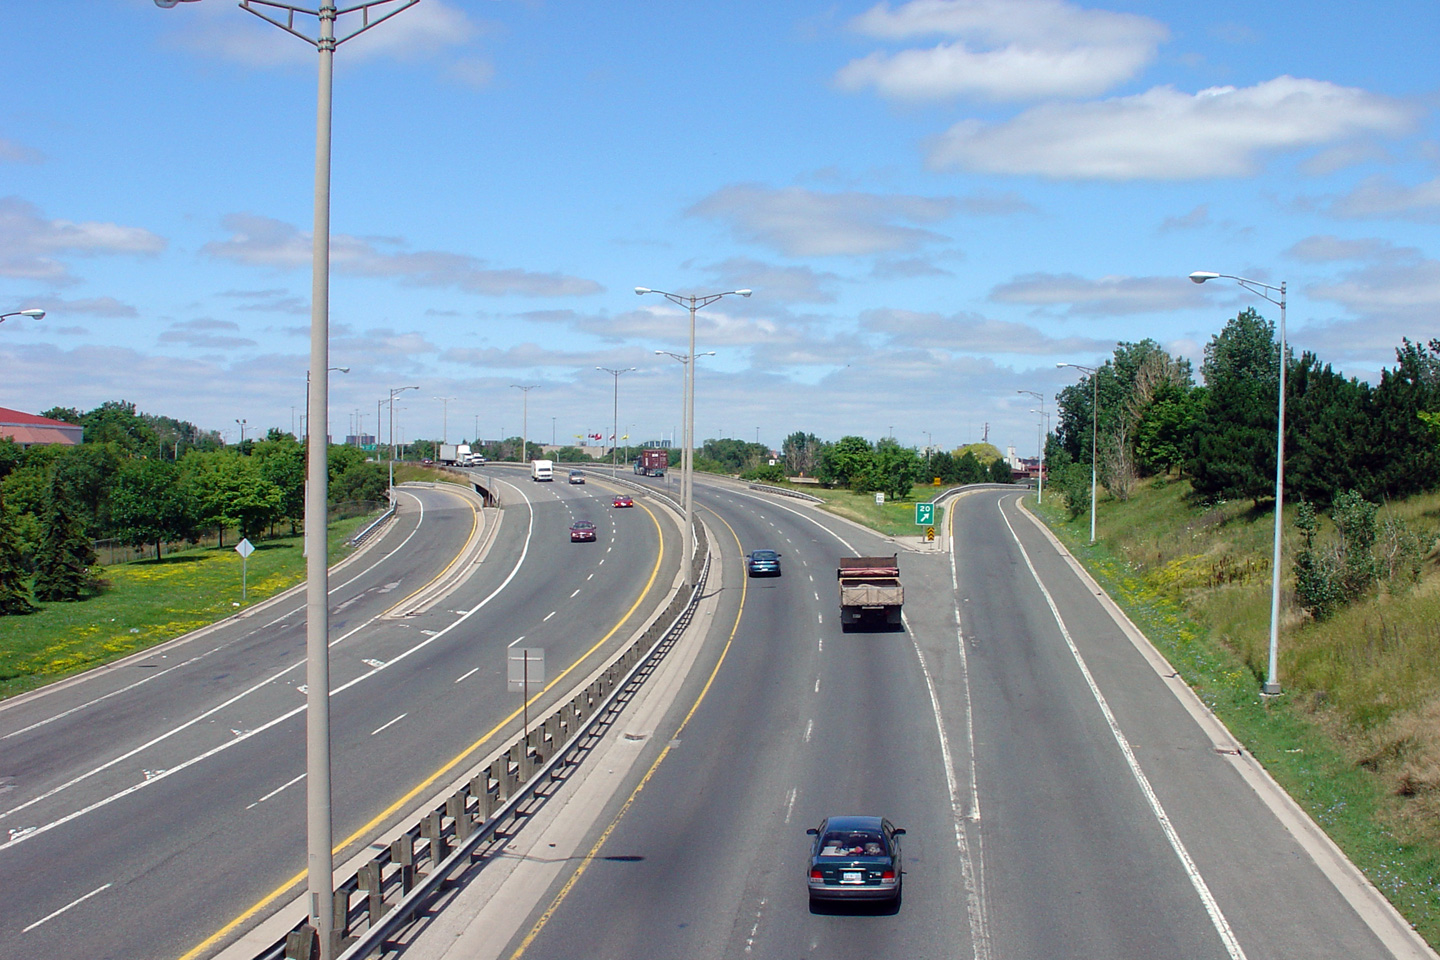
Southerly view from the Lloydtown-Aurora Road overpass. Click
here
for an additional view from this vantage point, taken July 234d, 2006.
Photo taken: May 6th, 2013. |
(720x480)
(1440x960)
(2400x1600) |
| Township of King Regional
Municipality of York |
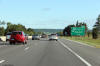
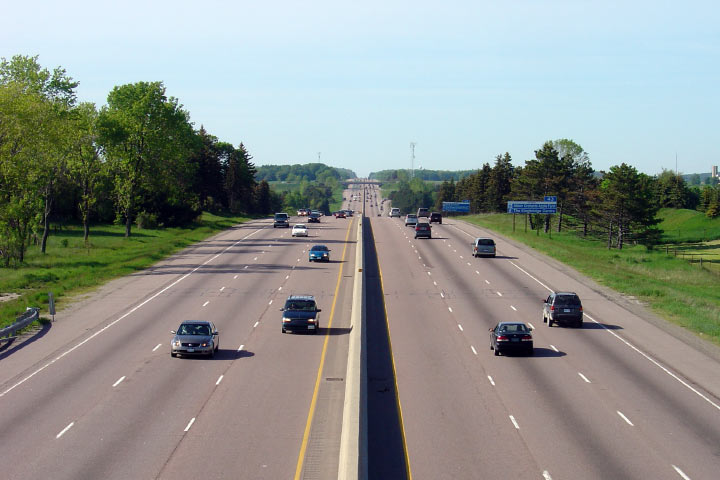
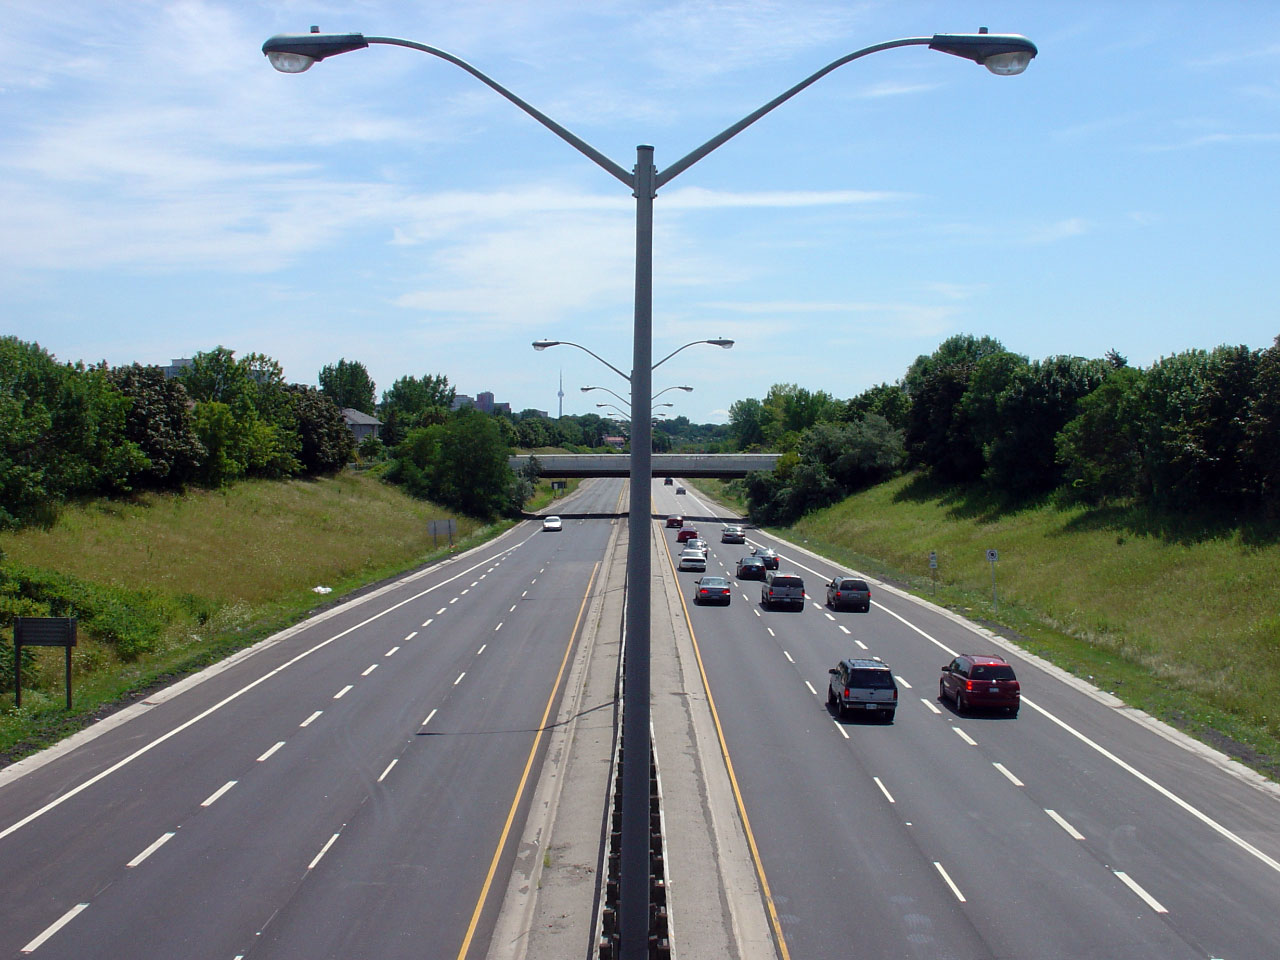
Looking north from Lloydtown-Aurora Road. Click
here
for an additional view from this vantage point, taken July 23rd, 2006.
Photo taken: May 6th, 2013. |
(720x480)
(1440x960)
(2400x1600) |
| Township of King Regional
Municipality of York |
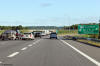
Southbound signage at the off-ramp to Lloydtown-Aurora Road.
Photo taken: June 1st, 2015. |
 (720x480) (720x480)
(1440x960)
(2400x1600) |
| Township of King Regional
Municipality of York |
Southbound signage in advance of the off-ramp to Lloydtown-Aurora Road.
Photo taken: June 1st, 2015. |
 (720x480) (720x480)
(1440x960)
(2400x1600) |
| Township of King Regional
Municipality of York |
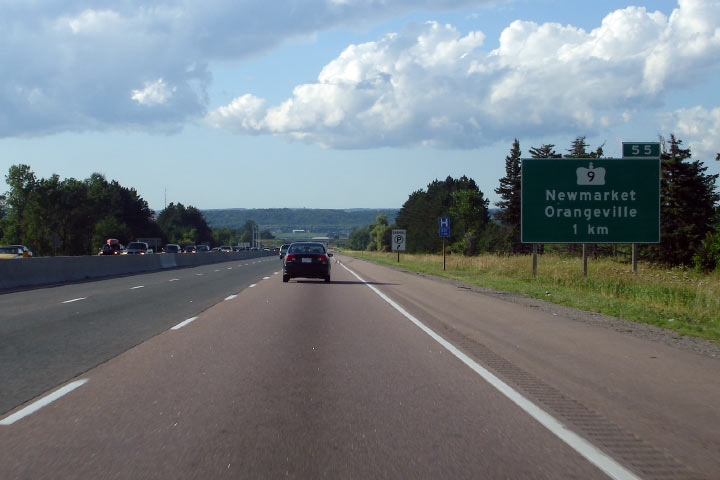
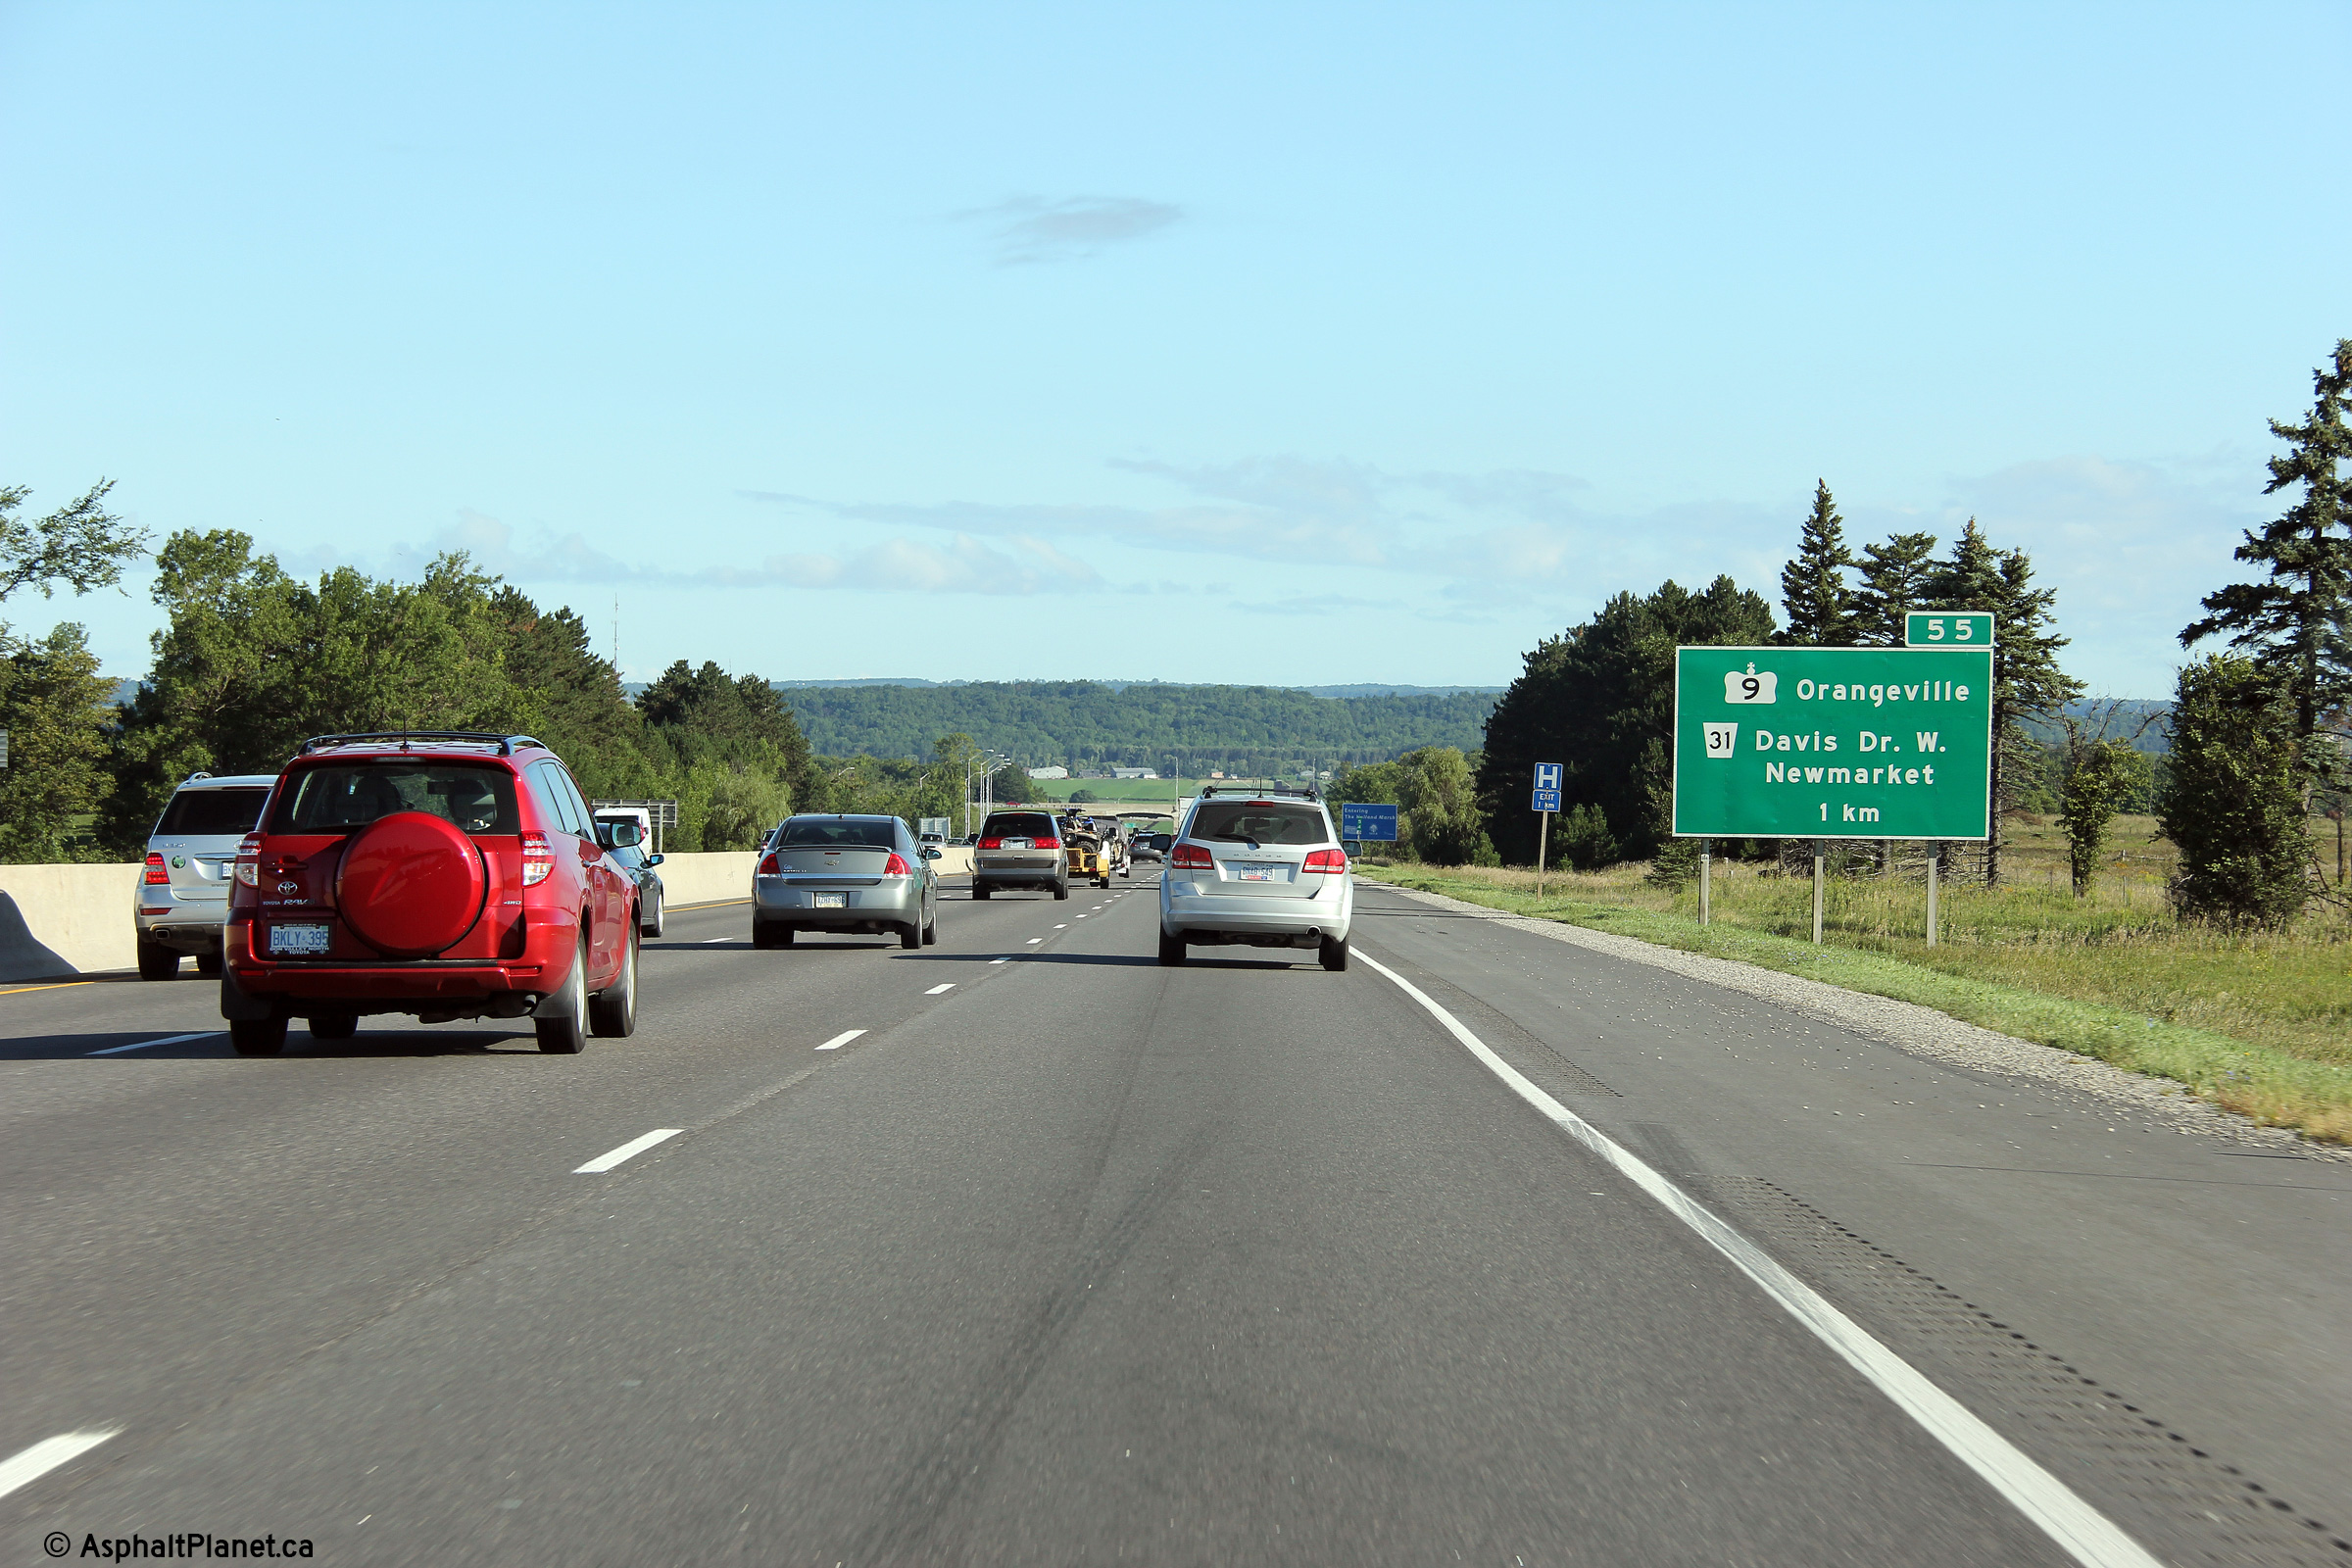
Northbound advanced sign for the Highway 9
interchange. Click here for an earlier incarnation of this signage,
taken in 2006. Photo taken: August 18th, 2012. |
 (720x480) (720x480)
(1440x960)
(2400x1600)
|
| Township of King Regional
Municipality of York |
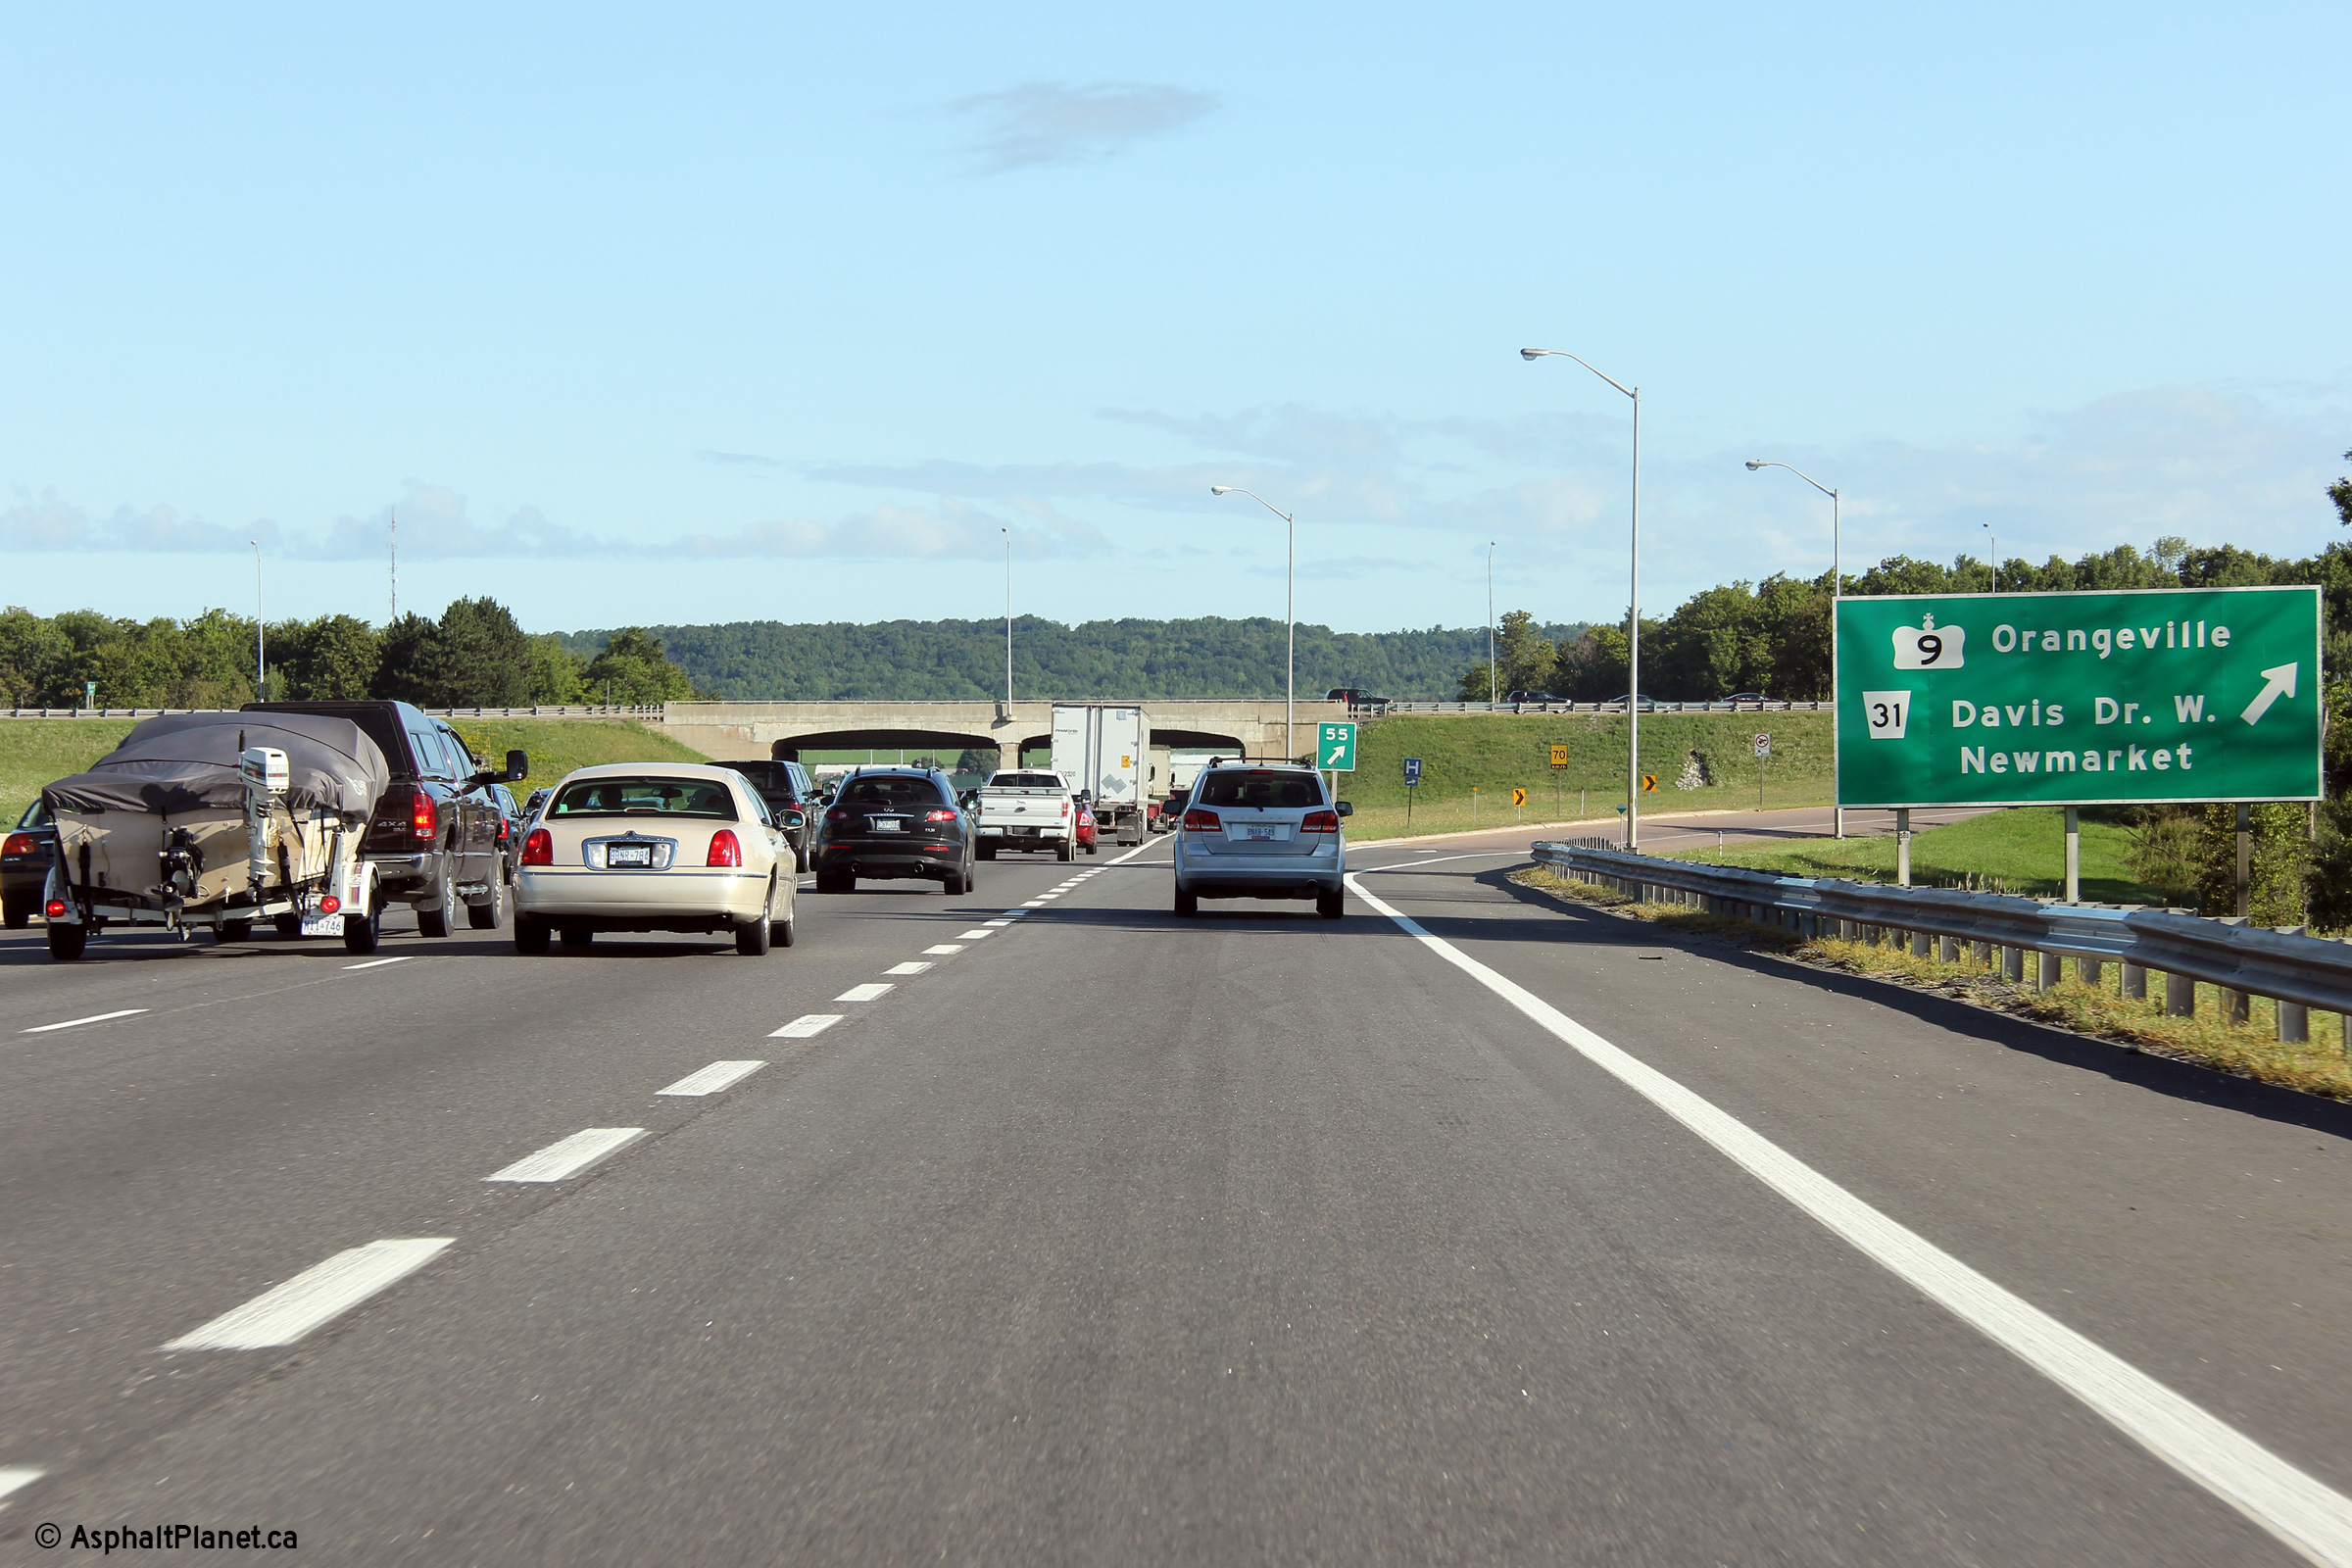
Northbound signage and exit ramp to Highway 9 from Highway 400.
Click here for an earlier incarnation
of this signage, taken in 2006, by Dan Garnell. Photo taken: August 18th,
2012. |
 (720x480) (720x480)
(1440x960)
(2400x1600) |
| Township of King Regional
Municipality of York |
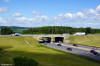
Two views looking northerly along Highway 400 towards the Highway 9
interchange and grade separation. The Highway 9 grade separation is
comprised of two different structure designs that have been linked together
by a common bridge deck. The southern portion of the Highway 9
overpass (carrying the eastbound lanes) is a concrete two span arch bridge
that was constructed late in the 1940s. The northern portion of the
overpass was constructed in the 1990s when Highway 9 was widened to four
lanes and is a single span concrete beam bridge.
Photos taken: August 14th, 2013. |

(720x480)
(1440x960)
(2400x1600)
(720x480)
(1440x960)
(2400x1600) |
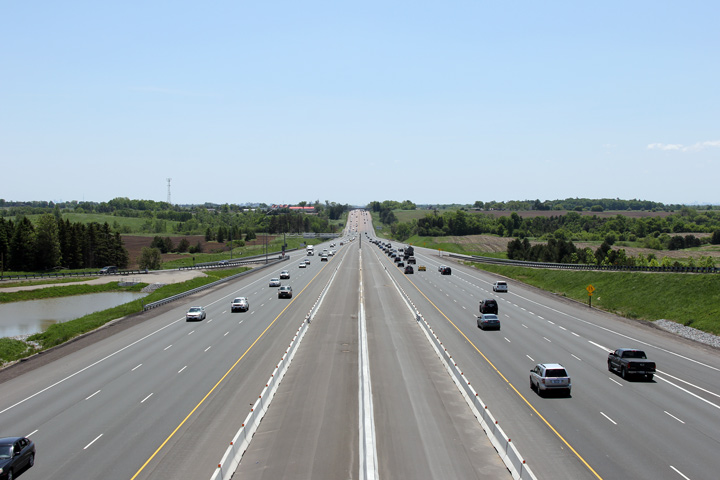
| Township of King Regional
Municipality of York |
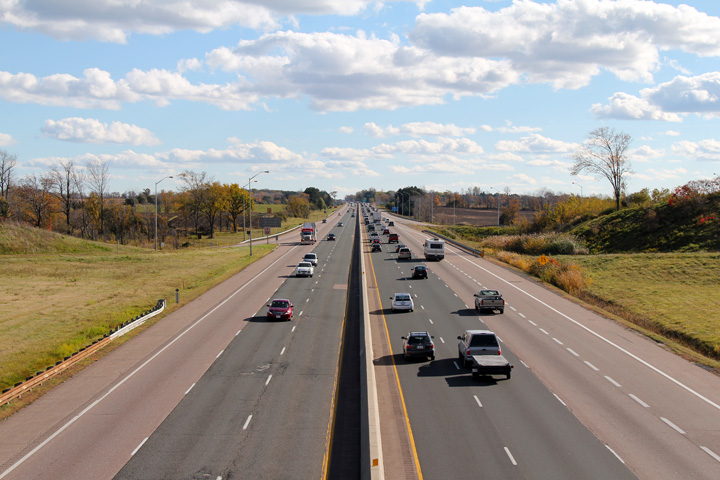
Looking south from the Highway 9 overpass. Photo taken: October 17th,
2010. |
(720x480)
(1440x960)
(2400x1600) |
|
Highway 9 extends west from Highway
400 to Orangeville and beyond.
Click
here for Highway 9 images. |
|
Click here for Highway 400 images between Highway 9
and Barrie. |

 (720x480)
 (720x480)
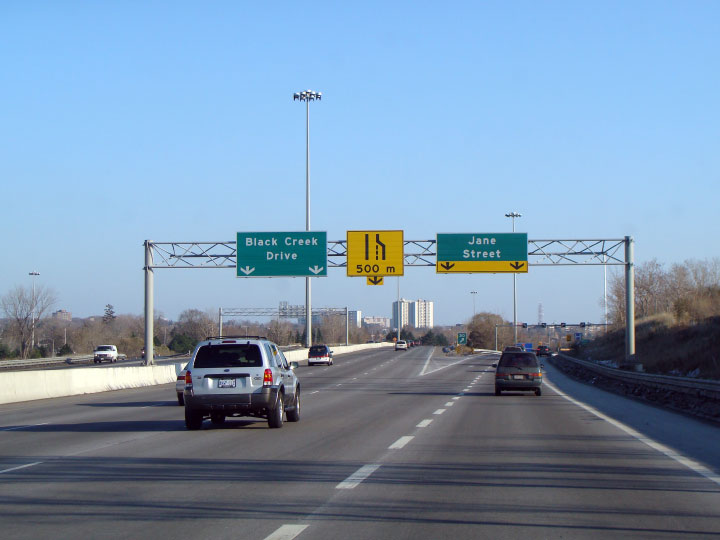 (720x480)
 (720x480)
 (720x480)
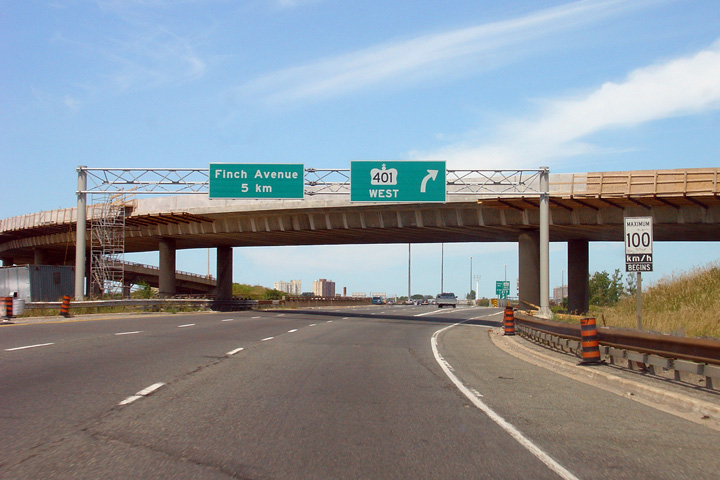 (720x480)
 (720x480)
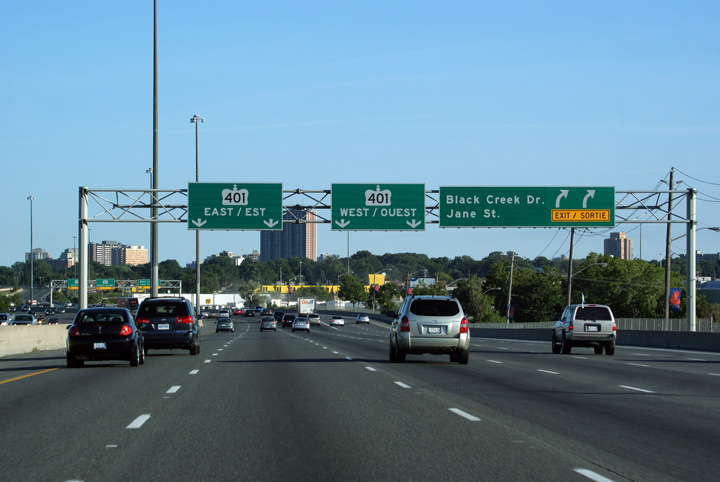 (720x480)
 (720x480)
 (720x480)
 (720x480)
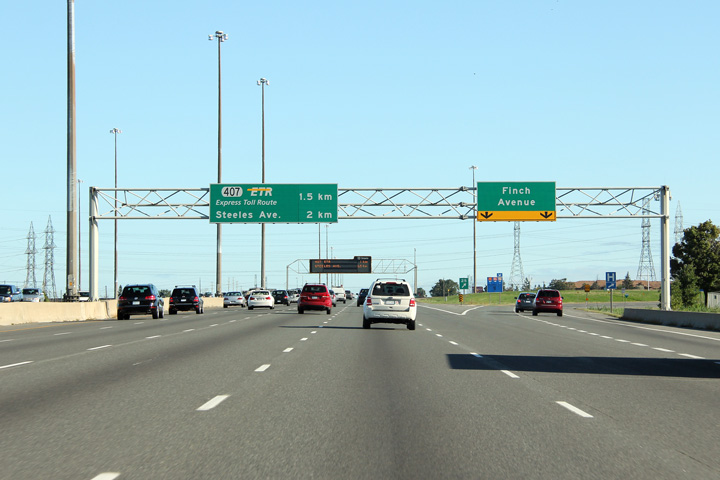 (720x480)
 (720x480)
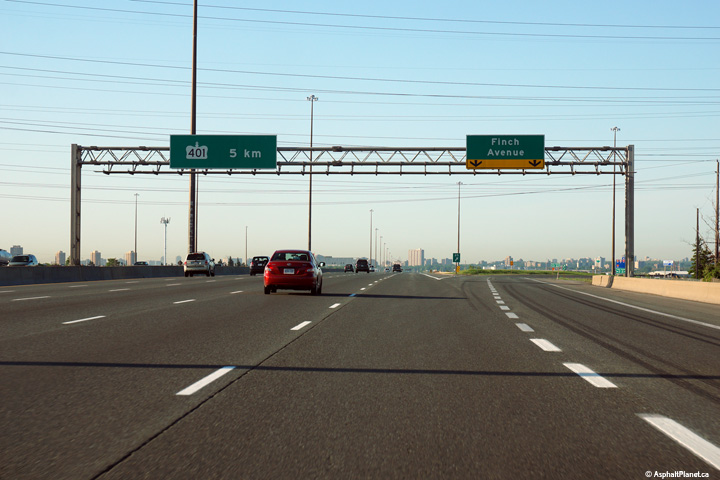 (720x480)
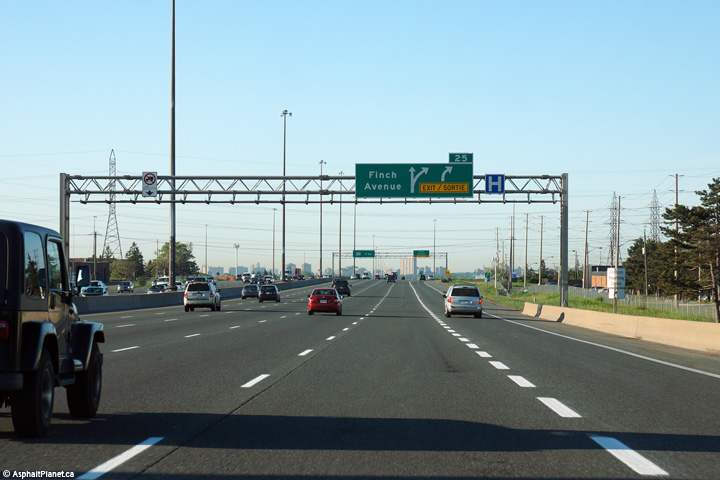 (720x480)
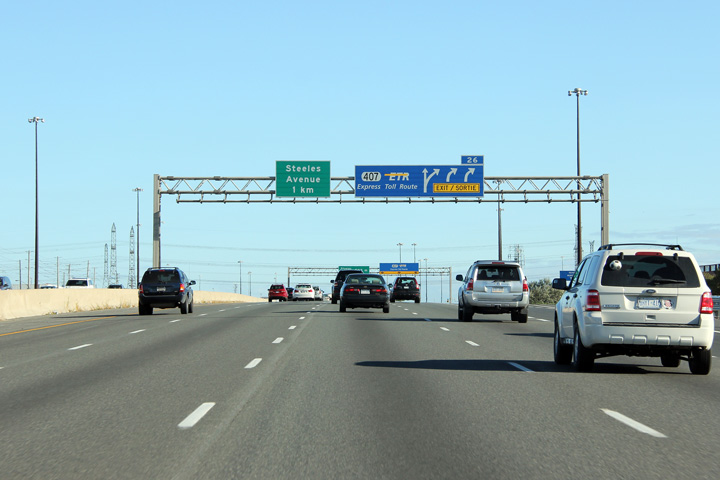 (720x480)
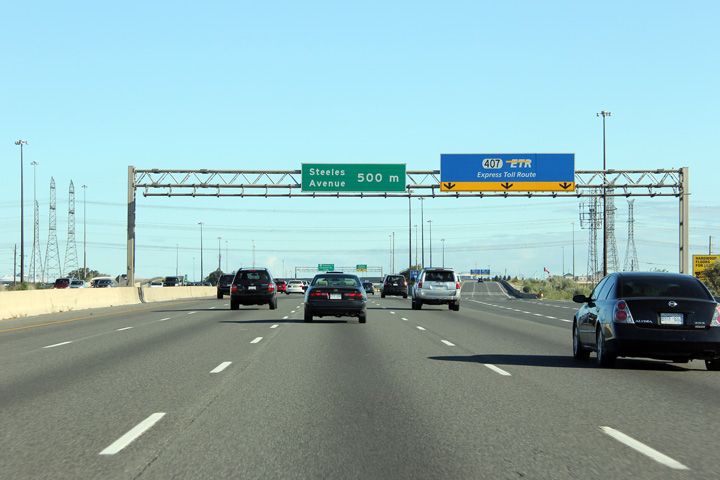 (720x480)
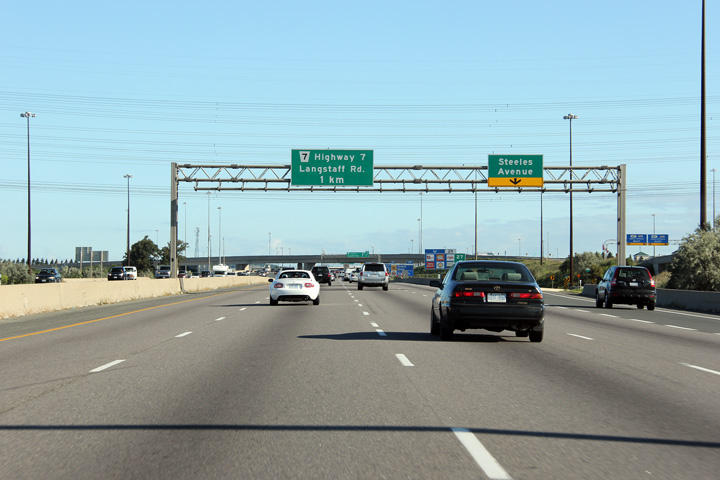
 (720x480)


 (720x480)
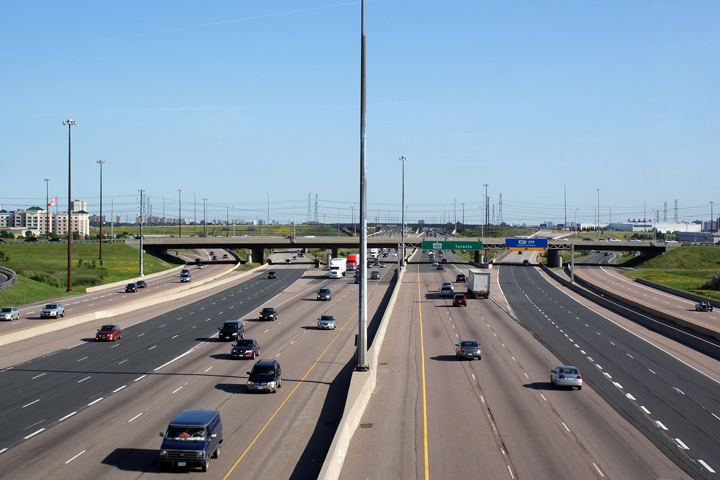


 (720x480)
 (720x480)

 (720x480)
 (720x480)
 (720x480)
 (720x480)
 (720x480)
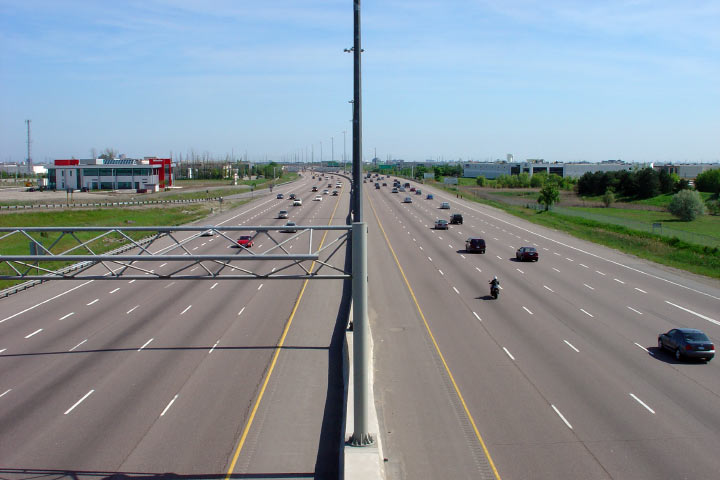
 (720x480)
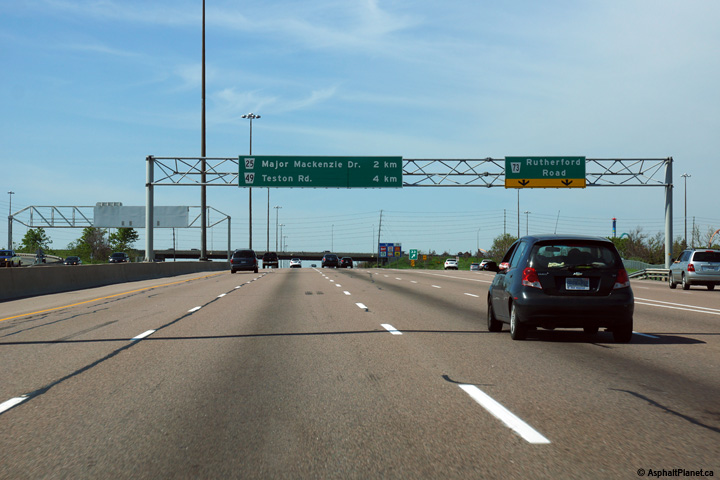 (720x480)
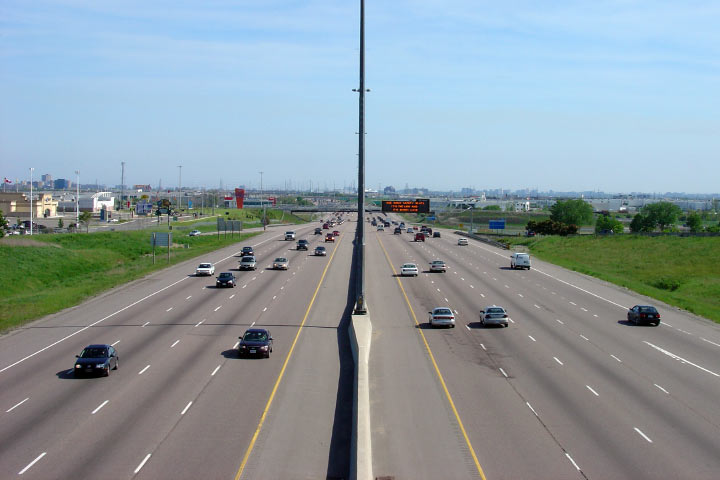
 (720x480)
 (720x480)
 (720x480)
 (720x480)


 (720x480)
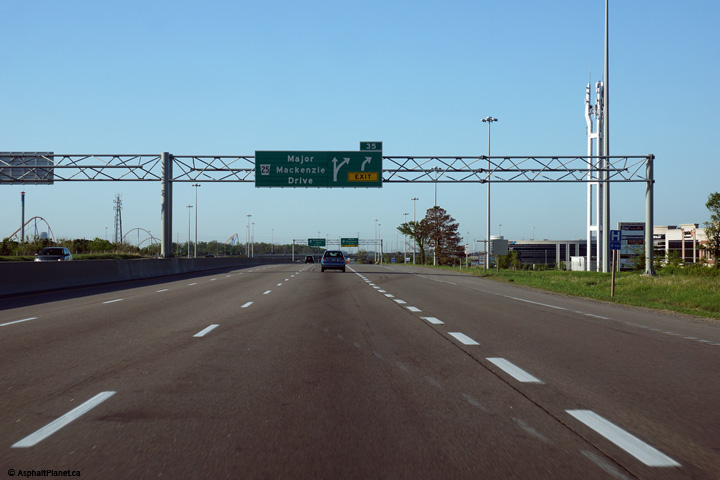 (720x480)
 (720x480)
 (720x480)
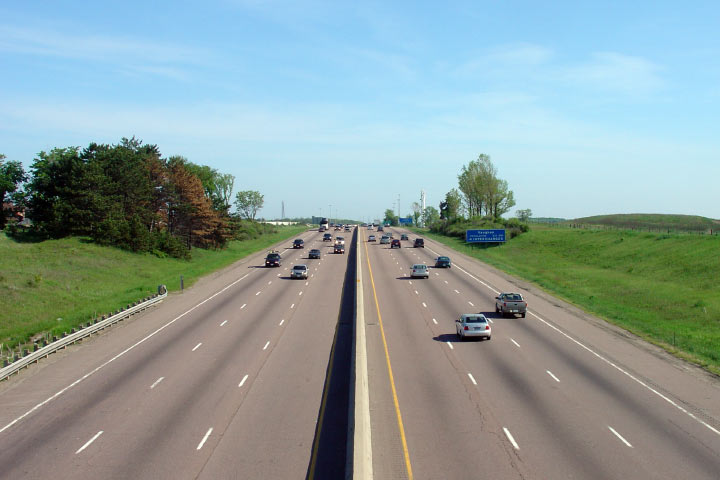


 (720x480)
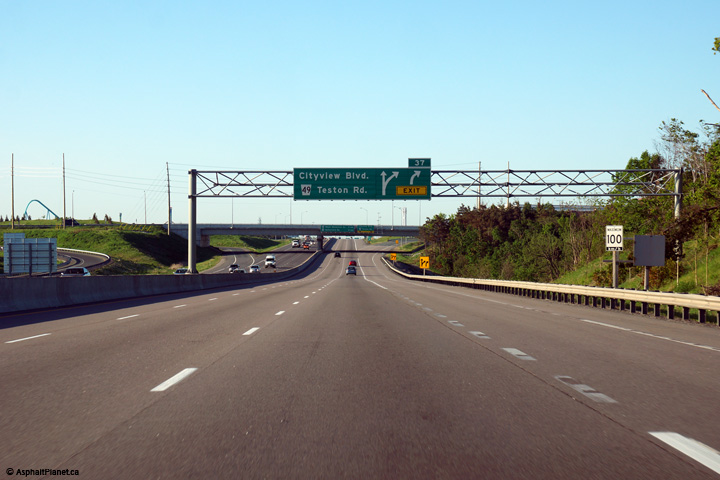 (720x480)
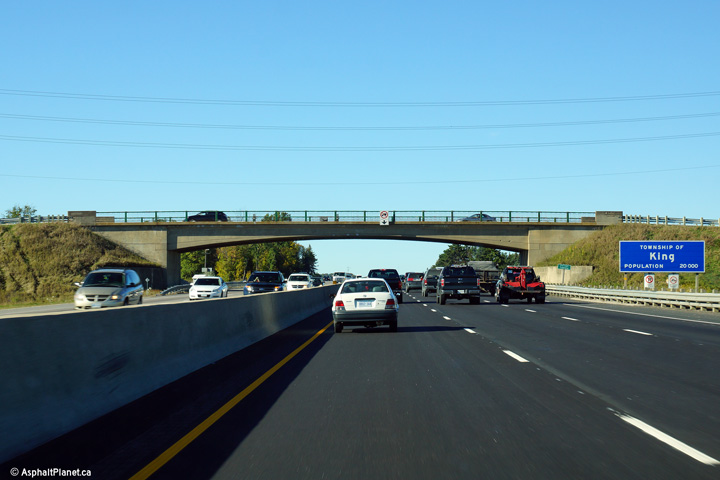 (720x480)

 (720x480)
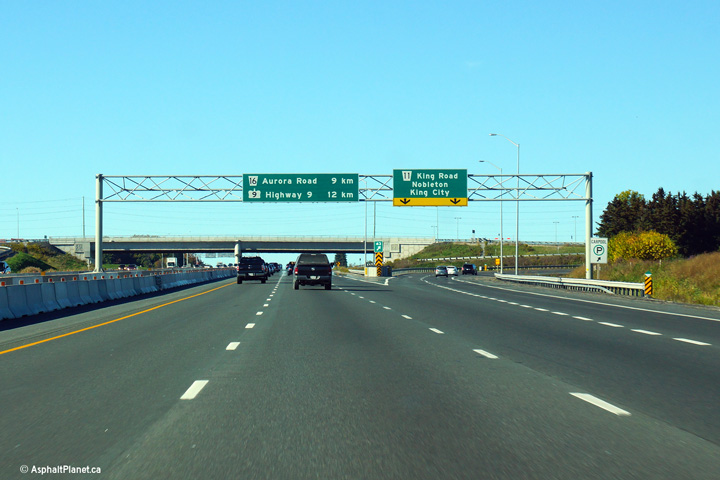 (720x480)


 (720x480)
 (720x480)
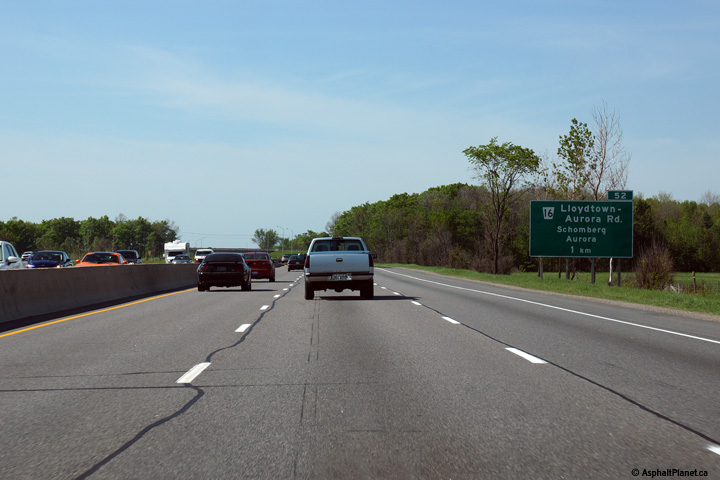 (720x480)
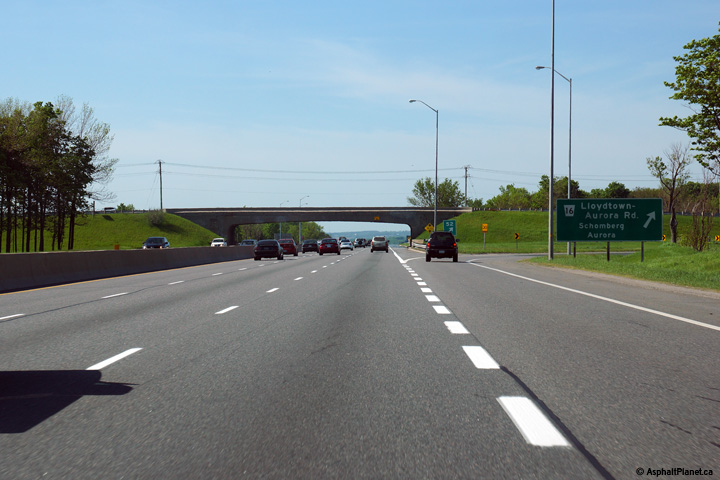 (720x480)
 (720x480)

 (720x480)
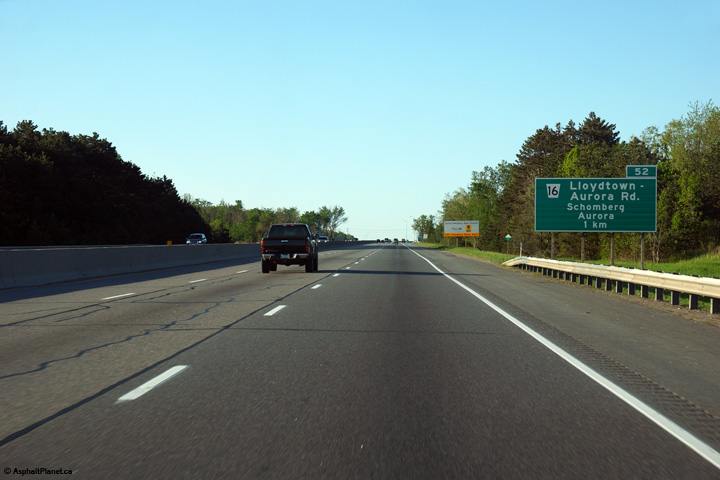 (720x480)
 (720x480)
